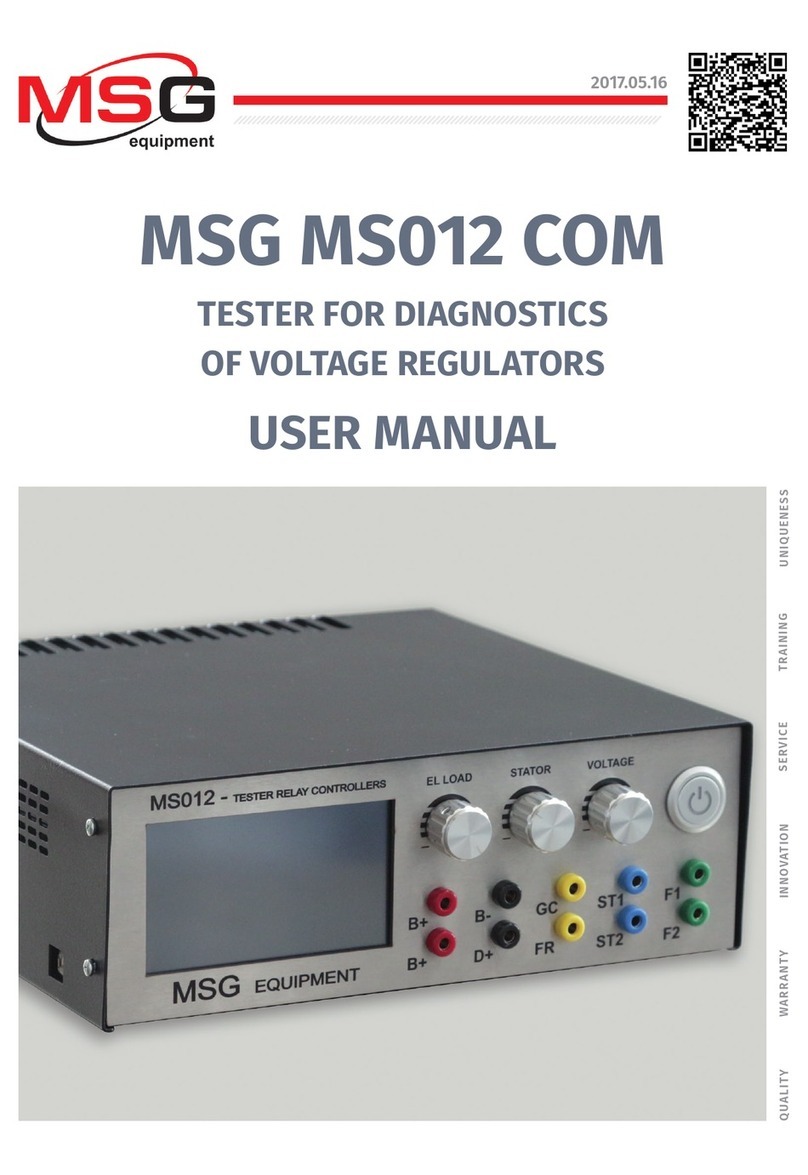
MSG MS005 User manual

2022.07.28
MS005
MANUAL ON DIAGNOSTICS
OF ALTERNATORS AND STARTERS
INSTRUKCJA DIAGNOSTYKI
ALTERNATORÓW I ROZRUSZNIKÓW
ИНСТРУКЦИЯ ПО ДИАГНОСТИКЕ
ГЕНЕРАТОРОВ ИСТАРТЕРОВ
UNIQUENESS
TRAINING
SERVICE
NNOVATION
WARRANTY
QUALITY


English
Test bench MS005
3
CONTENTS
INTRODUCTION....................................................................................................................................................4
1. TEST BENCH DESCRIPTION............................................................................................................................5
2. TEST BENCH MENU........................................................................................................................................10
3. APPROPRIATE USE........................................................................................................................................12
3.1. Safety Guidelines...................................................................................................................................12
4. ALTERNATOR DIAGNOSTICS .......................................................................................................................13
4.1. Connection of the wires of diagnostic cable to alternator connector terminals.................13
4.2. Alternator diagnostics menu .............................................................................................................16
4.3. Alternator diagnostics in manual mode..........................................................................................19
4.4. Alternator diagnostics in automatic mode.....................................................................................21
5. STARTER DIAGNOSTICS ...............................................................................................................................23
5.1. Starter diagnostics menu ...................................................................................................................23
5.2. Starter diagnostics............................................................................................................................... 24
APPENDIX 1.........................................................................................................................................................25
CONTACTS.......................................................................................................................................................... 28
APPENDIX 2 ........................................................................................................................................................81

English
Diagnostics manual
4
INTRODUCTION
The present manual contains the description of the methods of evaluation of technical condition
of automotive alternators, starters and voltage regulators at the bench MS005 (hereinafter “the
bench”).
WARNING! MSG Equipment is not responsible for any harm caused by the improper usage of
equipment.
Test bench MS005 checks:
1. The technical condition of automotive alternating current alternators with rated voltage 12 and
24V under the load up to 150 and 75 A accordingly, including alternators of system
«start-stop» 12V.
The diagnostics of automotive alternators and voltage regulators takes into account the following
criteria:
- Stabilizing voltage;
- control lamp working performance capacity;
- FR (displaying of the frequency and FR duty ratio, voltage regulator response).
- The AC pulsation value.
For COM alternator types (voltage regulators):
- ID;
- Protocol;
- data exchange speed;
- LIN protocol type;
- regulator self-diagnostics errors.
2. Automotive starters with power of 11kW with rated voltage 12 and 24 V, without load (at idle).
The diagnostics of the automotive starters considers the voltage changes nature and the currents
on the terminals 30, 45 and 50.
3. 12V automotive lead-acid storage batteries by residual capacity.

English
Test bench MS005
5
1. TEST BENCH DESCRIPTION
The bench consists of the following main elements (fig. 1):
Figure 1. Overall view of test bench
1– Access door to storage battery location.
2– Working spot.
3– Protective housing.
4– Touch screen - to display diagnostic parameters of a diagnosed unit and to control the bench
functions.
5– Control panel.
6– Pivot wheels with brake.

English
Diagnostics manual
6
The working spot (fig.2) consists of the following components:
Figure 2. Bench working spot
1– Alternator drive belts: V-belts and poly V-belts.
2– Power cables «В+» «В-».
3– Unit fixing chain.
4– The bracket for a diagnostic cable alligator clips.
5– Thermal vision camera.
6– Diagnostic cable connection port.
7– Diagnostic cable connection port for starter diagnostics.
The control panel (fig.3) consists of:
Figure 3. Bench control panel
1– buttons to control the tightening and loosening of alternator drive belt.

English
Test bench MS005
7
2– buttons to control the tightening and loosening of unit fixing chain.
3– button «COVER» - opens the protective housing.
4– button «OFF/ON» - is responsible for the power on the bench. The bench is turned off by
pressing the button «Turn off the bench» in the main menu of the service program.
5– Button «EMERGENCY STOP» - emergency stop of generator drive and chain/belt tightening.
In the bottom of the touch screen there are two USB ports (fig.4 ref. 1) for connecting the computer
periphery (mouse, keyboard, WiFi adapter) and network LAN port (ref. 2).
Figure 4. Position of USB and LAN ports
The bench supply slip includes the diagnostic cable (fig.5) that consists of the adapting wire kit
(fig.6) - for more convenient connection to alternator connection terminals.
Figure 5. Diagnostic cable MS-33001

English
Diagnostics manual
8
Figure 6. Adapting wire kit
The diagnostic cable MS-33001 has the following adapting wire color codes (see also Table 1):
•Orange - S(Sense Pin) - the terminal that enables the measuring of the storage battery voltage
by the voltage regulator as well as it compares the storage battery voltage with the alternator
output voltage. This adapting cable is connected to terminal S;
•Red – IG (Ignition) – the terminal is used for the connection of the ignition circuit, the
terminals: 15, A, IG;
•White – «FR» – the terminal that transmits the data on the regulator load. This adapting wire
is connected to the following terminals: «FR», «DFM», «M»;
•Gray – «D+» – the terminal for the connection of the circuit of voltage regulator control lamp.
It’s connected to the terminals: «D+», «L», «IL», «61»;
•Yellow – «GC» – is used for the connection of the channel of alternator voltage regulator
control. This adapting wire is connected to the following terminals: «COM», «SIG», etc.
•Brown – «К30» – is connected to the starter terminal 30 that is connected to the storage
battery terminal «+».
•Violet – «К45» – is connected to the starter solenoid output connected with starter electric
motor.

English
Test bench MS005
9
Table 1 – Color codes of cable MS-33001
Connector
Terminal
S
IG
FR
Lamp
GC
K30 (starter)
K45 (starter)
For convenient usage of the diagnostic cable, it’s recommended to put the alligator clips onto the
bracket (ref. 4, fig.2).
Figure 7. Diagnostic cable alligator clips that are set on the bracket.

English
Diagnostics manual
10
For the diagnostics of the starter, use the cable MS-33001 and the cable for the connection of the
terminal 50 (fig.8).
Figure 8. Cable for the connection of starter terminal 50
2. TEST BENCH MENU
The bench main menu (fig. 9) consists of:
Figure 9. Bench main menu
1 – Bench OFF button.
2 – Button to enter alternator database.
3 –Alternator diagnostics activation button.
4 – Starter diagnostics activation button.
5 –Information on the condition of the batteries connected to the bench.

English
Test bench MS005
11
6 – Indicator of the connected diagnostic cable.
7 –Indicator button for unit drive belt tightening and fixing chain tightening:
•red colour - belt/chain are not tightened;
•green colour - belt/chain are tightened.
Press to access the menu of belt and chain tightening control.
8 –Indicator button shows that the diagnostics cannot be performed. Press to open the window
where you can read the reasons of blocking:
•left service door is open;
•front service door is open;
•right service door is open;
•EMERGENCY STOP button is pressed.
9 –SETTINGS button – to enter bench settings menu.
In SETTINGS menu, you can change the program interface language only. The rest bench
parameters can be set by the manufacturer specialists only.
WARNING! It’s forbidden to modify any bench calibration data without professional help.
Once the mode of alternator diagnostics is activated, the menu for choosing of the diagnosed
alternator type (fig. 10) that contains:
Figure 10. Menu for choosing of the diagnosed alternator type
1– Diagnosed alternator type.

English
Diagnostics manual
12
2– Rated voltage of the diagnosed alternator.
3– Maximum current for the alternator diagnostics.
4– Connector terminal references of the most popular alternator types for choosing the
appropriate one for the diagnosed alternator.
5– Button to switch to automatic diagnostic mode of selected alternator type.
6– Button to switch to the manual diagnostic mode of the selected alternator type.
7– Setting of the diameter value for alternator pulley. This parameter is set when the rotation
rate during the alternator diagnostics has to be equal to the vehicle rotation rate.
3. APPROPRIATE USAGE
1. Use the bench for the specified purpose only.
2. Turning off the bench should be done through the interface of the service program by pressing
the "Turn off the bench" button.
3. Use EMERGENCY STOP button only if you need to immediately stop the bench drive, turn off the
belt/chain tightening and turn off the supply of the power cables.
4. The terminals of the diagnostic cable MS-33001 that are used for the diagnostics of alternators
and starters shall be connected only to the relay regulator terminals and starter terminals K30
and K45.
5. To protect the touch screen from damages use the stylus (included to supply slip).
6. In case of failures in the operation of the bench, stop further operation and contact the
manufacturer or sales representative.
The manufacturer is not responsible for any damage or injury to human health resulting from
non-compliance with the requirements of this manual.
3.1. Safety Guidelines
1. The bench has to be operated by the qualified persons who got the access to operate the
definite bench types and who were instructed on the safe operating procedures and methods.
2. The bench has to be turned off if the supply is terminated, during the cleaning and tidying up,
as well as in the emergency situations.
3. The work area must always be clean, with good light illumination, and spacious.
4. To ensure electrical and fire safety PROHIBITED:
- connect the bench to the electrical network having faulty protection against current overloads
or not having such protection;
— use a socket without a grounding contact to connect the bench;
— use extension cords to connect the bench to the electrical network. If the socket is far from the
bench installation site, it is necessary to modify the electrical network and install the socket;
- operation of the bench in defective condition.

English
Test bench MS005
13
- Independently to repair and make changes to the design of the bench, because it can lead to
serious damage to the bench and deprive the right to warranty repair.
5. It’s forbidden to leave the units with running drive on the bench unattended.
6. While mounting and dismounting of a unit from the bench, to prevent the hands from harming,
be more cautious.
7. Do not open the access door to the bench power section when the bench is connected to the
400V supply circuit.
4. ALTERNATOR DIAGNOSTICS
The following general diagnostics stages are considered for all alternator types:
1. The mounting and the fixing of alternator on the bench.
2. The mounting of the belt onto the pulley and the tightening.
3. Connection of the power wires to alternator. For convenient connection of power terminal B+,
screw the adapter on the positive terminal of the alternator.
4. Connect the diagnostic cable to the alternator connector terminals.
5. Choose the relevant alternator diagnostics parameters.
6. Alternator diagnostics.
7. The dismounting of unit from the bench.
4.1. Connection of the wires of diagnostic cable to
alternator connector terminals
To check the alternator performance, the wires of the diagnostic cable have to be properly
connected to alternator connector terminals.
Referring to the alternator OEM, that is commonly indicated on the body or rear cover, find the
information on the alternator connector terminal references in the bench database (fig. 11):
1. Press Database in the bench main menu (fig. 9, ref. 2).
2. In the opened window (fig. 11), in Search tab, enter the alternator serial number and press
Search button, or in Select car tab, choose the car make and model of car where the diagnosed
alternator was installed.
3. If the bench database has the required alternator, its type, main specifications, photos and
connection terminal references (press arrow under alternator image to display the connection
terminal references).
4. Use this information and the information from the Appendix 1 for the proper connection of the
diagnostic cable wires to the alternator connector.

English
Diagnostics manual
14
Figure 11. Database search menu and search results
If you can’t find the alternator in the database, look for the reference of alternator connector
terminals on the Internet. Then connect the diagnostic cable wires to the alternator connector
terminals, referring to the table in the Appendix 1. Prior to diagnostics, choose the alternator type
referring to the connector terminals.
Below you can see the example of the Bosch 0986049191 alternator connection (fig. 12).
Figure 12. Bosch alternator 0986049191 and connector terminal references.

English
Test bench MS005
15
Referring to the terminals on the figure 12 identify the alternator type. Now, the terminal L refers
to Lamp alternator type. Next, referring to Appendix 1, check what wires of diagnostic cable should
be connected with the alternator connector (connection layout - Table 2).
Table 2 – Connection of Bosch alternator 0986049191 to the bench
Alternator
connector terminal
Diagnostic cable wire
Diagnostic cable
wire colour
L
Lamp
gray
S
S
orange
Below you can see the example of the Toyota 2706020230 alternator connection (fig. 13).
Figure 13. Toyota 2706020230 alternator and connector terminal references.
Referring to the terminals on the figure 13 identify the alternator type. Now, the terminal L refers
to Lamp alternator type. Next, referring to Appendix 1, check what wires of diagnostic cable should
be connected with the alternator connector (connection layout - Table 3).
Table 3 – Toyota 2706020230 alternator connection
Alternator
connector terminal
Diagnostic cable wire
Diagnostic cable
wire colour
S
S
orange
IG
IG
red
L
Lamp
gray
DFM (M)
FR
white

English
Diagnostics manual
16
Below you can see the example of the Nissan 23100EN000 alternator connection (fig. 14).
Figure 14. Nissan 23100EN000 alternator and connector terminal references.
Referring to the terminals on the figure 14 identify the alternator type. In this case, the terminal
is C, and Japanese car make guides to alternator type - C JAPAN Next, referring to Appendix 1,
check what wires of diagnostic cable should be connected with the alternator connector
(connection layout - Table 4).
Table 4 – Nissan 23100EN000 alternator connection
Alternator
connector terminal
Diagnostic cable wire
Diagnostic cable
wire colour
L
Lamp
gray
S
S
orange
С
GC
yellow
4.2. Alternator diagnostics menu
When starting the diagnostics of Lamp, SIG, RLO, RVC, C KOREA, P-D, C JAPAN alternator types, the
following information may be displayed (fig. 15):
1– Test sense pin button - press to check the terminal S performance capacity. The voltage
regulator reads the actual battery voltage referring to terminal S (Sense) and increases the
alternator output voltage to compensate charge losses.
2– К15 button imitates the ignition start signal that is sent to the alternator voltage regulator. If
the alternator configuration includes the terminal (А or IG, or 15), press K15 button prior to the
alternator diagnostics.
3– Display field of measured parameter diagram
4– Diagnosed alternator type.

English
Test bench MS005
17
Figure 15. Alternator diagnostics menu view
5– Display unit temperature from thermal camera.
6– Alternator output voltage control buttons (if its design enables the voltage adjustment).
7– Alternator load control buttons. The value is rated as % of the set value (fig. 10, ref. 3).
8– Buttons to control the speed and direction of alternator rotation. By default, the bench rotates
the alternator clockwise (if you look from the pulley side). If required, change the rotation
direction by pressing CCW button.
9– Diagnostics process stop button.
10 – Indicator of control lamp operation.
K15 U V – voltage value in the ignition circuit (К15).
K15 I mA – current value in the ignition circuit (К15).
Duty % - duty ratio of PWM signal received through FR, DFM, M channel (on-condition rate of rotor
winding coil).
Frequency Hz - signal frequency value received through the channel FR, DFM, M.
Speed RPM - alternator rotation speed measured by regulator.
Lamp voltage V – voltage value on the control lamp.
Lamp current mA – value of electric current on the control lamp.

English
Diagnostics manual
18
I AC A – value of alternating current in the circuit B+.
I DC A – value of direct current in the circuit B+.
U DC V – terminal B+ voltage value.
Pulley RPM – alternator pulley rotation speed. If the pulley dimension is not specified in the menu
(fig. 10, ref. 7), the drive rotation speed value is indicated.
«Temperature C» is the maximum value of the temperature of the diagnosed unit, recorded by
thermal camera.
The menu of the COM alternator diagnostics (fig. 16) displays the following information:
Figure 16. Menu of diagnostics of COM alternator type.
Status – alternator connection status indicator.
COM protocol – voltage regulator protocol version indicator: BSS, LIN1 or LIN2.
ID – voltage regulator identification number.
COM speed – rate indicator for data transmission from control unit to voltage regulator. This
parameter is displayed for the alternators that are controlled by LIN protocol. The following speed
values can be displayed:
• L– 2400 Bod (low);
• M– 9600 Bod (medium);
• H– 19200 Bod (high).

English
Test bench MS005
19
TYPE – displaying of the type code for the LIN protocol regulator: A1, A2, A3, A4, B1, B2, B3, B4, C3,
D1, D2, E1.
EXCITATION – current value in the winding coil of alternator excitation. This parameter is read
from the voltage regulator by LIN protocol.
ERRORS – indicator of errors that the regulator transmits to engine control unit. The following
errors may happen:
• E(electrical) – electrical failures;
• M (mechanical) – mechanical failures;
• T(thermal) – overheating.
TEMPERATURE – the measured by regulator its own temperature.
Supplier – manufacturer of the alternator voltage regulator.
Supplier ID – manufacturer identification number of the alternator voltage regulator.
4.3. Alternator diagnostics in manual mode
1. Once the alternator is fixed and connected, enter the menu ‘Alternator’ on the start window
(fig. 9).
2. In the opened window, choose the rated voltage of the diagnosed alternator (12 or 24V), the
alternator type, the maximum diagnostics current, pulley diameter. When using the bench
alternator database, the diagnostics parameters are set automatically.
3. To start diagnostics, press button «Manual test».
WARNING! The diagnostics can be started only when the bench diagnostic outputs have been
connected to the alternator voltage regulator terminals.
3.1. If the diagnosed alternator is of COM type, wait until the bench identifies ID and TYPE of
alternator. The notification on the mechanical failure MEC shall appear near the indicator
ERRORS.
3.2. If the alternator configuration includes the terminal A or IG, or 15, activate the button K15.
3.4. If the alternator configuration includes the control lamp, its indicator shall light up
(fig. 15, ref. 10).
4. Alternator drive control buttons (fig. 15, ref. 8) can be used to set the rotation speed within the
limits of 100-150 rpm.
WARNING! For the alternators with the freewheel clutches, be more cautious when choosing
the rotation direction.
4.1. Visually inspect if the alternator rotates properly. If there are the abnormal noises or
alternator vibrations that may inform on the mechanical failure of alternator, stop the
diagnostics.

English
Diagnostics manual
20
5. Check the rotation speed when the generation starts as follows:
5.1. With drive control buttons, increase gradually the speed until the output voltage is equal to
rated voltage. Most of the operative alternators start generation from 700-850 rpm. Some
alternators of COM type start generation at the speed higher than 1200 rpm, besides, there are
LRC alternators (Load Response Control) that have the temporary delay at the output voltage
variation.
5.2. For Lamp type alternators, the stabilizing voltage value shall be set within 14-14.8V for 12V
alternators, and within 28-29.8V for 24V alternators.
5.3. If the alternator is equipped with the control lamp indicator it shall go off.
5.4. If the diagnosed alternator is of COM type, the mechanical error shall disappear.
6. Check the voltage regulator as follows:
6.1. Set the rotation speed within 1500-2000 rpm.
6.2*. Press the output voltage control buttons (fig. 15, ref. 6) to gradually adjust the alternator
output voltage (from min. to max.). The measured voltage shall change proportionally
*For the Lamp type alternators without voltage control, this paragraph is skipped.
6.3. For the alternator of C JAPAN type, set the rated stabilizing voltage to 0mode – the measured
stabilizing voltage value shall set equal to battery voltage value (fig. 9 ref. 5). Then, set the rated
stabilizing voltage to 1mode – the measured stabilizing voltage value shall set within 14-14.7V.
7. Check the alternator operation under the load as follows:
7.1. Set the rotation speed within the limits of 2500-3000 rpm.
7.2. Set the generation voltage within 14-14,8V. For the alternators of C JAPAN type,
turn on the mode 1.
7.3. Press electric load control buttons (fig. 15, ref. 7) to gradually increase the alternator load.
At the same time, the output voltage value shall remain constant while the alternating current
value (I, AC) in the circuit B+ shall not exceed 10% of the nominated load value (e.g., at the load
of 50A, the value I, AC shall not exceed 5A). The current oscillogram shall not have the big peaks,
the values should vary within the equal limits.
To check the technical condition of the alternator, the load from 50 up to 80A will be enough.
8. To finish the alternator diagnostics, press button to stop the alternator drive, then click
the «back» button to exit the mode and remove power from the power clamps. Now the
alternator can be dismounted from the bench.
9. Failure to comply with the one of the paragraphs 3.1, 3.4, 5 – 7.3 points to the alternator defects.
Table of contents
Languages:
Other MSG Test Equipment manuals