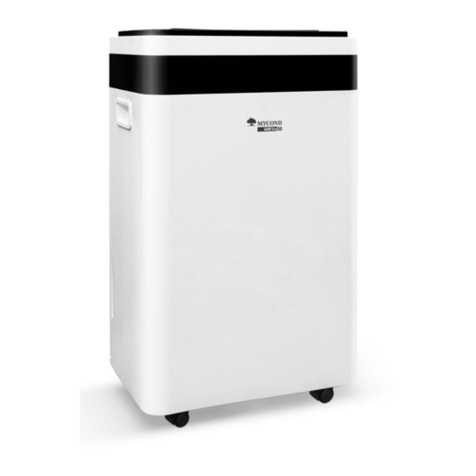
Mycond DESS-80 User manual

КЕРІВНИЦТВО З МОНТАЖУ
Й ЕКСПЛУАТАЦІЇ
MHW 27
MHW 35
MHW 45
MHW 54
МHW 72
Фанкойл
(настінного типу)
MANUAL
INSTRUCTION
DEHUMIDIFIER
MYCOND DESS-80

www.mycond.co.uk 2
1. GENERAL USE OF THE ADSORPTION DRYER
MYCOND DESS-80 adsorption dehumidifiers are normally used where dry air is essential for the various manufacturing
processes for the chemical, pharmaceutical and food or confectionary industry or where a dry environment is needed
for the storage and handling of moisture-sensitive products and raw materials. Tried and proven air drying by means
of adsorption is highly flexible when it comes to remedying air humidity problems. It gives the user independent
control of the air humidity, which makes it possible to achieve much lower dew points than refrigeration drying.
The devices are intended for use in occupied and unoccupied indoor rooms. When used outdoors, the units must be
protected against the eects of weather.
The dehumidifier works in a continuous process made up of two air flows with dierent flow rates (ratio of 3:1). The
greater air flow (process air) is dried when it passes through the dehumidifier, while the smaller regeneration air flow
is used to heat the rotor material and remove the adsorbed moisture from the desiccant. Moisture removed from the
process air is transferred to the regeneration air by the slow turning of the rotor.
2. SETTING UP THE DEVICES
Note:
1. There are two handles on the side of the MYCOND DESS-80 as well as a handhold depression on the top.
They are used exclusively for carrying the compressor.
2. The units must be secured against rolling away or slipping during transport. Never stack more than 3dryers
on top of each other.
3. When set-up close to stairs or ledges, the units must be secured against rolling away or tipping.
4. If possible, only put the units in rooms that are not constantly in use by people.
5. Prevent any tripping hazards caused by placement of the hoses. Consider hanging the hoses up in public
areas.
6. The dryers must have a power supply with 16 A fuse protection. The use of a starting current limiter is
recommended in old buildings in order to prevent premature triggering of fuses.
7. The electrical connection must be protected with a residual current operated circuit breaker (30 mA).
8. Under no circumstances is there to be an explosive atmosphere in the application area.
INSTALLATION
To exclude recirculation, care must be given during the installation to ensure that the emitted humid regeneration
air or the dried air is not drawn in again by the dehumidifier. Cold process air with relatively high humidity can cause
condensation inside the dehumidifier at the humid air outlet. Due to the high moisture content at the humid air out-
let, condensation can occur inside the pipe. We recommending installing the pipe at the humid air outlet at an angle
www.mycond.co.uk 3
so that condensate cannot flow back into the dehumidifier. If a rising air duct cannot be avoided, then a low point
must be specifically equipped with drainage, and the exhaust air pipe should be insulated. Pipeline pressure losses
aect the capacity of the dehumidifier. Lower pressure loss results in better capacity. The capacities for dierent
static pressures and dimensions of the installed pipelines can be found in the datasheet.
Connection possibilities on the front of the device
Connection possibilities on the back of the device
Air outlet / dry air
Air inlet 1 / process air
Air inlet 2 / process air
Air outlet / humid air

www.mycond.co.uk 4
Dehumidifier inside the room to be dehumidified
The outlet of the humid air is connected to the outside air. The process air inlet has two connecting pieces to create
pressure equalisation between the room to be dehumidified and the ambient air. The right inlet connecting piece
should be connected to the outside air with a pipe. The left inlet connecting piece can be left open if the dehumidified
room is well sealed from the surroundings. If the room to be dehumidified is not adequately sealed from the outside
air, then throttling should be installed on the left inlet connecting piece. If the inlet drawing air in from the room is
throttled, the dehumidifier creates overpressure in the room, which prevents the outside air from flowing into the
room to be dried. Make sure that the dry air can blow out freely.
Air humidifier outside the room to be dehumidified: The outlet for the dry air is connected via a pipe to the room to
be dehumidified. If particularly low moisture content is required, then a process air inlet should also be connected to
the room. If the room to be dehumidified is not sealed adequately, then overpressure should be created by throttling
the operating air flow of the process air from the room to be dehumidified.
3. OPERATION
1. Check whether both air equalisation throttles are open, if they are present, and whether the air flows in
the pipes are not obstructed in any way.
2. Make sure the filter is fitted properly.
3. Check whether the input fuse has the strength called for in the datasheet (16 A).
4. Plug in the connector into a 16 A power outlet protected with a residual current operated circuit breaker.
5. Before switching on, read the hours of operation as well as the energy meters in order to use them to
prepare an invoice after the drying operation.
6. Start the dehumidifier by pressing switch B.
You have a choice between permanent dehumidification operation (ON) and regulated operation via an
external hygrostat sensor (accessory). If this is the case, set the function to “AUTO”.
A. Operating hours meter
B. On/O/AUTO (main switch)
C. Power cord
D. Hygrostat connection
Strong esslectricity!
Do not touch it!!
E. Energy meter (kWh)

www.mycond.co.uk 5
4. MAINTENANCE/SERVICE
ATTENTION
Always unplug the unit first before any maintenance, cleaning or work on the compressor.
1. Remove the cover from the housing and blow it out with compressed air. Do not work with water!When
cleaning the outer panels with water, the entire panel must first of all be dried before switching the unit on.
2. Regularly check the cable fastening of the feed power outlets and the cable connectors. Cables and con-
nectors that are not okay must be replaced
3. Installation and repair work should only be carried out by a specialised workshop. If this work is per-
formed by third parties, then this voids the warranty and liability.
5. TECHNICAL SPECIFICATIONS
Type MYCOND DESS-80
Dehumidification capacity kg/h (at 26°/60% r.H.) 3.4
Electrical connection (V/Hz) 230 / 50Hz
Power consumption (kW) 1.4
Current consumption (A) 6
Fuse protection for in-house installation (A) 16
Length / width / height (mm) 395 / 335 / 410
Weight (kg) 20.8
Loudness level at max. speed (3m) dBA 46
Protection class (IP) IP 44
Humid volumetric flow rate (m3/h) 50
Air volumes of process air (m3/h) 330
Ambient temperatures (°C) -20~60
Diameter of dry air connection (front side) (mm) 125
Diameter of air inlet connection for process air 1 (back side) (mm) 125
Diameter of air inlet connection for process air 2 (back side) (mm) 80
Diameter of air outlet connection for humid air 1 (back side) (mm) 80
ATTENTION
The technical data can change during the course of ongoing development without prior announcement. Some of the
values are approximate values.

www.mycond.co.uk 6
6. TROUBLESHOOTING
WARNING
All the maintenance work listed below must be carried out with the power switched o, i.e.
with the plug removed.
PROBLEM CAUSE Execution SOLUTION
Motor switches o
during operation Overheating of the fan unit
U
U
AST
Possible overload (check
connections and hoses)
Ambient temperature too high
(room temperature may be a
max. of 40 °C)
Fan motor defective
Motor doesn’t run
No current to the unit
Switch not switched on
Turbine blocked
Air inlet or outlet blocked
Switch broken o
Wiring loose
U
U
U
U
AST
AST
Connect device; check fuse.
Turn on the switch
Eliminate the reason for the
blockage
Switch o the machine and
let it cool down; then check
the connections and hoses
Request a replacement switch
from the dealer or Preair
Check the wiring and tighten
if necessary
Motor runs but
impeller turns
irregularly or scrapes
Defective rotor or motor AST
Remove the impeller from
the housing and then clean or
repair it
Unit vibrates
excessively Accumulation of dirt on the impeller U Clean the impeller


www.mycond.co.uk
Table of contents
Other Mycond Dehumidifier manuals

Mycond
Mycond WORKER 50 User manual

Mycond
Mycond YUGO Smart 16 User manual

Mycond
Mycond ROOMER Smart 25 User manual

Mycond
Mycond GIANT Eco 70 User manual

Mycond
Mycond GIANT Eco 50 User manual

Mycond
Mycond TIBO Smart 12 User manual

Mycond
Mycond ROOMER Eco 25 User manual

Mycond
Mycond YUGO 12 User manual

Mycond
Mycond ROOMER 12 User manual

Mycond
Mycond BERG 25 User manual