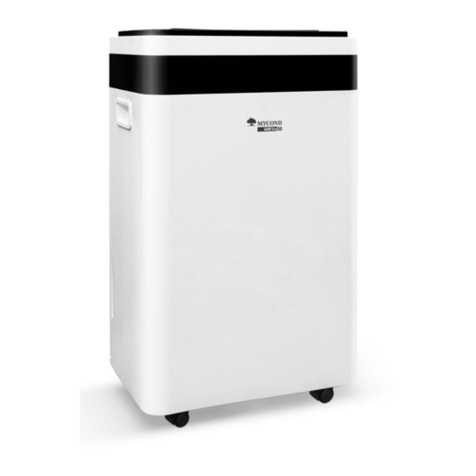
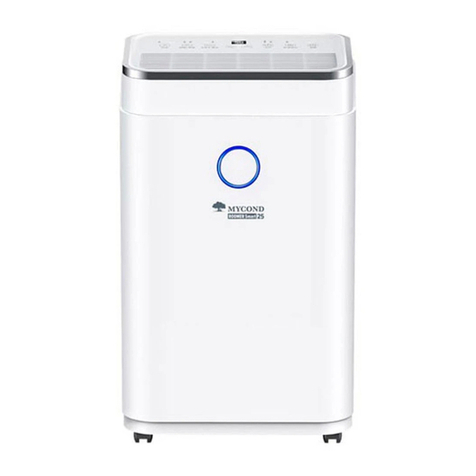
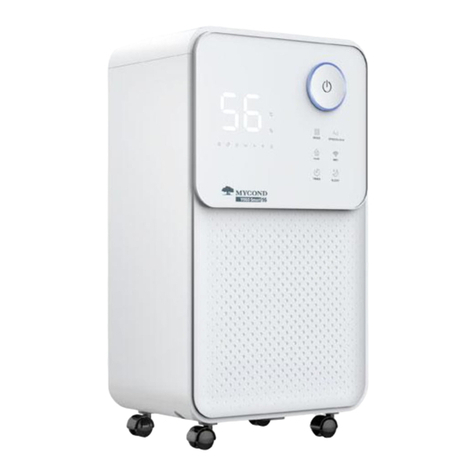
Mycond WORKER 50 User manual

SEMI-INDUSTRIAL DEHUMIDIFIER
MYCOND WORKER 50
USER MANUAL
KEEP THESE INSTRUCTIONS FOR FUTURE REFERENCE
Thank you for choosing our air dehumidifier. This user manual contains valuable information
required for correct configuration of the control panel. Please take some time to read the instruction
thoroughly and understand all the aspects of operating this control panel.


EN SEMIINDUSTRIAL DEHUMIDIFIER WORKER 50
3
CONTENTS
І. BEFORE YOU BEGIN.............................................................................................................................4
II. FOR YOUR SAFETY .............................................................................................................................6
III. INSTALLATION .................................................................................................................................9
IV. PRODUCT OVERVIEW........................................................................................................................ 10
V. FEATURES .......................................................................................................................................11
VI. SPECIFICATIONS...............................................................................................................................11
VII. OPERATION................................................................................................................................... 12
VIII. MAINTENANCE.............................................................................................................................. 16
IX. TROUBLESHOOTING ..........................................................................................................................17
X. DECOMMISSIONING.......................................................................................................................... 18

4
І. BEFORE YOU BEGIN
1.1 PRODUCT DESCRIPTION
The dehumidifier is used to remove excessive moisture from the air. The resulting reduction in relative humidity
protects buildings and their contents from the adverse effects of excess humidity.
The environmentally friendly R290 is used as the refrigerant. R290 has no damaging influence on the ozone layer
(ODP), a negligible greenhouse effect (GWP) and is available worldwide. Because of its efficient energy properties,
R290 is highly suitable as a coolant for this application. Special precautions must be taken into consideration due to
the coolant's high flammability.
1.2 SYMBOLS FROM THE UNIT AND USER MANUAL
This unit uses a flammable refrigerant.
WARNING!
If refrigerant leaks and comes in contact with fire or heating part, it will create harmful gas and there is risk of fire.
Read the USER MANUAL carefully before operation
Further information is available in the USER MANUAL, SERVICE MANUAL, and the like.
Service personnel are required to carefully read the USER MANUAL and SERVICE MANUAL before
operation.

SEMI-INDUSTRIAL DEHUMIDIFIER WORKER 50
5
EN
1.3 THE FOLLOWING SHOULD ALWAYS BE OBSERVED FOR SAFETY
■ It is strongly recommended that installation and service should be performed by a qualified technician or the
service agency.
■ The unit is designed only for use with R-290(propane) gas as the designated refrigerant.
■ The refrigerant loop is sealed. Only a qualified technician should attempt to service!
■ Do not discharge the refrigerant into the atmosphere.
■ R-290 (propane) is flammable and heavier than air.
■ It collects first in low areas but can be circulated by the fans.
■ If propane gas is present or even suspected, do not allow untrained personnel to attempt to find the cause.
■ The propane gas used in the unit has no odor.
■ The lack of smell does not indicate a lack of escaped gas.
■ If a leak is detected, immediately evacuate all persons from the store, ventilate the room and contact the local
fire department to advise them that a propane leak has occurred.
■ Do not let any persons back into the store until the qualified service technician has arrived and that technician
advises that it is safe to return to the store.
■ No open flames, cigarettes or other possible sources of ignition should be used inside or in the vicinity of the
units.
■ Component parts are designed for propane and non-incentive and non-sparking. Component parts shall only be
replaced with identical repair parts.
WARNING!
Failure to abide by this warning could result in an explosion, death, injury and property damage.

6
II. FOR YOUR SAFETY
2.1 OPERATIONAL PRECAUTIONS
To reduce the risk of fire, electric shock or injury to persons or property:
■ Always operate the unit from a power source of equal voltage, frequency and rating as indicated on the product
identification plate.
■ Always use a power outlet that is grounded.
■ Unplug the power cord when cleaning, servicing, or when not in use.
■ Do not operate with wet hands. Prevent water from spilling onto the unit.
■ Do not immerse or expose the unit to rain, moisture or any other liquid.
■ Do not leave the unit running unattended. Do not tilt or turn over the unit.
■ Do not unplug while the unit is operating.
■ Do not unplug by pulling on the power cord.
■ Do not use an extension cord or an adapter plug.
■ Do not put objects on the unit.
■ Do not climb or sit on the unit.
■ Do not insert fingers or other objects into the air outlet.
■ Do not touch the air inlet or the aluminum fins of the unit.
■ Do not operate the unit if it is dropped, damaged or showing signs of product malfunction.
■ Do not clean the appliance with any chemicals.
■ Do not operate the product with damaged plug or cord. If it is not working properly, contact a qualified electrician
or service centre for examination and repair, never try to dismantle it by yourself (user).
■ Take care to ensure that children do not play with the unit.
■ Ensure the unit is far away from fire, inflammable, or explosive objects.
■ The unit shall be installed in accordance with national wiring regulations.
■ Do not use means to accelerate the defrosting process or to clean, other than those recommended by the
manufacture.
■ The appliance shall be stored in a room without continuously operation sources (for example: open flames, an
operating gas appliance or an operating electric heater).
■ Do not piece or burn, even after use.
■ Be aware that refrigerants may not contain an odour.
■ Pipe-work shall be protected from physical damage and shall not be installed in an unventilated space, if that
space is smaller than 13m².
■ Compliance with national gas regulations shall be observed.
■ Keep any required ventilation openings clear of obstruction.

SEMI-INDUSTRIAL DEHUMIDIFIER WORKER 50
7
EN
WARNING!
Any person who is involved with working on or breaking into a refrigerant circuit should hold a current
valid certificate from an industry-accredited assessment authority, which authorizes their competence
to handle refrigerants safely in accordance with an industry, recognized assessment specification.
Servicing shall only be performed as recommended by the equipment manufacturer. Maintenance and
repair requiring the assistance of other skilled personnel shall be carried out under the supervision of
the person competent in the use of flammable refrigerants.
2.2 SAFETY PRECAUTIONS ON SERVICING
Please follow these warnings when to undertake the following when servicing a dehumidifier with R290.
2.2.1 Checks to the area
Prior to beginning work on systems containing flammable refrigerants, safety checks are necessary to ensure that
the risk of ignition is minimized. For repair to the refrigerating system, the following precautions shall be complied
with prior to conducting work on the system.
2.2.2 Work procedure
Work shall be undertaken under a controlled procedure so as to minimize the risk of a flammable gas or vapor being
present while the work is being performed.
2.2.3 General work area
All maintenance sta and others working in the local area shall be instructed on the nature of work being carried
out. Work in confined spaces shall be avoided. The area around the workspace shall be sectioned o. Ensure that the
conditions within the area have been made safe by control of flammable material.
2.2.4 Checking for presence of refrigerant
The area shall be checked with an appropriate refrigerant detector prior to and during work, to ensure the technician
is aware of potentially flammable atmospheres. Ensure that the leak detection equipment being used is suitable for
use with flammable refrigerants, i.e. no sparking, adequately sealed or intrinsically safe.
2.2.5 Presence of fire extinguisher
Ifanyhotworkistobeconductedontherefrigerationequipmentoranyassociatedparts,appropriatefireextinguishing
equipment shall be available to hand. Have a dry powder or CO2 fire extinguisher adjacent to the charging area.
2.2.6 No ignition sources
No person carrying out work in relation to a refrigeration system which involves exposing any pipe work that contains
or has contained flammable refrigerant shall use any sources of ignition in such a manner that it may lead to the risk
of fire or explosion. All possible ignition sources, including cigarette smoking, should be kept suciently far away
from the site of installation, repairing, removing and disposal, during which flammable refrigerant can possibly be

8
released to the surrounding space. Prior to work taking place, the area around the equipment is to be surveyed to
make sure that there are no flammable hazards or ignition risks. “No Smoking” signs shall be displayed.
2.2.7 Ventilated area
Ensure that the area is in the open or that it is adequately ventilated before breaking into the system or conducting
any hot work. A degree of ventilation shall continue during the period that the work is carried out. The ventilation
should safely disperse any released refrigerant and preferably expel it externally into the atmosphere.
2.2.8 Checks to the refrigeration equipment
Where electrical components are being changed, they shall be fit for the purpose and to the correct specification.
At all times the manufacturer’s maintenance and service guidelines shall be followed. If in doubt consult the
manufacturer’s technical department for assistance.
The following checks shall be applied to installations using flammable refrigerants:
■ The charge size is in accordance with the room size within which the refrigerant containing parts are installed;
■ The ventilation machinery and outlets are operating adequately and are not obstructed;
■ If an indirect refrigerating circuit is being used, the secondary circuit shall be checked for the presence of
refrigerant;
■ Marking to the equipment continues to be visible and legible. Markings and signs that are illegible shall be
corrected;
■ refrigeration pipe or components are installed in a position where they are unlikely to be exposed to any
substance which may corrode refrigerant containing components, unless the components are constructed of
materials which are inherently resistant to being corroded or are suitably protected against being so corroded.
2.2.9 Checks to electrical devices
Repair and maintenance to electrical components shall include initial safety checks and component inspection
procedures. If a fault exists that could compromise safety, then no electrical supply shall be connected to the
circuit until it is satisfactorily dealt with. If the fault cannot be corrected immediately but it is necessary to continue
operation, an adequate temporary solution shall be used. This shall be reported to the owner of the equipment so
all parties are advised.
Initial safety checks shall include:
■ those capacitors are discharged: this shall be done in a safe manner to avoid possibility of sparking;
■ that there no live electrical components and wiring are exposed while charging, recovering or purging the
system;
■ that there is continuity of earth bonding.

SEMI-INDUSTRIAL DEHUMIDIFIER WORKER 50
9
EN
Push handle
Thumb screw
Screw
Thumb screw
Nut
Wheel
Wheel
Main body
Washer
Washer
Washer
Washer
Nut
Screw
III. INSTALLATION
3.1 ASSEMBLING ACCESSORIES
3.2 OPERATING THE DEVICE SAFELY
■ Check the device after unpacking for any damage or scratches on it.
■ Place the unit on a firm, level surface in an area with at least 50cm of free space around it allow for proper air
circulation.
■ Do not operate in close proximity to walls, curtains, or other objects that may block inlet and outlet. Keep the
air inlet and outlet free of obstacles.
■ If tipped more than 45°, allow the unit to set upright for at least 24 hours before start up.
■ Never install the unit where it could be subject to:
― Heat sources such as radiators, heat registers, stoves or other products that products that produce heat.
― Direct sunlight
― Mechanical vibration or shock
― Excessive dust
― Lack of ventilation, such as cabinet or bookcase
― Uneven surface
WARNING!
Install the unit in rooms which exceed 13 m². Do not install the unit in a place where inflammable gas
may leak.
The manufacture may provide other suitable example or may provide additional information about the
refrigerant odour.

10
IV. PRODUCT OVERVIEW
Transport Handle
Air Outlet
Recessed Handle
Continuous Drainage opening
Universal Casters
Wheel
Grille
Power Cord Wrapping Post
Control Panel
Air Inlet grille
Air Filter
Front View
Back View

SEMI-INDUSTRIAL DEHUMIDIFIER WORKER 50
11
EN
V. FEATURES
■ Removes up to 70L per day
■ Programmable Humidity setting
■ Timed operation
■ Continuous draining option
■ Low decibel output
■ Digital humidistat control
■ Caster wheels for easy mobility and storage
■ Automatic Restart (humidity controller compatible)
■ Auto defrosting function
VI. SPECIFICATIONS
Model Worker 50
Rated Capacity 28.7L/day (30°C, 80%RH)
50L/day (27°C, 60%RH)
Power supply AC220-240V/50Hz
Power Consumption 650W/3.1A (30°C, 80%RH)
545W/2.7A (27°C, 60%RH)
Noise ≤55dB(A)
Water tank capacity 5.5L
Maximum Refrigerant Charge R290/230g
Net weight 36kg
Maximum design pressure 3.2MPa/0.7MPa
Minimum room size 12m2(Floor area)
Dimension 543 x 429 x 896mm
Fuse type and rating T-Type, AC 250V, 3.15A

12
VII. OPERATION
7.1 CONTROL PANEL
Function keys and Indicators
POWER button Press once to switch unit on or o.
Timer button Press to enable or disable the timer function.
Setting button(ADD) Adjust the humidity set-point within the range of 20%-90%.
Adjust the timer set-point. (1h~24h)
Setting button(MINUS)
Continuous button Press to set the unit for continuous dehumidifying mode.
Tank full Symbol Water tank is included in this device.
Timer indicator (green) Lights up when the timer function is set.
Defrost LED (green) Lights up when automatic defrosting is in process.
Continuous LED(green) Lights up when the continuous dehumidifying mode is turned on.
Water full LED (red) Lights up when water tank is almost full.
Digital Display (green) Displays the current humidity (20-95%) and the humidity setting (20-90%).
Displays timer setting and temperature.

SEMI-INDUSTRIAL DEHUMIDIFIER WORKER 50
13
EN
7.2 SETTINGS
1. OPERATION MODE
A. Continuous Operation
Press POWER key to turn on the unit.
The unit starts to dehumidify in continuous operation, regardless of the humidity. The humidity set-point cannot be
adjusted in this mode.
B. Normal Operation
Press POWER key to turn on the unit.
Press the CONT key to deactivate the continuous mode.
The unit operates in normal mode with the default 50% humidity set-point.
Press POWER key again to turn o the dehumidifier.
The fan keeps running for a while and then stops.
2. SET HUMIDITY SETTING RANGE: 20%90%:
The humidity set-point can be adjusted in normal operation.
Press ADD/MINUS key repeatedly to adjust humidity set-point.
Set the humidity level between 40% and 60% for comfort.
The unit will cycle on and o to maintain the level.
3. TIMER SETTING 1HOUR24HOURS:
The timer has two ways of operation:
To turn o (When power on) → Press Timer key to turn on the timer function. → Press ADD/MINUS repeatedly
to set the delay OFF time.
To turn on (When power o) → Press Timer key to turn on the timer function. → Press ADD/MINUS repeatedly
to set the delay ON time.
Cancel timer → Press Timer again to turn o the timer function.
Note: when press POWER will also exit the timer setting.
4. WATER FULL INDICATOR
The machine automatically shuts o once the water tank is full, alerting the user through an indicator light and
buzzing for 15 times. It reminds you to check:
■ If the water tank is full, empty and re-install the water tank.
■ If the water tank is not in position, the full indicator always on and the unit is inoperative.
■ Re-install the tank correctly, and the unit will auto operating as your last setting.

14
5. ROOM TEMPERATURE INSPECTION
In addition to the humidity level, the digital display (11) can also indicate the current room temperature. Please check
as follows:
Press and hold the TIMER button for 5 seconds.
The screen displays the temperature in degree Celsius.
6. AUTOMATIC DEFROST FUNCTION
At low room temperatures, frost may buildup at the evaporator reducing the airflow across it during dehumidifying.
The dehumidifier will automatically start defrosting for 15 minutes.
The Defrost LED blinking.
The compressor stops and the fan keeps running.
Do not turn o the unit and it will automatically restart dehumidifying.
7. OVERLOAD PROTECTION
In the event of a power loss, to protect the compressor there is a 3-minute delay until the compressor restarting.
7.3 DRAINAGE
There are two ways of removal collected water produced by the unit.
A. Manual draining: Empty water tank by manual.
B. Continuous draining: Use gravity to drain condensate water by attaching a drain hose.
7.3.1 Emptying the water tank
The water tank built in unit will fill up and shut the unit down once it
is full. It will run again once you empty the water tank and installed
properly.
1. When the tank is full, the “FULL” light will turn on.
2. The unit will make a buzzing sound. Press the power button to turn
o the machine.
3. To empty the water tank, open the front panel to access the water
tank.
4. Grab the handle of the water tank and pull it out horizontally.
5. After disposing of the water, replace the tank and close the front
panel.
6. Press the POWER button to resume operation.

SEMI-INDUSTRIAL DEHUMIDIFIER WORKER 50
15
EN
7.3.2 Continuous draining
For continuous operation or unattended dehumidification, please connect the attached drain hose to the unit.
1. Press the POWER button to turn o the machine.
2. Open the front lower cover; remove the water tank from the unit and then remove the seal on the water tank.
3. Push the drain hose through the continuous drainage opening and connect one end to the hose connection.
4. Re-fit the water tank in the unit and close the front lower cover.
5. Direct the other hose end to the desired area. Make sure the drain hose is not kinked or bends.
Remove the hose and seal the hose connection o with the plug if you want to collect the water in the water tank
again. Allow the hose to dry prior to storage.

16
VIII. MAINTENANCE
8.1 CLEANING THE AIR FILTER (EVERY TWO WEEKS)
The air filter is removable for easy cleaning. Do not operate the unit without an air filter, or the evaporator may be
contaminated.
1. Clean the machine with a soft wet cloth.
2. Pull out the louver on the front panel to gain access to the filter.
3. Remove the filter mesh from the unit.
4. Use a clean rag to absorb the surface dust on the filter mesh. If the filter is extremely dirty, use tap water to
flush the filter. Fully dry the filter before putting it back into the air inlet fence. A clean filter will increase the
machine’s capacity.
Switch o the unit
and remove air filter.
Rinse the air filter
under running water.
WARNING!
Do not touch the evaporator surface with bare-hand, or could cause injury of your fingers.
8.2 CLEANING UP OF REFRIGERANT
General Measures:
1. Gas/vapor heavier than air. May accumulate in confined spaces, particularly at or below ground level.
2. Eliminate every possible source of ignition.
3. Use appropriate personal protection equipment (PPE).
4. Evacuate unnecessary personnel, isolate, and ventilate area.
5. Do not get in eyes, on skin, or on clothing. Do not breathe vapors or gas.
6. Prevent entry to sewers and public waters.
7. Stop the source of the release, if safe to do so. Consider the use of water spray to disperse vapors.
8. Isolate the area until gas has dispersed. Ventilate and gas test area before entering. Contact competent
authorities after a spill.

SEMI-INDUSTRIAL DEHUMIDIFIER WORKER 50
17
EN
IX. TROUBLESHOOTING
Symptom Inspection Solution
The unit is not
operating.
Check if the water level indicator lights up? Insert the power cord securely
into the wall Outlet.
Empty the water tank and reinstall correctly. Empty the water tank and reinstall correctly.
Check the room temperature. The range of operating temperature is 5-35°C .
There is little
formation of
condensate.
Check the air filter for dirt. Clean the air filter as necessary.
Check if the air duct is blocked. To clear the obstacle.
Check if the room temperature is below 20°C . This is normal. Low humidity in low
temperature environment.
Set humidity level is higher than current
Humidity value.
Set the humidity level below
current humidity value.
Water
Leakage
Overflow while moving the unit. Empty the water tank before transport.
Check if the drain hose is kinked or bends. Straighten the hose to avoid a trap existing.
Excessive
Noise
Check if the unit is securely positioned. Place the unit on horizontal and firm ground.
Check if any loose, vibrating parts. Secure and tight the parts.
Noise sounds like water flowing. Noise comes from flowing refrigerant.
This is normal.
Error
Codes
E1 Temperature sensor failure Check connection or replace it.
E2 Humidity sensor dampened or failure. To clean or replace the humidity sensor.
CL Display when Room temperature
is below 5°C (41°F).
Normal. The compressor stops,
and the fan keeps running.
CH Display when Room temperature
is above 35°C (95°F).
Normal. The compressor stops,
and the fan keeps running.
LO Display when Room relative humidity
is bellow 20%RH.
Normal. The compressor stops,
and the fan keeps running.
HI Display when Room relative humidity
is above 95%RH.
Normal. The compressor
and the fan keep running.

18
X. DECOMMISSIONING
10.1 STORAGE
Long-term storage - If you will not be using the unit for an extended period of time (more than a few weeks) it is best
to clean the unit and dry it out completely. Please store the unit per the following steps:
1. Unplug the unit.
2. Drain the remaining water from the unit.
3. Clean the filter and let the filter dry completely in a shaded area.
4. Collect the power cord at the rear of the unit.
5. Re-install the filter at its position.
6. Preserving the machine in ventilating, dry, non- corrosive gas and safe place indoor.
7. The unit must be kept in upright position when in storage.
WARNING!
The evaporator inside the machine has to be dried out before the unit is packed to avoid component
damage and molds. Unplug the unit and place it in a dry open area for days to dry it out. Another way
to dry the unit is to set the humidity point more than 5% higher than the ambient humidity to force the
fan to dry the evaporator for a couple of hours.
10.2 DISPOSAL
Releasing refrigerant into atmosphere is strictly forbidden!
Do not dispose of electrical appliances as unsorted municipal waste, use separate collection facilities. Contact your
local government for information regarding the collection systems available. If electrical appliances are disposed of
in land¬fills or dumps, hazardous substances can leak into the groundwater and get into the food chain, damaging
your health and well-being.


Table of contents
Languages:
Other Mycond Dehumidifier manuals

Mycond
Mycond ROOMER Smart 12 User manual

Mycond
Mycond ROOMER Eco 25 User manual

Mycond
Mycond GIANT Eco 70 User manual

Mycond
Mycond TIBO 10 User manual

Mycond
Mycond ROOMER 12 User manual

Mycond
Mycond ABS 7A Service manual

Mycond
Mycond YUGO 12 User manual

Mycond
Mycond BERG 25 User manual

Mycond
Mycond TIBO Smart 12 User manual

Mycond
Mycond ROOMER Smart 25 User manual
Popular Dehumidifier manuals by other brands

Amcor
Amcor HD 2000HT instruction manual

Teddington
Teddington SecoSteel 80 USE AND MAINTENACE MANUAL

CUOGHI
CUOGHI NADER MIDI 2 manual

GEAppliances
GEAppliances ADEL30 owner's manual

Hanover
Hanover HANAD50A owner's manual

Olimpia splendid
Olimpia splendid AQUARIA 18 P Instructions for installation, use and maintenance