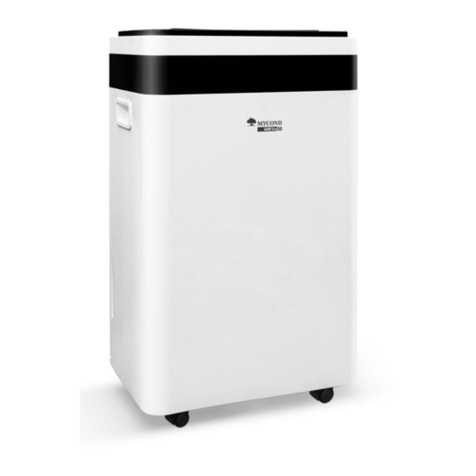
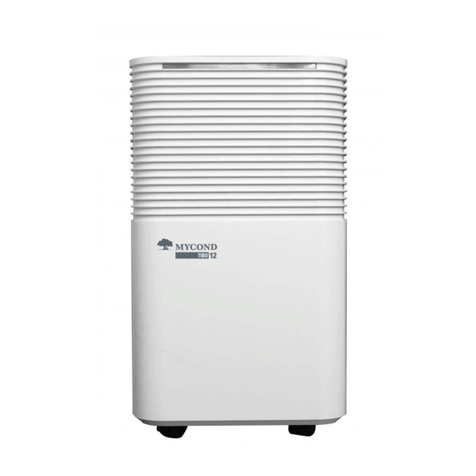
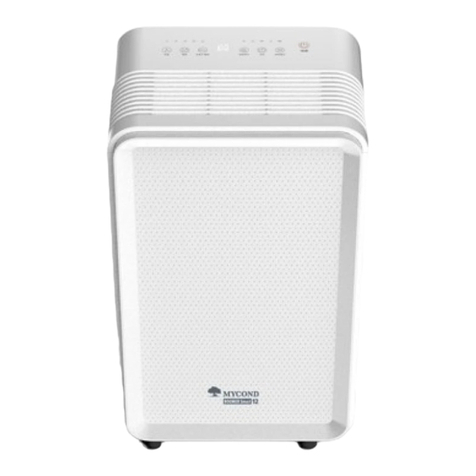
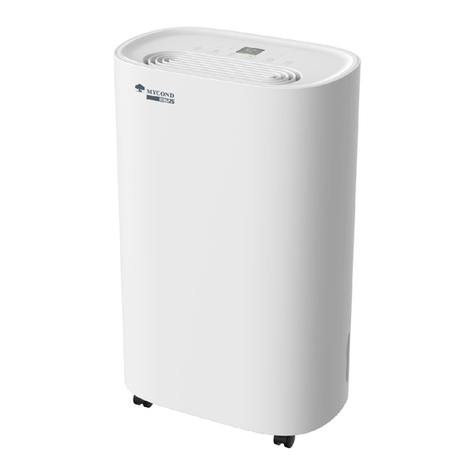
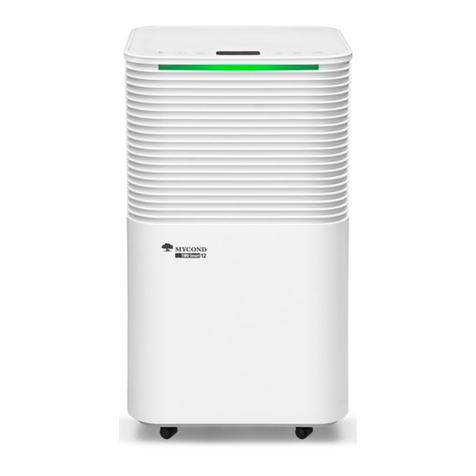
Mycond YUGO Smart 16 User manual

user's manual
■
посібник
користувача
■
руководство
пользователя
1
YUGO Smart 16
AIR DEHUMIDIFIER

AIR DEHUMIDIFIER
USER’S MANUAL
3
YUGO Smart 16

eng 4 5
CONTENTSUSER’S MANUAL
PRECAUTIONS ■■■■■■■■■■■■■■■■■■■■■■■■■■■■■■■■■■■■■■■■■■■■■■■■■■ 6
SPECIFICATIONS ■■■■■■■■■■■■■■■■■■■■■■■■■■■■■■■■■■■■■■■■■■■■■■■■ 11
APPEARANCE■■■■■■■■■■■■■■■■■■■■■■■■■■■■■■■■■■■■■■■■■■■■■■■■■■ 12
OPERATION ■■■■■■■■■■■■■■■■■■■■■■■■■■■■■■■■■■■■■■■■■■■■■■■■■■■ 14
MAINTENANCE■■■■■■■■■■■■■■■■■■■■■■■■■■■■■■■■■■■■■■■■■■■■■■■■■ 23
TROUBLESHOOTING ■■■■■■■■■■■■■■■■■■■■■■■■■■■■■■■■■■■■■■■■■■■■■ 26
DECOMMISSIONING ■■■■■■■■■■■■■■■■■■■■■■■■■■■■■■■■■■■■■■■■■■■■■ 28
PLEASE KEEP THIS MANUAL FOR FURTHER REFERENCE!
Thank you for selecting our super quality dehumidifier. Please be sure to read this manual
carefully before using it. If you have any questions, please contact the professional service for
help. Keep the manual for further reference.
The dehumidifier will remove excess moisture from the air, creating a comfortable
environment for your home and oce. Its compact design allows you to easily move it to any
room.

eng 6 7
PRECAUTIONS
Read the following notices carefully before operating this dehumidifier.
The warnings and notices must be observed effectively to ensure the safety of the operation.
1. This appliance is intended to be used by expert or trained users in shops, in light industry and on farms, or for
commercial use by lay persons.
2. This appliance can be used by children aged from 8 years and above and persons with reduced physical, sensory or
mental capabilities or lack of experience and knowledge if they have been given supervision or instruction concerning
use of the appliance in a safe way and understand the hazards involved. Children shall not play with the appliance.
Cleaning and user maintenance shall not be made by children without supervision.
3. The unit is designed only for use with R-290(propane) gas as the designated refrigerant.
4. The refrigerant loop is sealed. Only a qualified technician should attempt to service!
5. Do not discharge the refrigerant into the atmosphere.
6. R-290 (propane) is flammable and heavier than air.
7. It collects first in low areas but can be circulated by the fans.
8. If propane gas is present or even suspected, do not allow untrained personnel to attempt to find the cause.
9. The propane gas used in the unit has no odor.
10. The lack of smell does not indicate a lack of escaped gas.
11. If a leak is detected, immediately evacuate all persons from the store, ventilate the room and contact the local fire
department to advise them that a propane leak has occurred.
12. Do not let any persons back into the store until the qualified service technician has arrived and that technician advises
that it is safe to return to the store.
13. No open flames, cigarettes or other possible sources of ignition should be used inside or in the vicinity of the units.
14. Component parts are designed for propane and non-incentive and non-sparking. Component parts shall only be
replaced with identical repair parts.
15. If the supply cord is damaged, it must be replaced by the manufacturer, its service agent or similarly qualified persons
in order to avoid a hazard.
16. The A-weighted sound pressure level is below 36dB.
17. The appliance shall be disconnected from its power source during service.
18. Always operate the unit from a power source of equal voltage, frequency and rating as indicated on the product
identification plate.
19. Do not leave the unit running unattended.
20. Do not touch the air inlet or the aluminum fins of the unit.
21. Do not operate the unit if it is dropped, damaged or showing signs of product malfunction. Do not operate the product with
damaged plug or cord. If it is not working properly, contact a qualified electrician or service centre for examination and
repair, never try to dismantle it by yourself (user).
22. The unit shall be installed in accordance with national wiring regulations.
23. Do not use means to accelerate the defrosting process or to clean, other than those recommended by the manufacture.
24. The appliance shall be stored in a room without continuously operation sources (for example: open flames, an operating
gas appliance or an operating electric heater).
25. The appliance shall be stored so as to prevent mechanical damage from occurring.
26. Do not piece or burn, even after use.
27. Be aware that refrigerants may not contain an odour.
28. Pipe-work shall be protected from physical damage and shall not be installed in an unventilated space, if that space is
smaller than 12m².
29. Compliance with national gas regulations shall be observed.
30. Keep any required ventilation openings clear of obstruction.
31. The appliance shall be stored in a well-ventilated area where the room size corresponds to the room area as specified for
operation.
PRECAUTIONS
eng 8 9
Any person who is involved with working on or breaking into a refrigerant circuit should hold a current valid certificate from
an industry-accredited assessment authority, which authorizes their competence to handle refrigerants safely in accordance
with an industry, recognized assessment specification.
Servicing shall only be performed as recommended by the equipment manufacturer. Maintenance and repair requiring
the assistance of other skilled personnel shall be carried out under the supervision of the person competent in the use of
flammable refrigerants.
If you don’t understand something or need help, please contact the dealer services.
SAFETY PRECAUTIONS ON SERVICING
Please follow these warnings when to undertake the following when servicing a dehumidifier with R290.
Checks to the area
Prior to beginning work on systems containing flammable refrigerants, safety checks are necessary to ensure that the risk
of ignition is minimized. For repair to the refrigerating system, the following precautions shall be complied with prior to
conducting work on the system.
Work procedure
Work shall be undertaken under a controlled procedure so as to minimize the risk of a flammable gas or vapor being present
while the work is being performed.
General work area
All maintenance staff and others working in the local area shall be instructed on the nature of work being carried out. Work
in confined spaces shall be avoided. The area around the workspace shall be sectioned off. Ensure that the conditions within
the area have been made safe by control of flammable material.
Checking for presence of refrigerant
The area shall be checked with an appropriate refrigerant detector prior to and during work, to ensure the technician is aware
of potentially flammable atmospheres. Ensure that the leak detection equipment being used is suitable for use with flammable
refrigerants, i.e. no sparking, adequately sealed or intrinsically safe.
Presence of fire extinguisher
If any hot work is to be conducted on the refrigeration equipment or any associated parts, appropriate fire extinguishing
equipment shall be available to hand. Have a dry powder orCO2 fire extinguisher adjacent to the charging area.
No ignition sources
No person carrying out work in relation to a refrigeration system which involves exposing any pipe work that contains or
has contained flammable refrigerant shall use any sources of ignition in such a manner that it may lead to the risk of fire or
explosion. All possible ignition sources, including cigarette smoking, should be kept sufficiently far away from the site of
installation, repairing, removing and disposal, during which flammable refrigerant can possibly be released to the surrounding
space. Prior to work taking place, the area around the equipment is to be surveyed to make sure that there are no flammable
hazards or ignition risks. “No Smoking” signs shall be displayed.
Ventilated area
Ensure that the area is in the open or that it is adequately ventilated before breaking into the system or conducting any hot
work. A degree of ventilation shall continue during the period that the work is carried out. The ventilation should safely disperse
any released refrigerant and preferably expel it externally into the atmosphere.
Checks to the refrigeration equipment
Where electrical components are being changed, they shall be fit for the purpose and to the correct specification. At all
times the manufacturer’s maintenance and service guidelines shall be followed. If in doubt consult the manufacturer’s
technical department for assistance.
PRECAUTIONS PRECAUTIONS

eng 10 11
The following checks shall be applied to installations using flammable refrigerants:
The charge size is in accordance with the room size within which the refrigerant containing parts are installed;
The ventilation machinery and outlets are operating adequately and are not obstructed;
If an indirect refrigerating circuit is being used, the secondary circuit shall be checked for the presence of refrigerant;
Marking to the equipment continues to be visible and legible. Markings and signs that are illegible shall be corrected;
Refrigeration pipe or components are installed in a position where they are unlikely to be exposed to any substance which
may corrode refrigerant containing components, unless the components are constructed of materials which are inherently
resistant to being corroded or are suitably protected against being so corroded.
Checks to electrical devices
Repair and maintenance to electrical components shall include initial safety checks and component inspection procedures.
If a fault exists that could compromise safety, then no electrical supply shall be connected to the circuit until it is
satisfactorily dealt with. If the fault cannot be corrected immediately but it is necessary to continue operation, an adequate
temporary solution shall be used. This shall be reported to the owner of the equipment so all parties are advised.
Initial safety checks shall include:
those capacitors are discharged: this shall be done in a safe manner to avoid possibility of sparking;
that there no live electrical components and wiring are exposed while charging, recovering or purging the system;
that there is continuity of earth bonding.
PRECAUTIONS SPECIFICATIONS
Model No. YUGO Smart 16
Power Supply AC220V-240V/50 Hz
Power Consumption
270 W (30 °C, RH 80%)
225 W (27 °C, RH 60%)
Rated Current
1.4 A (30 °C, RH 80%)
1.25 A (27 °C, RH 60%)
Dehumidify Capacity
16 L/Day (30 °C, RH 80%)
9 L/Day (27 °C, RH 60%)
Noise ≤38 dB(A)
Airflow 150 m3/hr
Water Tank Capacity 2.0 L
Refrigerant/Charge R290/65 g
Note: Specifications subject to change without notice.

eng 12 13
APPEARANCE
Handle
Continuous drainage
Air filter
Water tank
APPEARANCE
Air Outlet
Front Case
Control panel
Castor

eng 14 15
INSTALLATION
1. Place the unit on a firm, level surface in an area with at least 20cm of free space around it allow for proper air
circulation.
2. Operate this unit in an ambient temperature from 5°C to 35°C.
3. Keep doors and windows close for better energy saving.
4. Do not operate in close proximity to walls, curtains, or other objects that may block inlet and outlet.
5. Do not operate the unit beneath furniture or where the air flow is restricted.
6. Do not operate or store the unit in direct sunlight or rain.
QUICK START GUIDE
Unpacking the appliance and check for any damage or scratches on the machine.
If tipped more than 45°, allow the unit to set upright for at least 2 hours before start up.
Check the bucket is empty and re-install correctly before plug in the dehumidifier. Be sure the bucket full indicator does not
light up.
Press POWER to turn on the dehumidifier.
Press MODE repeatedly to choose Auto Sunny (60%RH), Auto Rainy (40%RH), or Continuous Drying.
Press SLEEP for silent operating with dim light before go to bed.
Press TIMER repeatedly to set a 1-hour to 24-hour delay OFF before you go out.
Press POWER again to turn the unit o.
For more operational instructions, please read the following pages.
OPERATIONOPERATION

eng 16 17
OPERATIONOPERATION
POWER
Press to switch the machine on or o.
Steady On: Humidity levels below 40% relative humidity.
Steady On: Above 40% and below 60% relative humidity.
Steady On: High humidity above 60% relative humidity.
Flashing Blue: Defrosting is in progress.
Flashing Red: Indicates the water tank is almost full.
MODE
Press to choose Sunny, Rainy and Continuous Drying mode.
FAN SPEED /SAFE LOCK
Press to choose fan speed High and Low. Hold this button to turn on or o child lock function.
HUMIDITY
Adjusts the humidity set-point within the range of 20%-95%.
WIFI
Press and hold the Wifi button for about 3 seconds to connect or disconnect the Wi-Fi function.
TIMER
Sets a time for the unit to automatically start or stop.
SLEEP
Press to turn sleep mode on or o.
DIGITAL DISPLAY
Displays humidity value, Timer setting or Temperature.
1. The screen will display current relative humidity (%) when the machine is turned on. And display “——” when the
machine is o.
2. The screen will display following function:
Timer set.
Error code.
НатLong press HUM key to display Room temperature (°C).
3. The indicators will light up when the corresponding function is turned on.

eng 18 19
BUCKET FULL LIGHT
Lights up when water tank is almost full.
INDICATORS
Sunny
Rainy
Continuous drying
Low speed
High speed
Lights up when Child lock function is turned on.
OPERATION
DEHUMIDIFICATION MODE SETTING
Press POWER key to turn on the unit after plug in. The dehumidifier starts with sunny mode and air purifying function.
Press MODE key repeatedly to switch the mode:
Sunny mode: auto dehumidifying with 60%RH, High fan speed.
Rainy mode: auto dehumidifying with 40%RH, high fan speed.
Continuous mode: continuous dehumidifying.
SET SLEEP MODE
Press SLEEP key to turn on sleep function. It will operate in silent mode with low fan speed and dims all the lights.
Press any button to wake up the indicators. Press SLEEP key again to exit the sleep mode.
SET HUMIDITY SETTING RANGE: 20%95%
Press the HUM key to check the humidity set-point under current mode. Press the HUM key repeatedly to adjust
humidity set-point. Set appropriate humidity levels to create a comfortable environment.
Note. The HUM key cannot be set in the continuous mode.
WIFI CONNECTION
The “MYCOND” app is available for android and iOS. Scan the corresponding QR code below
to get directly to the download.
Note. Depending on the provider, there may be costs involved in downloading the app.
OPERATION

eng 20 21
INFORMATION ON HOW TO USE THE APP
This appliance allows you to operate the appliance via your home net-work. A prerequisite is a permanent Wi-Fi
connection to your router and the free app “MYCOND”.
We recommend disconnecting the appliance from the power supply when you are away from home to prevent
unintentional switching on while you are on the road!
System Requirement for Use of the App
iOs 8.0 or higher
Android 4.1 or higher
Commissioning via the App
1. Install the “MYCOND” app. Create a user account.
2. Activate the Wi-Fi function in the settings of your appliance.
3. Place the appliance at a distance of about 5 meters to your router.
4. Press and hold the Wi-fi button for about 3 seconds. The Wi-Fi lamp will flash rapidly.
5. Launch the app and select ”+”.
6. Select the “Dehumidifier (Wi-Fi)” in menu and follow the instructions on the display.
7. Once the appliance has been successfully connected, the Wi-Fi lamp lights up. Now you can operate the appliance
using the app.
8. Press and hold the Timer button for about 3 seconds, the appliance disconnect, the Wi-Fi lamp lights o.
9. If the appliance cannot be successfully connected, turn o the dehumidifier and unplug the power cord, then plug in
it again after 10 seconds and retry.
SET FAN SPEED
Press SPEED key to switch the speed between High speed and Low speed.
Note. The fan speed cannot be set when the indicator is o in sleep mode and defrosting progress.
CHILD LOCK FUNCTION
The child lock function is designed to prevent children from playing unit.
To active: Long press the SPEED/LOCK key for 5 seconds to disable all the buttons.
To unlock: Press and hold again to cancel the child lock.
OVERLOAD PROTECTION
In the event of a power loss, to protect the compressor there is a 3-minute delay until the compressor restarting.
TIMER SETTING SETTING RANGE: 1HOUR24HOURS
To turn o (When power on): Press Timer key to turn on the timer function. Press Timer repeatedly to set the delay OFF
time.
To turn on (When power o): Press Timer key to turn on the timer function. Press Timer repeatedly to set the delay ON
time.
Cancel the timer: Press Timer repeatedly until the screen shows ‘00’
Note: when press POWER will also exit the timer setting.
OPERATION OPERATION

eng 22 23
OPERATION MAINTENANCE
WATER FULL INDICATOR
The machine automatically shuts o once the water tank is full, alerting the user through an indicator light and
buzzing for 15 times. It reminds you to check:
If the water tank is full, empty and re-install the water tank.
If the water tank is not in position, the full indicator always on and the unit is inoperative.
Re-install the tank correctly, and the unit will auto operating as your last setting.
ROOM TEMPERATURE INSPECTION
In addition to the humidity level, the digital display (11) can also indicate the current room temperature. Please
check as follows: Press and hold the TIMER button for 5 seconds. The screen displays the temperature in degree
Celsius.
AUTO DEFROST FUNCTION
At low room temperatures, frost may buildup at the evaporator reducing the airflow across it during dehumidifying.
The unit will automatically start defrosting and the POWER indicator flashing. When the room temperature below
18°C or the humidity sensor failures, the compressor stops for 10 minutes during the automatic defrost function and
the fan keeps running.
DRAINAGE INSTRUCTIONS
There are two ways of removal collected water produced by the unit..
1. Manual draining: Empty water tank by manual.
2. Continuous draining: Use gravity to drain condensate water by attaching a drain hose.
EMPTYING THE WATER TANK
1. Unplug the dehumidifier from its power source.
2. Pull on the water tank and simply slide out of the body of the dehumidifier.
3. Do not remove the float out of the tank. Make sure that the float can move freely and that it will actuate the level switch
when the tank is full.
4. Clean the inside of the tank as well as the outside.
5. Allow the tank to air-dry completely and slide it back into place within the dehumidifier.
6. After you have replaced the tank, plug the unit back into its power source.
Warning! Use only mild soap, water and soft cloth. Do not use any commercial cleaning solvents.

eng 24 25
MAINTENANCE MAINTENANCE
CONTINUOUS DRAINAGE
Condensate water can be automatically flow into a bucket or drain by gravity with a water hose.
1. Set the unit in a horizontal surface and stable position.
2. Switch o the unit before operating.
3. Gently take out the water tank from the dehumidifier.
4. Securely and properly connect the drain hose and make sure it is not kinked and clear of obstruction.
5. Put back the water tank.
6. Place the outlet of hose over a drain or bucket and ensure that water could freely flow out of the unit.
7. Do not submerge the end of hose into water; otherwiseit can cause “Air Lock” in the hose.
To avoid water spillage:
1. As the negative pressure of condensate drain pan is large, tilt the drain hose downward toward the floor. It is
appropriate that the degree of inclination should exceed 20 degrees.
2. Straighten the hose to avoid a trap existing in the hose.
CLEANING AND CARE
The air filter is removable for easy cleaning. Clean the air filter every two weeks. Do not operate the unit without an air
filter, or the evaporator may be contaminated. Do not clean the appliance with any chemicals.
1. Switch o the unit and remove air filter.
Warning! Do not touch the evaporator surface with bare-hand, or could cause injury of your fingers.
2. Rinse the air filter under running water. The carbon filter cannot be washed with water. After 6 months of using a carbon
filter, you should replace it if you need high air quality.
3. Re-install the air filter.
Inner Diameter=9.5 mm 1
Еake out the water tank
32

eng 26 27
TROUBLESHOOTINGTROUBLESHOOTING
Emitting hot The air outlet is hotter than room temperature
a bit.
This is normal. The compressor produce heat
that has been removed by the air exhausted.
Error Code E2 Humidity sensor dampened or failure. To clean or replace the humidity sensor.
CL Display when Room temperature is below
5 °C (41 °F).
Normal. The compressor stops, and the fan
keeps running.
CH Display when Room temperature is above
35 °C (95 °F).
Normal. The compressor stops, and the fan
keeps running.
LO Display when Room relative humidity is bellow
20%RH.
Normal. The compressor stops, and the fan
keeps running.
HI Display when Room relative humidity is above
95%RH.
Normal. The compressor and the fan keep
running.
CAUTIONS:
Switch o the unit and unplug it immediately if you notice something
abnormal in the operation of the device.
Then contact a qualified electrician.
Do not dispose of electrical appliances as unsorted municipal waste, use
special collection facilities.
Contact your local authorities for information on available collection
facilities.
Releasing refrigerant into atmosphere is strictly forbidden! According to
European Directive 2012/19 / EU on waste electrical and electronic equipment
and transposition into national law, used electrical appliances must be
collected separately and recycled in an environmentally sound manner.
Problem Possible Cause Solution
The unit is not operating Check the power connection in securely. Insert the power cord securely into the wall
Outlet.
Check if the water level indicator lights up? Empty the water tank and re-install correctly.
Check the room temperature. The range of operating temperature is
5-35 °C.
There is little formation of condensate Check the air filter for dirt. Clean the air filter as necessary.
Check if the air duct is blocked. To clear the obstacle.
Check if the room temperature is below 20 °C. This is normal. Low humidity in low
temperature environment.
Set humidity level is higher than current
humidity value.
Set the humidity level below current humidity
value.
Water Leakage Overflow while moving the unit. Empty the water tank before transport.
Check if the drain hose is kinked or bends. Straighten the hose to avoid a trap existing.
Excessive Noise Check if the unit is securely positioned. Place the unit on horizontal and firm ground.
Check if any loose, vibrating parts. Secure and tight the parts.
Noise sounds like water flowing. Noise comes from flowing refrigerant. This
is normal.

eng 28
DECOMMISSIONING
STORAGE
Long-term storage: If you will not be using the unit for an extended period of time (more than a few
weeks) it is best to clean the unit and dry it out completely. Please store the unit per the following steps.
1. Unplug the unit.
2. Empty the water tank and dry with a cloth.
3. Clean the filter and let the filter dry completely in a shaded area.
4. Collect the power cord at the tank and re-install it.
5. Re-install the filter at its position.
6. Preserving the machine in ventilating, dry, non- corrosive gas and safe place indoor.
7. The unit must be kept in upright position when in storage.
Attention! The evaporator inside the machine has to be dried out before the unit is packed to avoid
component damage and molds. Unplug the unit and place it in a dry open area for days to dry it out.
Another way to dry the unit is to set the humidity point more than 5% higher than the ambient humidity to
force the fan to dry the evaporator for a couple of hours.

YUGO Smart 16
ОСУШУВАЧ
ПОВІТРЯ
ПОСІБНИК
КОРИСТУВАЧА
31

ukr 32 33
ЗМІСТ
ЗАПОБІЖНІ ЗАХОДИ ■■■■■■■■■■■■■■■■■■■■■■■■■■■■■■■■■■■■■■■■■■■■ 34
ТЕХНІЧНІ ХАРАКТЕРИСТИКИ ■■■■■■■■■■■■■■■■■■■■■■■■■■■■■■■■■■■■■■ 39
ЗОВНІШНІЙ ВИГЛЯД ■■■■■■■■■■■■■■■■■■■■■■■■■■■■■■■■■■■■■■■■■■■■ 40
ЕКСПЛУАТАЦІЯ ■■■■■■■■■■■■■■■■■■■■■■■■■■■■■■■■■■■■■■■■■■■■■■■■ 42
ОБСЛУГОВУВАННЯ ■■■■■■■■■■■■■■■■■■■■■■■■■■■■■■■■■■■■■■■■■■■■■ 51
УСУНЕННЯ НЕСПРАВНОСТЕЙ ■■■■■■■■■■■■■■■■■■■■■■■■■■■■■■■■■■■■■■ 54
ВИВЕДЕННЯ З ЕКСПЛУАТАЦІЇ■■■■■■■■■■■■■■■■■■■■■■■■■■■■■■■■■■■■■■ 56
БУДЬ ЛАСКА, ЗБЕРЕЖІТЬ ЦЕЙ ПОСІБНИК
ДЛЯ ПОДАЛЬШОГО ВИКОРИСТАННЯ!
Дякуємо вам за вибір нашого суперякісного осушувача. Будь ласка, уважно прочитайте
цей посібник користувача перед його використанням. Якщо у вас виникли будь-які
питання, будь ласка, зверніться до професійної служби по допомогу. Збережіть цей
посібник користувача для подальшого використання.
Осушувач повітря видаляє зайву вологу з повітря, створюючи комфортні умови для
вашого будинку і офісу. Завдяки своєму компактному дизайну, його можна легко
переміщати до будь-якої кімнати.
ПОСІБНИК КОРИСТУВАЧА

ukr 34 35
ЗАПОБІЖНІ ЗАХОДИ
Уважно ознайомтеся з наступними попереджувальними позначеннями перед
використанням цього приладу.
Попередження та повідомлення мають дотримуватися і бути прийняті до уваги для
забезпечення безпеки при роботі з приладом.
1. Діти віком від 8 років та особи з обмеженими фізичними, сенсорними та розумовими можливостями чи
недостатнім досвідом та знаннями можуть використовувати цей прилад лише під наглядом або після
інструктажу щодо безпечного використання приладу, за умови, що вони усвідомлюють пов’язані з цим
небезпеки. Не дозволяйте дітям гратися з приладом. Слідкуйте, щоб діти не чистили прилад і не виконували
користувацьке технічне обслуговування без нагляду.
2. Пристрій розрахований на роботу лише з призначеним для нього холодоагентом – газом R290 (пропаном).
3. Контур холодоагенту герметизований. Його обслуговуванням повинен займатися лише кваліфікований
технічний спеціаліст!
4. Не випускайте холодоагент в атмосферу.
5. Газ R290 (пропан) займистий і важчий, ніж повітря.
6. Він у першу чергу накопичується на низьких ділянках, проте циркулює під дією вентиляторів.
7. Якщо газоподібний пропан протікає, або хоча б є підозра, що він протікає, не допускайте непідготовлений
персонал до пошуку та усунення несправності.
8. Газоподібний пропан, що використовується у пристрої, не має запаху.
9. Відсутність запаху газу ще не означає, що він не протікає.
10. У разі виявлення витоку необхідно евакуювати всіх із будівлі, провітрити приміщення і повідомити місцеве
пожежне депо про витік пропану.
11. Не дозволяйте людям повертатися у приміщення, поки не прибуде кваліфікований спеціаліст із технічного
обслуговування і не підтвердить, що це безпечно.
12. Не допускайте паління, використання відкритого полум’я та інших можливих джерел займання всередині чи
поблизу пристроїв.
13. Компоненти пристрою розраховані на роботу з пропаном у негорючому та іскробезпечному середовищі. Для
заміни компонентів використовуйте лише ідентичні запчастини.
14. Якщо шнур живлення пошкоджений, для його заміни зверніться до виробника, його сервісного представника чи
особи з аналогічною кваліфікацією, щоб уникнути небезпечної ситуації.
15. Амплітудно-зважений рівень звукового тиску менший, ніж 36 дБ.
16. Перш ніж обслуговувати пристрій, його потрібно від’єднати від джерела живлення.
17. Живлення на пристрій слід завжди подавати від джерела живлення з такою ж напругою, частотою і номінальними
характеристиками, як вказано на паспортній табличці виробу.
18. Не залишайте пристрій працювати без нагляду.
19. Не доторкайтеся до отвору входу повітря чи алюмінієвих ребер пристрою.
20. Не експлуатуйте пристрій, якщо він падав, пошкоджений або має ознаки несправності.
21. Не експлуатуйте пристрій, якщо його вилка або шнур пошкоджені. Якщо пристрій не працює належним чином,
зверніться до кваліфікованого електрика або сервісного центру для виконання діагностики та ремонту, і в жодному
разі не намагайтеся розбирати його самостійно (силами користувача).
22. Пристрій необхідно встановити з дотриманням національних правил влаштування електропроводки.
23. Для прискорення процесу відтавання або чищення пристрою можна використовувати лише ті засоби, які
рекомендує виробник.
24. Прилад слід тримати у приміщенні без постійних джерел тепла (як-от відкрите полум’я, працюючий газовий прилад
або електронагрівник).
25. Зберігайте прилад таким чином, щоб не допустити його механічного пошкодження.
26. Не проколюйте і не спалюйте пристрій, навіть якщо він вже списаний.
27. Пам’ятайте, що холодоагент може не мати запаху.
28. Вжийте заходів для захисту трубопроводів від фізичних пошкоджень і не встановлюйте їх у місці, яке не
вентилюється, площею менше 12 м2.
29. Дотримуйтеся місцевих правил поводження з газом.
30. Слідкуйте, щоб усі необхідні вентиляційні отвори не були загороджені.
31. Тримайте прилад у приміщенні, яке добре вентилюється і має необхідну площу для його експлуатації.
ЗАПОБІЖНІ ЗАХОДИ

ukr 36 37
До роботи з контуром холодоагенту або його відкриття допускаються лише особи, які мають дійсний та актуальний
сертифікат, який підтверджує їх компетентність у питаннях безпечного поводження з холодоагентами, виданий
акредитованим галузевим атестаційним органом за загальновизнаною галузевою процедурою атестації.
Обслуговування слід здійснювати виключно за рекомендаціями виробника. Роботи з технічного обслуговування
та ремонту, які потребують участі іншого кваліфікованого персоналу, повинні здійснюватися під наглядом особи,
компетентної у питаннях використання займистих холодоагентів.
Якщо у вас виникли питання, або вам потрібна допомога, зверніться до фірми-продавця.
ЗАПОБІЖНІ ЗАХОДИ ПІД ЧАС ТЕХНІЧНОГО ОБСЛУГОВУВАННЯ
Під час обслуговування осушувача з холодоагентом R290 дотримуйтеся наведених нижче вказівок.
Перевіркаробочої ділянки
Перш ніж працювати з системами, у яких міститься займистий холодоагент, обов’язково перевірте їх безпечність,
щоб звести до мінімуму ризик займання. Виконуючи ремонт холодильної системи, перед роботою з системою
потрібно вжити описаних нижче запобіжних заходів.
Процедура роботи
Процедуру роботи слід контролювати, щоб мінімізувати ризик присутності займистого газу чи пари у
навколишньому середовищі під час роботи.
Загальнаробочаділянка
Обов’язково роз’ясніть характер роботи, що виконується, усьому персоналу, який займається технічним
обслуговуванням, та іншим особам, що працюють поблизу. Уникайте роботи у тісному просторі. Ділянка навколо
робочого місця повинна бути відгороджена. Організуйте контроль присутності займистих матеріалів, щоб
гарантувати безпечні умови на ділянці.
Перевіркаприсутності холодоагенту
Перед роботою та під час роботи перевіряйте ділянку за допомогою належного пристрою для виявлення холодоагенту,
щоб у випадку появи потенційно займистої атмосфери технічний спеціаліст про це дізнався. Переконайтеся, що
обладнання для виявлення витоків підходить для роботи з займистими холодоагентами, тобто не іскрить, належним
чином герметизоване або має вибухозахищене виконання.
Наявність вогнегасника
Під час виконання будь-яких вогненебезпечних робіт з холодильним обладнанням або пов’язаними з ним деталями
потрібно мати напоготові належне вогнегасне обладнання. Біля зони заправляння холодоагентом потрібно мати сухий
порошковий або вуглекислотний вогнегасник.
Відсутність джерел займання
Під час виконання робіт із холодильною системою, які супроводжуються відкриттям трубопроводів, що містять або
містили займистий холодоагент, не можна використовувати джерела займання у такий спосіб, що може створити
загрозу пожежі або вибуху. Усі потенційні джерела займання, у тому числі паління, повинні бути достатньо віддалені
від місця виконання робіт з монтажу, ремонту, демонтажу та утилізації, які можуть призвести до виходу займистого
холодоагенту у навколишнє середовище. Перед роботою перевірте ділянку навколо обладнання, щоб переконатися у
відсутності займистих речовин та джерел займання. Встановіть знаки «Не палити».
Вентиляція ділянки
Перш ніж відкривати систему або виконувати будь-які вогненебезпечні роботи, переконайтеся, що робоча ділянка
знаходиться під відкритим небом або належним чином вентилюється. Належна вентиляція повинна підтримуватися
впродовж усього часу виконання роботи. Вентиляція повинна забезпечувати безпечне розсіяння холодоагенту, який
виходить із системи, і – бажано – його відведення назовні в атмосферу.
Перевіркихолодильногообладнання
У разі заміни електричних компонентів нові компоненти повинні відповідати призначенню і мати належні технічні
характеристики. Завжди дотримуйтеся вказівок виробника щодо технічного обслуговування та догляду за
обладнанням. У разі виникнення сумнівів зверніться за допомогою до технічного відділу компанії-виробника.
ЗАПОБІЖНІ ЗАХОДИ ЗАПОБІЖНІ ЗАХОДИ

ukr 38 39
Установки, у яких використовується займистий холодоагент, слід перевірити на відповідність таким
вимогам:
Кількість холодоагенту, що заправляється в систему, повинна відповідати розміру приміщення, у якому встановлені
компоненти, що містять холодоагент.
Вентиляційне обладнання та вихідні отвори працюють належним чином і не загороджені;
У разі використання проміжного контура холодоагенту вторинний контур слід перевірити на присутність
холодоагенту.
Маркування на обладнанні помітне і розбірливе. Нерозбірливі маркування та знаки потрібно замінити.
Холодильні трубопроводи та компоненти встановлені у такому положенні, що вони навряд чи контактуватимуть
з будь-якою речовиною, яка може призвести до корозії компонентів, що містять холодоагент – за винятком
випадків, коли такі компоненти виготовлені з матеріалів, які самі по собі стійкі до корозії або належним чином
захищені від такої корозії.
Перевіркиелектричнихпристроїв
У ході ремонту та технічного обслуговування електричних компонентів повинні виконуватися початкові перевірки
безпеки та процедури огляду компонентів. За наявності будь-яких несправностей, які можуть загрожувати
безпеці, не подавайте живлення на контур, поки несправність не буде належним чином усунена. Якщо несправність
неможливо негайно усунути, а роботу необхідно продовжувати, застосуйте належне тимчасове рішення. Повідомте
про це власника обладнання, щоб усі сторони були поінформовані.
Початковіперевіркибезпеки повинніохоплюватитакі моменти:
переконайтеся, що конденсатори розряджені; це слід робити у безпечний спосіб, щоб виключити ризик іскріння;
під час заправляння, зливання холодоагенту чи продування системи переконайтеся у відсутності оголених деталей
та проводки під напругою;
перевірте заземлення на цілісність.
ЗАПОБІЖНІ ЗАХОДИ ТЕХНІЧНІ ХАРАКТЕРИСТИКИ
Модель YUGO Smart 16
Електричне живлення 220-240 В змінного струму, 50 Гц
Споживана потужність
270 Вт (30 °C, 80%)
225 Вт (27 °C, 60%)
Номінальний струм
1,4 А (30 °C, 80%)
1,25 А (27 °C, 60%)
Продуктивність осушення
16 л/добу (30 °C, 80%)
9 л/добу (27 °C, 60%)
Рівень шуму ≤38 дБ(А)
Повітрообмін 150 м3/год
Місткість контейнера для води 2 л
Кількість холодоагенту, що заправляється в систему R290 / 65 г
Примітка: Приведені вище технічні параметри можуть бути змінені без попереднього повідомлення.
Table of contents
Languages:
Other Mycond Dehumidifier manuals

Mycond
Mycond TIBO Smart 12 User manual

Mycond
Mycond WORKER 50 User manual

Mycond
Mycond ROOMER Eco 25 User manual

Mycond
Mycond ROOMER Smart 25 User manual

Mycond
Mycond TIBO 12 User manual

Mycond
Mycond GIANT Eco 50 User manual

Mycond
Mycond TIBO 10 User manual

Mycond
Mycond DESS-80 User manual

Mycond
Mycond ABS 7A Service manual

Mycond
Mycond ROOMER 12 User manual