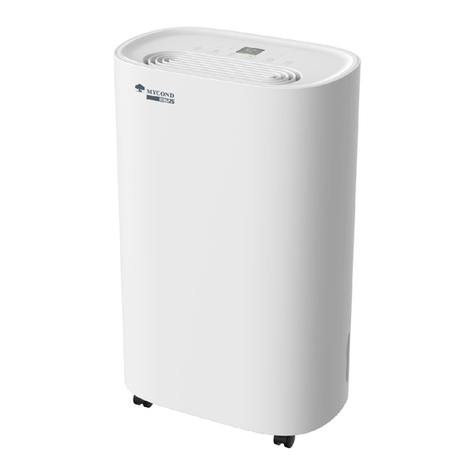
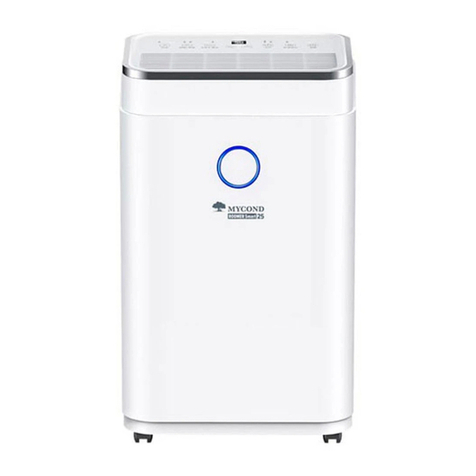
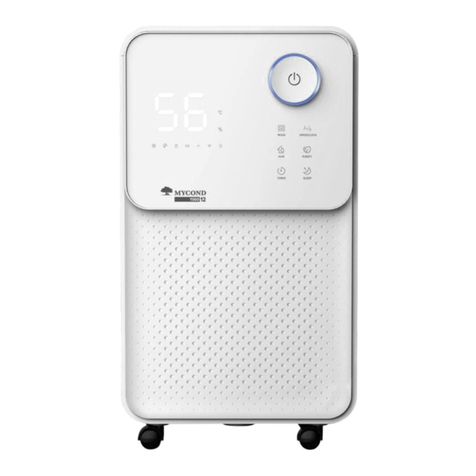
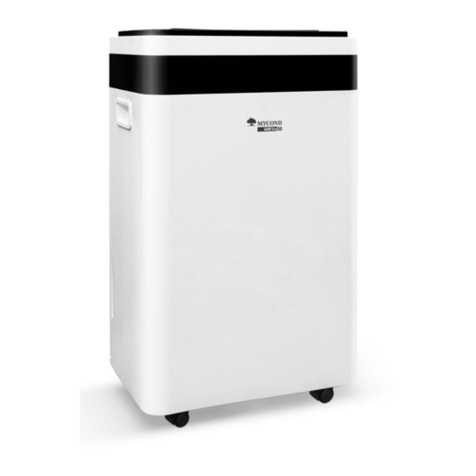
Mycond ROOMER 12 User manual

user's manual
■
посібник
користувача
■
руководство
пользователя
1
AIR DEHUMIDIFIER
ROOMER 12


ROOMER12
3
AIR
DEHUMIDIFIER
USER’S MANUAL

eng 4
USER’S MANUAL
PLEASE KEEP THIS MANUAL FOR FURTHER REFERENCE!
Thank you for selecting our super quality dehumidifier. Please be sure to read this manual
carefully before using it. If you have any questions, please contact the professional service for
help. Keep the manual for further reference.
The dehumidifier will remove excess moisture from the air, creating a comfortable
room.

5
CONTENTS ■■■■■■■■■■■■■■■■■■■■■■■■■■■■■■■■■■■■■■■■■■■■■■■■■■■ 5
PRODUCT INTRODUCTION ■■■■■■■■■■■■■■■■■■■■■■■■■■■■■■■■■■■■■■■■ 6
IMPORTANT SAFETY WARNING ■■■■■■■■■■■■■■■■■■■■■■■■■■■■■■■■■■■■■ 7
SPECIFICATIONS ■■■■■■■■■■■■■■■■■■■■■■■■■■■■■■■■■■■■■■■■■■■■■■■ 8
PARTS DESCRIPTION ■■■■■■■■■■■■■■■■■■■■■■■■■■■■■■■■■■■■■■■■■■■■ 9
CONTROL PANEL ■■■■■■■■■■■■■■■■■■■■■■■■■■■■■■■■■■■■■■■■■■■■■■■ 11
PRECAUTIONS■■■■■■■■■■■■■■■■■■■■■■■■■■■■■■■■■■■■■■■■■■■■■■■■■ 12
OPERATING INSTRUCTION ■■■■■■■■■■■■■■■■■■■■■■■■■■■■■■■■■■■■■■■■ 13
REMOVING CONDENSED WATER ■■■■■■■■■■■■■■■■■■■■■■■■■■■■■■■■■■■■ 16
TROUBLESHOOTING■■■■■■■■■■■■■■■■■■■■■■■■■■■■■■■■■■■■■■■■■■■■■ 18
MAINTENANCE ■■■■■■■■■■■■■■■■■■■■■■■■■■■■■■■■■■■■■■■■■■■■■■■ 20
ECOLOGY ■■■■■■■■■■■■■■■■■■■■■■■■■■■■■■■■■■■■■■■■■■■■■■■■■■■ 22
PACKING LIST ■■■■■■■■■■■■■■■■■■■■■■■■■■■■■■■■■■■■■■■■■■■■■■■■ 23
CONTENTS

PRODUCT INTRODUCTION
eng 6
The dehumidifier works with the principle of compression cooling to remove moisture from air eectively. The
dehumidifier is suitable for use at home, in oce to protect articles from moisture & decay, to protect furniture and
instruments from humid surroundings.
MAIN FEATURES:
Compact size to occupy little space:
Concise/beautiful touch keyboard with easy operation;
Universal wheels for easy moving;
Multi-dehumidification models to choose from;
Auto defrost for high eciency of dehumidification;
Auto switch o and alarming sound when tank is full.

7
IMPORTANT SAFETY WARNING
This chapter includes safety warning, protecting the user from personal injury and asset
damage. Please read carefully the information below, and follow all the instructions.
1. The power supply should be fixed at the place unreachable for children to avoid possible electric shock.
2. It is not allowed to shut down the dehumidifier by pulling o the power plug.
3. Children and people without self care ability are not allowed to insert the power plug into the power socket.
4. Do not store flammable and explosive gas at the place of using this unit.
5. Do not place the unit near any heat sources, corrosive gases.
6. Disassembling, repairing, fixing or cleaning the internal parts are not allowed.
7. Do not operate the appliance with wet hands.
8. Do not splash water at the appliance directly.
9. Do not place the appliance near water.
10. Do not connect this product using joined electric cords or extension cords, or sharing a power socket with other
electric appliances.
11. Use the appliance on stable flat surface.
12. Please connect plug of the unit to the power socket with ground cable.
13. Do not put hands into air inlet/outlet.
14. Do not sit on the unit.
15. Do not throw any subjects or pets into the appliance.
16. Clean the air filter regularly.
17. Before maintenance, always unplug the appliance from the main socket.
18. In lightning weather, please cut o the power to prevent the damage to the appliance.
19. Whenever the unit is to be left unused for a long period, make sure to unplug the unit for safety reasons.
20. In case of any abnormal phenomena (like fog, burnt odor), switch o the power immediately.
eng 8
SPECIFICATIONS
Home Dehumidifier ROOMER 12
Dehumidifying capacity
6L/Day (27°С, RH60%)
11.5L/Day (30°С, RH80%)
Airflow 100m3/H
Rated Voltage AC220-240V/50Hz
Rated Power 185W
Rated Current 1.2A
Max. Input Power 250W
Max. Input Current 1.4A
Anti-Electric Shock I
Max. working pressure of air intake/outlet 1.0/2.5MPa
Refrigerant R134a/110g
Weight 11.5kg
Temperature Scope of Application 5...32˚C

9
PARTS DESCRIPTION
Air Outlet
Universal Wheels (four)
Control Panel
Lifting handle

eng 10
PARTS DESCRIPTION
Air inlet grilles
Drain pipe interface
Power cable coiling post’
Tank
Power cable and plug

11
CONTROL PANEL
Auto mode indication
Dry clothes mode indication
Air purifying mode indication
Night operation mode indication
Slow speed running
mode indication
High speed running mode
indication
Tank full indication
Auto Defrost mode indication
Temperature and timer indication
Timer button
Mode button
Anion button
(Locking button)
Wind speed button
On/O
button
Manual dehu-
midifying and
temperature
setting button
Notice: The model picture shown in this manual is for reference only. It may dier from the model you actually
purchase.

PRECAUTIONS
eng 12
Do not use the appliance outdoors.
Do not obstruct the air intake or outlet, keeping the air intake and outlet unsheltered to reduce the electricity costs.
Use this appliance to keep books and other valuables dry.
Use this appliance in a closed room to achieve best performance.
Please close the window, door and other ventilation equipment when using this appliance.
Do not move this appliance on carpet or when there is condensed water in the tank, otherwise the device will slope
and condensed water will splash.
Universal wheels for easy moving.
If the appliance is to be operated for long periods, you are recommended to use the connecting drain pipe.
The power supply is in line with the Rating Label. Make sure the power socket is adequately earthed.
Insert the plug into the power socket firmly.
Place the appliance as on the picture below to get a good performance.
More than 50 cm
More than 50 cm
More than 50 cm
More than 20 cm
More than 20 cm

13
OPERATING INSTRUCTION
ON/OFF
Press “on/o” button, the unit starts operating.
Press this button again to stop unit’s operation.
WIND SPEED ADJUSTMENT
Wind speed button for setting high and slow operation mode.
Notice: When operating in clothes drying mode, the unit sets high-speed operation by default, but users can adjust
it manually. When operating in night mode, the unit sets low-speed operation by default, but users can adjust it
manually.
HUMIDITY ADJUSTMENT
When you press this button in other operating mode, it switches on manual operating mode. Press this button
continuously to set humidity.
The humidity setting range is 35%, 45%...75%, CO (continuously dehumidify), every time you press, the setting
value increases, if you do no press for 5 seconds, it shows setting value (first time it shows CO)
ANION GENERATING FUNCTION
Press “anion” button, it starts Anion Generating function. Press this button again, it stops this function.
Press this button for 3 seconds, start key locking function. Press this button again for 3 seconds, the key locking
function is canceled.
Notice: activating the Anion generating function can clean the air and wipe o odor and hazardous substances from
the air.

eng 14
OPERATING INSTRUCTION
MODE SELECTION
This button is used for mode select, every time you press it, it switches to another mode.
Auto mode: Under this mode, the appliance selects to tum on or turn o the compressor and air blower according
to the humidity.
Fan mode: Under this mode, the compressor does not work, air blower works, that is to say the appliance purifies
the indoor air without dehumidifying, so that the appliance achieves its best energy-saving performance.
Night mode: Under this mode, the unit sets humidity 50% by default. The compressor starts working when the
room humidity is over 50% and the compressor stops working when the room humidity is below 50%. The air
blower will delay stop by 3 minutes. The power indication will be on under night mode.
Drying Mode: Under clothes drying mode, the unit will operate continuously for 6 hours then shuts down
automatically. This operation is not limited by the set up humidity.
Under clothes drying mode, the operating time can be set up by adjusting the timer.
Hang wet clothes above the air outlet. Under clothes drying mode, the wind blades swing
from 45 to 90 degrees.
Tips:
Please dry clothes in the room with door/windows closed.
Please spin-dry wet clothes before using clothes drying mode to get the best eect.
It is not suitable for drying heavy clothes.
Do not hang wet clothes directly over the unit to avoid water dripping into the machine.
Do not cover the air outlet.
Do not cover the air outlet when switching on the unit. Do not pull/move the blades of air outlet manually as it may cause
damage to the machine.

15
TIMER
Set up timer: Press “timer” button, the timer indication is on and shows “00”.
Press “timer” button again to adjust time, each time you press the “timer” button, the setting time adds 1 hour.
Select setting time needed. If not operating for 5 seconds, it shows success of setting the timer.
Cancel timer: Press “timer” button for 3 seconds or press “on/o’ button, can cancel timer.
Check timer: Press “timer” button, the display screen shows the time left -”5 seconds”. If you press “timer”
button within 5 seconds, you can re-set timer.
FULL TANK PROTECTION FUNCTION
If the water tank is full, or it is moved or placed wrongly, the warning light and beep will be on, and the appliance
stops. The tank full protection function starts. Please empty the water tank.
MEMORY FUNCTION IN CASE OF POWER FAILURE
If the appliance plugged in after power outage during the operation process, the appliance will start automatically
and operate like before.
AUTO DEFROSTING FUNCTION
The appliance will do auto defrosting during the operation. The compressor stops and air flows operates only until
the auto defrosting is over, and the defrost indication will tum on. The compressor will start working automatically
after the auto defrosting, air flow operates continuously.
Tips: Do not set up humidity too low, the best humidity for people’s living is 50%-65%.
OPERATING INSTRUCTION

eng 16
REMOVING CONDENSED WATER
WHEN USING THE WATER TANK
1. Under operating condition, the warning beep will be on for 5 seconds. The “full” light will be on(red), the power
light shows slow flash.
2. Hold two sides of the tank and pull it out flatly to avoid condensed water to spill.
3. Remove the condensed water. Put the tank to the original place. The unit will start working automatically and “full”
indication will be o.
Tips:
Handle the tank carefully;
Do not touch any internal parts of the unit after taking out the tank;
After taking out the tank, the unit will stop automatically.

17
IN CONTINUOUS DRAINING
1. Take o the tap from drain pipe interface on the back of unit.
2. Insert the drain pipe into the interface and place another end of the pipe to the sewer. Now condensed water can be
drained continuously.
Tips:
The internal diameter of the drain pipe is 14mm.
The drain pipe must be fixed tightly to avoid leakage. Make sure there is no bending of the pipe.
The position of drain pipe should be lower than the unit.
Please set up proper humidity and wind speed if the unit will be operating under the dehumidifying mode for a long
time.
If the unit is not in use for a long time, take o the drain pipe and put on the tap.
Take o the tap.
lnsert the drain pipe
into the interface.
REMOVING CONDENSED WATER

TROUBLESHOOTING
eng 18
If any trouble occurs, the below code will be shown on the panel:
E1 trouble with temperature sensor
E2 trouble with humidity sensor
COMMON PHENOMENA
Do not worry if you meet the troubles below. Please find the relative solution according to the trouble cause. Please
contact maintenance service for the troubles you cannot settle by yourself.
Trouble Cause Solution
Unit not working Power cut Wait for power supply
Unit is not switched on Switch on the unit
Fuse blowout Change fuse(5A/250V •3.6X10)
“Timer On” does not arrive Cancel “Timer On”
Tank is full or not placed well Clean tank or place it properly

19
TROUBLESHOOTING
Poor Dehumidifying Humidity is not property set Set correct humidity
Unit Is covered by something Remove the cover/obstacle
Dehumidifying time is not enough Unit should keep operating
Door/Window Is open Close door/window
Room temperature below 5 °C or over 32 °C It is normal performance
Abnormal sounds when operating Air filter is blocked Remove the blocking stu
Unit is not placed well Place unit properly
Ground surface is not flat Place unit on flat surface
Water leakage Drain pipe is not connected well Connect drain pipe properly
Drain is blocked Remove the blocking stu
Frosting Frosting on unit surface Normal performance and unit has auto-
defrosting function
Shaking Slight shaking when switching on/o!f Normal performance

eng 20
MAINTENANCE
CLEANING THE FRAME
It is necessary to switch o the unit before cleaning the frame.
Wash cloth in water, dry it and clean the unit frame gently.
CLEANING THE TANK
Pull out the tank, clean it.
Then dry the tank and place it back. No direct sunshine should be used for drying the tank.
Tips: Clean the unit regularly to keep it beautiful and protect it from harmful bacteria.
Table of contents
Languages:
Other Mycond Dehumidifier manuals

Mycond
Mycond GIANT Eco 70 User manual

Mycond
Mycond WORKER 50 User manual

Mycond
Mycond TIBO Smart 12 User manual

Mycond
Mycond GIANT Eco 50 User manual

Mycond
Mycond YUGO 12 User manual

Mycond
Mycond YUGO Smart 16 User manual

Mycond
Mycond BERG 25 User manual

Mycond
Mycond ABS 7A Service manual

Mycond
Mycond TIBO 12 User manual

Mycond
Mycond TIBO 10 User manual