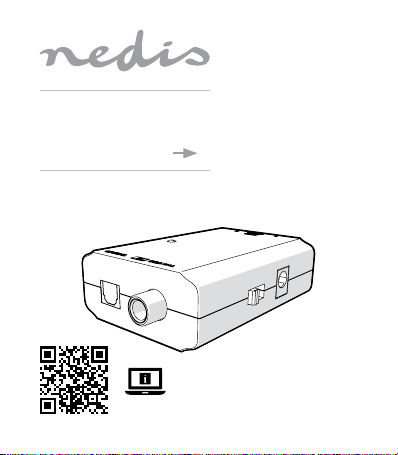
nedis ACON2509BK User manual

ned.is/acon2509bk
Digital Audio Converter
RCA + Toslink 2x RCA
ACON2509BK

aQuick start guide 4
cKurzanleitung 6
bGuide de démarrage rapide 9
dSnelstartgids 12
jGuida rapida all’avvio 15
hGuía de inicio rápido 18
iGuia de iniciação rápida 21
eSnabbstartsguide 24
gPika-aloitusopas 26
fHurtigguide 29
2Vejledning til hurtig start 32
kGyors beüzemelési útmutató 34
nPrzewodnik Szybki start 37
xΟδηγό γρήγορη εκκίνηση 40

1Rýchly návod 43
lRychlý návod 46
yGhid rapid de iniiere 49
5
7
3
1
2
4
6
A

4
aQuick start guide
Digital Audio Converter ACON2509BK
For more information see the extended manual online:
ned.is/acon2509bk
Intended use
This product is intended to convert an RCA signal or a Toslink signal
into a stereo RCA signal.
The product is intended for indoor use only.
The product is not intended for professional use.
Any modication of the product may have consequences for safety,
warranty and proper functioning.
Specications
Product Digital Audio Converter
Article number ACON2509BK
Power input 5.0 VDC ; 0.6 A
Conversion RCA + Toslink to 2x RCA stereo
audio
Supported formats PCM
Supported bitrates 44.1 kHz 24-bit
48 kHz 24-bit
96 kHz 24-bit

5
Main parts (image A)
Power indicator LED
Stereo RCA female output
Power port
Input selector switch
RCA female input
Toslink female input
DC to USB power cable
Safety instructions
-
WARNING
• Ensure you have fully read and understood the instructions in
this document before you install or use the product. Keep this
document for future reference.
• Only use the product as described in this document.
• Do not use the product if a part is damaged or defective. Replace
a damaged or defective product immediately.
• Do not drop the product and avoid bumping.
• This product may only be serviced by a qualied technician for
maintenance to reduce the risk of electric shock.
• Do not expose the product to water or moisture.
• Only use the provided power cable.
Installation
1. Make sure all the devices you want to connect have been
switched o.
2. Plug an RCA cable (not included) into the RCA female input A5
or plug a Toslink cable (not included) into the Toslink female
input A6.

6
3. Plug the other end of the cable into your audio source device.
4. Plug a twin RCA cable (not included) into the stereo RCA female
output A2.
5. Plug the other end of the cable into your audio output device.
Connecting the power supply
1. Plug the DC to USB power cable A7into the power port A3.
2. Plug the other end of A7into a USB power source or adapter.
The product switches on.
The power indicator LED A2burns blue.
Use
1. Select the input port with the input selector switch A4.
2. Switch on the connected audio devices.
cKurzanleitung
Digitaler Audio-Konverter ACON2509BK
Weitere Informationen nden Sie in der erweiterten
Anleitung online: ned.is/acon2509bk
Bestimmungsgemäße Verwendung
Dieses Produkt ist dazu gedacht, ein RCA-Signal oder ein Toslink-
Signal in ein RCA-Signal umzuwandeln.
Das Produkt ist nur zur Verwendung innerhalb von Gebäuden
gedacht.

7
Das Produkt ist nicht für den professionellen Einsatz gedacht.
Jegliche Modikation des Produkts kann Folgen für die Sicherheit,
Garantie und ordnungsgemäße Funktionalität haben.
Spezikationen
Produkt Digitaler Audio-Konverter
Artikelnummer ACON2509BK
Stromeingang 5,0 VDC ; 0,6 A
Umwandlung RCA + Toslink zu 2x RCA
Stereo-Audio
Unterstützte Formate PCM
Unterstützte Bitraten 44,1 kHz 24-bit
48 kHz 24-bit
96 kHz 24-bit
Hauptbestandteile (Abbildung A)
Betriebsanzeige-LED
Stereo RCA-Ausgangsbuchse
Stromanschluss
Eingangswahlschalter
RCA-Eingangsbuchse
Toslink-Eingangsbuchse
DC-zu-USB-Netzkabel

8
Sicherheitshinweise
-
WARNUNG
• Vergewissern Sie sich, dass Sie die Anweisungen in diesem
Dokument vollständig gelesen und verstanden haben, bevor Sie
das Produkt installieren oder verwenden. Heben Sie dieses
Dokument zum späteren Nachschlagen auf.
• Verwenden Sie das Produkt nur wie in diesem Dokument
beschrieben.
• Verwenden Sie das Produkt nicht, wenn ein Teil beschädigt ist
oder es einen Mangel aufweist. Ersetzen Sie ein beschädigtes
oder defektes Produkt unverzüglich.
• Lassen Sie das Produkt nicht herunterfallen und vermeiden Sie
Kollisionen.
• Dieses Produkt darf nur von einem ausgebildeten Techniker
gewartet werden, um die Gefahr eines Stromschlags zu
reduzieren.
• Setzen Sie das Produkt keinem Wasser oder Feuchtigkeit aus.
• Verwenden Sie nur das mitgelieferte Stromkabel.
Installation
1. Stellen Sie sicher, dass alle Geräte, die Sie verbinden wollen,
ausgeschaltet sind.
2. Stecken Sie ein RCA-Kabel (nicht im Lieferumfang enthalten) in
die RCA-Eingangsbuchse A5oder stecken Sie ein Toslink-Kabel
(nicht im Lieferumfang enthalten) in die Toslink-Eingangsbuchse
A6.
3. Schließen Sie das andere Ende des Kabels an Ihrer Audioquelle
an.

9
4. Stecken Sie ein Doppel-RCA-Kabel (nicht im Lieferumfang
enthalten) in die Stereo-RCA-Ausgangsbuchse A2.
5. Schließen Sie das andere Ende des Kabels an Ihrem
Audioausgabegerät an.
Verbinden der Stromversorgung
1. Stecken Sie das DC-zu-USB-Netzkabel A7in den
Stromanschluss A3.
2. Stecken Sie das andere Ende von A7in eine USB-Stromquelle
oder einen Adapter.
Das Produkt schaltet sich ein.
Die Betriebsanzeige-LED A2leuchtet blau.
Verwendung
1. Wählen Sie den Eingangsanschluss mit dem
Eingangswahlschalter A4.
2. Schalten Sie die angeschlossenen Audiogeräte ein.
bGuide de démarrage rapide
Convertisseur audio numérique ACON2509BK
Pour plus d'informations, consultez le manuel détaillé en
ligne : ned.is/acon2509bk
Utilisation prévue
Ce produit est destiné à convertir un signal RCA ou un signal Toslink
en un signal RCA stéréo.

10
Le produit est prévu pour un usage intérieur uniquement.
Le produit n’est pas destiné à un usage professionnel.
Toute modication du produit peut avoir des conséquences sur la
sécurité, la garantie et le bon fonctionnement.
Spécications
Produit Convertisseur audio numérique
Article numéro ACON2509BK
Alimentation électrique 5,0 VDC ; 0,6 A
Conversion RCA + Toslink vers 2x RCA stéréo
audio
Formats pris en charge PCM
Débits pris en charge 44,1 kHz 24 bits
48 kHz 24 bits
96 kHz 24 bits
Pièces principales (image A)
Voyant LED d'alimentation
Sortie RCA stéréo femelle
Port d'alimentation
Sélecteur d'entrée
Entrée RCA femelle
Entrée Toslink femelle
Câble d'alimentation CC
vers USB

11
Consignes de sécurité
-
AVERTISSEMENT
• Assurez-vous d'avoir entièrement lu et compris les instructions
de ce document avant d'installer ou d'utiliser le produit.
Conservez ce document pour référence ultérieure.
• Utilisez le produit uniquement comme décrit dans le présent
document.
• Ne pas utiliser le produit si une pièce est endommagée ou
défectueuse. Remplacez immédiatement un produit
endommagé ou défectueux.
• Ne pas laisser tomber le produit et éviter de le cogner.
• Ce produit ne peut être réparé que par un technicien qualié
an de réduire les risques d'électrocution.
• Ne pas exposer le produit à l'eau ou à l'humidité.
• Utilisez uniquement le câble d’alimentation fourni.
Installation
1. Assurez-vous que tous les appareils que vous souhaitez
connecter soient hors tension.
2. Branchez un câble RCA (non inclus) sur l'entrée RCA femelle A5
ou branchez un câble Toslink (non inclus) sur l'entrée Toslink
femelle A6.
3. Branchez l’autre extrémité du câble sur votre appareil source
audio.
4. Branchez un double câble RCA (non inclus) sur la sortie RCA
stéréo femelle A2.
5. Branchez l'autre extrémité du câble sur votre appareil de sortie
audio.

12
Connecter l'alimentation électrique
1. Branchez le câble d’alimentation CC vers USB A7sur le port
d'alimentation A3.
2. Branchez l'autre extrémité de A7sur une source d’alimentation
USB ou un adaptateur.
Le produit se met sous tension.
Le voyant LED d'alimentation A2s’allume en bleu.
Utilisation
1. Sélectionnez le port d'entrée avec le sélecteur d'entrée A4.
2. Mettez sous tension les appareils audio connectés.
dSnelstartgids
Digitale geluid-omzetter ACON2509BK
Zie voor meer informatie de uitgebreide handleiding
online: ned.is/acon2509bk
Bedoeld gebruik
Dit product is bedoeld voor de omzetting van een RCA-signaal naar
een stereo RCA-signaal.
Het product is enkel bedoeld voor gebruik binnenshuis.
Het product is niet bedoeld voor professioneel gebruik.
Elke wijziging van het product kan gevolgen hebben voor de
veiligheid, garantie en correcte werking.

13
Specicaties
Product Digitale geluid-omzetter
Artikelnummer ACON2509BK
Stroomingang 5,0 VDC ; 0,6 A
Omzetting RCA + Toslink naar 2x RCA
stereogeluid
Ondersteunde formaten PCM
Ondersteunde bitrates 44,1 kHz 24-bit
48 kHz 24-bit
96 kHz 24-bit
Belangrijkste onderdelen (afbeelding A)
Voedingsindicatie LED
Stereo RCA vrouwelijke
uitgang
Voedingspoort
Ingang selectieschakelaar
RCA vrouwelijke ingang
Toslink vrouwelijke ingang
DC naar USB-stroomkabel
Veiligheidsvoorschriften
-
WAARSCHUWING
• Zorg ervoor dat u de instructies in dit document volledig
gelezen en begrepen heeft voordat u het product installeert of
gebruikt. Bewaar dit document voor toekomstig gebruik.
• Gebruik het product alleen zoals in dit document beschreven.
• Gebruik het product niet als een onderdeel beschadigd of defect
is. Vervang een beschadigd of defect product onmiddellijk.

14
• Laat het product niet vallen en voorkom stoten.
• Dit product mag voor onderhoud alleen worden geopend door
een erkend technicus om het risico op elektrische schokken te
verkleinen.
• Stel het product niet bloot aan water of vocht.
• Gebruik alleen het meegeleverde netsnoer.
Installatie
1. Controleer of alle apparaten die u wilt aansluiten uitgeschakeld
zijn.
2. Steek een RCA-kabel (niet meegeleverd) in de RCA vrouwelijke
ingang A5of steek een Toslink kabel (niet meegeleverd) in de
Toslink vrouwelijke ingang A6.
3. Sluit het andere uiteinde van de kabel aan op uw audiobron.
4. Steek een dubbele RCA-kabel (niet meegeleverd) in de stereo
RCA vrouwelijke uitgang A2.
5. Sluit het andere uiteinde van de kabel aan op uw
audio-uitgangsapparaat.
De voeding aansluiten
1. Steek de DC naar USB-stroomkabel A7in de voedingspoort
A3.
2. Steek het andere uiteinde van A7in een
USB-voedingspoort/-adapter.
Het product schakelt in.
Het stroom-indicatorlampje A2licht blauw op.

15
Gebruik
1. Selecteer de ingangspoort met de ingang selectieschakelaar
A4.
2. Schakel de aangesloten geluidsapparaten in.
jGuida rapida all’avvio
Convertitore audio digitale ACON2509BK
Per maggiori informazioni vedere il manuale esteso
online: ned.is/acon2509bk
Uso previsto
Questo prodotto è inteso per la conversione di un segnale RCA o di
un segnale Toslink in un segnale RCA stereo.
Il prodotto è inteso solo per utilizzo in interni.
Il prodotto non è inteso per utilizzi professionali.
Eventuali modiche al prodotto possono comportare conseguenze
per la sicurezza, la garanzia e il corretto funzionamento.
Speciche
Prodotto Convertitore audio digitale
Numero articolo ACON2509BK
Ingresso di alimentazione 5,0 VDC ; 0,6 A
Conversione Da RCA + Toslink a 2x RCA audio
stereo

16
Formati supportati PCM
Bitrate supportati 44.1 kHz 24 bit
48 kHz 24 bit
96 kHz 24 bit
Parti principali (immagine A)
Spia LED di alimentazione
Uscita femmina RCA stereo
Porta di alimentazione
Selettore di ingresso
Ingresso femmina RCA
Ingresso femmina Toslink
Cavo di alimentazione da
CC a USB
Istruzioni di sicurezza
-
ATTENZIONE
• Assicurarsi di aver letto e compreso pienamente le istruzioni in
questo documento prima di installare o utilizzare il prodotto.
Conservare il documento per farvi riferimento in futuro.
• Utilizzare il prodotto solo come descritto nel presente
documento.
• Non utilizzare il prodotto se una parte è danneggiata o difettosa.
Sostituire immediatamente un prodotto danneggiato o
difettoso.
• Non far cadere il prodotto ed evitare impatti.
• Il prodotto può essere riparato e sottoposto a manutenzione
esclusivamente da un tecnico qualicato per ridurre il rischio di
scosse elettriche.

17
• Non esporre il prodotto all’acqua o all’umidità.
• Utilizzare esclusivamente il cavo di alimentazione in dotazione.
Installazione
1. Assicurarsi che tutti i dispositivi che si desidera collegare siano
stati spenti.
2. Inserire un cavo RCA (non incluso) nell’ingresso femmina
RCA A5o inserire un cavo Toslink (non incluso) nell’ingresso
femmina Toslink A6.
3. Collegare l’altra estremità del cavo al dispositivo sorgente audio.
4. Inserire un cavo RCA doppio (non incluso) nell’uscita femmina
RCA stereo A2.
5. Collegare l’altra estremità del cavo al dispositivo di uscita audio.
Collegamento dell’alimentazione
1. Collegare il cavo di alimentazione da CC a USB A7alla porta di
alimentazione A3.
2. Collegare l’altra estremità di A7in una sorgente di
alimentazione USB o in un adattatore.
Il prodotto si accende.
La spia LED di alimentazione A2si accende in blu.
Uso
1. Selezionare la porta di ingresso con il selettore di ingresso A4.
2. Accendere i dispositivi audio collegati.

18
hGuía de inicio rápido
Conversor de audio digital ACON2509BK
Para más información, consulte el manual ampliado en
línea: ned.is/acon2509bk
Uso previsto por el fabricante
Este producto está diseñado para convertir una señal RCA o una
señal Toslink en una señal RCA estéreo.
El producto está diseñado únicamente para uso en interiores.
El producto no está diseñado para un uso profesional.
Cualquier modicación del producto puede tener consecuencias
para la seguridad, la garantía y el funcionamiento adecuado.
Especicaciones
Producto Conversor de audio digital
Número de artículo ACON2509BK
Potencia de entrada 5,0 VDC ; 0,6 A
Conversión RCA + Toslink a 2 audio estéreo
RCA
Formatos compatibles PCM
Tasas de bits compatibles 44,1 kHz 24 bits
48 kHz 24 bits
96 kHz 24 bits

19
Partes principales (imagen A)
Indicador LED de
alimentación
Salida hembra RCA estéreo
Puerto de alimentación
Interruptor selector de
entrada
Entrada hembra RCA
Entrada hembra Toslink
Cable de alimentación CC
a USB
Instrucciones de seguridad
-
ADVERTENCIA
• Asegúrese de que ha leído y entendido completamente las
instrucciones en este documento antes de instalar o utilizar el
producto. Guarde este documento para futuras consultas.
• Utilice el producto únicamente tal como se describe en este
documento.
• No use el producto si alguna pieza está dañada o presenta
defectos. Sustituya inmediatamente un producto si presenta
daños o está defectuoso.
• No deje caer el producto y evite que sufra golpes.
• Este producto solo puede recibir servicio de un técnico
cualicado para su mantenimiento para así reducir el riesgo de
descargas eléctricas.
• No exponga el producto al agua o a la humedad.
• Utilice solamente el cable de alimentación suministrado.

20
Instalación
1. Asegúrese de que todos los dispositivos que quiere conectar se
hayan apagado.
2. Enchufe un cable RCA (no incluido) en la entrada hembra RCA
A5o enchufe un cable Toslink (no incluido) en la entrada
hembra Toslink A6.
3. Enchufe el otro extremo del cable a su dispositivo de fuente de
audio.
4. Enchufe un cable RCA doble (no incluido) en la salida hembra
RCA estéreo A2.
5. Enchufe el otro extremo del cable a su dispositivo de salida de
audio.
Cómo conectar la fuente de alimentación
1. Enchufe el cable de alimentación CC a USB A7en el puerto de
alimentación A3.
2. Enchufe el otro extremo de A7a una toma de alimentación
USB o adaptador.
El producto se enciende.
El indicador LED de encendido A2se ilumina en azul.
Uso
1. Seleccione el puerto de entrada con el interruptor selector de
entrada A4.
2. Encienda los dispositivos de audio conectados.
Table of contents
Languages:
Other nedis Media Converter manuals

nedis
nedis ACON2510BK User manual

nedis
nedis VSPL3462AT User manual

nedis
nedis VCON3463BK User manual

nedis
nedis ACON2507BK User manual

nedis
nedis VCON3450AT User manual

nedis
nedis VGRRU101BK User manual

nedis
nedis ACON2505BK User manual

nedis
nedis VCON3461BK User manual

nedis
nedis HQ AVSPLIT-40 User manual

nedis
nedis VCON3458AT User manual
Popular Media Converter manuals by other brands

Beresford
Beresford Bushmaster MKI instruction manual

Canon
Canon R-1P32 instruction manual

Hubner
Hubner FGH 14 Operating and assembly instructions

Bose
Bose Wave Music System IC-1 owner's guide

SMAR
SMAR FP302 Owner's operation and maintenance manual

Storm Interface
Storm Interface 450 Series Engineering manual