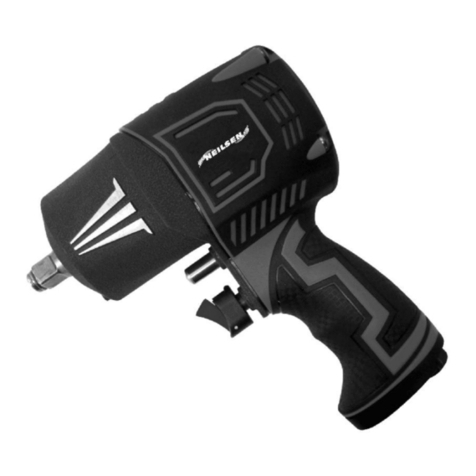
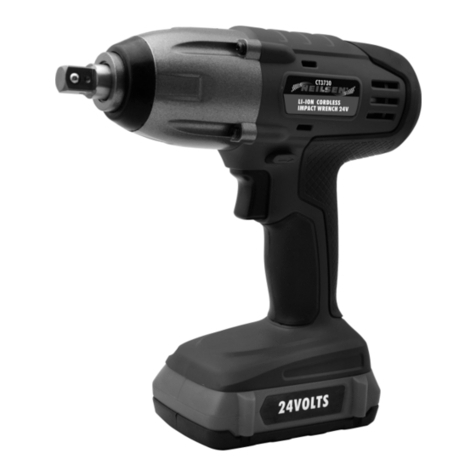
Neilsen CT4789 User manual

ORIGINAL INSTRUCTIONS
Cannon Tools Limited
Address: 20 Station Road, Rowley Regis, West Midlands, B65 0JU.U.K.
SAVE THESE INSTRUCTIONS AND PRECAUTIONS.
READ ALL PRECAUTONS AND INSTRUCTIONS BEFORE USE.
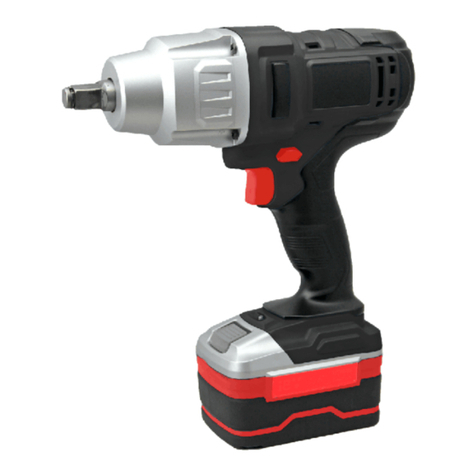
20V CORDLESS IMPACT WRENCH CT4789

EC DECLARATION OF CONFORMITY
We CANNON TOOLS LTD
20 Station road, Rowley Regis, West Midlands,B65 0JU.U.K.
Declare that the following machine complies with the appropriate
basic safety and health requirements of the EC Directive based
on its design and type, as brought into circulation by us.
In case of alteration of the machine, not agreed upon by us,
this declaration will lose its validity.
Product description:
Model:
Applicable EC Directives:
EC Machinery Directive 2006/42/EC
EC Directive of Electromagnetic Compatibility 2014/30/EU
Harmonized standards
EN 60745-1, EN 60745-2-1, EN 60745-2-2, EN 55014-1, EN 55014-2
20 Station Road, Rowley Regis, West Midlands, B65 0JU.U.K.
Mr. Gurcharan Tony Singh Sanghera
Managing Director
CANNON TOOLS LTD
20V CORDLESS IMPACT WRENCH
CT4789
2018-03-23
1


CT4789-1CT4789-2

5
Ensure the trigger is in the locked position when not in
use and before installing the battery. Do not carry the
tool with your finger on the On/Off trigger, whether the
battery is installed or not.
The Impact Wrench requires the use of both hands
when operating. This helps maintain tool stability and
keeps hands away from the work area.
Do not operate the tool for more than 10 minutes
continuously. Allow the tool to cool down between
each continuous operation.
Always block or chock wheels and apply emergency
brakes prior to use of this tool.
Do not touch the Impact Wrench drive with your
hands during operation.
Do not use the tool to change vehicle wheels while the
engine is running.
When using the impact wrench on alloy wheels be
careful not to over tighten as it is possible to fracture
the alloy wheel mountings. If in doubt consult a
qualified mechanic and/or garage to confirm the
correct torque with a torque wrench.
ADDITIONA SAFETY RU ES CHARGERS
1. Before using the charger, read all the instructions
and cautionary markings on the charger and battery
pack as well as the instructions on using the battery
pack.
2. Only charge your batteries indoors as the charger is
designed for indoor use only.
3. DANGER! If the battery pack is cracked or
damaged in any other way, do not insert it in the
charger. There is a danger of electric shock or
electrocution.
4. WARNING! Do not allow any liquid to come into
contact with the charger. There is a danger of electric
shock.
5. The charger and battery packs supplied with it are
specifically designed to work together. Do not attempt
to charge the battery pack with any other charger than
the one supplied.
6. Do not pull on the power cord to disconnect it from
the mains supply socket.
7. Do not use the charger if it has been subjected to a
heavy knock, dropped or otherwise damaged in any
way. Take the charger to an authorised service centre
for a check or repair.
8. Do not disassemble the charger. Take it to an
authorised service centre when service or repair is
required. Incorrect re-assembly may result in the risk
of fire, electric shock or electrocution.
9. To reduce the risk of an electric shock, unplug the
charger from the power supply before attempting to
clean it. Removing the battery alone does not reduce
the risk.
ADDITIONA SAFETY RU ES FOR THE BATTERY
PACK
1. The battery pack for this tool has been shipped in a
low charge condition. You should charge the battery
pack fully before use.
2. Do not incinerate the battery pack even if it is
seriously damaged or can no longer hold a charge.
The battery pack can explode in a fire.
3. A small leakage of liquid from the battery pack may
occur under extreme usage or temperature conditions.
This does not necessarily indicate a failure of the
battery pack. However, if the outer seal is broken and
this leakage comes into contact with your skin wash
the affected area quickly with soap and water. If the
leakage gets in your eyes flush your eyes with clean
water for a minimum of 10 minutes and seek
immediate medical attention.
Inform the medical staff that the liquid is a 25-35%
solution of potassium hydroxide.
4. Never attempt to open the battery pack for any
reason. If the plastic housing of the battery pack
breaks open or cracks, immediately discontinue its
use and do not recharge it.
5. Do not store or carry a spare battery pack in a
pocket or toolbox or any other place where it may
come into contact with metal objects. The battery
pack may be short- circuited causing damage to the
battery pack, burns or a fire.
BATTERY CHARGING INFORMATION
Charging rates for NiCad and/or Li-Ion NiCad and/or
Li-Ion battery charging rates are determined by the
time taken to fully charge the battery and are
determined by the charge current. The three most
commonly used charging rates are typically:
Fast charge.
Slow charge.
Trickle charge.
FAST CHARGE BATTERIES
The charging rates for fast charge batteries can vary
between 30 minutes and 90 minutes. The charging
rate for the battery supplied with a cordless power
tool is stated in the product manual.
S OW CHARGE BATTERY
The charging rates for slow charge batteries are
between 3 hours and 5 hours..
TRICK E CHARGE BATTERIES
The charging rates for trickle charge batteries are
between 7 hours and 9 hours.

6
IMPORTANT!
NICAD AND/OR I-ION BATTERY CHARGING
INFORMATION.
A WAYS FU Y DISCHARGE A NiCad and/or i-
Ion BATTERY BEFORE CHARGING AND NEVER
EXCEED THE CHARGING RATE TIME, EXCEPT
WHEN “CONDITIONING” A NEW BATTERY.
CHARGING PROCEDURE
When charging a new NiCad and/or Li-Ion battery it
should be fully discharged followed by a full charge
for the charging rate for the battery as stated in the
product manual plus 30 minutes. This should then be
followed by a full discharge and a further full charge
for the charging rate for the battery as stated in the
product manual plus 30 minutes. This procedure will
condition the battery and equalise the cell voltages.
Following this procedure will ensure the optimum
operation of the battery.
When repeatedly using the charger to charge a
number of batteries always allow the charger to cool
down before charging another battery. It is
recommended that the cooling down period is not
less than 30 to 45 minutes.
When charging a battery that has been discharged
during heavy use allow the battery to cool down
before charging. It is recommended that the cooling
down period is not less than 30 to 45 minutes.
NICAD AND/OR I-ION CHARGING & CHARGERS
NiCad and/or Li-Ion batteries need to be recharged
with a reasonable amount of care, largely because
they can be damaged by overcharging.
Overcharging can result in the battery temperature
and internal pressure to rise rapidly. This can cause
the cells to distort and lose electrolyte, and in extreme
cases where the internal pressure is extremely high
they can even explode.
This situation can also arise when an overcharged
battery is fitted to the product and is being used. In
order to avoid this extreme situation it is of vital
importance that NiCad and/or Li-Ion batteries are fully
discharged before charging and that the charge time
is not exceeded except when “Conditioning” a new
battery. Repeated charging of partially discharged
batteries could cause failure of one or more of the
cells.
SE F DISCHARGE
A lithium battery can self discharge and lose its stored
charge. Typically it can lose approximately 5% of its
charge in the first month after fully charging (when
stored at room temperature), and then loses it by a
further 3% per month. When stored at higher
temperatures the self discharge rate will be
accelerated.
BATTERY CHARGING INDOORS
This charger is designed to be used indoors. We do
not recommend that it is used inside your home.
Ideally batteries should be charged on a bench in a
workshop, garage or shed. If the charging operation is
to be carried out in your home the area must be well
ventilated and the charger must be placed on a non
combustible surface ensuring that the ventilation slots
are not blocked. Never exceed the charging time
except when “Conditioning” a new battery, as this
could damage the battery and charger.
BATTERY DISPOSA
When the battery fails to charge or maintain its
charge, its usable life is exhausted. To preserve
natural resources, please recycle or dispose of the
battery pack properly. This battery pack contains
nickel-cadmium cells. Before disposal ensure that the
battery pack is fully discharged by operating your
cordless product then remove the battery pack from
the drill housing and cover the battery pack
connections with heavy duty tape, to prevent short
circuit and energy discharge which could result in a
fire. Do not attempt to open or remove any of the
components.
Consult your local waste authority for information
regarding available recycling and / or disposal
options.
SPECIFIC SAFETY INSTRUCTIONS
RE-CHARGEAB E BATTERIES.
Batteries may leak or explode if not charged or
handled correctly. Always observe the following
precautions when handling batteries. Ensure that the
machine is switched off before removing or fitting
batteries.
Do not use this battery with any other product.
Do not attempt to fit the battery the wrong way round.
Do not short out, or attempt to dismantle the battery.
Do not expose the battery to flames or excessive
heat.
Do not immerse in or expose the battery to water.
Do not store or transport the battery with loose metal
objects such drill and driver bits.
Batteries are prone to leakage when discharged. To
avoid damage to the product, remove or
re-charge the battery when no charge remains. Store
the battery in a cool place when not in use.
After prolonged use the battery may become hot.
Before removing the battery, switch the machine off
and allow the battery to cool down. Do not use the
battery if you notice any discoloration or distortion of
the battery casing.

7
GENERA SAFETY RU ES
WARNING! Read all instructions Failure to follow all
instructions listed below may result in electric shock,
fire and/or serious injury. The term "power tool" in all
of the warnings listed below refers to your mains
operated (corded) power tool or battery operated
(cordless) power tool.
SAVE THESE INSTRUCTIONS
1) WORK AREA
a) Keep work area clean and well lit. Cluttered and
dark areas invite accidents.
b) Do not operate power tools in explosive
atmospheres, such as in the presence of
flammable liquids, gases or dust. Power tools
create sparks which may ignite the dust or fumes.
c) Keep children and bystanders away while
operating a power tool. Distractions can cause you
to lose control.
2) E ECTRICA SAFETY
a) Power tool plugs must match the outlet. Never
modify the plug in any way. Do not use any
adapter plugs with earthed (grounded) power
tools. Unmodified plugs and matching outlets will
reduce risk of electric shock.
b) Avoid body contact with earthed or grounded
surfaces such as pipes, radiators, ranges and
refrigerators.
There is an increased risk of electric shock if your
body is earthed or grounded.
c) Do not expose power tools to rain or wet
conditions. Water entering a power tool will
increase the risk of electric shock.
d) Do not abuse the cord. Never use the cord for
carrying, pulling or unplugging the power tool.
Keep cord away from heat, oil, sharp edges or
moving parts. Damaged or entangled cords
increase the risk of electric shock.
e) When operating a power tool outdoors, use an
extension cord suitable for outdoor use. Use of a
cord suitable for outdoor use reduces the risk of
electric shock.
3) PERSONA SAFETY
a) Stay alert, watch what you are doing and use
common sense when operating a power tool. Do
not use a power tool while you are tired or under
the influence of drugs, alcohol or medication.
A moment of inattention while operating power
tools may result in serious personal injury.
b) Use safety equipment. Always wear eye
protection. Safety equipment such as dust mask,
non-skid safety shoes, hard hat, or hearing
protection used for appropriate conditions will
reduce personal injuries.
c) Avoid accidental starting. Ensure the switch is in
the off position before plugging in. Carrying power
tools with your finger on the switch or plugging in
power tools that have the switch on invites
accidents.
d) Remove any adjusting key or wrench before
turning the power tool on.
A wrench or a key left attached to a rotating part
of the power tool may result in personal injury.
e) Do not overreach. Keep proper footing and
balance at all times. This enables better control of
the power tool in unexpected situations.
f) Dress properly. Do not wear loose clothing or
jewellery. Keep your hair, clothing and gloves
away from moving parts. Loose clothes, jewellery
or long hair can be caught in moving parts.
g) If devices are provided for the connection of dust
extraction and collection facilities, ensure these
are connected and properly used. Use of these
devices can reduce dust related hazards.
4) POWER TOO USE AND CARE
a) Do not force the power tool. Use the correct
power tool for your application. The correct power
tool will do the job better and safer at the rate for
which it was designed.
b) Do not use the power tool if the switch does not
turn it on and off. Any power tool that cannot be
controlled with the switch is dangerous and must
be repaired.
c) Disconnect the plug from the power source before
making any adjustments, changing accessories, or
storing power tools. Such preventive safety
measures reduce the risk of starting the power
tool accidentally.
d) Store idle power tools out of the reach of children
and do not allow persons unfamiliar with the
power tool or these instructions to operate the
power tool. Power tools are dangerous in the
hands of untrained users.
e) Maintain power tools. Check for misalignment or
binding of moving parts, breakage of parts and
any other condition that may affect the power
tools operation. If damaged, have the power tool
repaired before use. Many accidents are caused
by poorly maintained power tools.
f) Keep cutting tools sharp and clean. Properly
maintained cutting tools with sharp cutting edges
are less likely to bind and are easier to control.
g) Use the power tool, accessories and tool bits etc.,
in accordance with these instructions and in the
manner intended for the particular type of power
tool, taking into account the working conditions
and the work to be performed. Use of the power
tool for operations different from intended could
result in a hazardous situation.

8
5) BATTERY TOO USE AND CARE
a) Recharge only with the charger specified by the
manufacturer. A charger that is suitable for one
type of battery pack may create a risk of fire when
used with another battery pack.
b) Use power tools only with specifically designated
battery packs. Use of any other battery packs may
create a risk of injury and fire.
c) When battery pack is not in use, keep it away from
other metal objects, like paper clips, coins, keys,
nails, screws or other small metal objects, that can
make a connection from one terminal to another.
Shorting the battery terminals together may cause
burns or a fire.
d) Under abusive conditions, liquid may be ejected
from the battery; avoid contact. If contact
accidentally occurs, flush with water. If liquid
contacts eyes, additionally seek medical help.
Liquid ejected from the battery may cause irritation
or burns.
6) SERVICE
a) Have your power tool serviced by a qualified repair
person using only identical replacement parts. This
will ensure that the safety of the power tool is
maintained.
COMPONENTS & CONTRO S (FIG 1)
UNPACKING
Caution! This packaging contains sharp objects. Take
care when unpacking. Remove the machine, together
with the accessories supplied, from the packaging.
Check carefully to ensure that the machine is in good
condition and account for all the accessories listed in
this manual.
Also make sure that all the accessories are complete.
If any parts are found to be missing, the machine and
its accessories should be returned together in their
original packaging to the retailer.
Do not throw the packaging away, keep it safe
throughout the guarantee period, then recycle if
possible, otherwise dispose of it by the proper means.
Do not let children play with empty plastic bags due
to the risk of suffocation.
CHARGING THE BATTERY PACK
Warning! Only charge in compatible 18V chargers.
Use of other chargers may result in fire, damage or
serious personal injury.
The battery pack for this tool has been shipped in a
low charge condition to prevent possible problems.
Therefore, you should charge it until the green LED on
the front right hand side of the charger comes on.
Note: Batteries will not reach full charge the first time
they are charged. Allow several cycles (operation
followed by recharging) for them to become fully
charged.
First read the safety instructions then follow the
charging instructions.
Plug the charger into a standard 230V~50Hz mains
socket outlet, the green LED on the front left hand
side of the charger will illuminate.
Do not allow the cable to become knotted or kinked.
Place the battery pack into the charger base.
(Note the battery has raised ribs which allows it to fit
into the charger only one way). Time the charge for 60
minutes only.
The red LED on the front right hand side of the
charger will illuminate to indicate charging is in
progress. A green LED will illuminate when the battery
is fully charged.
Unplug the charger when not in use and store it in a
suitable storage cabinet.
Avoid charging your battery in freezing conditions as
charging power will not be sufficient.
When charging more than one battery pack in
succession allow at least 30 minutes for the charger
to cool down before charging an additional battery.
Always remove the battery pack and store it safely
when the tool is not in use.
Caution: If at any point during the charging process
none of the LEDs are lit, remove the battery pack from
the charger to avoid damaging the product. DO NOT
insert another battery.
INSTA ING THE BATTERY PACK
Warning! Always remove battery pack from your tool
when you are assembling parts, making adjustments,
cleaning, carrying, transporting or when not in use.
Removing battery pack will prevent accidental starting
that could cause serious personal injury.
NOTE: To avoid serious personal injury, always
remove the battery pack and keep hands clear of the
lock-out button when carrying or transporting the tool.
Slide the battery pack into the tool base, Fig.2. (Note
the battery has raised ribs which allows it to fit into
the pole saw only one way). Make sure the battery
pack snaps into place and that battery pack is
secured in the tool before beginning operation.
1. 1/2 inch anvil
2. Forward/reverse switch
3. Hand grip
4. Belt clip attachment point
5. Li-ion battery
6. Battery release catch
7. On/Off trigger switch

9
Improper installation of the battery pack can cause
damage to internal components.
REMOVING THE BATTERY PACK
Locate the battery release catch on the top of the
battery and press downwards, Fig.3. Whilst holding
down the battery release catch slide the battery pack
away from the tool.
CHARGE STATUS
To display the amount of charge left in the battery,
press the charge level indicator button, Fig.4.
VARIAB E SPEED CONTRO (FIG. 5)
Simply apply light pressure to the trigger to start the
wrench on a slow speed. Increasing the pressure on
the switch will increase the speed of the wrench.
Note: You might hear a high pitched noise from the
switch during use. Do not be concerned; this is a
normal part of the switch function.
FORWARD & REVERSE SWITCH
This feature is selected via a slide switch located
above the trigger, Fig.6. To select direction of the
wrench rotation simply push the button fully in on the
left side for reverse rotation. To change to forward
rotation push the button fully in on the right side of the
handle.
Note: As a safety precaution from accidental
engagement while being carried pushing the
forward/reverse button into the middle or neutral
position will render the wrench inoperative.
Caution: To prevent gear damage, always allow the
anvil to come to a complete stop before changing the
direction of rotation.
Note: The wrench will not run unless the direction of
rotation selector is pushed fully to the left or right.
Avoid running the wrench at low speeds for extended
periods of time. Running at low speeds under
constant usage may cause the wrench to become
overheated. If this occurs, cool the wrench by running
it without a load and at full speed.
INSTA ING AND REMOVING SOCKETS
Use only sockets designed for impact wrenches.
Always select the correct size impact socket for nuts
and bolts. Using the wrong size socket may damage
the nut or bolt and cause the fastening torque to be
inaccurate or inconsistent.
Remove the battery pack.
Push the socket onto the anvil until the detent pin
locks it into place, Fig.7.
To remove the socket, pull it away from the anvil.
INSTA ING THE BE T C IP
Before fitting the belt clip set the forward/reverse
button to the centre position or turn tool off and
disconnect battery pack.
To reduce the risk of serious personal injury, do not
suspend tool overhead or suspend objects from the
belt hook. Only hang the tool’s belt clip from a work
belt.
When attaching or replacing the belt clip, use only the
screw that is provided. Be sure to securely tighten the
screw with a Phillips screwdriver.
The belt clip can be be attached to either side of the
tool using only the screw provided, to accommodate
left or right handed users.
To move belt clip, remove the screw that holds the
belt clip in place then reassemble on the opposite
side. Be sure to securely tighten screw.
OPERATING THE IMPACT WRENCH
Proper fastening torque may be determined by the
kind of bolt, the size of the bolt or the material or the
workpiece. It is helpful to perform a test operation to
determine the proper fastening time for the nut or bolt
you are using. While performing the test, make note of
the speed selection.
Hold the tool pointed straight at the nut or bolt.
Depress the switch and fasten for the proper fastening
time.
After fastening, always check the torque with a torque
wrench.
NOTE: Do not use this tool to install lug nuts on
wheels without a torque limiting device. Doing so
could result in galled or broken lugs.
Charge level indicator Amount of charge
remaining
0-10%
10-25%
25-50%
50-75%
75-100%

10
IMPACT TIME
Many variables exist that will cause the available
torque of the fastener to vary considerably. The
optimum impact time is approximately 6 seconds.
NOTE: Using a universal joint or extension bar may
reduce the fastening force of the impact wrench and
require longer fastening time.
MAINTENANCE
WARNING! Always remove battery pack from your
tool when you are assembling parts, making
adjustments, cleaning, or when not in use. Removing
battery pack will prevent accidental starting that could
cause serious personal injury.
This power tool normally requires no maintenance;
from time to time the ventilation slots on the motor
casing should be cleaned out. If the unit should
become defective, repair should be performed by an
authorized service agent for electric tools.
Tightening Avoid using solvents when cleaning plastic
parts. Most plastics are susceptible to damage from
various types of commercial solvents and may be
damaged by their use. Use clean cloths to remove
dirt, dust, oil, grease, etc.
Warning! Do not at any time let brake fluids, gasoline,
petroleum based products, penetrating oils, etc.,
come in contact with plastic parts. Chemicals can
damage, weaken or destroy plastic which may result
in serious personal injury.
TECHNICAL SPECIFICATION
Voltage 20V
No load speed 0-2200min-1
Impact rate 0-2900Bpm
Anvil 1/2in.square
Nut-busting torque 300ft. lb./400Nm
Tightening torque 260ft. lb./350Nm
Sound Pressure Level LpA 84 dB(A)
K=3dB(A)
Sound Power Level LWA 95 dB(A)
K=3dB(A)
Vibration Level 9.09 m/s2, K=1.5m/s2
ENVIRONMENTAL PROTECTION
Information for (private householders) for the environmentally responsible disposal of Waste Electrical and
Electronic Equipment (WEEE)
This symbol on products and or accompanying documents indicates that used and end of life
electrical and electronic equipment should not be disposed of in household waste. For the
proper disposal, treatment, recovery and recycling, please take these products to designated
collection points, where they will be accepted on a free of charge basis. Alternatively, in some
countries you may be able to return your products to your retailer upon the purchase of an
equivalent new product. Disposing of this product correctly will help to save valuable resources
and prevent any potential adverse effects on human health and the environment which could
otherwise arise from inappropriate waste disposal and handling. Please contact your local
authority for further details of your nearest designated collection point. Penalties may be applicable for incorrect
disposal of this waste in accordance with national legislation.
FOR BUSINESS USERS IN THE EUROPEAN UNION.
If you wish to discard electrical and electronic equipment, please contact your dealer or supplier for further
information.
Information on Disposal in other Countries outside the European Union.
This Symbol is only valid in the European Union.
If you wish to dispose of this product, please contact your local authorities or dealer and ask for the correct
method of disposal.

11
SYMBOLS
The rating plate on your tool may show symbols. These represent important information about the product or
instructions on its use.
Conforms to relevant safety
standards.
Read the instruction manual.
Product conforms to RoHs
requirements
Waste electrical products should
not be disposed of with
household waste. Please recycle
where facilities exist. Check with
your Local Authority or retailer for
recycling advice.
General warning
Wear hearing protection.
Wear eye protection.
Wear respiratory protection.
130°
Li-ion
Thermal link with operating
temperature
Contains Lithium Ion
Table of contents
Other Neilsen Power Tools manuals

Neilsen
Neilsen CT1082 User manual

Neilsen
Neilsen CT0675 User manual

Neilsen
Neilsen CT1109 User manual

Neilsen
Neilsen CT0674 User manual

Neilsen
Neilsen CT2594 Assembly instructions

Neilsen
Neilsen CT4542 User manual

Neilsen
Neilsen CT3772 User manual

Neilsen
Neilsen CT1405 User manual

Neilsen
Neilsen CT3990 User manual

Neilsen
Neilsen CT0957 User manual

Neilsen
Neilsen CT2914 User manual

Neilsen
Neilsen CT4343 User manual

Neilsen
Neilsen CT1091 User manual

Neilsen
Neilsen CT2818 Operation instructions

Neilsen
Neilsen CT0904 Operation instructions

Neilsen
Neilsen CT3766 User manual

Neilsen
Neilsen CT1282 User manual

Neilsen
Neilsen CT1764 User manual

Neilsen
Neilsen CT4040 User manual

Neilsen
Neilsen CT1703 User manual