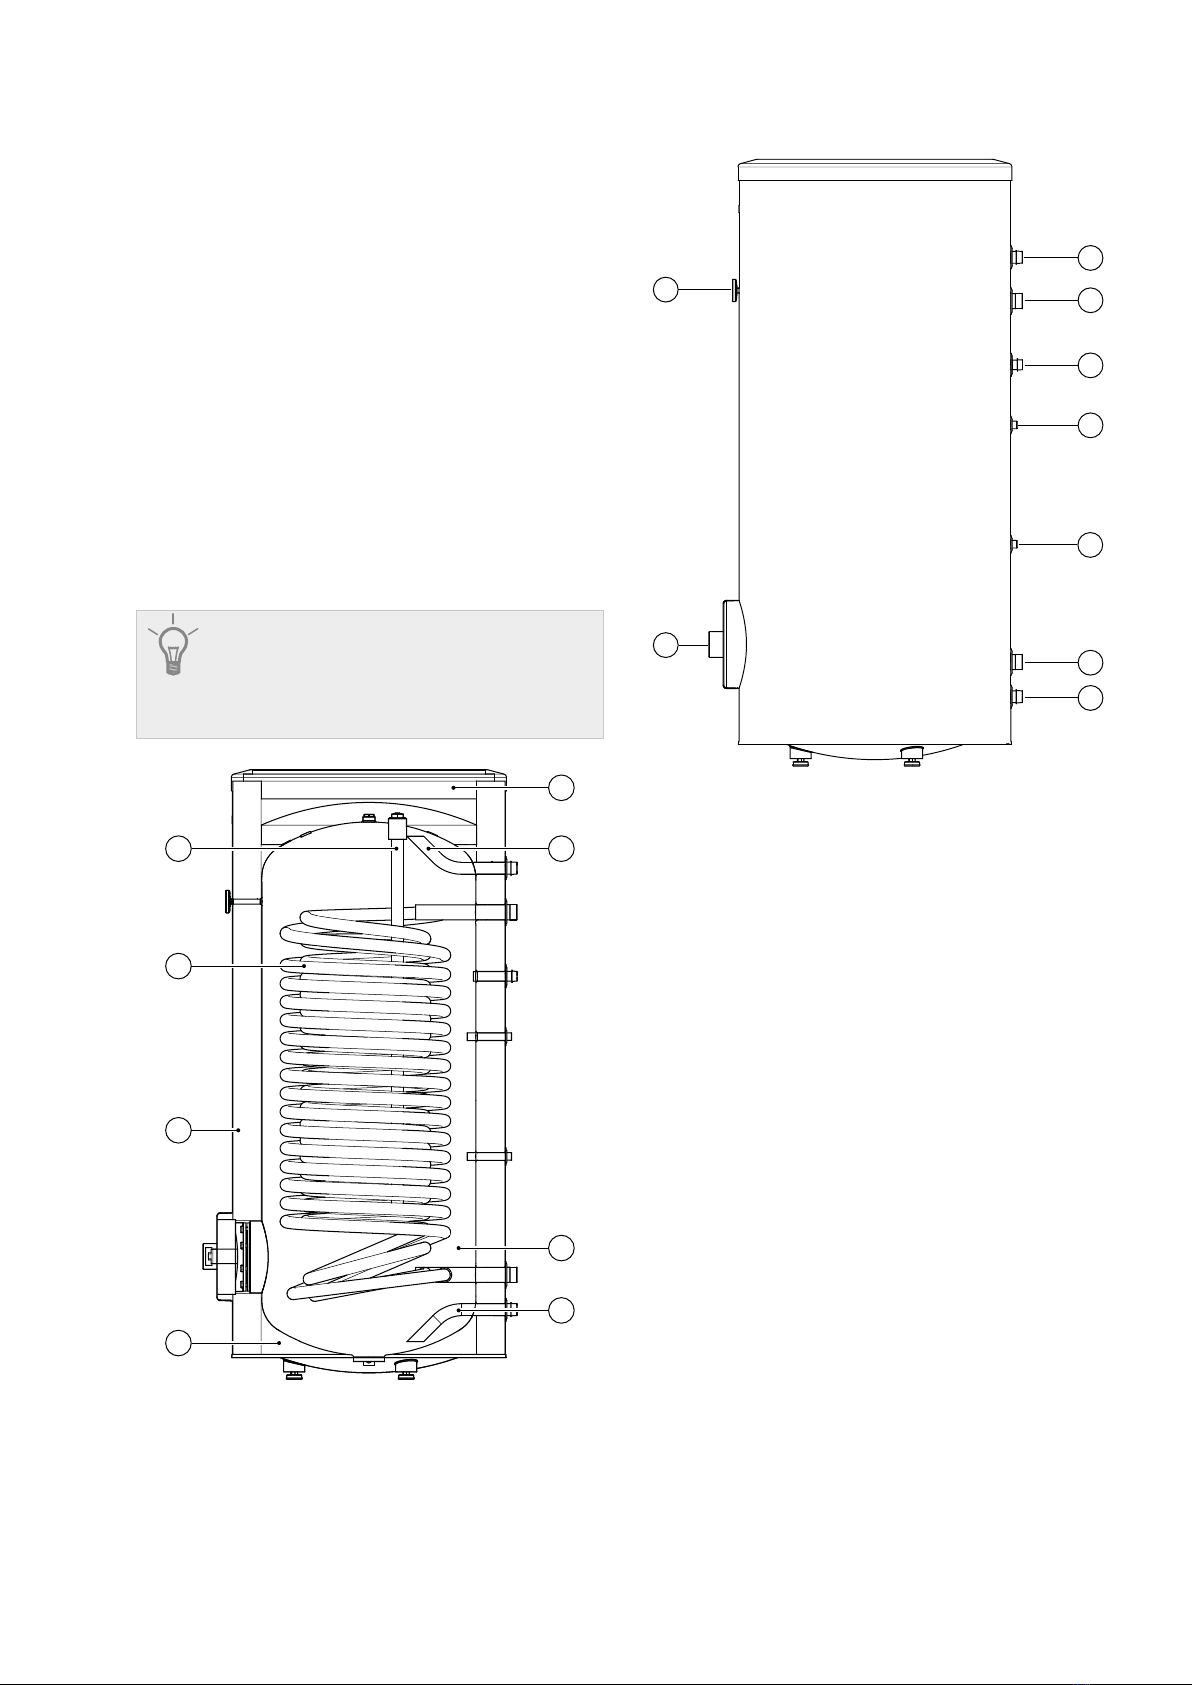
10 Chapter 5 | Maintenance Hot Water Storage Tank with large surface coil
BA-ST 9030- 1FEDC
BA-ST 9040- 1FEDC
BA-ST 9050- 1FEDC
1
Cleaning of
the Storage Tank
When replacing the magnesium anode, follow the
procedure below (see Fig. 10):
1. In units with the electric heating unit installed,
disconnect power from the unit first.
2. Switch the storage tank coil heaters OFF and
wait until the water inside cools down.
3. Cut-off the hot water supply and drain some
water from the tank through the drain valve (see
Fig. 7 item 4).
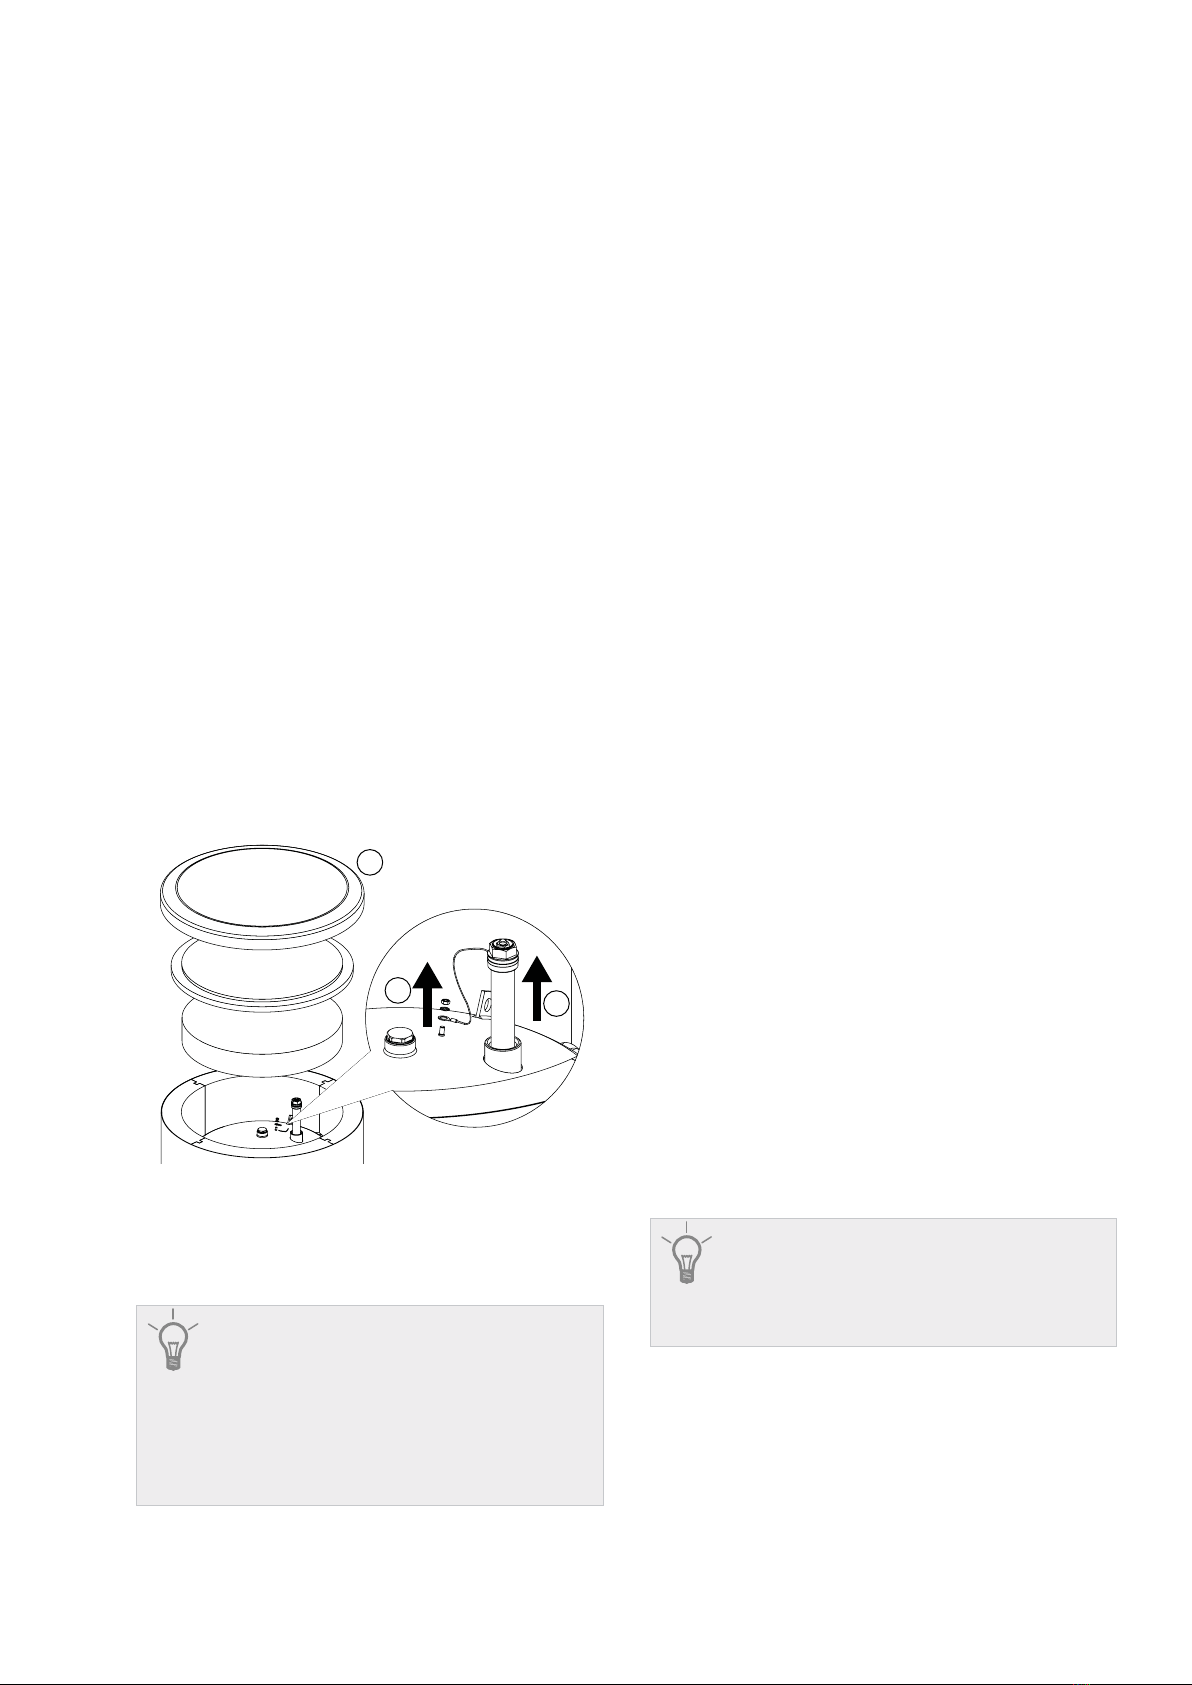
4. Remove the housing cover together with ther-
mal insulation (1).
5. Remove the anode protective conductor (2).
6. Remove the worn magnesium anode (3).
7. Screw the new magnesium anode.
8. Connect the anode protective conductor to the
storage tank.
9. Fill the tank with water and vent it as described
in par. Start-Up.
10. Check tightness of the installed anode.
11. Reinstall the thermal insulation and the housing
cover.
Boiler scale is precipitated from the heated water
during the storage tank operation. The amount of de-
posited scale depends on the water hardness, the
operating temperature and operating time. Heating
surfaces covered with boiler scale reduce the heat
output of the storage tank, increase power consump-
tion and extend the heating time. It is recommended
to clean the storage tank from deposits at least once
every two years. In the case of hard or very hard wa-
ter, cleaning should be carried out at shorter intervals.
Storage tank cleaning procedure:
1. Prepare a new inspection opening gasket. The
old gasket may not be reused (for the list of the
inspection opening gaskets, see Section 6 Acces-
sories and Spare Parts).
2. In storage tanks with the electric heating unit in-
stalled, disconnect power from the unit first.
3. Switch the storage tank coil heaters OFF and
wait until the water inside cools down.
4. Cut-off the hot water supply and drain the storage
tank through the drain valve (see Fig. 7 item 4).
5. Remove the inspection opening blanking plate
and gasket.
6. Remove the inspection opening screws and
flanged cover and flush the storage tank and re-
move accumulated sludge and lime slurry. If nec-
essary, remove lime deposits from the coil – this
guarantees a proper heat exchange. Pay special
attention to not damage the ceramic enamel
coating.
7. Replace a new gasket and the inspection open-
ing flanged cover. Screw tightening torque: 25±5
Nm.
8. Fill the tank with water and vent it as described
in par. Start-Up.
9. Check tightness of the inspection opening.
10. Replace the insulation and inspection opening
blanking plate.
Fig. 10 Replacement of the protective magnesium
anode.
Once making the above steps, the storage tank is
ready to use. Ensure that the anode protective con-
ductor is connected to the storage tank top head
after installing the new isolated magnesium anode.
Lack of contact between the anode and the tank will
interfere operation of the anode and the tank will not
be protected against corrosion.
Once cleaned, the unit is ready to use.
Connect the anode protective conductor to the M5
pin fixed to the top head of the storage tank.
23
TIP
Ensure that the anode protective conductor
is connected to the storage tank top head
after installing the new isolated magnesium
anode. Lack of contact between the anode
and the tank will interfere operation of the
anode and the tank will not be protected
against corrosion.
TIP
During mechanical cleaning, be careful to
not damage the enamel. In the case of
chemical cleaning, pay special attention to
neutralize the chemicals used for cleaning.


 null")
 null")


 Operation and maintenance instructions")