manuals.online logo
Brands
  1. Home
  2. •
  3. Brands
  4. •
  5. Nilfisk-Advance
  6. •
  7. Pressure Washer
  8. •
  9. Nilfisk-Advance Excellent 160 Operating instructions

Nilfisk-Advance Excellent 160 Operating instructions

Repair Manual ver. 1.0
Excellent 160
Excellent 170
2
Index
A. Safety Precautions
3
B. Technical Data
4
C. Construction
5-10
D. Service / Repair
11-15
E. Operating Supplies
16
F. Electric Diagram
17-19
G. Troubleshooting
20
A
Safety Precautions.
3
WARNING!
•
High pressure jets can be dangerous. Never aim the water jet at persons,
pets, electrical equipment, or the machine itself.
•
The operator and anyone in the immediate vicinity of the site of cleaning
should take action to protect themselves from being struck by debris dis-
lodged during operation. Wear goggles during operation.
•
Never try to clean clothes or footwear on yourself or other persons.
•
Children or people who have not read the instruction manual do not
operate the machine.
•
Never use the machine in an environment where there could be a danger of
explosion. Any doubts, please contact local authorities.
•
It is not allowed to clean asbestos- containing surfaces with high pressure.
•
This high-pressure washer must not be used at temperatures below 0°C.
•
Never stay under the product when stored on the wall.
B
Technical Data.
4
Product segment: Consumer
Excellent
160
Excellent
170
Specification
bar
Max 160
Max 170
Voltage
V
230-240
230-240
Frequency
Hz
50
50
Power consumption
Current
10A
10A
Power absorbed
KW
2.1
2.1
Water volume, HP
l/min.
5.8
6.4
Pump pressure
bar
112.5
121.5
Opening pressure
bar
96~107
111~129
Retaining time
min.
>5
>5
Oil contents
ml
60
60
Oil type
L-HM32
L-HM32
Max water inlet temperature
C
40
40
Max water inlet pressure
bar
10
10
High pressure hose length
m
10
10
Suction height
m
Max 0.5
Max 0.5
Electric cable
m
5
5
Insulation class
I
I
Tightness
IPX5
IPX5
C
Construction.
5
Excellent 160
Construction Of Cabinet
parts.
C
Construction.
6
Excellent 160
Construction Of Cabinet
C
Construction.
7
16 Nm
16 Nm
4 Nm
6 Nm
4 Nm
Excellent 160
Construction Of Pump Unit Including Assembly Torque Specification
C
Construction.
8
Excellent 170
Construction Of Cabinet
parts.
C
Construction.
truction.
9
Excellent 170
Construction Of Cabinet
parts.
C
Construction.
truction.
10
Excellent 170
Construction Of Pump Unit Including Assembly Torque Specification
6 Nm
16 Nm
16 Nm
4 Nm
4 Nm
11
D
Service/Repair.
truction.
Fig. 2
Fig. 1
Fig. 2
2
3
4
Dismounting of cabinet rear part on following variants: Excellent 160-Excellent 170
1. Tools: Screwdriver PH2 (Fig. 1)
2. Remove the water inlet coupling (Fig. 2)
3. Remove the 1 screw on lance holder (Fig.2)
4. Remove the remining 10 screws fixing the cabinet rear part (Fig.2)
5. The cabinet rear part can be removed and there is now access to the motor pump unit
12
D
Service/Repair.
truction.
Fig. 1
Fig. 2
Dismount / mounting of switch box cover and switch box Excellent 160-Excellent 170.
1. Front panel of switch box. (Fig 1)
2. Remove the 4 screws and switch box cover. (Fig 2)
3. Assembly: Ensure that the single cords are inside the box and are not squeezed during
assembly and that cable relief is mounted correctly in the slut in the switch box. (Fig 3)
4. Assembly: Ensure that the switch is correctly mounted in the two-fixing taps (Fig 3)
Fig. 3
13
D
Service/Repair.
truction.
Fig. 1
Fig. 2
Fig. 3
Dismounting / mounting of the start / stop valve Excellent 160-Excellent 170.
1. Tool: Socket spanner (Fig 1)
2. Use the socket spanner to take out the seat of start/stop valve (Fig 2)
3. Fig 3 shows how the start/stop valve must be assembled
4. NOTE: Do not damage the valve components.
14
D
Service/Repair.
truction.
Fig. 3
Fig. 1
Fig. 2
Dismounting / mounting of water / oil seal and valve Excellent 160-Excellent 170.
1. To change the oil seals, water seals and pressure valve, use a screwdriver to dismount
the parts (Fig 1).
2. Cleanup and lubricate before mounting
3. Fig 2 is showing the pump after opening the cylinder head from the cylinder block.
4. The bearing system can only be mounted in one direction. The ball ring can be placed
both directions. Oil level: 60ml. (Fig 3)
Note: The pressure valves must be placed correctly
D
Service/Repair.
15
1
2
3
4
5
6
7
8
9
10
11
12
13
14
15
16
17
18
19
20
21
IMPORTANT mounting information:
To optimize the self-suction mode, the valve bodies must be positioned correctly according to
the water canals inside the cylinder head. The “leg” of the valve body must not be placed in
front of a canal. Fig 1 is showing the WRONG positioning and fig 2 is showing the
CORRECT positioning.
Fig. 1
Fig. 2
16
E
Operating Supplies.
1
Recommended oil types:
2
The pump is filled with 60 ml LHM 32 from the production.
3
In case of service where the oil must be changed Nilfisk recommends using 60
4
ml Bartram HV 46.
5
Alternative oil types that are allowed:
6
BP, Bartram HV 46
7
Shell, Tellus T 46
8
Exxon, Statoil Univis N 46
9
Mobil Oil Mobil DTE 25
10
Recommended lubrication:
11
White grease for o-rings, sealings etc.:
12
Silicone grease (Unisilkon L250) - All moveable parts and O-rings.
13
DOW CORNING(R) M 55 O-RING LUBRICANT - All stationary O-rings
14
15
16
F
Electric Diagram.
.
17
Motor pump function of Excellent 160-Excellent 170
Machine stopped and hose emptied
Machine operation
F
18
Electric Diagram.
.
Motor pump function of Excellent 160-Excellent 170
Machine standby
F
19
Electric Diagram.
.
20
G
Troubleshooting.
.

This manual suits for next models

5

Other Nilfisk-Advance Pressure Washer manuals
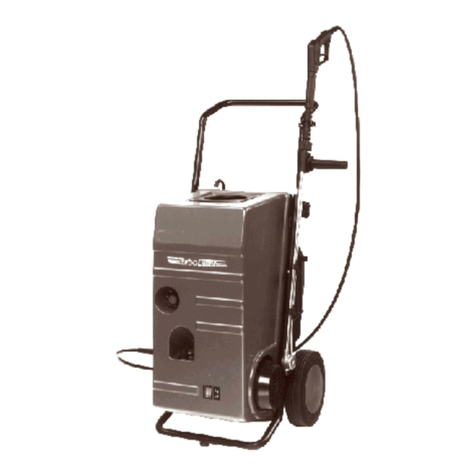
Nilfisk-Advance E130.3 X-TRA Operating instructions

Nilfisk-Advance

Nilfisk-Advance E130.3 X-TRA Operating instructions

Nilfisk-Advance D 130.4 X-TRA User manual

Nilfisk-Advance

Nilfisk-Advance D 130.4 X-TRA User manual

Nilfisk-Advance C 125.4 Operating instructions

Nilfisk-Advance

Nilfisk-Advance C 125.4 Operating instructions

Nilfisk-Advance MC 5M User manual

Nilfisk-Advance

Nilfisk-Advance MC 5M User manual

Nilfisk-Advance Alto POSEIDON 2 User manual
Nilfisk-Advance

Nilfisk-Advance Alto POSEIDON 2 User manual

Nilfisk-Advance MH 5M E User manual

Nilfisk-Advance

Nilfisk-Advance MH 5M E User manual

Nilfisk-Advance SH SOLAR G User manual

Nilfisk-Advance

Nilfisk-Advance SH SOLAR G User manual

Nilfisk-Advance MC 5M User manual

Nilfisk-Advance

Nilfisk-Advance MC 5M User manual

Nilfisk-Advance MC 2C-180 PE User manual

Nilfisk-Advance

Nilfisk-Advance MC 2C-180 PE User manual

Nilfisk-Advance FI-30N User manual

Nilfisk-Advance

Nilfisk-Advance FI-30N User manual

Nilfisk-Advance MH 5M User manual

Nilfisk-Advance

Nilfisk-Advance MH 5M User manual

Nilfisk-Advance P 150.2 X-TRA User manual

Nilfisk-Advance

Nilfisk-Advance P 150.2 X-TRA User manual

Nilfisk-Advance TITAN X-TRA Firmware update

Nilfisk-Advance

Nilfisk-Advance TITAN X-TRA Firmware update

Nilfisk-Advance MH 1C User manual

Nilfisk-Advance

Nilfisk-Advance MH 1C User manual

Nilfisk-Advance P 130.2 User manual

Nilfisk-Advance

Nilfisk-Advance P 130.2 User manual

Nilfisk-Advance C 135.1 User manual

Nilfisk-Advance

Nilfisk-Advance C 135.1 User manual

Nilfisk-Advance N/G-6900A/C User manual

Nilfisk-Advance

Nilfisk-Advance N/G-6900A/C User manual

Nilfisk-Advance 2300A User manual

Nilfisk-Advance

Nilfisk-Advance 2300A User manual

Nilfisk-Advance MC 4M User manual

Nilfisk-Advance

Nilfisk-Advance MC 4M User manual
Nilfisk-Advance AQUA 1100.2 User manual

Nilfisk-Advance

Nilfisk-Advance AQUA 1100.2 User manual

Nilfisk-Advance SelectSpray 1500EH User manual

Nilfisk-Advance

Nilfisk-Advance SelectSpray 1500EH User manual

Nilfisk-Advance MH 3M User manual

Nilfisk-Advance

Nilfisk-Advance MH 3M User manual

Nilfisk-Advance P 160.2-15 SUPER PRO X-TRA User manual
Nilfisk-Advance

Nilfisk-Advance P 160.2-15 SUPER PRO X-TRA User manual

Nilfisk-Advance APC 328 User manual

Nilfisk-Advance

Nilfisk-Advance APC 328 User manual

Popular Pressure Washer manuals by other brands

Graco G-Force II 3325 HA-DD Operation - repair - parts

Graco

Graco G-Force II 3325 HA-DD Operation - repair - parts

Briggs & Stratton 020503-00 Quick setup guide

Briggs & Stratton

Briggs & Stratton 020503-00 Quick setup guide

Spitwater SCW70/TS Operating and maintenance manual

Spitwater

Spitwater SCW70/TS Operating and maintenance manual

SNOWJOE SUNJOE SPX2003 Operator's manual

SNOWJOE

SNOWJOE SUNJOE SPX2003 Operator's manual

North American AR142P Operating instructions and parts list

North American

North American AR142P Operating instructions and parts list

Kärcher K 1800 IB Operator's manual

Kärcher

Kärcher K 1800 IB Operator's manual

Troy-Bilt 2500 PSI Operator's manual

Troy-Bilt

Troy-Bilt 2500 PSI Operator's manual

Kärcher HD 645 operating instructions

Kärcher

Kärcher HD 645 operating instructions

Clarke TIGER 1800 Operation & maintenance instructions

Clarke

Clarke TIGER 1800 Operation & maintenance instructions

SurfaceMaxx SGY-PWA83A instruction sheet

SurfaceMaxx

SurfaceMaxx SGY-PWA83A instruction sheet

Robust RB-HP 1435 Original operating instructions

Robust

Robust RB-HP 1435 Original operating instructions

Kärcher K 4 Full Control operating instructions

Kärcher

Kärcher K 4 Full Control operating instructions

Bergman PRO XK01-40A instruction manual

Bergman

Bergman PRO XK01-40A instruction manual

Kärcher HD 525 S Operation manual

Kärcher

Kärcher HD 525 S Operation manual

Briggs & Stratton SpeedClean 020239-0 owner's manual

Briggs & Stratton

Briggs & Stratton SpeedClean 020239-0 owner's manual

Kranzle Profi 160 TST operating manual

Kranzle

Kranzle Profi 160 TST operating manual

Snapper SP3400 Quick Start Up/Shutdown Guide

Snapper

Snapper SP3400 Quick Start Up/Shutdown Guide

Lavor LMX Series manual

Lavor

Lavor LMX Series manual

manuals.online logo
manuals.online logoBrands
  • About & Mission
  • Contact us
  • Privacy Policy
  • Terms and Conditions

Copyright 2025 Manuals.Online. All Rights Reserved.