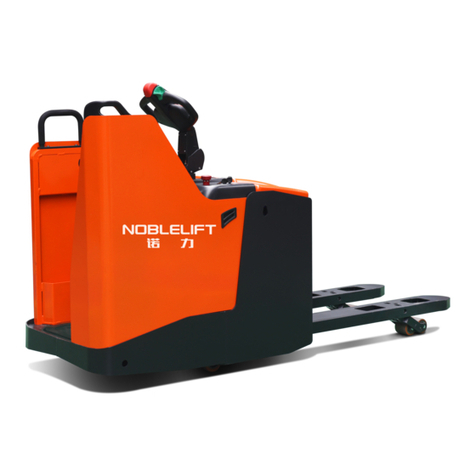
Noblelift PTE15/20Q-B User manual

Version 1/2022
PTE15/20Q –B-SMS-002-EN
WARNING
Do not use the pallet truck before reading and
understanding these operating instructions.
NOTE:
Please check the designation of your
present type at the last page of this
document as well as on the ID-plate.
Keep for future reference.
INSTRUCTION MANUAL
Electric Pallet Truck
PTE15/20Q-B

FOREWORD
Before operating the truck, read this ORIGINAL INSTRUCTION MANUAL carefully and understand the
usage of the truck completely. Improper operation could create danger.
This manual describes the usage of different electric pallet trucks. When operating and servicing the
truck, make sure, that it applies to your type.
Keep this manual for future reference. If this or the warning/ caution labels are damaged or get lost,
please contact your local dealer for replacement.
This truck complies with the requirements according to EN 12895 (Industrial trucks- electromagnetic
compatibility), EN 12053 (Safety of industrial trucks- test methods for measuring noise emissions),
assumed the truck is used according to the described purpose.
ATTENTION:
Environmentally hazardous waste, such as batteries, oil and electronics, will have a
negative effect on the environment, or health, if handled incorrectly.
The waste packages should be sorted and put into solid dustbins according to the
materials and be collected disposal by local special environment protection bureau. To
avoid pollution, it’s forbidden to throw away the wastes randomly.
To avoid leaking during the use of the products, the user should prepare some
absorbable materials (scraps of wooden or dry duster cloth) to absorb the leaking oil in
time. To avoid second pollution to the environment, the used absorbable materials
should be handed in to special departments in terms of local authorities.
Our products are subject to ongoing developments. Because this manual is only for the
purpose of operating/servicing the pallet truck, therefore please have understanding,
that there is no guarantee out of particular features out of this manual.
NOTE: In this manual, the left symbol indicates warning and danger, which may lead
to death or serious injury if not followed.
Copyright
The copyright remains with the company, mentioned on the CE- certificate at the end of this document or,
if sold within the USA, with the company, mentioned on the company sticker.

2
TABLE OF CONTENTS
1. CORRECTAPPLICATION..................................................................................................................... 3
2. DESCRIPTION OF THE PALLET TRUCK............................................................................................. 4
a. Overview of the main components..................................................................................................... 4
b. Technical data..................................................................................................................................... 5
c. Description of the safety devices and warning labels (Europe and other, excepting USA)............... 6
d. Identification plate............................................................................................................................... 7
3. WARNINGS, RESIDUAL RISK AND SAFETY INSTRUCTIONS .......................................................... 8
4. COMMISSIONING, TRANSPORTING, DECOMMISSIONING.............................................................. 9
a. Commissioning................................................................................................................................... 9
b. Hoisting/ transportation....................................................................................................................... 9
c. Decommissioning.............................................................................................................................. 10
5. DAILY INSPECTION ............................................................................................................................ 10
6. OPERATING INSTRUCTIONS.............................................................................................................11
a. Parking............................................................................................................................................11
b. Lifting .................................................................................................................................................11
c. Lowering.............................................................................................................................................11
d. Travelling............................................................................................................................................11
e. Steering.......................................................................................................................................... 12
f. Braking............................................................................................................................................... 12
g. Malfunctions...................................................................................................................................... 13
h. Emergency........................................................................................................................................ 13
7. BATTERY SAFETY, CHARGINGAND REPLACEMENT.................................................................... 13
a. Safety Instructions............................................................................................................................ 14
b. Matters requiring attention................................................................................................................ 15
c. Replacement..................................................................................................................................... 15
d. Tiller panel......................................................................................................................................... 16
e. Charging ........................................................................................................................................... 16
8. REGULAR MAINTENANCE................................................................................................................. 18
a. Maintenance checklist...................................................................................................................... 18
b. Lubricating points.............................................................................................................................. 20
c. Check and refill hydraulic oil............................................................................................................. 20
d. Checking electrical fuses.................................................................................................................. 21
9. TROUBLE SHOOTING........................................................................................................................ 21
10. WIRING/ CIRCUIT DIAGRAM ........................................................................................................... 23
a. Electrical circuit diagram................................................................................................................... 23
b. Hydraulic circuit diagram.................................................................................................................. 26
11. SPECIALIZED STIPULATIONS FOR THE US-AMERICAN MARKET............................................. 27
a. Foreword/ Compliance ..................................................................................................................... 27
b. Identification plate............................................................................................................................. 28
c. Description warning labels (only US- market).................................................................................. 29
d. Technical data for US market ........................................................................................................... 31
12. DECLARATION OF CONFORMITY (valid, if sold within EU)............................................................ 33

3
1. CORRECT APPLICATION
It is only allowed to use this electric pallet truck according to this instruction handbook.
The trucks described in this handbook are self-propelled electric power pallet trucks. The trucks are
designed to lift, lower and transport palletized loads.
A wrong usage can cause human injuries or can damage equipment.
The operator/ the operating company has to ensure the correct usage and has to ensure, that this pallet
truck is used only by staff, which is trained and authorized to use this truck.
The pallet truck has to be used on substantially firm, smooth, prepared, level and adequate surfaces.
The truck is intended to be used for indoor applications with ambient temperatures between +5C and +
40C and for various transportation applications without crossing permanent obstacles or potholes. The
work on ramps is allowed if ramp is not exceeding the allowed angle. While operating, the load must be
placed approximately on the longitudinal center plane of the truck.
Lifting or transporting people is forbidden.
If used on tail lifts or loading ramps, please ensure that these are used correctly according to the
operating instructions.
The capacity is marked on capacity sticker as well on the Identification plate. The operator has to
consider the warnings and safety instructions.
Operating lighting must be minimum 50 Lux.
Modification
No modifications or alterations to this pallet truck which may affect, for example, capacity, stability or
safety requirements of the truck, shall be made without the prior written approval of the original truck
manufacturer, its authorized representative, or a successor thereof. This includes changes affecting, for
example braking, steering, visibility and the addition of removable attachments. When the manufacturer
or its successor approve a modification or alteration, they shall also make and approve appropriate
changes to capacity plate, decals, tags and operation and maintenance handbooks.
By not observing these instructions, the warranty becomes void.

4
2. DESCRIPTION OF THE PALLET TRUCK
a. Overview of the main components
1. Safety (belly) button
2. Tiller
3. Key
4. Battery discharging indicator
5. Emergency button
6. Plastic cover
7. Chassis
8. Fork
9. Load roller
10. Battery
11. Apron
12. Drive unit
13. Side wheel (optional)
Fig. 1: Overview of the main components

5
b. Technical data
Fig. 2: Technical data

5
Table 1: Main technical data for standard version
Type sheet for industrial truck acc. to VDI 2198
Distinguishing mark
1.2
Manufacturer’s type designation
PTE15Q-B
PTE20Q-B
1.3
Drive: electric (battery type, mains, ...),
diesel, petrol, fuel gas
Battery
1.4
Operator type: hand, pedestrian, standing,
seated, order-picker
Pedestrian
1.5
Rated capacity/ rated load
Q(t)
1.5
2.0
1.6
Load centre distance
c(mm)
600
1.8
Load distance, centre of drive axle to fork
x(mm)
947
1.9
Wheelbase
y(mm)
1189
Weight
2.1
Service weight
kg
117
122
130
135
2.2
Axle loading, laden front/ rear
kg
485/ 1132
488/ 1134
481/ 1649
485/ 1650
2.3
Axle loading, unladen front/ rear
kg
97/ 20
98/ 24
100/ 30
100/ 30
Tyres, chassis
3.1
Tires
Polyurethane (PU)
3.2
Tire size, front
x w (mm)
220×70
3.3
Tire size, rear
x w (mm)
80×70 (80×93)
3.4
Additional wheels (dimensions)
x w (mm)
-/ 80×30
3.5
Wheels, number front/ rear(x=driven wheels)
1x/ 2(1x/ 4) or 1x +2/ 2(1x +2/ 4)
3.6
Tread, front
b10 (mm)
-/ 430
3.7
Tread, rear
b11 (mm)
380
525
380
525
Dimensions
4.4
Lift
h3(mm)
115
4.9
Height drawbar in driving position min./ max.
h14 (mm)
745/ 1160
4.15
Height, lowered
h13 (mm)
80
4.19
Overall length
l1(mm)
1543
4.20
Length to face of forks
l2(mm)
393
4.21
Overall width
b1(mm)
540
685
540
685
4.22
Fork dimensions DIN ISO 2331
s/ e/ l(mm)
50/ 160/ 1150
4.25
Fork spread
b5 (mm)
540
685
540
685
4.32
Ground clearance, centre of wheelbase
m2(mm)
30
4.34
Aisle width predetermined load dimensions
Ast (mm)
2013
4.35
Turning radius
Wa(mm)
1340
Performance
5.1
Travel speed, laden/ unladen
km/h
4.3/ 4.9
4.9/ 4.9
5.2
Lift speed, laden/ unladen
m/s
0.015/ 0.022
0.016/ 0.019
5.3
Lowering speed, laden/ unladen
m/s
0.05/ 0.026
0.052/ 0.023
5.8
Max. gradeability, laden/ unladen
%
6/ 16
7/ 16

6
5.10
Service brake
Electromagnetic
Electric- engine
6.1
Drive motor rating S2 60min
kW
0.75
1.0
6.2
Lift motor rating at S3 10%
kW
0.50
0.8
6.3
Battery acc. to DIN 43531/35/36 A, B, C, no
No
6.4
Battery voltage/ nominal capacity K5
(V)/(Ah)
24/ 20 (24/ 40)
48/ 20
6.5
Battery weight
kg
5.8
8.1
6.6
Energy consumption acc. to DIN EN 16796
kWh/h
0.25
0.17
Addition
data
8.1
Type of drive unit
DC
8.4
Sound pressure level at driver’s seat
dB (A)
<70
c.Description of the safety devices and warning labels (Europe
and other, excepting USA)
Fig. 3: Safety and warning labels

7
A Sticker to read and follow this instruction
B Emergency button sticker
C Oil filling decal
D Model sticker (ATOM)
E “No passengers” decal
F Crane hook label
G Identification plate (ID-plate)
H Capacity label
I Battery ID plate
J No collision sticker
K Battery warning sticker
L Charger ID plate
M Warning sticker (operation steps)
R Sticker to read and follow maintenance manual
T Warning sticker (hands pinching)
U Sticker (do not discard the label)
The truck is equipped with an emergency switch (5) which stops all lifting-, lowering-, driving- functions
and engages the fail-safe electromagnetic brake when it is pressed. By turning this button clockwise, the
truck can be operated after the controller checked the functions. Before operating, insert the key (3) to
start the truck. To prevent unauthorized access, press emergency switch (5) or remove the key (3).
The truck is equipped with a safety (belly) button (1) which switches the driving function away from the
operator, if the truck travels towards the operator and the tiller is activated in the tillers operating zone.
Follow also the instructions given on the labels and decals. Replace the label and decals in time if they
are damaged or missing.
d. Identification plate
Pallet Truck
Type
xxxx
Rated capacity
xxxx kg
Rated voltage
xx V
Service weight
without battery
xxxx kg
Battery weight
maximum
xxx kg
Battery weight
minimum
xxx kg
Net weight (without
load and battery)
xxx kg
Lift height
maximum
xxxx mm
Serial number
XXXXXXXXXX
Equipment code
XXXXXXXXXX
Manufacturing Name XXXXXXXXXXXXXXX
Manufacturing Address XXXXXXXXXXXXXXX
Fig. 4: Identification plate
Check the ID plate taped on the truck for contents and type.

8
3. WARNINGS, RESIDUAL RISK AND SAFETY INSTRUCTIONS
DO NOT
Put foot or hand under or into the lifting mechanism.
Allow other person than the operator to stand in front of or behind the truck when it is
moving or lifting/lowering.
Overload the truck.
Put foot in front of the wheels, injury could result.
Lift people. People could fall down and suffer severe injury.
Push or pull loads
Side or end load. Load must be distributed evenly on the forks.
Use the truck with unstable or unbalanced load.
Use truck without manufacturer’s instructions manual.
Lifted loads could become unstable at wind forces. In the case of wind forces do not
lift the load if there is any influence to the stability.
Watch difference in floor levels when driving. Load could fall down or the truck could get uncontrollable.
Keep watching the condition of load. Stop operating the truck if load becomes unstable.
Brake the truck and activate the emergency switch (5) by pushing when sliding load on or off the truck. If
the truck has any malfunctions, follow chapter 10.
Practice maintenance work according to regular inspection. This truck is not designed to be water
resistant. Use the truck under dry condition. Prolonged continuous operation might cause damage of the
power pack. Stop operation if temperature of hydraulic oil is too high.
When operating the electric pallet truck, the operator has to wear safety shoes.
The truck is intended to be used for indoor applications with ambient temperatures
between+5C and + 40C.
The operating lighting must be minimum 50 Lux.
To prevent unintended sudden movements when not operating the truck (i.e. from
another person, etc.), press emergency switch (5) or remove the key (3).

9
4. COMMISSIONING, TRANSPORTING, DECOMMISSIONING
a. Commissioning
Table 2: Commissioning data
Type
PTE15Q-B
(540X1150)
PTE15Q-B
(685X1150)
PTE20Q-B
(540X1150)
PTE20Q-B
(685X1150)
Commissioning weight [kg]
136kg
139kg
141kg
144kg
Dimensions [mm]
1554x540x1245
1554x685x1245
1554x540x1245
1554x685x1245
After receiving our new pallet truck or for re-commissioning you have to do the following before (firstly)
operating the truck:
Check if are all parts included and not damaged
Make sure the tiller is assembled correctly (electrical socket is connected and fixed with two plastic
clamps, circlip of the axle is installed)
Check that battery is charged (follow chapter 8)
Do the work according to the daily inspections as well as functional checks.
b. Hoisting/ transportation
For transporting, remove the load, lower the forks to the lowest position and fix the truck safely with
dedicated hoisting equipment according to the following figures.
Hoisting
USE DEDICATED CRANE AND HOISTING EQUIPMENT
DO NOT STAND UNDER THE SWAYING LOAD
DO NOT WALK INTO THE HAZARDOUS AREA DURING HOISTING
Fig. 5: Hoisting with a crane
Fig. 6: Fixing points

10
Transportation
ALWAYS FASTEN THE TRUCK SECURELY DURING TRANSPORTATION ON A
TRANSPORT VEHICLE
Lower the forks and park the truck securely.
Fasten the truck according to Fig. 6 by fixing dedicated lashing belts to each side of the trucks crane
hook holes and fasten the other side at the transporting truck.
c. Decommissioning
For storage, remove the load, lower the truck to the lowest position, grease all in this handbook
mentioned greasing points (regular inspection), and eventually protect the truck against corrosion and
dust. Remove the batteries and jack the truck safely, so that there will be no flattening after storage.
For final decommissioning hand the truck to a designated recycling company. Oil, batteries and electric
components must be recycled due to legal regulations.
5. DAILY INSPECTION
This chapter describes pre-shift checks before putting the truck into operation.
Daily inspection is effective to find the malfunction or fault on this truck. Check the truck on the following
points before operation.
Remove load from truck and lower the forks.
DO NOT USE THE TRUCK IF ANY MALFUNCTION IS FOUND.
Check for scratches, deformation or cracks.
Check if there is any oil leakage from the cylinder.
Check the smooth movement of the wheels.
Check the function of driving with tiller in its vertical position.
Check the function of the emergency brake by activating the emergency switch.
Check the braking function of the proximity switch of the tiller.
Check the lifting and lowering functions by operating the buttons.
Check if all bolts and nuts are tightened firmly.
Visual check if there are any broken electric wires.

11
Fig. 8: Load facing uphill
6. OPERATING INSTRUCTIONS
BEFORE OPERATING THIS TRUCK, PLEASE FOLLOW THE WARNINGSAND
SAFETY INSTRUCTIONS (CHAPTER 3).
a. Parking
DO NOT PARK THE TRUCK ON INCLINED SURFACES
The truck is equipped with an electromagnetic fail-safe stopping and parking brake.
Always lower the forks fully and press the emergency switch (5) for parking.
b. Lifting
DO NOT OVERLOAD THE TRUCK!
MAXIMUM CAPACITY OF PTE15Q IS 1500KG.
MAXIMUM CAPACITY OF PTE20Q IS 2000KG.
Travel with the lowered forks fully underneath the pallet and press the lifting button (Fig. 7, 16) until you
reach the desired lifting height.
c. Lowering
Press the lowering button (17) carefully.
Lower the load until the forks are clear of the pallet, then drive the truck carefully out of the load unit.
d. Travelling
Fig.7: Tiller control buttons
Make sure, that the load is palletized
and stable and that the daily inspection
is carried out.
Start the truck by the key (3).
Press the horn button (Fig.7, 15) to
activate the audible warning signal.
TRAVEL ON INCLINES ONLY WITH
THE LOAD FACING UPHILL.
DO NOT TRAVEL ON INCLINES MORE
THAN SPECIFIED WITH THE
TECHNICAL DATA.

12
After starting the truck by the magnetic lock, move the tiller to the operating zone (‘F’, Fig.9).
Turn the accelerator knob to the desired direction forward ‘Fw.’ or backwards Bw.’(Fig. 9).
Control the travelling speed by operating the accelerator knob (Fig.7,13) carefully until you reach the
desired speed.
If you move the accelerator knob back to the neutral position, the controller will decelerates the truck
until the truck stops. If the truck stops, the parking brake will be engaged.
Drive the truck to the destination carefully. Watch the route conditions and adjust the travelling speed by
operating the accelerator.
Press turtle button (Fig.7,18) to enter into slow speed mode, travel slowly by operating the accelerator
knob (Fig.7,14), press turtle button again to switch to regular speed mode.
Press the turtle button and hold it for 2 seconds to activate driving function with tiller in vertical position
when operating in confined areas.
e. Steering
Steer the truck by moving the tiller to the left or right side.
f. Braking
PLEASE CHECK THE BRAKING DISTANCE WITH TRUCK BEFORE OPERATION
THE BRAKING PERFORMANCE DEPENDS ON THE TRACK CONDITIONS AND
THE LOAD CONDITIONS OF THE TRUCK
The braking function can be activated in several ways:
By moving the accelerator knob (14) to the initial ‘0’ position or by releasing the knob, the
regenerative braking is activated. The truck brakes until it stops.
Fig. 9: Operating direction

13
By moving the accelerator knob (14) from one driving direction directly to the opposite direction, the
regenerative braking is activated until the truck starts traveling into the opposite direction.
The truck brakes, if the tiller is located in the braking zones (‘B’). If the tiller is released, the tiller
moves automatically to the upper braking zone (‘B’). The truck brakes until it stops.
The safety (belly) button (1) prevents the operator from crush. If this button is activated, the truck
decelerates and/or starts traveling into backwards direction (‘Bw.’) for a short distance and stops then.
Please consider that this button still works if the truck is not traveling with tiller in operating zone.
g. Malfunctions
If there are any malfunctions or the truck is inoperative, please stop using the truck and activate the
emergency button (5) by pushing it. If possible, park the truck in a safe area and remove the key (3).
Inform immediately the manager or call your service. If necessary, move the truck out of the operating
area by using dedicated towing/ hoisting equipment.
h. Emergency
In emergencies or in the event of tipping over (or fall off a dock), keep a safe distance immediately. If
possible, push the emergency button (5) and all electrical functions will be stopped.
7. BATTERY SAFETY, CHARGING AND REPLACEMENT
Only qualified personnel are allowed to service or charge the batteries. The
instructions of this handbook must be observed.
The batteries are lithium batteries.
Recycling of batteries undergoes national regulations. Please follow these
regulations.
By handling batteries, open fire is prohibited!
In the area of battery charging neither burning materials nor burning liquids are
allowed. Smoking is prohibited and the area must be ventilated.
Park the truck securely before starting charging or installing/changing the batteries
Before finishing the maintenance work, make sure, that all cables are connected
correctly and that they are no disturbing towards other components of the truck.
Table 3: Available batteries
Model
Battery specification
PTE15Q
24V20Ah lithium battery, 5.1kg
PTE20Q
48V20Ah lithium battery, 6.5kg
IT IS ONLYALLOWED TO USE LITHIUM BATTERIES.
PLEASE CONSIDER THE MAXIMUM OPERATING TEMPERATURE OF THE
BATTERIES AND REFER TO SAFETY INSTRUCTIONS BELOW

14
a.Safety Instructions
Failure to follow the below requirements may cause damage to your property, cause injuries or death.
Measures to prevent ignition
It is forbidden to work at temperatures over 60 ℃.
It is forbidden to place it beside heat sources, such as stoves, fireplaces, etc.
Direct sunlight must be avoided.
It is forbidden to place batteries near inflammable and explosive substances.
Measures to prevent explosion
Do not hit the battery, no impacts are allowed.
Exclude penetration of objects through battery case or damages to battery case
DO not throw products into the fire or water.
Measures to prevent electric leakage
Do not disassemble.
Do not contact by wet hands.
Do not expose it to moisture or liquids.
Do not place batteries in a place of easy access by children or animals.
Measures to preventing damage to battery systems
It is forbidden to contact liquids or corrosive chemicals.
Do not expose batteries to high temperature and/or high pressure.
No trampling, disassembly or smashing.
Do not attempt charging from discharge terminals and discharging from charging terminals.
Installation environment
In order to ensure the best operating performance, the battery need to be kept under normal working
conditions: between 0 and 40 degrees Celsius and normal humidity. Avoid excessive temperature
difference on both sides of the battery (more than 5℃).
Emergency management
Below are examples of several ways to deal with possible emergencies:
In case of Smoke or Ignition: stop to use equipment immediately, take appropriate actions
according to working instructions and stay away from the scene.
In case battery is immersed in water: stop to use equipment immediately, take appropriate
actions according to working instructions and stay away from the scene.
Products produce smell: stop to use equipment immediately, remove the battery and take
appropriate actions according to working instructions and stay away from the scene. Avoid
contact with any leaking liquids or gases out of the battery (in case of contact clean
immediately).
Necessary safety equipment
Self-contained breathing apparatus and personal protective equipment.
Sevofluoropropane fire extinguishing system.

15
b.Matters requiring attention
The charging function of batteries may be blocked by Battery Management System if
temperature of cells inside the battery case is lower than +5℃. Make sure the own temperature
of battery is above this value and the temperature of the battery is even.
Batteries are forbidden to charge at low temperatures, but they can be used in occasional low
temperature environment (please refer to normal working conditions allowed for the truck), but
their efficient capacity will be lower, which is a normal phenomenon.
Note: Although the battery can be discharged at very low temperature, it is easy to generate
condensate during the charging process, which will damage the internal electronic devices of
the battery and create unpredictable hidden dangers. Batteries cannot be charged until they
are slowly warmed up to minimum allowed temperature for activation of charging function (may
take up to 4 hours in normal temperature conditions). Forced warming up (e.g., using of heaters,
vents etc.) is forbidden.
The dependence of actual capacity from environmental temperature is shown for reference
only and can not be used as a commitment/allowance for low temperature operation, please
refer to the Chapter 1 for correct application conditions.
The battery protection level is IP40, so please do not wash the battery directly with water.
When the lithium battery pack is not in use for a long time store it with 30-50% level of charge to
extend its life-time.
When the vehicle is prohibited to run, that is, when the handle power indicator is blinking red,
please charge in time; otherwise, there may be the risk of battery power loss;It is recommended
that charging be carried out within 7 days when driving is prohibited.
c.Replacement
Ambient temperature
Remaining discharge capacity of battery pack
25℃
100%
0℃
90%
-20℃
70%
-30℃
40%
Fig. 10: Battery replacement
Park the truck securely and press the emergency button (5) to
power off the truck. Remove the battery connector, hold the
battery grip and then take out the battery vertically.
The installation is in the reverse order.

16
d.Tiller panel
Turtle Symbol
Press the Turtle Symbol button, the green indicator above the button is on, it shows activation of the
“soft” mode of the truck, in which maximum speed and acceleration are reduced.
Fault Code
When a fault code is generated, firstly all four battery indicator lights are on, then the first (most left)
battery indicator flashes and counts, then multiply this number by ten for the first number; then the fourth
(most right) battery indicator flashes and counts the times for the second number; Plus these two
numbers you will get the fault code.
Battery state of charge (SOC)
The state of charge (SOC) of the battery is represented by 4 LED indicator lights. As the battery
discharges, the four indicator lights will be on in turn, and the yellow LED is defined as a warning light,
indicating that SOC is insufficient. When the red LED is on, please charge the battery immediately.
e.Charging
Before charging ensure that you are using an appropriate charger for charging the
installed battery and that all safety measures are taken into consideration.
Fig. 11: Tiller panel

17
Before using the charger, please fully understand the instructions of the charger
instructions.
Always follow these instructions
The room, where you are charging must be ventilated.
The exactly charge status can be only checked from the discharge indicator. To
control the status, the charging must be interrupted and the truck must be started.
Do not make attempts to charge the battery if it is impacted and the battery case is
damaged.
It’s also allowed to remove the battery out and charge in dedicated area.
If there is an optional second battery, the truck can continue to work after replacing the battery, and
charge the battery that needs to be charged separately.
Table 4: LED-Status
Table 5: Charger
LED - Signal
Function
Red
Charging
Green
Fully charged
Model
Specification
Input
Output
PTE15Q
DZL300SS02
24V8A (EN)
180Vac -240Vac~3.0A MAX
29.4V 8.0A
SSLC300V29
24V8A (EU)
180Vac -240Vac~3.0A MAX
29.4V 8.0A
SSLC300V29
24V8A (US)
120Vac~3.0A MAX
29.4V 8.0A
WTL2412PMF
24V12A
100Vac -240Vac~6.0A MAX
29.4V 12.0A
PTE20Q
DZL500SS02
48V9A
180Vac -240Vac ~5.0A MAX
54.6V 9.0A
SSLC500V48
48V9A
100Vac -132Vac ~6.3A MAX
54.6V 9.0A
SSLC500V48
48V9A
200Vac -240Vac ~5.0A MAX
54.6V 9.0A
Fig.12: Battery charging
Park the truck at a dedicated secured
area with a dedicated power supply.
Lower the forks and remove the load;
Switch the truck off and connect the
charger power cord (18) to the socket of
power supply, and connect the charger
plug (19) to the charging socket (20) of
the battery. The charger starts charging
the battery.
If charging is completed, disconnect the
charger from the battery and the power
supply, then put the charger in the
designated pocket.

18
8. REGULAR MAINTENANCE
Only qualified and trained personnel are allowed to do maintenance on this truck.
Before maintaining, remove the load from the forks and lower the forks to the
lowest position.
If you need to lift the truck, follow chapter 4b by using designated lashing or jacking
equipment. Before working, put safety devices (for instance designated lift jacks,
wedges or wooden blocks) under the truck to protect against accidental lowering,
movement or slipping.
Please pay attention by maintain the tiller arm. The gas pressure spring is
pre-loaded by compression, carelessness can cause injury.
Use approved and from your dealer released original spare parts.
Please consider that oil leakage of hydraulic fluid can cause failures and accidents.
It is allowed to adjust the pressure valve only from trained service technicians.
If you need to replace the wheels, please follow the instructions above. The casters must be round and
free of abnormal wear.
Check the items emphasized in maintenance checklist.
a.Maintenance checklist
Table 7: Maintenance checklist
Interval (Monthly)
1
3
6
12
Hydraulic
1
Check the hydraulic cylinder for damage noise and leakage
2
Check the hydraulic joints for damage and leakage
3
Inspect the hydraulic oil level, refill if necessary
4
Replace the hydraulic oil ( 12 month or 1500 working hours )
5
Check and adjust the pressure valve (1500kg (PTE15Q)+0/+10%
Check and adjust the pressure valve (2000kg (PTE20Q)+0/+10%
Mechanical system
6
Inspect the forks for deformation and cracks
7
Check the chassis for deformation and cracks
8
Check if all screws are fixed
9
Check the push rods for deformation and damages
10
Check the gearbox for abnormal sound and noise
11
Inspect the wheels for deformation and damages
12
Inspect and lubricate the steering bearing
Table of contents
Other Noblelift Truck manuals

Noblelift
Noblelift PS E12BSL manual

Noblelift
Noblelift PTE15Q-A User manual

Noblelift
Noblelift FE3P16-35 N User manual

Noblelift
Noblelift RT16Li User manual

Noblelift
Noblelift PTE15N SC User manual

Noblelift
Noblelift PTE15Q User manual

Noblelift
Noblelift PS E12B User manual

Noblelift
Noblelift RT16P User manual

Noblelift
Noblelift PTE15Q User manual

Noblelift
Noblelift PTE15Q2-B User manual