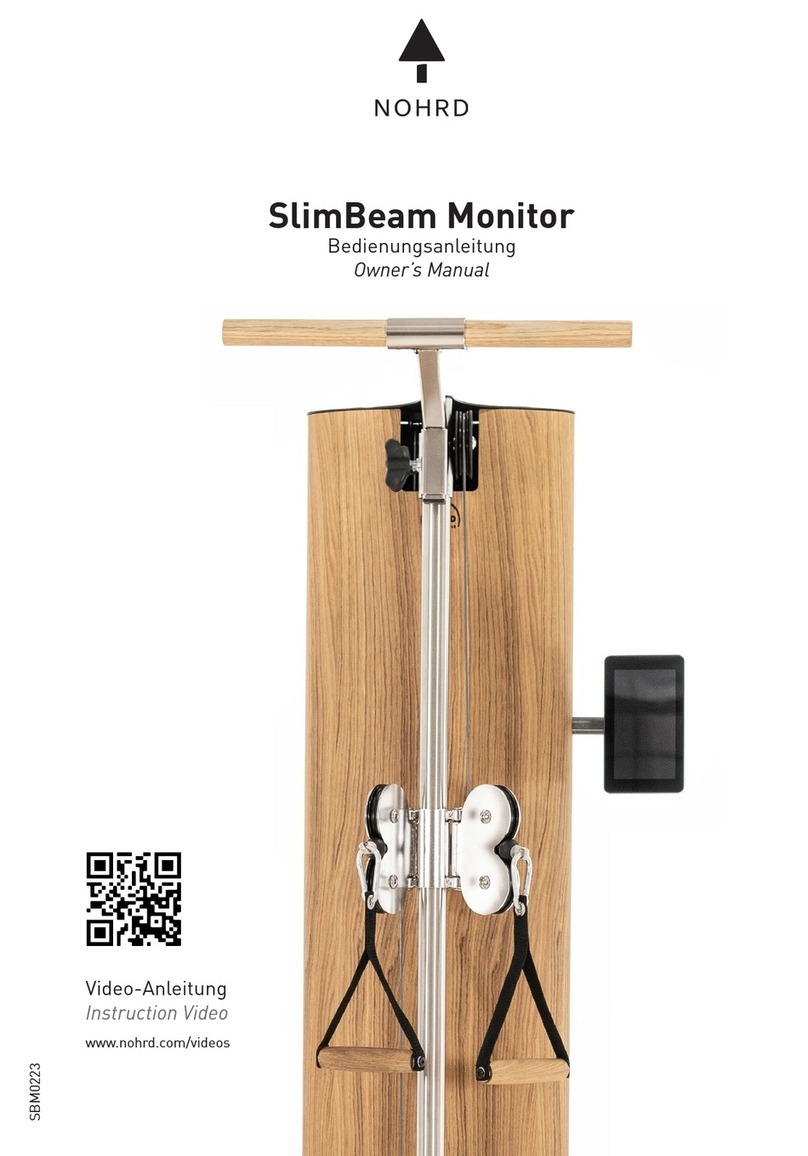
Nohrd Moniteur SlimBeam User manual

SBM0223
Moniteur SlimBeam
Manuel Utilisateur
Owner’s Manual
Vidéo d'assemblage
Video Instruction
www.nohrd.com/videos

3
2
Pages
3
4
5
6
7
8
9-20
21
Sommaire
Content
Détails de la fabrication | Informations générales
Production details |General Information
Consignes de sécurité
Safety Instructions
Instructions d'utilisation
Handling Instructions
Notice d'assemblage
Assembly Instructions
Service client
Customer Service
Pièces
Parts
Assemblage
Assembly
Vidéo tutoriel
Video tutorial
21
Utilisation | Applications
Usage |Application
Modèle
Moniteur SlimBeam
Dimensions (sans le bras):
Largeur: 11,4 cm
Hauteur: 19,6 cm
Profondeur: 4,8 cm
Matériaux:
Plastiques, métaux
Livraison :
1 carton
Fonction :
Application d'entraînement pour
SlimBeam
Remarques importantes
AVERTISSEMENT :
Ce produit ne convient pas aux
enfants de moins de 36 mois car il
contient de petites pièces qui
peuvent être avalées. Les enfants ne
sont autorisés à utiliser ce produit
que sous la surveillance d'une
personne adulte. La barre de traction
ne convient pas à un poids corporel
supérieur à 130 kg.
Model:
SlimBeam Monitor
Measurements (without tabletarm):
Width: 11,4 cm
Height: 19,6 cm
Depth: 4,8 cm
Materials:
Plastics, Metal
Delivery:
Delivery in 1 box
Function:
Training app for SlimBeam
Important Notes:
WARNING:
This product is not suited for children
under the age of 36 months as it
contains small parts that can be
swallowed. Children are allowed
only to use this product under the
surveillance of a grown up person.
The chin-up bar is not suitable for body
weight more than 130 kg.

5
4
Consignes de sécurité
Veuillez lire et respecter les
instructions suivantes concernant la
manipulation, le travail et l'entretien
de l'appareil. Conservez-les dans un
endroit approprié afin de pouvoir vous
y référer en cas de besoin. Si vous
respectez les remarques et les
instructions, l'utilisation de l'appareil
est sûre.
1. La sécurité peut être compromise
par des composants endommagés.
Par conséquent, n'utilisez pas
l'appareil si l'un des composants
d'origine ne fonctionne pas, est
endommagé ou usé. Remplacez la
pièce défectueuse uniquement par
des pièces de rechange d'origine du
fabricant.
2. Des réparations mal effectuées ou
des pièces de rechange ne provenant
pas du fabricant peuvent présenter un
danger.
3. Les modifications de l'appareil ne
doivent être effectuées que par du
personnel qualifié.
4. Consultez votre médecin avant
d'utiliser l'appareil et vérifiez votre
état de santé. L'exécution incorrecte
des exercices peut nuire à votre
santé.
Safety instructions
Please read and observe the following
instructions for handling, working
with and maintaining the device.
Please keep them in a suitable place
so that you can refer to them if neces-
sary. If you observe the notes as well
as the instructions, the operation of
the device is safe.
1. Safety may be impaired by dama-
ged components. Therefore, avoid
using the device in case one of the
original components is not functional,
damaged or worn out. Replace the
defective part only with original spare
parts from the manufacturer.
2. Incorrectly performed repairs or
spare parts that are not from the ma-
nufacturer may cause danger.
3. Modifications to the device should
only be performed by qualified staff.
4. Consult your health care provider
before using the app and check your
health condition. Performing the
exercises incorrectly may cause da-
mage to your health.
Utilisation
Veuillez lire attentivement ces
instructions d'utilisation ! Les
informations données ici vous
aideront à utiliser et à entretenir
correctement l'appareil.
1. N'utilisez pas l'appareil tant que
l'assemblage n'est pas terminé et
conforme aux instructions.
2. Étudiez les options de réglage de
l'appareil avant la première séance
d'entraînement et effectuez les
réglages corrects en fonction de vos
conditions physiques.
3. Installez l'appareil dans un endroit
sec. Dans les endroits humides, les
parties métalliques de l'appareil
peuvent rouiller.
4. N'utilisez jamais de produits de
nettoyage agressifs ou corrosifs pour
nettoyer l'appareil.
5. Les enfants ne doivent jamais
utiliser l'appareil sans la surveillance
d'un adulte. Pendant la séance,
l'utilisateur doit veiller à ce qu'aucune
autre personne (en particulier les
enfants) ne perturbe le processus de
formation ou ne mette la main sur
l'appareil.
6. Pour l'entraînement, nous
recommandons des vêtements et des
chaussures d'entraînement adaptés.
Handling and Use
Please read these handling instruc-
tions carefully! The information given
here will help you to use and maintain
the device correctly.
1. Do not use the device until the as-
sembly is complete and according to
the instructions.
2. Learn the setting options of the
device before the first workout and
make the correct settings for your
physical conditions.
3. Set up the device in a dry place. In
damp areas, metal parts of the device
may rust.
4. never use aggressive or corrosive
cleaning agents for cleaning.
5. Children should never use the
equipment without the supervision
of an adult. During training, the user
must ensure that no other persons
(especially children) disturb the trai-
ning process or reach into the device.
6. For training, we recommend sui-
table training clothing and training
shoes.

7
6
Notice d'assemblage
Déballez d'abord complètement
l'appareil et vérifiez qu'il n'a pas été
endommagé pendant le transport. Le
matériel d'emballage ne doit être jetté
qu'après l'assemblage complet et la
mise en service fonctionnel de
l'appareil, car il peut servir
d'emballage de transport en cas de
retour.
Vérifier que la livraison est complète.
Veuillez vous référer à la liste des
pièces ci-dessous pour connaître le
contenu de la livraison. Si des pièces
manquent ou ont été livrées de
manière défectueuse, veuillez
contacter le revendeur spécialisé ou
le fabricant.
Le montage ne doit être effectué que
par une personne adulte. En cas de
doute, demandez l'aide d'une autre
personne adulte ayant des
compétences techniques.
Lisez d'abord les instructions de
montage.
Assemblez l'appareil conformément
aux instructions de montage et suivez
les illustrations.
Faites attention aux instructions
figurant sur les images. Une fois le
montage terminé, vérifiez à nouveau
soigneusement tous les raccords à
vis.
Assembly Information
First unpack the unit completely and
check for any transport damage. The
packaging material should only be
removed properly after complete
assembly and satisfactory commissi-
oning of the device, as this may serve
as transport packaging for returns.
Check the completeness of the de-
livery. Please refer to the parts list
below for the scope of delivery. If any
parts are missing or have been de-
livered defective, please contact the
specialist dealer or the manufacturer.
Assembly should only be carried out
by an adult person. If in doubt, enlist
the help of another adult with techni-
cal skills.
First read through the assembly ins-
tructions.
Assemble the device according to the
assembly instructions and follow the
illustrations. Pay attention to the
instructions in the pictures. After
complete assembly, carefully check
all screw connections again.
Service Client:
Pour toute demande de service,
veuillez toujours indiquer le numéro
de série de votre produit. Le numéro
de série se trouve sur le repose-
pieds.
Veuillez toujours inclure le numéro
de série dans vos demandes de
service.
Contact SAV
WaterRower France
1 rue Paul Langevin
59200 Tourcoing
www.waterrower.fr
Customer Service:
For service inquiries please always
indicate your product's serial
number. The serial number is
located on the foot stand.
Please always include the serial
number with service requests.
Customer Service Address:
WaterRower GmbH
Otto-Hahn-Straße 75
48529 Nordhorn
Telefon 0 59 21 - 17 98 400
www.nohrd.com

9
8
A Clé Allen
Allen key
B
2x Plug-in dowel
C
1x Schraube
D
Main electronic board
F
Power adapter
G
E
Monitor incl. tablet arm
Connector cable with round plug
Câble de connexion nécessaire jusqu'au
numéro de série SB12073 inclus.
Connection cable required up to and
including serial number SB12073.
A B C D F
G
H
I
1
2
Connecter la fiche à 4 broches à la carte électronique droite et la fiche à 6
broches à la carte électronique gauche.
Connect the 4-pin-plug to the right electronic board and the 6-pin-plug to
the left electronic board.
Faites d'abord passer le câble plat avec la fiche à 4 broches dans les trous
de la plaque de connexion métallique, comme indiqué dans les images 1 à 3.
First guide the flat ribbon cable with the 4-pin plug through the metal
connection plate holes as shown in pic 1 - pic 3.
2x chevilles enfichables
Carte électronique principale
1x vis
Flat ribbon cable
Câble de connexion avec fiche ronde
Câble plat
Adaptateur électrique
Support de câble
Moniteur avec bras pour tablette
H
I
Cable holder

11
10
5
6
Branchez le câble large (1) sur le connecteur à 8 broches, puis le câble étroit
(2) sur le connecteur à 6 broches. Branchez ensuite le câble USB (3).
Connect the wide cable (1) to the 8-pin connector and then the narrow cable
(2) to the 6-pin connector. Then attach the USB cable (3).
Desserrez ensuite la plaque de recouvrement située à l'intérieur du
SlimBeam.
Now loosen the cover plate, which is located inside the SlimBeam.
3
4
Insérez la tige du support de la tablette ainsi que le câble USB dans le cadre
principal, de manière à ce qu'ils soient alignés avec les trous de vis.
Insert the tablet holder rod along with the USB cable into the main frame, so
that it is aligned with the screw holes.
Retirez le bouchon en plastique du cadre principal du SlimBeam en le
poussant de l'intérieur.
Remove the plastic plug from the SlimBeam’s main frame by pushing it out
from the inside.
1
2
3

13
12
8
9
Faites passer le câble de connexion avec la fiche ronde par l'ouverture dans
le bras de la tablette.
Lead the connection cable with round plug ahead through the opening into
the tablet arm.
Fixer le support de tablette en le vissant au cadre principal.
Fasten by screwing the tablet holder tight to the main frame.
7
Fixez maintenant la carte électronique principale (avec les plucs vers
l'intérieur) à l'aide des deux broches noires (incluses dans la livraison).
Now fasten the main electronic board (with the plucs facing inwards) using
the two black push pins (included with delivery).
Si vous avez un SlimBeam dont le numéro de série commence par
SB12074, ne suivez les étapes de ce manuel qu'à partir de l'étape
15.
If you have a SlimBeam with a serial number starting from SB12074,
please follow the steps in this manual only from step 15 onwards.

15
14
12
13
Fixez les support de cable fournis à la structure de la SlimBeam pour
ranger le câble.
Attach the included cable holders to the SlimBeam to store the cable.
Retournez le moniteur, sortez le câble et retournez-le pour pouvoir connecter
plus facilement la prise ronde à la tablette.
Turn the monitor back, pull out the cable and turn it around so that you can
connect the round plug to the tablet more easily.
10
Tournez le moniteur de manière à pouvoir atteindre l'avant du bras de la
tablette et tirez le câble par l'ouverture.
Turn the monitor around so that you can reach the front of the tablet arm
and pull the cable out through the opening.
11
Tirez le câble (à l'extérieur de la vis), tournez légèrement le moniteur vers
l'arrière et faites-le passer par l'ouverture entre le moniteur et la barre de
support de la tablette.
Pull the cable out (outside the screw), turn the monitor back a bit, and feed
it through the opening between the monitor and the tablet support bar.
180°

17
16
15
Insérez le câble, qui est déjà installé dans votre SlimBeam, avec la fiche ronde
en premier à travers l'ouverture du SlimBeam et le bras de la tablette.
Insert the cable, which is already installed in your SlimBeam, with the round
plug first through the opening of the SlimBeam and the tablet arm.
14
Branchez ensuite le câble de connexion à l'adaptateur d'alimentation. La
tablette démarre automatiquement dès que vous tirez sur le câble.
Then connect the connection cable to the power adapter. The tablet starts
automatically as soon as you pull the cable.
A partir de là, les étapes pour les numéros de série commençant
par SB12074 sont valables.
From here on the steps for serial number starting with SB12074 are
valid.
16
Tournez le moniteur de manière à pouvoir atteindre l'avant du bras de la
tablette et tirez le câble par l'ouvert
Turn the monitor around so that you can reach the front of the tablet arm
and pull the cable out through the opening.
180°

19
18
17
Tirez le câble (à l'extérieur de la vis), tournez légèrement le moniteur vers
l'arrière et faites-le passer par l'ouverture entre le moniteur et la barre de
support de la tablette.
Pull the cable out (outside the screw), turn the monitor back a bit, and feed
it through the opening between the monitor and the tablet support bar.
18
Retournez le moniteur et tirez le câble au maximum pour faciliter la
connexion du connecteur circulaire à la tablette.
Important : il est important de tirer le câble au maximum et de le ranger
dans le bras de la tablette. Le câble restant ne doit pas rester dans le
corpus, car il peut se prendre dans les poids qui s'y trouvent.
Turn the monitor back and pull the cable out as far as it will go to make it
easier to connect the circular connector to the tablet.
Important: It is important to pull the cable out as far as it will go and stow it
in the tablet arm. The leftover cable may not remain in the corpus, as it can
get caught in the weights there.

21
20
19
Fixez le porte-tablette en le vissant au cadre principal.
Fasten by screwing the tablet holder tight to the main frame.
20
Branchez ensuite le câble de connexion à l'adaptateur d'alimentation. La
tablette démarre automatiquement dès que vous tirez sur le câble.
Then connect the connection cable to the power adapter. The tablet starts
automatically as soon as you pull the cable.
Vidéo Tutoriel
To the video tutorial:
www.nohrd.com/videos

23
22
Plus d'informations sur l'application :
More info about the app:
www.nohrd.com/slimbeammonitor

WaterRower GmbH · Otto-Hahn-Straße 75 · 48529 Nordhorn · Germany
Phone +49 (0) 59 21 - 17 98 400 · Fax +49 (0) 59 21 - 17 98 411
[email protected] · www.nohrd.com
Other Nohrd Fitness Equipment manuals
Nohrd
Nohrd WallBars User manual

Nohrd
Nohrd WallBars User manual
Nohrd
Nohrd TriaTrainer User manual

Nohrd
Nohrd WallBars User manual
Nohrd
Nohrd SlimBeam User manual
Nohrd
Nohrd Eau-Me Board User manual

Nohrd
Nohrd SlimBeam User manual
Nohrd
Nohrd WaterWorkx Installation guide
Nohrd
Nohrd W-Workx Series User manual

Nohrd
Nohrd Sling User manual

Nohrd
Nohrd SlimBeam User manual

Nohrd
Nohrd CombiTrainer User manual

Nohrd
Nohrd Sling User manual
Nohrd
Nohrd Sprintbook User manual

Nohrd
Nohrd TriaTrainer User manual

Nohrd
Nohrd SlimBeam User manual
Nohrd
Nohrd WaterGrinder User manual

Nohrd
Nohrd SlimBeam User manual

Nohrd
Nohrd Wall Compact User manual
Nohrd
Nohrd SlimBeam User manual
