manuals.online logo
Brands
  1. Home
  2. •
  3. Brands
  4. •
  5. Nortel
  6. •
  7. Telephone System
  8. •
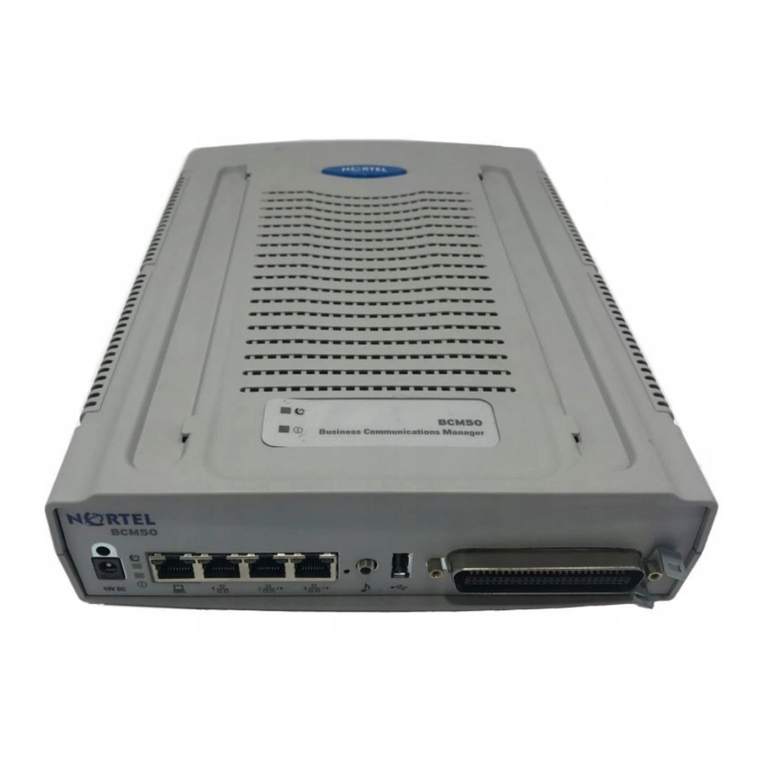
  9. Nortel BCM1000 User manual

Nortel BCM1000 User manual

BCM
Business Communications Manager
Document Status: Standard
Document Version: 03.02
Document Number: NN40010-301
Part Code: N0158289
Date: July 2007
Keycode Installation Guide
Copyright © 2006–2007 Nortel Networks, All Rights Reserved
The information in this document is subject to change without notice. The statements, configurations, technical data, and
recommendations in this document are believed to be accurate and reliable, but are presented without express or implied
warranty. Users must take full responsibility for their applications of any products specified in this document. The
information in this document is proprietary to Nortel Networks.
Trademarks
Nortel, the Nortel logo, and the Globemark are trademarks of Nortel Networks.
All other trademarks and registered trademarks are the property of their respective owners.
3
Keycode Installation Guide
Chapter 1
Obtaining a keycode
This guide tells an installer how to obtain and enable software keycodes.
You require a keycode to enable software features on the Business Communications Manager
(BCM) system. The keycode is a 24-digit code that authenticates the feature or bundle of features
you purchased for your BCM.
To obtain a keycode you require the following:
• feature authorization code for the BCM
•systemID
The authorization code is a six-digit code you receive for each of the features you purchase.
The authorization code is on the label affixed to the keycode information sheet.
The system ID is a unique number for your BCM. You can find the system ID:
• on the product packaging label
• in Element Manager
• using the telset-based administration interface
In the BCM Element Manager, the sequence number indicates how many times the keycode has
been modified. Each time the keycode is modified, the sequence number increases by 1. The key
type identifies the method of authentication for the keycode. For BCM, only type 2 keys are
supported.
Adding a keycode to your system involves:
1“Determining the BCM system ID” on page 4
2“Obtaining Web keycodes” on page 5
3“Entering keycodes on the BCM system” on page 9
Note: You receive one keycode whether you purchase one feature or a bundle of
features, but you receive an authorization code for each feature you purchase. For
example, if you have one feature, you receive one authorization code and one
keycode. If you purchase four features, you receive four authorization codes and
one keycode.
Note: For BCM 3.x releases, the BCM200, BCM400, and BCM1000 hardware
required a separate keycode for each feature and an authorization code for each
feature. For BCM 4.0, however, the BCM200, BCM400, and BCM1000 hardware
requires only one keycode for one feature or a bundle of features, but one
authorization code for each feature you purchase. BCM50 requires only one
keycode for one feature or a bundle of features, and one authorization code for
each feature you purchase.
4Chapter 1 Obtaining a keycode
NN40010-301NN40010-301
Determining the BCM system ID
Before you can obtain a software keycode, you must determine the system ID for your BCM
system. When you add a keycode, you must make sure the keycode file name matches the system
ID for which it is generated.
You can find the system ID in Element Manager and on the product packaging (see Figure 1).
Figure 1 Product label sample
To use Element Manager to find your system ID
1Log on to Element Manager and select the BCM system for which you want to find the system
identification number.
For information about how to log on to Element Manager, refer to your administration guide.
2On the Task Navigation Panel, select the Configuration tab.
The configuration folders appear.
3Select the System folder.
4Click Keycodes.
The system ID appears in the System ID field.
5Record the system ID.
Chapter 1 Obtaining a keycode 5
Keycode Installation Guide
Obtaining Web keycodes
To obtain your keycode file, access the Nortel Keycode Retrieval System Web page using your
Web browser or Element Manager.
You must be a registered user to access this system. To register, access the Nortel Keycode
Retrieval System Web page at: http://www.nortel.com/servsup/krs.
To obtain a keycode using a Web browser
1Access the Nortel Keycode Retrieval System at:
http://www.nortel.com/servsup/krs
2Select the login location that applies to you.
This is the location you want to use to access the Keycode Retrieval System.
3Select the product family option that applies to you.
For the BCM system, select Business Communications Manager or Business Communications
Manager 50.
4Enter your username and password.
Use the username and password from the KRS registration process.
5Click OK.
6Select the Keycode Retrieval System option that applies to you.
7Enter the system ID in the Enter System ID field.
For example: 000A0AA0A00
See “Determining the BCM system ID” on page 4.
8Click Continue.
9Enter the authorization code for the feature in the Auth Code field.
10 Click Add.
The system validates the authorization code and adds the feature to the feature list.
11 Repeat steps 7 and 8 until all of the authorization codes are added.
You can enter up to 100 authorization codes before you generate the keycode.
Note: To obtain your keycode file, you must have your system ID, your
authorization codes, and your user name and password from the Nortel Keycode
Retrieval System.
Note: Ensure the customer registration information is entered for this system.
Select Customer Registration in the main menu options to verify the customer
registration information is entered. Without proper customer registration, an error
appears when requesting keycode generation.
6Chapter 1 Obtaining a keycode
NN40010-301NN40010-301
12 After you have added all the authorization codes, click Continue.
A Web page appears with your system ID, the list of authorization codes, and a table of the
features.
At this point, if the customer registration information has not previously been entered for this
system, the Keycode Retrieval System displays an error and asks you to enter the information
by selecting Customer Registration in the main menu options.
13 Verify that the system ID, authorization codes, and feature list are correct.
aIf yes, click Generate Keycode.
bIf no, click Cancel to re-enter the authorization codes.
14 Click Generate to retrieve the keycode file.
The keycode file contains the 24-digit keycode, sequence number, and list of features and data
values.
15 Do one of the following:
• Download the keycode file to your computer. Click Download Keycode.
You can use this file to copy the keycode into your BCM system. Loading this keycode
file into your BCM is the fastest and easiest installation method. The default name of the
keycode file contains the system ID within the file name to help you keep track of the files
that belong to each system.
• Record the keycode. To do this, write down the information, print the file, or copy and
paste the information into another document.
To obtain a keycode using Element Manager
1Log on to Element Manager and select the BCM system you want to access.
For information about how to log on to Element Manager, refer to your administration guide.
2On the Task Navigation Panel, select the Configuration tab.
The configuration folders appear.
3Select the System folder and then select Keycodes.
The Keycodes panel appears.
4Click the Connect to Nortel Keycode Retrieval System button.
The Nortel Keycode Retrieval System (KRS) Web page launches.
Note: Nortel recommends that you download the keycode file to your computer.
If you download the keycode file rather than enter it manually, you will reduce the
chance of error.
Warning: Do not alter the name or the contents of the generated keycode file. If
you change the file, the keycode becomes invalid and the BCM rejects the file.
Chapter 1 Obtaining a keycode 7
Keycode Installation Guide
5Go to step 2 in the procedure “To obtain a keycode using a Web browser” on page 5.
8Chapter 1 Obtaining a keycode
NN40010-301NN40010-301
Try ’N Buy keycode
You can use the Try ’N Buy keycode to sample features on the BCM. You can evaluate the
Try ’N Buy features for 60 days from the date the keycode is generated.
The Try ’N Buy feature is not available when the expiry date is reached. You cannot extend the
expiry date or obtain another Try ’N Buy keycode for the feature on that BCM system. If you want
to continue using the feature, you must purchase the appropriate keycode and install it.
The new keycode file for the Try ’N Buy feature allows you to try all of the features installed on
the BCM. For example, if you have Unified Messaging installed on your BCM and you decide to
add a Try ’N Buy feature, the new keycode files include Unified Messaging and the Try ’N Buy
feature.
To obtain a Try ’N Buy keycode
1Access the Nortel KRS at:
http://www.nortel.com/servsup/krs
2Select the login location that applies to you.
This is the location from which you want to access the KRS.
3Select the product family option that applies to you.
For the BCM system, select Business Communications Manager or Business Communications
Manager 50.
4Enter your username and password.
Use the username and password from the KRS registration process.
5Click OK.
6In the Product Control section, click the Gen Try ’N Buy keycode link.
The Generate Try ’N Buy keycode Web page opens.
7Follow the instructions on the Generate Try ’N Buy Web page to generate the keycode.
Note: You are not required to order any products from Nortel to obtain a Try ’N
Buy keycode. You do not require an authorization code, but you must have the
BCM system ID.
Note: On the Generate Try ’N Buy keycode page, enter the system ID, For
example: 0000A0AA0A00.
Chapter 2 Entering keycodes on the BCM system 9
Keycode Installation Guide
Chapter 2
Entering keycodes on the BCM system
There are five ways to enter keycodes:
•“Loading a keycode using Element Manager” on page 9
•“Manually adding a keycode using Element Manager” on page 10
•“Adding a keycode using the telset administration interface” on page 11
•“Loading a keycode using the Startup Profile” on page 13
•“Loading a keycode using Network Configuration Manager” on page 13
Loading a keycode using Element Manager
If you retrieved a keycode file from the Keycode Retrieval System (KRS), use this method.
To load a keycode file
1Log on to Element Manager and select the BCM you want to access.
For information about how to log on to Element Manager, refer to your administration guide.
2On the Task Navigation Panel, select the Configuration tab.
The configuration folders appear.
3Select the System folder and click the Keycodes task.
The Keycodes panel appears.
4Click Load File.
The Open file dialog box appears.
5Browse to where you saved the keycode file you downloaded from KRS.
6Click Open.
The file uploads and the feature appears in the Keycodes list.
Note: You must have access privileges to enter a keycode on the BCM system.
Contact your system administrator for more information.
Warning: You must reboot your BCM system if a dialog box prompts you to do
so.
10 Chapter 2 Entering keycodes on the BCM system
NN40010-301NN40010-301
Manually adding a keycode using Element Manager
If you do not have a keycode file saved to your computer that uploads automatically, you can enter
the keycode file information manually. For example, you can enter keycode information that your
distributor faxes to you.
You need the information from the keycode file to complete this procedure. You must have the:
• sequence number
• list of features and data values
• expiry date of Try ‘N Buy feature (if applicable)
• 24-digit keycode
To manually add a keycode file
1Log on to Element Manager and select the BCM you want to access.
1For information about how to log on to Element Manager, refer to your administration guide.
2On the Task Navigation Panel, select the Configuration tab.
The Configuration folders appear.
3Select the System folder and then click the Keycodes task.
The Keycodes panel appears.
4Click Modify Feature Licences Table.
The Modify Features Licences Table window appears.
5In the Modify Features Licences Table box, verify that the sequence number in the
Sequence # box is identical to the sequence number in the new keycode file.
6In the Feature Licences table, select the feature you want to modify, and click the number in
the Data column.
7Modify the data feature value to ensure it is identical to the value in the new keycode file.

8Click a feature name to allow the data you entered to be accepted.
Note: The sequence number increases by one each time you obtain a new
keycode file. Element Manager should automatically increase the sequence
number.
Note: If the sequence numbers do not match, manually correct the number so it is
identical to the sequence number in the new keycode file.
Chapter 2 Entering keycodes on the BCM system 11
Keycode Installation Guide
9Change the data value for each new feature you have purchased. For example, if you purchase
four voice mail seats, the data value for VM seat must be 4.
10 In the Keycode field, enter the new 24-digit keycode.
11 Click OK.
The keycode uploads and the feature appears in the Keycodes List.
Adding a keycode using the telset administration interface
The telset administration interface allows authorized system installers to add, change, and delete
keycodes through a telset interface.
The telephone you use to add a keycode must be on your BCM system.
Note: If you are adding a Try ‘N Buy feature, you must also add the expiry date
for the feature. Select the Expiry date box of the feature and enter the expiry date
as year-month-day, for example: 2005-05-09.
Note: The feature status change in the keycodes panel can take up to one minute
to appear, depending on the system load and component response. You can refresh
the keycode window to see the feature status change, after adding the keycode
file, by selecting the refresh button in Element Manager.
The status can appear as:
Idle—the feature is not on the system.
Active—the feature is on the system and active.
Expired—the feature has expired and is not active.
Added—the feature has been added and the status will change to active.
Modified—the feature has been modified and the status will change to active.
Deleted—the feature has been removed and the status will change to idle.

Note: You must enter all of the features before you enter the keycode.
Note: If you enter a keycode for a Try ‘N Buy feature, after you enter the feature
data value, you are prompted for the expiry date. Enter the expiry date as

year-month-day. For example: 2005-05-09.
12 Chapter 2 Entering keycodes on the BCM system
NN40010-301NN40010-301
To add a keycode using telset administration interface
1.Press Feature 9*8.
2.Log on by following the voice prompts or the display button options.
3.Enter your password and press OK.
The Features Codes display.
4.Press OK to continue.
The system ID (SID) displays.
5.Press NEXT.
6.Enter your sequence ID, and press NEXT.
7.Press SHOW to scroll through the Features List and select the feature
you want.
8.In this example, the feature is VM Seats. Press CHNGE to enter the
feature data value.
The current feature data value displays.
9.Press CHNGE to enter the new feature data value. For example, if you
have two voicemail seats, enter 2.
10. Enter the new feature data value. Press OK to accept the data feature
value.
11.The new feature data value displays. Press BACK to return to the
feature.
12.Press NEXT to scroll through the feature list and select the feature you
want. Repeat steps above to add more features.
Add all features and feature data values before you enter the keycode.
13.After you add all of the features you have purchased, press BACK.
The Features List displays.
14. Press NEXT to continue to the Keycode display.
15.Press SHOW to enter the keycode.
The keycode is a 24-digit code. Enter the keycode in three 8-digit sets.
16.Press CHNGE to enter the first eight digits of the keycode.
17.Enter the first eight digits of the keycode and press OK.
User ID:_
RETRY OK
Password:_
RETRY OK
Features Codes
NEXT OK
SID:
NEXT BACK
Sequence ID
NEXT CHNGE BACK
Features List
NEXT SHOW BACK
VM Seat
NEXT CHNGE BACK
Data:_
CHNGE BACK
Data:2
CANCL RETRY OK
Data:2
CHNGE BACK
VM Seat
NEXT CHNGE BACK
VM Seat
NEXT CHNGE BACK
Features List
NEXT SHOW BACK
Keycode
NEXT SHOW BACK
1st:
NEXT CHNGE BACK
1st:
CANCL RETRY OK
Chapter 2 Entering keycodes on the BCM system 13
Keycode Installation Guide
Loading a keycode using Network Configuration Manager
Network Configuration Manager (NCM) is an optional management application that provides
centralized configuration and system management capabilities for a multi-BCM network. You can
use NCM to distribute keycode files to many BCM devices on a scheduled, handsfree basis, by
using the NCM Keycode Wizard. For more information, refer to NCM documentation.
Loading a keycode using the Startup Profile
You can use the Startup Profile to program the initial configuration parameters of the BCM. The
keycode file for the system is included in the Startup Profile. You do not require Element Manager
or the telset administration interface to enter a keycode using the Startup Profile.
The keycode file and the Startup Profile must both be on the USB storage device used to load the
Startup Profile onto the BCM. The Startup Profile must include a line that instructs the BCM to
look on the USB storage device for the keycode file specific to that BCM. Refer to your hardware
installation and configuration guide for this procedure.
18.Press CHNGE to enter the second set of eight digits of the keycode
19.Enter the second set of eight digits of the keycode, and press OK.
20.Press CHNGE to enter the third set of eight digits of the keycode, and
press OK.
21.Enter the third set of eight digits of the keycode, and press OK.
22.The first eight digits display. Press BACK to continue.
23.Keycode displays. Press BACK to continue.
24.Activate? displays. Press YES to activate the features.
25.Activated displays.
Warning: You must reboot your BCM system if a dialog box prompts you to do
so.
2nd:
NEXT CHNGE BACK
2nd:
CANCL RETRY OK
3rd:
NEXT CHNGE BACK
3rd:
CANCL RETRY OK
1st:12345678
NEXT CHNGE BACK
Keycode
NEXT SHOW BACK
Activate?
YES NO
Activated
14 Appendix A Keycode regeneration
NN40010-301NN40010-301
Appendix A
Keycode regeneration
Keycode regeneration (Product Support) is used when a failed system is being replaced with a new
system.
You must return the failed or old system (or MSC card) if you use the Keycode Regeneration
feature.
Regenerating keycodes
Use the following procedure if you have a failed system:
1Log into the Keycode Retrieval System (KRS).
2Select Keycode Regeneration from the sidebar.
3From the list, select the region where you are located.
4Select ACCEPT or CANCEL.
5Enter the failed system and replacement system ID information.
6Click Regeneration.
A summary of features to be regenerated appears.
7Click Continue or Cancel.
If you click Continue, all identified features will be regenerated and saved to the database.
The keycodes for the new (replacement) system appear. MSC card return instructions appear.
After the regeneration is complete, an automated e-mail is sent to the system administrator.
Keycode migration
Keycode migration (Platform migration) is used when you purchase an authorization code to
migrate keycodes from one platform (for example, BCM1000) to another platform (BCM200/
400).
You must return the failed or old system (or MSC card) if you migrate the keycodes.
Migrating keycodes
Use the following procedure if you are replacing a BCM1000, BCM200, or BCM400 system with
another BCM1000, BCM200, or BCM400 system:
1Log into the KRS.
2Select Migrate Keycodes (Platform migration).
3From the list, select the region where you are located.
Appendix A Keycode regeneration 15
Keycode Installation Guide
4Enter the application migration authorization code.
The KRS sets a flag indicating the authorization code has been used. This type of authorization
is used only as proof of purchase.
5Select ACCEPT or CANCEL.
6Enter the old system and new system ID information.
7Click Regeneration.
A summary of features to be regenerated appears.
8Select Continue or Cancel.
If you select Continue, all identified features will be regenerated and saved to the database.
The keycodes for the new (replacement) system appear. MSC card return instructions appear.
After regeneration is complete, an automated e-mail is sent to the system administration.
16 Appendix A Keycode regeneration
NN40010-301NN40010-301
Keycode information sheet
Figure 2 Authorization number label
Documenting your information
For future reference, you can enter your system ID number, keycode number, and feature names in
the following table.
BCM System ID Number ___ ___ ___ ___ ___ ___ ___ ___ ___ ___ ___ ___
Keycode number __ __ __ __ __ __ __ __ __ __ __ __ __ __ __ __ __ __ __ __ __ __ __ __
Feature name_________________________________

Other manuals for BCM1000

1

This manual suits for next models

3

Other Nortel Telephone System manuals

Nortel Norstar Modular ICS Parts list manual

Nortel

Nortel Norstar Modular ICS Parts list manual

Nortel BCM50 2.0 User manual

Nortel

Nortel BCM50 2.0 User manual

Nortel MER-1002-003 User manual

Nortel

Nortel MER-1002-003 User manual

Nortel Meridian 1 Option 11C User manual

Nortel

Nortel Meridian 1 Option 11C User manual

Nortel Meridian Meridian 1 Operating and installation instructions

Nortel

Nortel Meridian Meridian 1 Operating and installation instructions

Nortel BCM50 Operator's manual

Nortel

Nortel BCM50 Operator's manual

Nortel BCM50 Operator's manual

Nortel

Nortel BCM50 Operator's manual

Nortel BCM50 User manual

Nortel

Nortel BCM50 User manual

Nortel Norstar SMDR6 User manual

Nortel

Nortel Norstar SMDR6 User manual

Nortel FastRad User manual

Nortel

Nortel FastRad User manual

Nortel BCM50 Product manual

Nortel

Nortel BCM50 Product manual

Nortel DMS-100 Series User manual

Nortel

Nortel DMS-100 Series User manual

Nortel BCM50 User manual

Nortel

Nortel BCM50 User manual

Nortel BM450 User manual

Nortel

Nortel BM450 User manual

Nortel Meridian Meridian 1 Instruction manual

Nortel

Nortel Meridian Meridian 1 Instruction manual

Nortel Norstar Modular ICS Parts list manual

Nortel

Nortel Norstar Modular ICS Parts list manual

Nortel Meridian 1 Option 11C User manual

Nortel

Nortel Meridian 1 Option 11C User manual

Nortel BCM50 Installation guide

Nortel

Nortel BCM50 Installation guide

Nortel Business Communications Manager 2.5 Operating instructions

Nortel

Nortel Business Communications Manager 2.5 Operating instructions

Nortel DMS-100 Series User manual

Nortel

Nortel DMS-100 Series User manual

Nortel DMS-10 User manual

Nortel

Nortel DMS-10 User manual

Nortel BCM50 2.0 Installation guide

Nortel

Nortel BCM50 2.0 Installation guide

Nortel BCM1000 Product manual

Nortel

Nortel BCM1000 Product manual

Nortel BCM50 User manual

Nortel

Nortel BCM50 User manual

Popular Telephone System manuals by other brands

Ericsson BUSINESSPHONE 6 manual

Ericsson

Ericsson BUSINESSPHONE 6 manual

AirCell AXXESS quick guide

AirCell

AirCell AXXESS quick guide

Siemens HiPath 4000 operating instructions

Siemens

Siemens HiPath 4000 operating instructions

Panasonic KX-TD816AL user manual

Panasonic

Panasonic KX-TD816AL user manual

AT&T SPIRIT 2448 Expansion Unit installation instructions

AT&T

AT&T SPIRIT 2448 Expansion Unit installation instructions

Norvado SmartLink quick guide

Norvado

Norvado SmartLink quick guide

Intelbras Micro PABX Conecta manual

Intelbras

Intelbras Micro PABX Conecta manual

Mircom TX3 Series user guide

Mircom

Mircom TX3 Series user guide

Visonic AMBER SELECT quick start guide

Visonic

Visonic AMBER SELECT quick start guide

Panasonic DBS 824 manual

Panasonic

Panasonic DBS 824 manual

Panasonic KX-TD500CE user manual

Panasonic

Panasonic KX-TD500CE user manual

Panasonic KX-TD816NZ user manual

Panasonic

Panasonic KX-TD816NZ user manual

Vodavi Starplus Triad-S System programming manual

Vodavi

Vodavi Starplus Triad-S System programming manual

NEC NEAX 2000IVS2 Retrofit Guide

NEC

NEC NEAX 2000IVS2 Retrofit Guide

Samsung OfficeServ 7200 General description

Samsung

Samsung OfficeServ 7200 General description

PABX CDX-CP832 user manual

PABX

PABX CDX-CP832 user manual

Advent Instruments AI-5120 user guide

Advent Instruments

Advent Instruments AI-5120 user guide

HYBREX GDS-600 Installation

HYBREX

HYBREX GDS-600 Installation

manuals.online logo
manuals.online logoBrands
  • About & Mission
  • Contact us
  • Privacy Policy
  • Terms and Conditions

Copyright 2025 Manuals.Online. All Rights Reserved.