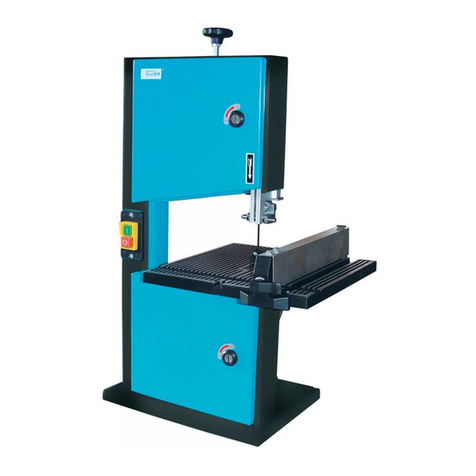
Gude GBS 200 User manual

GBS 200
#83810
©Güde GmbH & Co. KG - Birkichstrasse 6 - D-74549 Wolpertshausen - Deutschland
Deutsch D 4
Originalbetriebsanleitung
BANDSÄGE
English GB 8
Original Operating Instructions
BAND SAW
Français F 12
Mode d’emploi original
SCIE À RUBAN
Čeština CZ 16
Originální návod k obsluze
PÁSOVÁ PILA
Slovenčina SK 20
Originálny návod na obsluhu
PÁSOVÁ PÍLA
Nederlands NL 24
Originele gebruiksaanwijzing
BANDZAAG
Italiano I 28
Originale del Manuale d’Uso
SEGA A NASTRO
Magyar H 32
Eredeti használati utasítás
SZALAGFŰRÉSZ
Slovenščina SLO 36
Originalna navodila za uporabo
TRAČNA ŽAGA
Hrvatski HR 40
Originalne upute za korištenje
TRAČNA PILA
Bošnjački BIH 44
Originalna uputstva za upotrebu
TRAČNA PILA
RomânăRO 48
Mod de operare - versiune originală
FERĂSTRĂU CU BANDĂ
Български BG 52
Оригинално упътване за обслужване
БАНЦИГ

1
2
3
2

4
A
B
5
3 mm 6
A
7
A
CB
3

D
Lesen Sie bitte diese Bedienungsanleitung sorgfältig durch, bevor Sie das Gerät in Betrieb nehmen.
A.V. 2 Nachdrucke, auch auszugsweise, bedürfen der Genehmigung. Technische Änderungen vorbehalten.
Abbildungen beispielhaft! Dies ist eine original Bedienungsanleitung.
Kennzeichnung
Produktsicherheit:
Produkt ist mit den
einschlägigen Normen und
Richtlinien der Europäischen
Gemeinschaft konform
TÜV Rheinland
Geprüfte Sicherheit
Gebote:
Gebrauchsanweisung
beachten
Augen- und Gehörschutz
benutzen!
Schutzhandschuhe benutzen!
Verbot:
Warnung vor
Handverletzungen
Vor Nässe und Feuchtigkeit
schützen
Am Kabel ziehen verboten
Warnung:
Warnung vor gefährlicher
elektrischer Spannung
Sicherheitsabstand
einhalten
Warnung vor umherfliegenden
Teilen
Umweltschutz:
Abfall nicht in die Umwelt
sondern fachgerecht
entsorgen.
Verpackungsmaterial aus
Pappe kann an den dafür
vorgesehen Recycling-
Stellen abgegeben werden.
Schadhafte und/oder zu
entsorgende elektrische oder
elektronische Geräte müssen
an den dafür vorgesehen
Recycling-Stellen abgegeben
werden.
Vor Nässe schützen
Achtung Zerbrechlich
Packungsorientierung Oben
Interseroh
Technische Daten:
Anschluss~Frequenz Motorleistung
Umdrehungen pro Minute Durchschnitt
Sägebandrollen
Sägebandlänge Tischgröße
Gewicht
Lieferumfang
Überprüfen Sie bitte, ob folgende Teile im Karton
beigepackt sind:
Abb. 1:
- 1 Maschinentisch
- 1 Gehrungsanschlag
- 1 Parallelanschlag
- 1 Standardsägeblatt
- 1 Tischeinsatz
- 1 Inbusschlüssel
-1 Maulschlüssel
- 4 Schrauben mit Sicherungsringen
- 1 Senkkopfschraube mit Mutter und Unterlegscheibe
- 1 Bedienungsanleitung
Nach Möglichkeit sollten Sie die Bandsäge auf einem
massiven Arbeitsplatz oder Werkbank
befestigen. Verwenden Sie dazu die in dem Maschinenfuß
befindlichen Bohrungen.
Überprüfen Sie die Leistungsdaten Ihres Stromnetzes mit
den auf der Maschine angegebenen
Leistungsdaten. Die Spannung und Frequenz sollten
übereinstimmen, jedoch nicht 240 V/60 Hz
überschreiten.
4

Gewährleistung
Die Gewährleistung erstreckt sich ausschließlich auf
Mängel, die auf Material- oder Herstellungsfehler
zurückzuführen sind. Bei Geltendmachung eines Mangels
im Sinne der Gewährleistung ist der original Kaufbeleg mit
Verkaufdatum beizufügen.
Von der Gewährleistung ausgeschlossen sind
unsachgemäße Anwendungen, wie z. B. Überlastung des
Gerätes, Gewaltanwendung, Beschädigungen durch
Fremdeinwirkung oder durch Fremdkörper.
Nichtbeachtung der Gebrauchs- und Aufbauanleitung und
normaler Verschleiß sind ebenfalls von der
Gewährleistung ausgeschlossen.
Technische Daten
Motorleistung: 250 Watt S2 15 min
Anschluss: 230 V/50 Hz
Sägebandgeschwindigkeit: 15,7 m/sek.
Sägebandlänge: 1400 mm
Sägebandrollen: 205 mm
Max. Durchlasshöhe: 80 mm
Max. Durchlassbreite: 190 mm
Tischgröße: 300 x 300 mm
Gewicht: ca.20 kg
Allgemeine Sicherheitshinweise
Die Bedienungsanleitung muss vor der ersten
Anwendung des Gerätes ganz durchgelesen werden.
Falls über den Anschluss und die Bedienung des
Gerätes Zweifel entstehen sollten, wenden Sie sich an
den Hersteller (Service-Abteilung).
UM EINEN HOHEN GRAD AN SICHERHEIT ZU
GARANTIEREN, BEACHTEN SIE AUFMERKSAM
FOLGENDE HINWEISE:
ACHTUNG!
•Halten Sie den Arbeitsbereich sauber und
aufgeräumt. Unordentliche Arbeitsplätze und
Werkbänke erhöhen die Gefahr von Unfällen und
Verletzungen.
•Achten Sie auf die Umgebungsbedingungen,
unter denen Sie arbeiten. Verwenden Sie keine
Elektrowerkzeuge und Werkzeugmaschinen in
feuchter oder nasser Umgebung. Sorgen Sie für
ausreichend Beleuchtung. Setzen Sie elektrische
Werkzeuge nicht dem Regen oder hoher
Luftfeuchtigkeit aus. Schalten Sie elektrische
Werkzeuge nicht in einer Umgebung mit leicht
entflammbaren Flüssigkeiten oder Gasen ein.
•Lassen Sie keine Fremden an die Maschine.
Besucher und Zuschauer, vor allem Kinder sowie
kranke und gebrechliche Personen, sollten vom
Arbeitsplatz fern gehalten werden.
•Sorgen Sie für die sichere Aufbewahrung von
Werkzeugen. Werkzeuge, die nicht gebraucht
werden, müssen an einem trockenen, möglichst hoch
gelegenen Platz aufbewahrt oder unzugänglich
verwahrt werden.
•Verwenden Sie für jede Arbeit immer das richtige
Werkzeug. Verwenden Sie z.B. keine
Kleinwerkzeuge oder Zubehör für Arbeiten, die
eigentlich mit schwerem Werkzeug verrichtet werden
müssen. Verwenden Sie Werkzeuge ausschließlich
für die Zwecke, für die sie gebaut wurden. Überlasten
Sie das Gerät nicht!
•Achten Sie auf das Stromkabel. Ziehen Sie nicht
am Kabel. Fassen Sie zum Abziehen nur den
Stecker. Halten Sie das Kabel fern von
Wärmequellen, Öl und scharfen Kanten.
•Verhindern Sie unbeabsichtigtes Einschalten.
Achten Sie immer darauf, dass das Werkzeug am
Geräteschalter ausgeschaltet ist, bevor Sie den
Netzstecker in die Steckdose stecken.
•Verwenden Sie im Außenbereich spezielle
Verlängerungskabel. Für den Außeneinsatz
benötigen Sie spezielle Verlängerungskabel, die
dafür geeignet und entsprechend markiert sind.
•Bleiben sie immer aufmerksam. Achten Sie auf
das, was Sie tun. Setzen Sie Ihren gesunden
Menschenverstand ein. Verwenden Sie keine
Elektrowerkzeuge, wenn Sie müde sind.
•Achten Sie auf beschädigte Teile. Untersuchen Sie
das Werkzeug, bevor Sie es benutzen. Sind einzelne
Teile beschädigt? Fragen Sie sich bei leichten
Beschädigungen ernsthaft, ob das Werkzeug
trotzdem einwandfrei und sicher funktionieren wird.
•Beugen Sie Stromschlägen vor. Vermeiden Sie
jeden körperlichen Kontakt mit geerdeten Objekten,
z.B. Wasserleitungen, Heizkörpern, Kochern und
Kühlschrankgehäusen.
•Verwenden Sie nur zugelassene Teile. Verwenden
Sie bei Wartung und Reparatur nur identische
Ersatzteile. Wenden Sie sich für Ersatzteile an ein
zugelassenes Service Center.
•Warnung! Die Verwendung von Zubehör und
Anbauteilen, die nicht ausdrücklich in dieser
Bedienungsanleitung empfohlen werden, kann die
Gefährdung von Personen und Objekten nach sich
ziehen.
•Überdehnen Sie nicht Ihren Standbereich
Vermeiden Sie abnormale Körperhaltung. Sorgen Sie
für sicheren Stand, und halten Sie jederzeit das
Gleichgewicht.
•Lassen Sie keine Werkzeugschlüssel stecken
Überprüfen Sie vor dem Einschalten, dass die
Schlüssel und Einstellwerkzeuge entfernt sind.
Gerätespezifische Sicherheitshinweise
Machen Sie sich mit der Maschine unter zu
Hilfemaßnahme der Bedienungsanleitung vertraut
•Schutzverkleidungen dürfen nicht entfernt werden.
•Vor dem Einschalten der Maschine,
Einstellwerkzeuge entfernen
•Arbeitsbereich sauber halten
•Kinder und Zuschauer fern halten
•Maschine nicht überlasten
•Richtiges und einwandfreies Werkzeug verwenden
•Tragen Sie geeignete enganliegende Kleidung
•Schutzbrille tragen
•Werkstück gut festhalten
•Lassen Sie niemals die Maschine unbeaufsichtigt
•Nach Einnahme von Drogen, Alkohol, oder
Medikamenten darf die Maschine nicht betrieben
werden.
Zusätzliche Sicherheitsanweisungen für die
Benutzung von Bandsägen:
•Bandsägeblattführung so einstellen, daß dieser
maximal 3 mm über der höchsten Kante des
Werkstückes steht
•Finger und Hände vom Bandsägeblatt fern halten
•Verwenden Sie Hilfsmittel zum Nachschieben des
Werkstückes
•Schalten Sie die Maschine ab, bevor Sie
Sägeabschnitte vom Tisch entfernen
•Einstellungen und Einrichtungen nur an stromloser
Maschine vornehmen
•Die Schutzabdeckungen der Bandsäge dürfen nicht
entfernt werden
•Alle Einstellelemente müssen gegen ein
unbeabsichtigtes Verstellen gesichert sein
•Das Werkstück sicher festhalten und mit
gleichmäßigem Anpressdruck arbeiten
•Verwenden Sie nur zugelassene Bandsägeblätter
5

Während des Gebrauchs des Gerätes kann der
Lärmpegel 80 dB(A) erreicht werden, deshalb muss
ein Gehörschutz getragen werden.
Verhalten im Notfall
Für einen eventuell eintretenden Unfall sollte immer ein
Verbandskasten nach DIN 13164 am Arbeitsplatz
griffbereit vorhanden sein. Dem Verbandskasten
entnommenes Material ist sofort wieder aufzufüllen.
Wenn Sie Hilfe anfordern, machen Sie folgende Angaben:
Ort des Unfalls
Art des Unfalls
Zahl der Verletzten
Art der Verletzungen
Leiten Sie die der Verletzung entsprechend notwendigen
Erste- Hilfe-Maßnahmen ein und fordern Sie schnellst
möglich qualifizierte ärztliche Hilfe an.
Bewahren Sie den Verletzten vor weiteren Schädigungen
und stellen Sie diesen ruhig.
Entsorgung
Die Entsorgungshinweise ergeben sich aus den
Piktogrammen die auf dem Gerät bzw. der Verpackung
aufgebracht sind. Eine Beschreibung der einzelnen
Bedeutungen finden Sie im Kapitel „Kennzeichnung“.
Entsorgung der Transportverpackung
Die Verpackung schützt das Gerät vor Transportschäden.
Die Verpackungsmaterialien sind in der Regel nach
umweltverträglichen und entsorgungstechnischen
Gesichtspunkten ausgewählt und deshalb recycelbar.
Das Rückführen der Verpackung in den Materialkreislauf
spart Rohstoffe und verringert das Abfallaufkommen.
Verpackungsteile (z.B. Folien, Styropor) können für Kinder
gefährlich sein. Es besteht Erstickungsgefahr!
Bewahren Sie Verpackungsteile außerhalb der Reichweite
von Kindern auf und entsorgen Sie sie so schnell wie
möglich.
Anforderungen an den Bediener
Der Bediener muss vor Gebrauch des Gerätes
aufmerksam die Bedienungsanleitung gelesen haben.
Qualifikation
Außer einer ausführlichen Einweisung durch eine
sachkundige Person ist keine spezielle Qualifikation für
den Gebrauch des Gerätes notwendig.
Mindestalter
Das Gerät darf nur von Personen betrieben werden, die
das 18. Lebensjahr vollendet haben und mit dem Umgang
und der Wirkungsweise vertraut sind. Jugendlichen
zwischen 16 und 18 Jahren ist das Arbeiten nur unter
Aufsicht eines Erwachsenen gestattet.
Eine Ausnahme stellt die Benutzung als Jugendlicher dar,
wenn die Benutzung im Zuge einer Berufsausbildung zur
Erreichung der Fertigkeit unter Aufsicht eines Ausbilders
erfolgt.
Schulung
Die Benutzung des Gerätes bedarf lediglich einer
entsprechenden Unterweisung. Eine spezielle Schulung ist
nicht notwendig.
Transport und Lagerung
•Bei längerer Lagerung muss das Gerät gründlich
gereinigt und unzugänglich für unbefugte Personen
aufbewahrt werden.
•Sichern Sie die Maschine vor jedem Transport gegen
Umfallen.
Montage (Abb. 2+3+6)
Tischmontage:
Befestigen Sie den Tisch mit den vier im Lieferumfang
enthaltenen Schrauben und Sicherheitsringen am Sockel
(Abb. 6).
Sichern Sie den Schlitz im Tisch wie in Abbildung 2
gezeigt, mit der Senkkopfschraube, Mutter und
Unterlegscheibe.
Führung justieren:
Mit dem Inbusschlüssel wird die Führung eingestellt (Abb.
3).
Bandsägeblatt (Abb. 7)
Betreiben Sie die Maschine nur an einem
Stromanschluss mit Fehlerstromschalter (FI) 30mA.
Einlegen und Spannen des Sägebandes
1. Schalten Sie die Maschine aus und entfernen Sie den
Netzstecker.
2. Gehäusedeckel öffnen.
3. Spannschraube (Abb. 7/A) durch Drehen gegen den
Uhrzeigersinn entspannen.
4. Band einlegen und leicht spannen (durch Drehen der
Spannschraube (Abb. 7/A) im Uhrzeigersinn).
5. Gehäusedeckel schließen.
6. Netzstecker anschließen und Maschine einschalten.
Spannschraube im Uhrzeigersinn drehen, so dass die
Maschine sauber läuft.
7. Gegebenenfalls die seitliche.
Neigungsschraube (Abb. 7/B) nachjustieren (Band
sollte im mittleren Drittel der Sägebandrolle laufen).
Spurlaufeinstellung
Es ist sicherzustellen, dass das Sägeblatt mittig auf den
Umlenkrädern läuft, um einen zuverlässigen, sauberen
Schnitt zu erhalten.
Achten Sie bei der Einstellung darauf, dass die
Maschine ausgeschaltet und der Netzstecker gezogen
ist.
Knopf zur Einstellung des Sägeblattspurlaufes befindet
sich auf der Rückseite des Gerätes in Höhe der
Befestigung des oberen Laufrades. Mit diesem Knopf wird
zum einen die Blattspannung zum anderen auch der
Spurlauf eingestellt. Die Einstellung des Blattspurlaufes ist
mit geöffnetem Seitendeckel vorzunehmen. Drehen Sie die
Umlenkrollen von Hand durch um den Spurlauf zu
kontrollieren. Beachten Sie, dass die Laufrichtung des
Sägeblattes von oben nach unten verläuft.
Einstellen der Sägeblattführung (Abb. 4)
Die obere und untere Sägeblattführung einstellen
nachdem die Blattspannung eingestellt und geprüft
worden ist. Die Führungsstifte (Abb. 4/A), links und rechts,
müssen so eingestellt werden, dass rechts und links vom
Sägeblatt ein Spalt von maximal 0,1 mm verbleibt.
Justieren Sie das Stützlager (Abb. 4/B) so, dass der
Sägeblattrücken am Lageraußenring läuft. Das Stützlager
hat die Aufgabe das Sägeblatt bei großer Schnitttiefe zu
unterstützen und einen einwandfreien Schnitt zu
gewährleisten.
6

Oberer Blattschutz (Abb. 5)
Der Blattschutz ist so einzustellen, dass zwischen
Werkstück und Blattschutz maximal ein Abstand von 3 mm
verbleibt (Abb. 5). Im Allgemeinen ist der Abstand so
gering wie möglich zu halten.
Wartung
Untersuchen Sie die Maschine regelmäßig auf
Abnutzungserscheinungen und erneuern Sie rechtzeitig
verschlissene Teile.
Schmierung
Schmieren Sie die Lagerstellen der Umlenkrollen
periodisch mit einem hochwertigen Fett, spätestens
jedoch nach etwa 25-30 Betriebsstunden.
Nach Beendigung der Arbeit, die Maschine mit einem
Staubsauger vom Sägestaub und Spänen
befreien. Dazu die Seitentür des Maschinenrahmens
öffnen. Übersehen Sie bitte nicht die Lüftungsschlitze des
Motors zu reinigen.
Service
Sie haben technische Fragen? Eine Reklamation?
Benötigen Ersatzteile oder eine Bedienungsanleitung?
Auf unserer Homepage www.guede.com im Bereich
Service helfen wir Ihnen schnell und unbürokratisch
weiter. Bitte helfen Sie uns Ihnen zu helfen. Um Ihr Gerät
im Reklamationsfall identifizieren zu können benötigen wir
die Seriennummer sowie Artikelnummer und Baujahr. Alle
diese Daten finden Sie auf dem Typenschild. Um diese
Daten stets zur Hand zu haben, tragen Sie diese bitte
unten ein.
Seriennummer:
Artikelnummer:
Baujahr:
Tel.: +49 (0) 79 04 / 700-360
Fax: +49 (0) 79 04 / 700-51999
EG-KONFORMITÄTSERKLÄRUNG
Hiermit erklären wir
Güde GmbH & Co. KG
Birkichstrasse 6
74549 Wolpertshausen
Deutschland,
dass die nachfolgend bezeichneten Geräte aufgrund ihrer
Konzipierung und Bauart sowie in den von uns in Verkehr
gebrachten Ausführungen den einschlägigen,
grundlegenden Sicherheits- und
Gesundheitsanforderungen der EG-Richtlinien
entsprechen.
Bei einer nicht mit uns abgestimmten Änderung
der Geräte verliert diese Erklärung ihre Gültigkeit.
Bezeichnung der Geräte:
BANDSÄGE GBS 200 „Profi“
Artikel-Nr:
#83810
Einschlägige EG-Richtlinien:
2006/95/EG
2004/108/ EG
Angewandte harmonisierte Normen:
EN 60825 - 1 : 2007
EN 61029 - 1 : 2009
EN 61029 - 2 - 5 : 2002
EN 55014 - 1 : 2006
EN 55014 - 2 : 1997 + A1
EN 61000 - 3 - 2 : 2006
EN 61000 - 3 - 3 : 1995 + A1 + A2
Datum/Herstellerunterschrift: 06.09.2011
Angaben zum Unterzeichner: Geschäftsführer,
Hr. Arnold
Technische Dokumentation: J. Bürkle FBL; QS
________________
________________
________________
________________
________________
7

GB Please read carefully the following Operating Instructions before putting the machine into operation.
A.V. 2 Any reprints, even partial, are subject to approval. Technical changes reserved.
Pictures just for illustration purposes! This document is the original Operating Instructions.
Marking
Product safety:
Product corresponds to
appropriate EU standards
TÜV Rheinland
Proven safety
Commands:
Keep the Operating
Instructions
Use protective glasses and
headphones!
Protective gloves to be used!
Prohibitions:
Warning against hand injury Protect against wet and
moisture
No pulling the cable
Warning:
Warning against dangerous
voltage Keep safe distance
Warning against flying items
Environment protection:
Dispose waste professionally
so as not to harm the
environment.
Packing cardboard material
may be delivered to
collection centres for
recycling.
Any defective and/or disposed
electric or electronic
appliances must be delivered
to appropriate collection
centres.
Protect against moisture
Caution - fragile
This side up
Interseroh
Technical specifications:
Connection Engine output
Engine speed Bandsaw blade pulley
diameter
Bandsaw blade length Table size
Weight
Supply includes
Please check whether the following parts are included:
- 1 machine table
- 1 mitre stop
- 1 parallel stop
- 1 standard bandsaw blade
- 1 table insert
- 1 Allen key
- 1 flat key
- 4 lock ring screws
- 1 countersunk head and washer screw
- 1 Operating Instructions
The band saw should be mounted to a massive work
station or work-table if possible. For that, use holes in the
machine legs.
Check the parameters of your electrical network with those
given on the machine. The voltage and frequency should
be identical, not exceeding 240 V/60 Hz.
Warranty
The warranty exclusively applies to material or
manufacturing defects. The original proof of purchase with
the purchase date must be submitted when lodging a claim
in the warranty period.
The warranty does not include any unauthorised use, e.g.
machine overloading, violent use, damage by a third party
or foreign item. The failure to follow the Operating
Instructions and assembly instructions and common wear
and tear are not covered by the warranty, either.
8

Technical specifications:
Engine output: 250 W S2 15 min
Connection: 230V~50Hz
Bandsaw blade speed: 15.7 m per second
Bandsaw blade length: 1,400 mm
Bandsaw blade pulleys: 205 mm
Max. clear height: 80 mm
Max. clear width: 190 mm
Table size: 300 x 300 mm
Weight: app. 20 kg
General safety instructions
The Operating Instructions must be read
thoroughly before using the machine for the first time.
If there are any doubts regarding the machine
connection, please contact the manufacturer (service
department).
TO ENSURE HIGH SAFETY LEVEL, PLEASE FOLLOW
CAREFULLY THESE INSTRUCTIONS:
CAUTION!
•Keep the place of your work clean and tidy. Mess
in the place of your work and work-table increases
the risk of accidents and injuries.
•Consider carefully the conditions of the
environment you are working in. Do not use any
electric tools and machine tools in a wet and moist
environment. Provide adequate lighting. Do not
expose any electric tools to rain or high air humidity.
Do not switch electric tools on near highly flammable
liquids and gases.
•Do not let other persons get near the machine.
Keep all visitors and bystanders, especially children
and ill or weak persons, in a safe distance from the
place of your work.
•Make sure tools are kept safe. Keep any tools you
are not using in a dry place, elevated if possible, or
lock them to prevent other persons accessing them.
•Use the right machine for your work. Do not use
e.g. small tools or accessory equipment for works that
actually need to be performed by big tools. Use the
machine only for purposes for which it has been
designed. Do not overload your machine!
•Look out for the feeder cable. Do not pull the cable.
Do not use the cable to unplug the machine. Keep the
cable out of reach of heat sources, oil and sharp
edges.
•Avoid any unintentional switching-on. Before
plugging the machine, make always sure the machine
is switched off.
•Special extension cables to be used outdoors. To
use the machine outdoors, special extension cables
appropriate for that purpose and adequately labelled
must be used.
•Be cautious at all times. Pay attention to what you
are doing. Use common sense when working. Do not
use any electric tools when you are tired.
•Watch for any worn parts. Inspect the machine
before using it. Are any parts damaged? In case of
slight damage, consider seriously whether the
machine can work perfectly and safely.
•Prevent electric shock. Avoid any physical contact
with grounded items, e.g. water pipes, heating units,
cookers and fridges.
•Approved parts to be used only. Identical spare
parts to be used only for any servicing or repair. For
that purpose, contact an authorised service centre.
•Caution! Using accessory equipment and extensions
not explicitly recommended in these Operating
Instructions may pose a risk to persons and property.
•Do not incline from the place of your work
Avoid any abnormal body posture. Provide safe
posture and keep balance at all times.
•Do not leave any adjusting wrench in the machine
Before starting the machine, check whether
adjustment wrenches and tools have been removed.
Machine-specific safety instructions
Learn your machine using the Operating Instructions
•Protection covers must not be removed
•Before starting the machine, remove any adjustment
wrenches and tools
•Keep the place of your work clean
•Keep children and bystanders in a safe distance from
the place of your work
•Do not overload your machine
•Use the right machine with no defects
•Wear appropriate closefitting clothes
•Wear protective glasses
•Hold the cut material properly
•Never leave the machine unattended
•The machine must not be used after you have
consumed any drugs, alcohol or pharmaceuticals.
Additional safety instructions for using band saws:
•Adjust the bandsaw blade guide so that it protrudes
not more than 3 mm above the highest edge of the
cut material
•Keep your fingers and hands in a safe distance from
the bandsaw blade
•To move the cut material, use appropriate accessory
•Switch the machine off first and then remove any
cuttings off the table
•Setting and adjusting to be performed only when the
machine is unplugged
•Protection covers of the band saw must not be
removed
•All adjusting elements must be secured against any
unintentional adjustment change
•Hold the cut material safely and work with balanced
pressure
•Approved bandsaw blades to be used only.
Noise may reach a level of 80 dB(A) when the machine
is being operated, therefore you should wear earmuffs.
Behaviour in case of emergency
First aid kit must always be available in the place of your
work in case of accident in accordance with DIN 13164.
Material taken out of the first aid kit needs to be
supplemented right away.
If help is needed, please provide the following details:
Place of accident
Accident nature
Number of injured persons
Injury type
Provide necessary first aid treatment corresponding to the
injury nature and seek qualified medical help as soon as
possible. Protect the injured person from other injuries and
calm him/her down.
Disposal
The disposal instructions are based on icons placed on the
machine or on its package. The description of the
meanings can be found in the “Marking“ section.
Transport container disposal
The container protects the machine against damage during
transport. Container materials are usually selected based
on their environment friendliness and disposal method and
can therefore be recycled. Returning the container back to
circulation saves raw materials and reduces waste
disposal costs. Parts of the container (e.g. foils, styropor)
can be dangerous to children. Risk of suffocation!
Keep parts of the container out of reach of children and
dispose them as quickly as possible.
9

Operator requirements
The operator must carefully read the Operating
Instructions before using the machine.
Qualification
No special qualification is necessary to use the machine
apart from detailed instructions by an expert.
Minimum age
The machine may only be operated by persons over 18
years of age who have been instructed in handling and
operating the machine. Young people between 16 and 18
years of age may only work with the machine when
supervised by an adult.
An exception includes youngsters operating the machine
within their professional education to achieve necessary
skills under trainer's supervision.
Training
Using the machine only requires appropriate instructions
by an expert or reading the Operating Instructions. No
special training necessary.
Transport and storing
•The machine must be cleaned thoroughly and kept
out of reach of unauthorised persons when stored for
a long time.
•Secure the machine against turnover every time it is
to be transported.
Installation (pic. 2+3+6)
Table installation:
Fasten the table to the base (pic. 6) using four screws and
retaining rings included in the supply.
Secure the slot in the table as shown in picture 2, using
the countersunk head screw, nut and washer.
Guide calibration:
Use the Allen key to adjust the guide (pic. 3).
Bandsaw blade (pic. 7)
Machine to be used only with connection
including safety switch against stray current (FI)
30mA.
Bandsaw blade fitting and tightening
1. Switch the machine off and unplug it.
2. Open the cover of the machine.
3. Loosen the tightening screw (pic. 7/A) by turning it
counter-clockwise.
4. Fit the bandsaw blade and tighten slightly (by turning
the tightening bolt clockwise (pic. 7/A)).
5. Close the cover of the machine.
6. Plug the machine and switch it on. Turn the tightening
screw clockwise until the machine is running
smoothly.
7. If appropriate, adjust the side screw (pic. 7/B) to
adjust the inclination (the bandsaw blade should go
through the central third of the bandsaw blade pulley).
Bandsaw blade trace adjustment
It is necessary to make sure the bandsaw blade goes
through the centre of the guide wheels to achieve reliable
and clear cutting.
When adjusting the machine, make sure it is switched
off and unplugged.
The blade trace adjustment button is at the back of the
machine, matching the upper wheel mounting height. The
bandsaw blade tightening and trace are adjusted with this
button. The blade trace must be adjusted with the side
cover being opened up. Turn the guide wheels with your
hand to check the trace. Make sure the bandsaw blade
trace goes down from top.
Bandsaw blade guide adjustment (pic. 4)
Adjust the upper and bottom blade guide after adjusting
and checking the blade tightening. The guide pins (pic.
4/A), on the left and right, must be adjusted in a way there
is a gap of not more than 0.1 mm on the right and left from
the bandsaw blade. Adjust the thrust bearing (pic. 4/B) in
a way the rear part of the bandsaw blade goes through the
outer ring of the bearing.
The purpose of the thrust bearing is to support the
bandsaw blade when cutting too deep and provide cutting
with no defects.
Upper blade protection cover (pic. 5)
The blade protection cover must be adjusted in a way so
as there is a gap of not more than 3 mm between the cut
material and the protection cover (pic. 5). Generally, the
gap needs to be kept as small as possible.
Servicing
At regular intervals, check the machine for any sign of
wear and replace any worn parts in time if necessary.
Lubrication
At periodic intervals, lubricate the guide wheel bearings
with high-quality grease, however, not later than after app.
25-30 hours of operation.
After finishing your work, use a vacuum cleaner to vacuum
any dust and cuttings off the machine. To this effect, open
the side door of the machine frame. Please do not forget to
clean the engine ventilation slots.
Maintenance
Do you have any technical questions? A claim? Do you
need any spare parts or the Operating Instructions?
You will be helped quickly and without any bureaucracy at
our webpage www.guede.com, Maintenance section.
Please help us be able to assist you. To identify your
machine when claimed, we need to know its serial No.,
order No. and year of production. All these details can be
found on the type label. Enter the details below for future
reference.
Serial No.
Order No.
Year of production:
Tel.: +49 (0) 79 04 / 700-360
Fax: +49 (0) 79 04 / 700-51999
E-Mail: [email protected]
10

EU DECLARATION OF CONFORMITY
We
Güde GmbH & Co. KG
Birkichstrasse 6
D74549 Wolpertshausen
Germany,
herewith declare that the following machine complies with
the appropriate basic safety and healthy requirements of
the EU Directives based on its design and type, as brought
into circulation by us.
In case of alternation of the machine, not agreed
upon by us, this declaration will lose its validity.
Machine description:
GBS 200 “Profi“ band saw
Article No.
#83810
Applicable EU Directives:
2006/95 EG
2004/108 EG
Applicable harmonised standards:
EN 60825/A3:- 1 2007
EN 61029/A3:- 1 2009
EN 61029- 2/A3:- 5 2002
EN 55014/A3:- 1 2006
EN 55014/A3:- 2 1997 + A1
EN 61000- 2/A3:- 3 2006
EN 61000- 3/A3:- 3 1995 + A1
Date/authorised signature: 06.09.2011
Title of signatory: Managing Director
Mr Arnold
Technical documentation: J. Bürkle FBL; QS
Comments
11

F Avant de mettre l’appareil en marche, veuillez lire attentivement le mode d’emploi.
A.V. 2 Toute réimpression, même partielle, nécessite une autorisation. Modifications techniques réservées.
Images d‘illustration! Ceci est un mode d’emploi original.
Symboles
Sécurité du produit:
Produit répond aux normes
correspondantes de la CE
TÜV Rheinland
Sécurité contrôlée
Consignes:
Respectez le mode d‘emploi Utilisez des lunettes de
protection et un casque!
Portez des gants de protection
Interdiction:
Avertissement – danger de
blessure des mains
Protégez de l’humidité et de
la pluie
Défense de tirer sur le câble
Avertissements:
Avertissement – tension
électrique dangereuse
Respectez une distance de
sécurité
Avertissement – projection
d’objets
Protection de l’environnement:
Liquidez les déchets de
manière à ne pas nuire à
l’environnement.
Déposez l’emballage en
carton au dépôt pour
recyclage.
Déposez les appareils
électriques ou électroniques
défectueux et/ou destinés à
liquidation au centre de
ramassage correspondant.
Protégez de l‘humidité
Attention - fragile
Sens de pose
Interseroh
Caractéristiques techniques:
Fiche Puissance du moteur
Tours du moteur Diamètre des poulies de la
lame de scie
Longueur de la lame de scie Dimensions de la table
Poids
Contenu du colis
Contrôlez l’intégralité et l’existence des pièces suivantes :
- 1 table de la machine
- 1 butée pour la coupe à onglet
- 1 butée parallèle
- 1 lame de scie standard
- 1 pièce d’insertion de la table
- 1 clé hexagonale
- 1 clé plate
- 4 vis avec bagues de sécurité
- 1 vis avec tête à noyer et rondelle
- 1 mode d‘emploi
Selon les possibilités, fixez la scie à ruban à un établi
massif ou à une table de travail. Utilisez pour cela les
orifices situés dans le montant de la machine.
Comparez les paramètres de votre réseau électrique avec
les paramètres indiqués sur la machine. La tension et la
fréquence devraient être identiques et ne devraient pas
dépasser 240 V/60 Hz.
Garantie
La garantie s’applique exclusivement sur des défauts
provoqués par un défaut de matériel ou un défaut de
fabrication. Lors de la réclamation pendant la durée de la
garantie, il est nécessaire de joindre de certificat d’achat
comportant la date d’achat.
La garantie n’inclut pas l’utilisation incompétente telle que
– surcharge de la machine, utilisation de la force,
endommagement par une tierce personne ou un objet
étranger. Le non respect du mode d’emploi et du mode de
montage ainsi que l’usure normale de la machine ne sont
pas non plus inclus dans la garantie.
12

Caractéristiques techniques:
Puissance du moteur: 250 W S2 15 min
Fiche: 230V~50Hz
Vitesse de la lame de scie: 15,7 m/s
Longueur de la lame de scie: 1400 mm
Poulies de la lame de scie: 205 mm
Hauteur de passage maximale: 80 mm
Largeur de passage maximale: 190 mm
Dimensions de la table: 300 x 300 mm
Poids: environ 20 kg
Consignes générales de sécurité
Avant la première utilisation, il est nécessaire de lire
entièrement le mode d’emploi. Si vous avez des doutes en
ce qui concerne le branchement ou la manipulation,
contactez le fabricant (service après-vente).
AFIN D’ASSURER UN GRAND DEGRÉ DE SÉCURITÉ,
RESPECTEZ LES CONSIGNES SUIVANTES :
ATTENTION !
•Maintenez votre lieu de travail en ordre. Le
désordre sur le lieu de travail et l’établi augmente des
risques d’accidents et de blessures.
•Prenez en considération les conditions
atmosphériques. N’utilisez pas les outils et les
appareils électriques dans un milieu humide ou
mouillé. Assurez un éclairage suffisant. N’exposez
pas les outils électriques à la pluie ou à un taux
d’humidité élevé. Ne mettez pas les outils électriques
en marche à proximité des liquides ou gaz hautement
inflammables.
•Empêchez l’accès à l’appareil aux personnes
étrangères. Éloignez les visiteurs, les spectateurs,
en particulier les enfants, les personnes malades ou
faibles, de votre lieu de travail.
•Assurez un rangement sûr des outils. Rangez les
outils que vous n’utilisez pas à un endroit sec, si
possible en hauteur ou à un endroit inaccessible.
•Utilisez pour chaque travail l’outil adéquat.
N’utilisez pas, par exemple, de petits outils ou
accessoires pour des travaux destinés aux outils plus
grands. Utilisez les outils uniquement pour le but pour
lequel ils ont été conçus. Ne surchargez pas la
machine !
•Surveillez le câble d’alimentation. Ne tirez pas sur
le câble. Ne l’utilisez pas pour retirer la fiche de la
prise. Éloignez-le des sources de chaleur, de l’huile
et des bords tranchants.
•Évitez la mise en marche involontaire de
l’appareil. Avant de brancher la fiche à la prise,
vérifiez que l’interrupteur de l’appareil se trouve en
position « arrêt“
•Pour les travaux à l’extérieur, utilisez uniquement
des câbles de rallongement spéciaux. Pour les
travaux extérieurs, utilisez des câbles de
rallongement spéciaux adéquats marqués de façon
correspondante.
•Soyez attentifs. Faites attention à ce que vous
faites. Utilisez le bon sens. N’utilisez pas les
appareils électriques si vous êtes fatigués.
•Faites attention aux pièces endommagées.
Vérifiez l’appareil avant de l’utiliser. Certaines pièces
sont endommagées ? En cas d’un endommagement
léger, réfléchissez si l’appareil peut fonctionner
sûrement et parfaitement.
•Prévention de l'électrocution. Empêchez le contact
du corps avec des objets mis à la terre, tels que
robinets, corps de chauffe, réchauds et réfrigérateurs.
•Utilisez uniquement des pièces approuvées.
Utilisez lors de l’entretien et les réparations
uniquement des pièces détachées identiques. Pour
cela, contactez le service de maintenance agréé.
•Avertissement ! L’utilisation des accessoires et des
pièces d’extension non recommandés explicitement
dans cette notice peut représenter un danger pour
des personnes et des objets.
•Ne vous penchez pas de votre lieu de travail
Évitez des postures anormales du corps. Veillez à
une posture sûre et maintenez l’équilibre.
•Ne laissez pas les clés de réglage dans la
machine
Avant de mettre la machine en marche, contrôlez si
vous avez retiré toutes les clés et outils de réglage de
la machine.
Consignes de sécurité spécifiques pour l’appareil
Familiarisez-vous avec la machine à l’aide du mode
d’emploi
•Il est interdit de retirer les capots de protection.
•Avant de mettre la machine en marche, retirez toutes
les clés et outils de réglage de la machine.
•Maintenez votre lieu de travail propre.
•Éloignez les enfants et les spectateurs de votre lieu
de travail.
•Ne surchargez pas la machine.
•Utilisez des outils adéquats et parfaits.
•Portez une tenue adhérente adéquate.
•Portez des lunettes de protection.
•Maintenez bien le matériel à couper.
•Ne laissez jamais la machine sans surveillance.
•Il est interdit d’utiliser la machine après avoir
consommé des drogues, de l’alcool ou des
médicaments.
Consignes de sécurité supplémentaires relatives à
l’utilisation des scies à ruban:
•Réglez le guide de la lame de scie de façon à ce qu’il
dépasse au maximum 3 mm au-dessus du bord le
plus élevé du matériel scié
•Éloignez les doigts et les mains de la lame de scie.
•Utilisez les accessoires pour pousser le matériel à
scier.
•Arrêtez d’abord la machine et seulement après
supprimez les copeaux de la table.
•Réalisez les ajustements et le réglage uniquement
lorsque la machine n’est pas sous tension.
•Il est interdit de retirer les capots de protection de la
scie à ruban.
•Tous les éléments de réglage doivent être protégés
contre une modification involontaire du réglage.
•Maintenez le matériel à scier et travaillez avec une
pression uniforme.
•Utilisez uniquement des lames de scie approuvées.
Pendant l’utilisation de la machine, le niveau sonore
peut atteindre 80 dB(A), par conséquent, utilisez une
protection auditive.
Conduite en cas d’urgence
Pour des raisons de risque d’accident, le lieu de travail doit
être équipé d’une armoire à pharmacie selon DIN 13164. Il
est nécessaire de compléter immédiatement le matériel
pris dans l’armoire à pharmacie.
Si vous appelez les secours, fournissez les
renseignements suivants:
Lieu d‘accident
Type d‘accident
Nombre de blessés
Type de blessure
Effectuez les premiers gestes de secours et appelez
rapidement les premiers secours.
Protégez le blessé d’autres blessures et calmez-le.
13

Liquidation
Les consignes de liquidation résultent des pictogrammes
indiqués sur l’appareil ou sur l’emballage. La description
des significations individuelles se trouve dans le chapitre
« Indications sur l’appareil ».
Liquidation de l’emballage de transport
L’emballage protège l’appareil de l’endommagement lors
du transport. En général, le matériel d’emballage est choisi
de façon à ce qu’il réponde aux règles de protection de
l’environnement et de liquidation des déchets, par
conséquent, il peut être recyclé. La remise de l’emballage
dans le circuit de matières permet d’économiser des
matières premières et de réduire les déchets. Des parties
de l’emballage (telles que films, styropore) peuvent être
dangereux pour les enfants. Danger d’étouffement!
Rangez les parties de l’emballage hors de portée des
enfants et liquidez-les le plus rapidement possible.
Opérateur
L’opérateur doit lire attentivement la notice avant d’utiliser
l’appareil.
Qualification
Mis à part l’instruction détaillée par un spécialiste, aucune
autre qualification spécifique n’est requise.
Âge minimal
L’appareil peut être utilisé uniquement par des personnes
de plus de 18 ans qui ont été familiarisées avec sa
manipulation et son fonctionnement. Les adolescents entre
16 et 18 ans peuvent utiliser la machine uniquement sous
la surveillance d’un adulte.
Exception faite des adolescents manipulant l’appareil dans
le cadre de l’enseignement professionnel sous la
surveillance du formateur.
Formation
L’utilisation de l’appareil nécessite uniquement l’instruction
par un spécialiste, éventuellement par la notice. Une
formation spéciale n’est pas nécessaire.
Transport et stockage
•En cas de stockage prolongé, il est nécessaire de
nettoyer soigneusement la machine et de la ranger
hors de portée des personnes non autorisées.
•Avant tout transport, protégez la machine contre le
basculement.
Montage (fig. 2+3+6)
Montage de la table :
Fixez la table au bâti à l’aide de quatre vis et bagues de
sécurité fournies avec la machine (fig. 6).
Bloquez la fente dans la table selon l‘image 2 avec la vis à
tête noyée, l’écrou et la rondelle.
Calibrage du guide :
Le guide peut être réglé à l’aide de la clé hexagonale (fig.
3).
Lame de scie (fig. 7)
Utilisez la machine uniquement sur une fiche
équipée d’un disjoncteur différentiel (FI) 30mA.
Insertion et tension de la lame de scie
1. Arrêtez la machine et retirez la fiche.
2. Ouvrez le capot de la machine.
3. Desserrez la vis de tension (fig. 7/A) en la tournant
dans le sens contraire des aiguilles d’une montre.
4. Insérez la lame et tendez-la légèrement (en tournant
la vis de tension (fig. 7/A) dans le sens des aiguilles
d’une montre).
5. Fermez le capot de la machine.
6. Insérez la fiche et mettez la machine en marche.
Tournez la vis de serrage dans le sens des aiguilles
d’une montre jusqu’à ce que la machine ne tourne
sans à-coups.
7. Réglez éventuellement la vis latéral (fig. 7/B) pour le
réglage de l’inclinaison (la lame devrait passez par le
tiers central de la poulie de la lame de scie).
Réglage du pas de la lame de scie
Veillez à ce que la lame de scie passe par le centre des
roues de guidage, de façon à obtenir une coupe fiable et
propre.
Lors du réglage de la machine, veillez à ce qu’elle soit
arrêtée et la fiche retirée.
Le bouton de réglage du pas de la lame de scie se trouve
à l’arrière de la machine au niveau de la fixation de la roue
dentée supérieure. Ce bouton permet de régler la tension
de la lame ainsi que son pas. Le réglage du pas de la lame
doit être réalisé avec le capot latéral découvert. Tournez
les roues de guidage à la main de façon à contrôler le pas.
Veillez à ce que le pas de la lame de scie passe du haut
vers le bas.
Réglage du guide de la lame de scie (fig. 4)
Réglez les guides supérieur et inférieur de la lame de scie
après le réglage et le contrôle de la tension de la lame.
Les chevilles de guidage (fig. 4/A) situées à gauche et à
droite doivent être réglées de façon à ce que l’espace à
gauche et à droite de la lame de scie soit au maximum de
0,1 mm. Réglez le roulement d’appui (fig. 4/B) de façon à
ce que la partie arrière de la lame de scie passe par
l’anneau intérieur du roulement.
Le rôle du palier de butée est de soutenir la lame de scie
en cas d’une grande profondeur de coupe et d’assurer une
coupe parfaite.
Capot de protection supérieur de la lame (fig. 5)
Le capot de protection de la lame doit être réglé de façon à
garder une distance maximale de 3 mm entre le matériel à
couper et le capot de protection (fig. 5). En général, il
convient de garder la distance la plus petite possible.
Entretien
Contrôlez régulièrement la machine du point de vue de
signes d’usure et remplacez à temps les pièces usées.
Graissage
Graissez périodiquement les paliers des roues de guidage
à l’aide d’une graisse de qualité, et au plus tard après
environ 25-30 h de fonctionnement.
À la fin du travail, aspirer la poussière et les copeaux de la
machine à l’aide d’un aspirateur. Pour cela, ouvrez la porte
latérale du bâti de la machine. N’oubliez pas de nettoyer
les fentes d’aération du moteur.
14

Service
Vous avez des questions techniques ? Une réclamation
? Vous avez besoin de pièces détachées ou d’un mode
d’emploi ?
Nous vous aiderons rapidement et sans bureaucratie
inutile par l’intermédiaire de nos pages Web
www.guede.com dans la rubrique Service. Aidez-nous
pour que nous puissions vous aider. Pour identifier votre
appareil en cas de réclamation, nous avons besoins du
numéro de série, numéro de produit et l’année de
fabrication. Toutes ces informations se trouvent sur la
plaque signalétique. Pour avoir ces informations toujours à
porté de main, veuillez les inscrire ici :
Numéro de série:
N° de commande:
Année de fabrication:
Tél.: +49 (0) 79 04 / 700-360
Fax: +49 (0) 79 04 / 700-51999
E-mail: support@ts.guede.com
Déclaration de conformité CE
Nous,
Güde GmbH & Co. KG
Birkichstrasse 6
D-74549 Wolpertshausen
Allemagne
Déclarons par la présente que les appareils indiqués
ci-dessous répondent du point de vue de leur
conception, construction ainsi que de leur réalisation
mise sur le marché, aux exigences fondamentales
correspondantes des directives de la CE en matière de
sécurité et d’hygiène. Cette déclaration perd sa
validité après une modification de l’appareil sans
notre approbation préalable.
Description de l’appareil:
SCIE À RUBAN GBS 200 "Profi“
N° de commande :
#83810
Directives applicables de la CE :
2006/95 EG
2004/108 EG
Normes harmonisées applicables :
EN 60825/A3:- 1 2007
EN 61029/A3:- 1 2009
EN 61029- 2/A3:- 5 2002
EN 55014/A3:- 1 2006
EN 55014/A3:- 2 1997 + A1
EN 61000- 2/A3:- 3 2006
EN 61000- 3/A3:- 3 1995 + A1
Date/signature du fabricant: 06.09.2011
Titre du Signataire: gérant,
Monsieur Arnold
Documents techniques: J. Bürkle FBL; QS
Notes
15

CZ
Dříve než uvedete přístroj do provozu, pročtěte si prosím pečlivětento návod k obsluze.
A.V. 2 Dotisky, a to i částečné, vyžadují schválení. Technické změny vyhrazeny.
Ilustrační obrázky! Toto je originální návod k obsluze.
Označení
Bezpečnost produktu:
Produkt odpovídá
příslušným normám EU
TÜV Rheinland
Prověřená bezpečnost
Příkazy:
Dodržujte návod k použití Používejte ochranné brýle a
sluchátka!
Používejte ochranné rukavice!
Zákaz:
Výstraha před poraněním
rukou
Chraňte před mokrem a
vlhkostí
Zákaz tahání za kabel
Výstraha:
Výstraha před nebezpečným
elektrickým napětím
Dodržujte bezpečnostní
odstup
Výstraha před poletujícími
předměty
Ochrana životního prostředí:
Odpad zlikvidujte odbornětak,
abyste neškodili životnímu
prostředí.
Obalový materiál z lepenky
lze odevzdat za účelem
recyklace do sběrny.
Vadné a/nebo likvidované
elektrické či elektronické
přístroje musí být odevzdány
do příslušných sběren.
Chraňte před vlhkem
Pozor - křehké
Obal musí směřovat nahoru
Interseroh
Technické údaje:
Napětí~frekvence Výkon motoru
Otáčky za minutu Průměr kladek pilového
pásu
Délka pilového pásu Velikost stolu
Hmotnost
Objem dodávky
Zkontrolujte prosím, zda jsou do krabice přibaleny tyto
součásti:
Obr. 1:
- 1 stůl stroje
- 1 doraz pro řezání na pokos
- 1 paralelní doraz
- 1 standardní pilový pás
- 1 vložka stolu
- 1 imbusový klíč
- 1 plochý klíč
- 4 šrouby s pojistnými kroužky
- 1 šroub se zápustnou hlavou a podložkou
- 1 návod k obsluze
Podle možností byste měli pásovou pilu připevnit k
masivnímu pracovišti nebo pracovnímu stolu. K tomu
použijte otvory, které se nacházejí v noze stroje.
Parametry Vaší elektrické sítěporovnejte s parametry
uvedenými na stroji. Napětí a frekvence by měly být
shodné, avšak ne vyšší než
240 V/60 Hz.
Záruka
Záruka se vztahuje výlučněna vady materiálu nebo
výrobní vady. Při uplatňování reklamace v záruční době
přiložte originální doklad o koupi s datem koupě.
Ze záruky je vyloučeno neodborné použití jako např.
přetížení přístroje, násilné použití, poškození cizí osobou
nebo cizím předmětem. Nedodržení návodu k použití a
návodu k montáži a normální opotřebení je rovněž
vyloučeno ze záruky.
16

Technické údaje:
Výkon motoru: 250 W S2 15 min
Přípojka: 230V~50Hz
Rychlost pilového pásu: 15,7 m/s
Délka pilového pásu: 1400 mm
Kladky pilového pásu: 205 mm
Max. průchodná výška: 80 mm
Max. průchodná šířka: 190 mm
Velikost stolu: 300 x 300 mm
Hmotnost: cca 20 kg
Všeobecné bezpečnostní pokyny
Návod k obsluze je třeba před prvním použitím
přístroje kompletněpřečíst. Pokud nastanou o
zapojení a obsluze přístroje pochybnosti, obraťte se
na výrobce (servisní oddělení).
ABY BYL ZARUČEN VYSOKÝ STUPEŇBEZPEČNOSTI,
DODRŽUJTE POZORNĚNÁSLEDUJÍCÍ POKYNY:
POZOR!
•Pracovištěudržujte čisté a uklizené. Nepořádek na
pracovišti a pracovním stole zvyšuje nebezpečí
nehod a úrazů.
•Dávejte pozor na podmínky prostředí, ve kterých
pracujete. Elektrické nářadí a obráběcí stroje
nepoužívejte ve vlhkém a mokrém prostředí. Zajistěte
dostatečné osvětlení. Elektrické nářadí nevystavujte
dešti či vysoké vlhkosti vzduchu. Elektrické nářadí
nezapínejte v blízkosti vysoce hořlavých kapalin či
plynů.
•Ke stroji nepouštějte cizí osoby. Návštěvy a
přihlížející, především děti a nemocné či slabé osoby
udržujte v bezpečné vzdálenosti od svého pracoviště.
•Zajistěte bezpečné uložení nástrojů.Stroje, které
nepoužíváte, uložte na suché místo pokud možno do
výšky nebo je zamkněte tak, aby nebyly přístupné
jiným osobám.
•Pro každou práci používejte vždy správný přístroj.
Nepoužívejte např. malé přístroje nebo příslušenství
pro práce, které je vlastnětřeba vykonat velkými
přístroji. Přístroje používejte výhradněpro účely, pro
něž byly zkonstruovány. Přístroj nepřetěžujte!
•Dávejte pozor na napájecí kabel. Netahejte za
kabel. Nepoužívejte jej k vytažení zástrčky. Držte
kabel mimo dosah tepelných zdrojů, oleje a ostrých
hran.
•Vyhněte se neúmyslnému zapnutí. Dříve než dáte
zástrčku do zásuvky, dbejte vždy na to, aby byl
přístroj vypnut na vypínači přístroje.
•Venku používejte jen speciální prodlužovací
kabely. Pro venkovní použití potřebujete speciální
prodlužovací kabely, které jsou pro tento účel vhodné
a odpovídajícím způsobem označené.
•Buďte vždy pozorní. Dávejte pozor na to, co
děláte. Při práci se řiďte zdravým rozumem.
Elektrické nářadí nepoužívejte, jste-li unaveni.
•Dávejte pozor na poškozené součásti. Přístroj před
použitím prohlédněte. Jsou některé součásti
poškozené? V případělehkého poškození se vážně
zamyslete nad tím, zda přístroj přesto bude fungovat
bezvadněa bezpečně.
•Předcházejte úderům elektrickým proudem.
Zabraňte tělesnému kontaktu s uzemněnými objekty,
např. vodovody, topná tělesa, vařiče a chladničky.
•Používejte pouze schválené součásti. Při údržběa
opravách používejte pouze shodné náhradní díly. Za
tím účelem se obraťte na autorizované servisní
středisko.
•Výstraha! Používání příslušenství a nástavců, které
nejsou výslovnědoporučeny v tomto návodu k
obsluze, může vést k ohrožení osob a objektů.
•Nenaklánějte se ze svého stanoviště
Vyhněte se abnormálnímu držení těla. Zajistěte si
bezpečný postoj a udržujte neustále rovnováhu.
•Nenechávejte v přístroji seřizovací klíče
Před zapnutím zkontrolujte, zda jste z přístroje
odstranili seřizovací klíče a nástroje.
Bezpečnostní pokyny specifické pro přístroj
Pomocí návodu k obsluze se seznamte se strojem
•Ochranné kryty nesmí být snímány.
•Před zapnutím odstraňte z přístroje seřizovací klíče a
nástroje
•Pracovištěudržujte čisté
•Děti a přihlížející udržujte v bezpečné vzdálenosti od
svého pracoviště
•Stroj nepřetěžujte
•Používejte správný a bezvadný přístroj
•Noste vhodný přiléhavý oděv
•Noste ochranné brýle
•Řezaný materiál dobře přidržujte
•Stroj nenechávejte nikdy bez dozoru
•Po požití drog, alkoholu či lékůnesmíte stroj
používat.
Dodatečné bezpečnostní pokyny pro používání
pásových pil:
•Vodítko pilového pásu seřiďte tak, aby vyčnívalo
maximálně3 mm nad nejvyšší hranou
řezaného materiálu
•Prsty a ruce udržujte v bezpečné vzdálenosti od
pilového pásu
•K posouvání řezaného materiálu používejte pomůcky
•Stroj nejprve vypněte a teprve pak odstraňte ze stolu
odřezky
•Nastavení a seřizování provádějte pouze tehdy, není-
li stroj pod proudem
•Ochranné kryty pásové pily nesmí být snímány
•Všechny stavěcí prvky je nutno zajistit proti
neúmyslné změněnastavení
•Řezaný materiál bezpečněpřidržujte a pracujte s
rovnoměrným přítlakem
•Používejte pouze schválené pilové pásy
Během používání přístroje může hlučnost dosahovat
80 dB(A), tzn. noste chrániče uší.
Chování v případěnouze
Kvůli případné nehoděmusí být na pracovišti vždy po ruce
lékárnička první pomoci dle DIN 13164. Materiál, který si z
lékárničky vezmete, je třeba ihned doplnit.
Pokud požadujete pomoc, uveďte tyto údaje:
Místo nehody
Druh nehody
Počet zraněných
Druh zranění
Zaveďte úrazu odpovídající potřebnou první pomoc a
vyzvěte co možná nejrychleji kvalifikovanou lékařskou
pomoc.
Chraňte zraněného před dalšími úrazy a uklidněte jej.
Likvidace
Pokyny pro likvidaci vyplývají z piktogramůumístěných na
přístroji resp. obalu. Popis jednotlivých významůnajdete v
kapitole „Označení“.
Likvidace přepravního obalu
Obal chrání přístroj před poškozením při přepravě.
Obalové materiály jsou zvoleny zpravidla podle jejich
šetrnosti vůči životnímu prostředí a způsobu likvidace a lze
je proto recyklovat. Vrácení obalu do oběhu materiálu šetří
suroviny a snižuje náklady na likvidaci odpadů. Části obalu
(např. fólie, styropor) mohou být nebezpečné pro děti.
Existuje riziko udušení! Části obalu uschovejte mimo
dosah dětí a co nejrychleji zlikvidujte.
17

Požadavky na obsluhu
Obsluha si musí před použitím přístroje pozorněpřečíst
návod k obsluze.
Kvalifikace
Kroměpodrobného poučení odborníkem není pro
používání přístroje nutná žádná speciální kvalifikace.
Minimální věk
Na přístroji smí pracovat jen osoby, jež dosáhly 18 let a
byly seznámeny s jeho obsluhou a funkcí. Mladistvým
mezi 16. a 18. rokem je práce povolena jen pod dohledem
dospělé osoby.
Výjimku představuje využití mladistvých, pokud se toto
děje během profesního vzdělávání za účelem dosažení
dovednosti pod dohledem školitele.
Školení
Používání přístroje vyžaduje pouze odpovídající poučení
odborníkem resp. návodem k obsluze. Speciální školení
není nutné.
Přeprava a skladování
•Při delším skladování musí být přístroj důkladně
vyčištěn a uložen mimo dosah nepovolaných osob.
•Před každou přepravou zajistěte stroj proti
překlopení.
Montáž (obr. 2+3+6)
Montáž stolu:
Stůl připevněte čtyřmi šrouby a pojistnými kroužky, které
jsou součástí dodávky, k podstavci (obr. 6).
Štěrbinu ve stole zajistěte podle obrázku 2 šroubem se
zápustnou hlavou, maticí a podložkou.
Kalibrace vodítka:
Imbusovým klíčem se nastaví vodítko (obr. 3).
Pilový pás (obr. 7)
Stroj používejte jen na přípojce s ochranným
vypínačem proti chybovému proudu (FI) 30mA.
Vložení a napnutí pilového pásu
1. Stroj vypněte a vytáhněte zástrčku.
2. Otevřete kryt stroje.
3. Upínací šroub (obr. 7/A) povolte otáčením proti
směru hodinových ručiček.
4. Pás vložte a lehce napněte (otáčením upínacího
šroubu (obr. 7/A) ve směru hodinových ručiček).
5. Kryt stroje zavřete.
6. Zastrčte zástrčku a stroj zapněte. Upínací šroub
otáčejte ve směru hodinových ručiček tak dlouho,
dokud stroj čistěneběží.
7. Případněseřiďte boční šroub pro nastavení sklonu
(obr. 7/B) (pás by měl procházet střední třetinou
kladky pilového pásu).
Nastavení stopy pilového pásu
Je třeba zajistit, aby pilový pás procházel prostředkem
vodicích kol tak, aby bylo dosaženo spolehlivého a čistého
řezu.
Při nastavení dbejte na to, aby byl stroj vypnutý a
zástrčka vytažená.
Knoflík pro nastavení stopy pilového pásu se nachází na
zadní straněpřístroje ve výšce připevnění vrchního
oběžného kola. Tímto knoflíkem se za prvé nastaví
napnutí pásu a za druhé i jeho stopa. Nastavení stopy
pásu je třeba provést při odkrytém bočním víku. Vodicí
kola protočte rukou tak, abyste zkontrolovali stopu. Dbejte
na to, že stopa pilového pásu prochází seshora dolů.
Nastavení vodítka pilového pásu (obr. 4)
Vrchní a spodní vodítko pilového pásu nastavte poté, co
jste nastavili a zkontrolovali napnutí pásu. Vodicí kolíky
(obr. 4/A), vlevo a vpravo, musí být nastaveny tak, aby
vpravo a vlevo od pilového pásu zůstala mezera
maximálně0,1 mm. Opěrné ložisko (obr. 4/B) seřiďte tak,
aby zadní část pilového pásu procházela vnějším
kroužkem ložiska. Opěrné ložisko má za úkol podpírat
pilový pás při velké hloubce řezu a zaručit bezvadný řez
Vrchní ochranný kryt pásu (obr. 5)
Ochranný kryt pásu je třeba nastavit tak, aby mezi
řezaným materiálem a ochranným krytem zůstala
maximálněvzdálenost 3 mm (obr. 5). Obecněje třeba
vzdálenost udržovat co možná nejmenší.
Údržba
Stroj pravidelněprohlédněte z hlediska příznaků
opotřebení a vyměňte včas opotřebené součásti.
Mazání
Ložiska vodicích kol mažte periodicky kvalitním tukem,
nejpozději však po cca 25-30 hodinách provozu.
Po ukončení práce vysajte ze stroje vysavačem prach a
třísky. Pro tento účel otevřete boční dvířka rámu stroje.
Nezapomeňte, prosím, vyčistit větrací štěrbiny motoru.
Servis
Máte technické otázky? Reklamaci? Potřebujete
náhradní díly nebo návod k obsluze?
Na naší domovské stránce www.guede.com Vám v oddílu
Servis pomůžeme rychle a nebyrokraticky. Prosím
pomožte nám pomoci Vám. Aby bylo možné Váš přístroj v
případěreklamace identifikovat, potřebujeme sériové číslo,
objednací číslo a rok výroby. Všechny tyto údaje najdete
na typovém štítku. Abyste měli tyto údaje vždy po ruce,
zapište si je prosím dole.
Sériové číslo:
Objednací číslo:
Rok výroby:
Tel.: +49 (0) 79 04 / 700-360
Fax: +49 (0) 79 04 / 700-51999
E-Mail: [email protected]
18

PROHLÁŠENÍ O SHODĚEU
Tímto prohlašujeme my
Güde GmbH & Co. KG
Birkichstrasse 6
D74549 Wolpertshausen
Německo,
že koncepce a konstrukce níže uvedených přístrojův
provedeních, která uvádíme do oběhu, odpovídá
příslušným základním požadavkům směrnic EU na
bezpečnost a hygienu.
V případězměny přístroje, která s námi nebyla
konzultována, ztrácí toto prohlášení svou platnost.
Označení přístrojů:
PÁSOVÁ PILA GBS 200 „Profi“
Obj. č.:
#83810
Příslušné směrnice EU:
2006/95 EG
2004/108 EG
Použité harmonizované normy:
EN 60825/A3:- 1 2007
EN 61029/A3:- 1 2009
EN 61029- 2/A3:- 5 2002
EN 55014/A3:- 1 2006
EN 55014/A3:- 2 1997 + A1
EN 61000- 2/A3:- 3 2006
EN 61000- 3/A3:- 3 1995 + A1
Datum/podpis výrobce: 06.09.2011
Údaje o podepsaném: jednatel,
pan Arnold
Technická dokumentace: J. Bürkle FBL; QS
________________
________________
________________
________________
19

SK Skôr ako uvediete prístroj do prevádzky, prečítajte si, prosím, dôkladne tento návod na obsluhu.
A.V. 2 Dotlač, a to i čiastočná, vyžaduje schválenie. Technické zmeny vyhradené.
Ilustračné obrázky! Toto je originálny návod na obsluhu.
Označenie
Bezpečnosťproduktu:
Produkt zodpovedá
príslušným normám EÚ
TÜV Rheinland
Preverená bezpečnosť
Príkazy:
Dodržujte návod na použitie Používajte ochranné
okuliare a slúchadlá!
Používajte ochranné rukavice!
Zákaz:
Výstraha pred poranením rúk Chráňte pred mokrom a
vlhkosťou
Zákaz ťahania za kábel
Výstraha:
Výstraha pred nebezpečným
elektrickým napätím
Dodržujte bezpečnostný
odstup
Výstraha pred poletujúcimi
predmetmi
Ochrana životného prostredia:
Odpad zlikvidujte odborne tak,
aby ste neškodili životnému
prostrediu.
Obalový materiál z lepenky
je možné odovzdaťs
cieľom recyklácie do
zberne.
Chybné a/alebo likvidované
elektrické či elektronické
prístroje sa musia odovzdaťdo
príslušných zberní.
Chráňte pred vlhkom
Pozor – krehké
Obal musí smerovaťhore
Interseroh
Technické údaje:
Prípojka Výkon motora
Otáčky motora Priemer kladiek pílového
pásu
Dĺžka pílového pásu Veľkosťstola
Hmotnosť
Objem dodávky
Skontrolujte, prosím, či sú do škatule pribalené tieto
súčasti:
- 1 stôl stroja
- 1 doraz na rezanie na pokos
- 1 paralelný doraz
- 1 štandardný pílový pás
- 1 vložka stola
- 1 imbusový kľúč
- 1 plochý kľúč
- 4 skrutky s poistnými krúžkami
- 1 skrutka so zápustnou hlavou a podložkou
- 1 návod na obsluhu
Podľa možností by ste mali pásovú pílu pripevniťk
masívnemu pracovisku alebo pracovnému stolu. Na to
použite otvory, ktoré sa nachádzajú v nohe stroja.
Parametre vašej elektrickej siete porovnajte s parametrami
uvedenými na stroji. Napätie a frekvencia by mali byť
zhodné, no nie vyššie než 240 V/60 Hz.
Záruka
Záruka sa vzťahuje výlučne na chyby materiálu alebo
výrobné chyby. Pri uplatňovaní reklamácie v záručnej
lehote priložte originálny doklad o kúpe s dátumom kúpy.
Zo záruky je vylúčené neodborné použitie, ako napr.
preťaženie prístroja, násilné použitie, poškodenie cudzou
osobou alebo cudzím predmetom. Nedodržanie návodu na
použitie a návodu na montáž a normálne opotrebenie je
tiež vylúčené zo záruky.
20
Other manuals for GBS 200
1
This manual suits for next models
1
Table of contents
Languages:
Other Gude Saw manuals

Gude
Gude GRK 250 User manual

Gude
Gude TKGS 1800 User manual

Gude
Gude GBS 200 User manual

Gude
Gude TK 2500 User manual

Gude
Gude GTK 2000.1 User manual

Gude
Gude GRK 250/500 User manual

Gude
Gude TK 2400 ECO Wiring diagram

Gude
Gude GTKS 315 / 230 V User manual

Gude
Gude GDS 16 E User manual

Gude
Gude GMK 350 TA User manual

Gude
Gude PBK 500 User manual

Gude
Gude GWS 500 HM User manual

Gude
Gude GTKS 315/230V Wiring diagram

Gude
Gude TKGS 216 User manual

Gude
Gude TK 2400 P User manual

Gude
Gude GRK 210 BS User manual

Gude
Gude GTKS 1800 PRO User manual

Gude
Gude TK 2100 User manual

Gude
Gude MBS 125 V User manual

Gude
Gude PRS 700 Wiring diagram