manuals.online logo
Brands
  1. Home
  2. •
  3. Brands
  4. •
  5. OBERON
  6. •
  7. Wireless Access Point
  8. •
  9. OBERON 1015-00 User manual

OBERON 1015-00 User manual

Installation Guide / Guía de instalación forfor for
for Oberon Model 1015-00 and 1015-C
para Modelo Oberon 1015-00 y 1015-C
!
.!
! ! !!!!!!!!!!!!!!!!!
! ! !!!!!!!!!!
"Oberon" and all other marks where denoted are trademarks of Oberon Inc. ©1999-2017 Oberon Incorporated. All rights reserved. P/N 2460 Rev. L & P/N 2461 Rev. K - 07/12/2017
"Oberon" y todas las demás marcas donde se denotan son marcas comerciales de Oberon Inc. © 1999-2017 Oberon Incorporated. Todos los derechos reservados.
! ! ! !
!
!
Mounting Solutions for WiFi Access Points
! !
!
!
!
!
!
!
!
!
!
!
!
!
!
!
!
!
!
!
!
!
!
!
!
!
!
!
!
!
!
!
!
!
!
!
!
!
!
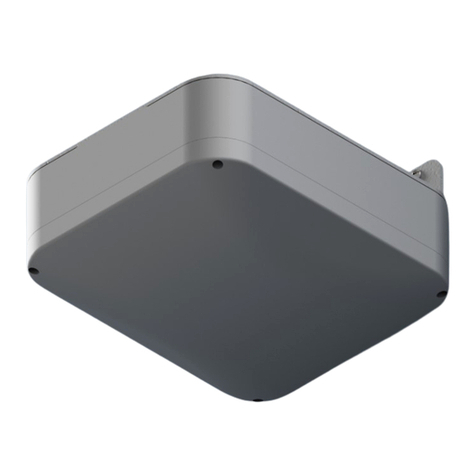
Compact, non-metallic enclosure secures and protects APs in
residence halls, hotels, retail locations and other indoor venues. This
rugged ABS plastic enclosure is virtually transparent to wireless
signals so APs with integrated antennas or small detachable
antennas may be protected. The box can be mounted directly over
the telecommunication outlet, and cable raceway or conduit can be
conveniently terminated.
Este soporte de montaje en ángulo recto tiene paredes laterales para
ayudar a ocultar el cableado y se puede colocar directamente sobre
la salida de datos. Instalar rápidamente los puntos de acceso en la
orientación horizontal preferida. Características de montaje para
puntos de acceso Cisco y Aruba Networks, con barra en T universal
para la mayoría de los puntos de acceso de otros proveedores.
Acero lacado blanco. Ideal para entornos de tapa dura, como
ingresos a las residencias.!
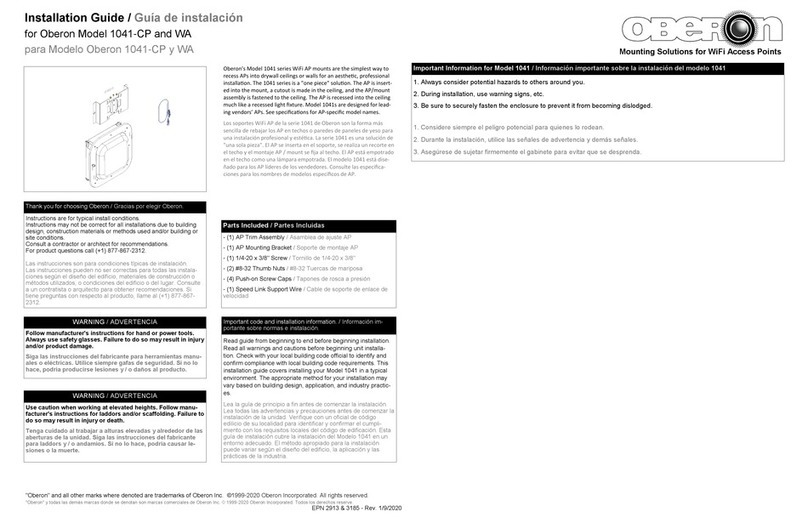
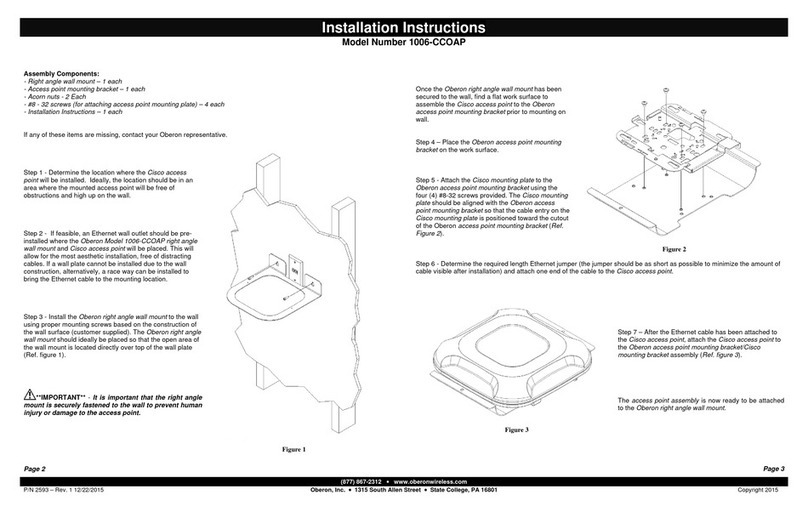
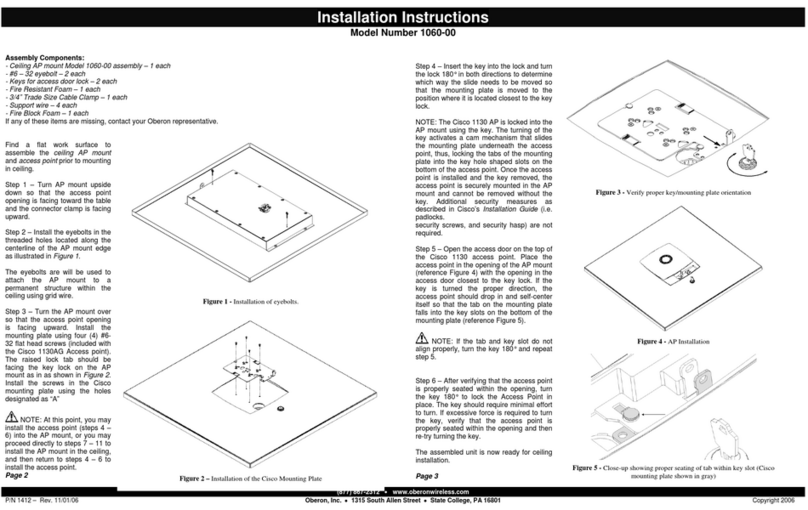
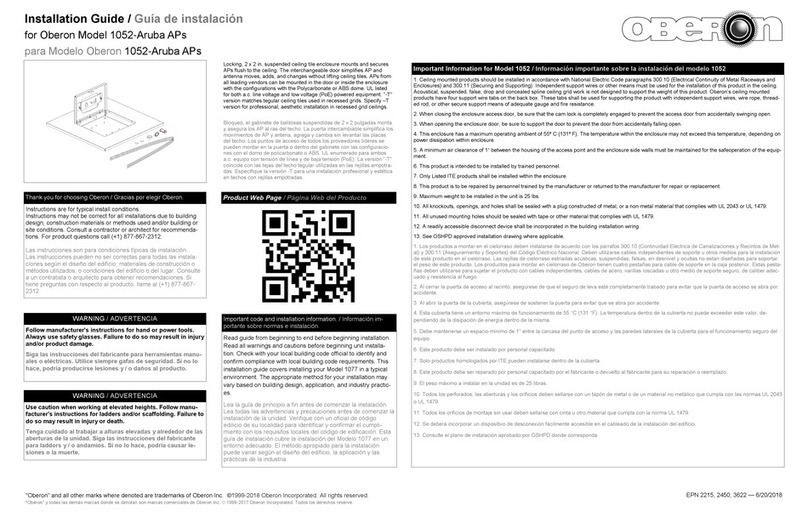
Thank you for choosing Oberon.
/ Gracias por elegir Oberon.
Instructions are for typical install conditions.
Instructions may not be correct for all installations due to
building design, construction materials or methods used
and/or building or site conditions.
Consult a contractor or architect for recommendations.
For product questions call (+1) 814-867-2312.
Las instrucciones son para condiciones típicas de instalación.
Las instrucciones pueden no ser correctas para todas las
instalaciones según el diseño del edificio, materiales de
construcción o métodos utilizados, o condiciones del edificio
o del lugar. Consulte a un contratista o arquitecto para
obtener recomendaciones. Si tiene preguntas con respecto al
producto, llame al (+1) 814-867-2312.
!
Important code and installation information. / Información
importante sobre normas e instalación.
Read guide from beginning to end before beginning
installation. Read all warnings and cautions before beginning
unit installation. Check with your local building code official to
identify and confirm compliance with local building code
requirements. This installation guide covers installing your
Model 1015-00 or 1015-C in a typical environment. The
appropriate method for your installation may vary based on
building design, application, and industry practices.
Lea la guía de principio a fin antes de comenzar la
instalación. Lea todas las advertencias y precauciones antes
de comenzar la instalación de la unidad. Verifique con un
oficial de código edilicio de su localidad para identificar y
confirmar el cumplimiento con los requisitos locales del
código de edificación. Esta guía de instalación cubre la
instalación del Modelo 1015-00 y 1015-C en un entorno
adecuado. El método apropiado para la instalación puede
variar según el diseño del edificio, la aplicación y las
prácticas de la industria.
!
Important Information for Model 1015
/ Información importante sobre la instalación del modelo 1015
1. When closing the enclosure access door, be sure that the cam lock is completely engaged to prevent the access door
from accidentally swinging open (Note: The cam lock has a "snap" feature to lock it firmly in place, be sure to turn the lock
fully to snap it in place).
2. When ceiling mounted, be sure to support the door to prevent the door from accidentally falling open.
1. Al cerrar la puerta de acceso de la caja, asegúrese de que la cerradura de la leva esté totalmente encajada para evitar
que la puerta de acceso se abra accidentalmente (Nota: La cerradura de la leva tiene una función de "encaje" para
bloquearla firmemente, asegúrese de girar la cerradura Completamente para encajarlo en su lugar).
2. Cuando esté montado en el techo, asegúrese de sujetar la puerta para evitar que la puerta se caiga accidentalmente.
!
Tools Needed /Herramientas necesarias
•Phillips-Head Screwdriver
/ Destornillador Phillips
!
Estimated Installation Time:
Tiempo Estimado de Instalación:
10m
Parts Included /Partes Incluidas!!!!
(2)Keys for access door lock / Llaves para la cerradura de acceso
(1)T-Bar Bracket / Soporte de la barra en T
(4)#6 x 1/4" Flat Head Screw / # 6 x tornillo de cabeza plana de 1/4 "
(2)1/2" O.D. Nylon Spacer / Espaciador de nylon de 1/2 "O.D.
(2)#6 x 7/8" Screw / # 6 x 7/8 "Tornillo
(2)#6 x 1/4" Screw / # 6 x 1/4 "Tornillo
! !
WARNING / ADVERTENCIA
Follow manufacturer's instructions for hand or power
tools. Always use safety glasses. Failure to do so may
result in injury and/or product damage.
Siga las instrucciones del fabricante para herramientas
manuales o eléctricas. Utilice siempre gafas de
seguridad. Si no lo hace, podría producirse lesiones y / o
daños al producto.
!
WARNING / ADVERTENCIA
Use caution when working at elevated heights. Follow
manufacturer's instructions for laddors and/or
scaffolding. Failure to do so may result in injury or death.
Tenga cuidado al trabajar a alturas elevadas y alrededor
de las aberturas de la unidad. Siga las instrucciones del
fabricante para laddors y / o andamios. Si no lo hace,
podría causar lesiones o la muerte.
!
Product Web Page / Página web del producto
!!!!!!!!!!!!!!!!!! !
!!!!!!!!!!!!!!!!!!!!!!!!!!!!!! !
Installation Guide / Guía de instalación forfor for
for Oberon Model 1015-00 and 1015-C
para Modelo Oberon 1015-00 y 1015-C
!
.!
! ! !!!!!!!!!!!!!!!!!
! ! !!!!!!!!!!
"Oberon" and all other marks where denoted are trademarks of Oberon Inc. ©1999-2017 Oberon Incorporated. All rights reserved. P/N 2460 Rev. L & P/N 2461 Rev. K - 07/12/2017
"Oberon" y todas las demás marcas donde se denotan son marcas comerciales de Oberon Inc. © 1999-2017 Oberon Incorporated. Todos los derechos reservados.
! ! ! !
!
!
Mounting Solutions for WiFi Access Points
!
!
!
!
!
!
!
!
!
!
!
If possible, the preferred mounting method is to place an
ethernet wall plate at the location where the enclosure will
be mounted. There is a wall plate opening in the back of the
enclosure to accommodate the wall plate.
Si es posible, el método de montaje preferido es colocar una placa
de pared Ethernet en el lugar donde se montará el recinto. Hay una
abertura de la placa de la pared en la parte posterior del recinto para
acomodar la placa de la pared.!
3A
►
There are two ways to mount your AP to the Model 1015-00 and 1015-C. Choose your preferred method (1A or 1B)
►Existen varias maneras de montar su AP en los modelos 1015-00 y 1015-C. Elija su método preferido (1A o 1B)
►
A surface mount box (or biscuit jack) and
equipment cord can be conveniently mounted
inside the Model 1010. Use an adhesive backed
surface mount box. Consider bend radius of
horizontal cable and equipment cord when
attaching the surface mount box.
►
Se pueden ser montar una caja de montaje de
superficie o entrada de teléfono y el cable del
equipo dentro del Modelo 900. Utilice una caja
de montaje con superficie trasera adhesiva.
Considere el radio de curvatura del cable de
enlace permanente y el cable de datos al colocar
la caja de montaje de superficie.
! !
Slide the access point onto the mount. Use the #6-32 as a “screw
lock” to keep the access point from sliding off the mount. Refer to the
legend for “screw lock” location for each type of AP.
Deslice el punto de acceso sobre el montaje. Utilice el tornillo #6-32
incluido como un “tornillo de seguridad” para evitar que el punto de
acceso se deslice fuera del montaje. Consulte la leyenda para la
ubicación del “tornillo de seguridad” para cada tipo de punto de
acceso.
!
1A
Cisco
Aruba
Option 1: Attach AP with Mounting Plate
Attach the access point to the previously installed access
point mounting plate, close and lock the door.
Conecte el punto de acceso a la placa de montaje del punto de
acceso previamente instalado, cierre y bloquee la puerta. La
instalación ya está completa.en el techo.
7
Bring in the Ethernet cable and attach to the access point.
Introduzca el cable Ethernet y conéctelo al punto de acceso.
6
Set the enclosure to the side and drill holes for wall
anchors. Install the wall anchors and mount the enclosure.
Coloque el gabinete a un lado y haga agujeros para los anclajes de
pared. Instale los anclajes de pared y monte el gabinete.
5
Place the enclosure against the surface to which it will be
mounted and mark the hole locations to drill pilot holes.
Coloque el gabinete contra la superficie a la que va a montarse y
marque las ubicaciones de agujero para perforar los agujeros piloto.
4
When mounting the enclosure on a wall or hard lid surface,
use the four (4) keyholes located on the four corners of the
back box so that you will be able to mount the enclosure to the
surface using screws and anchors (not included).
Cuando monte el gabinete en una pared o superficie de tapa dura,
use los cuatro (4) agujeros de llave ubicados en las cuatro esquinas
de la caja trasera para poder montar el gabinete a la superficie
usando tornillos y anclajes (no incluidos).
2
!!!!!!! !
Slide the access point onto the mount. Use the #6-32 as a “screw
lock” to keep the access point from sliding off the mount. Refer to the
legend for “screw lock” location for each type of AP.
Deslice el punto de acceso sobre el montaje. Utilice el tornillo #6-32
incluido como un “tornillo de seguridad” para evitar que el punto de
acceso se deslice fuera del montaje. Consulte la leyenda para la
ubicación del “tornillo de seguridad” para cada tipo de punto de
acceso.
!
1B
Cisco
Aruba
Option 2: Attach AP to T-bar
Other
If it is not possible to place a wall plate where the enclosure is to be
installed, decide the best location from which to bring in the Ethernet
cable. There are two (2) 3/4” trade sized knockouts located on the top
and bottom of the enclosure. Bring the Ethernet cable (and conduit if
needed) into the enclosure in a way that best fits your application.
Si no es posible colocar una placa de pared donde se va a instalar el
gabinete, decida la mejor ubicación desde la cual introducir el cable
Ethernet. Hay dos (2) 3/4 "troquelados de tamaño comercial
ubicados en la parte superior e inferior del recinto. Traiga el cable
Ethernet (y el conducto si es necesario) al gabinete de la manera que
mejor se adapte a su aplicación.
!
3B
!
!
!!!!!!!!!!!!!!!! !

This manual suits for next models

1

Other OBERON Wireless Access Point manuals

OBERON 1020 Assembly instructions

OBERON

OBERON 1020 Assembly instructions

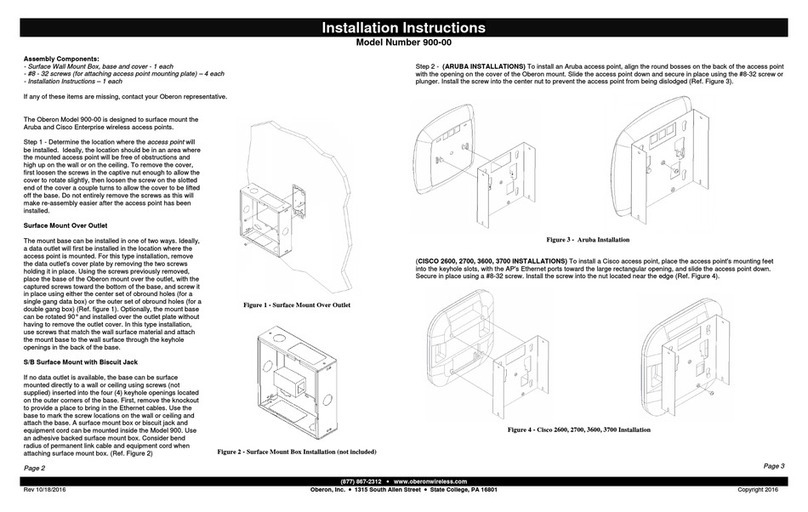
OBERON 900-00 User manual

OBERON

OBERON 900-00 User manual

OBERON 1052-Aruba User manual

OBERON

OBERON 1052-Aruba User manual

OBERON 1022-00 User manual

OBERON

OBERON 1022-00 User manual

OBERON 3030 Series User manual

OBERON

OBERON 3030 Series User manual

OBERON 1076-Aruba User manual

OBERON

OBERON 1076-Aruba User manual

OBERON 33-1021-PMB-CVR User manual

OBERON

OBERON 33-1021-PMB-CVR User manual

OBERON 1006-CCOAP User manual

OBERON

OBERON 1006-CCOAP User manual

OBERON 1045-00 User manual

OBERON

OBERON 1045-00 User manual

OBERON 1041 User manual

OBERON

OBERON 1041 User manual

OBERON 1060-00 User manual

OBERON

OBERON 1060-00 User manual

OBERON 1041-CP User manual

OBERON

OBERON 1041-CP User manual

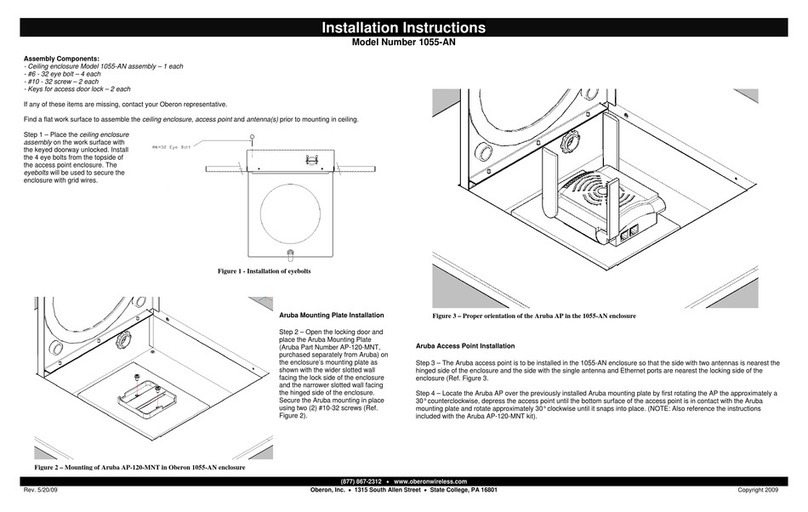
OBERON 1055-AN User manual

OBERON

OBERON 1055-AN User manual

Popular Wireless Access Point manuals by other brands

4IPNET OWL800 user manual

4IPNET

4IPNET OWL800 user manual

Tenda AP Series Quick installation guide

Tenda

Tenda AP Series Quick installation guide

EnGenius M36 user manual

EnGenius

EnGenius M36 user manual

Atheros AP222A user manual

Atheros

Atheros AP222A user manual

Extreme Networks ExtremeWireless AP560h installation guide

Extreme Networks

Extreme Networks ExtremeWireless AP560h installation guide

D-Link DWL-2700AP - AirPremier Outdoor Wireless Access... user manual

D-Link

D-Link DWL-2700AP - AirPremier Outdoor Wireless Access... user manual

NETGEAR WAB102 - 802.11a+b Dual Band Wireless Access... Specifications

NETGEAR

NETGEAR WAB102 - 802.11a+b Dual Band Wireless Access... Specifications

Luminate LEAP-10 Hardware installation guide

Luminate

Luminate LEAP-10 Hardware installation guide

Allied Telesis AT-TQ4400e Quick installation guide

Allied Telesis

Allied Telesis AT-TQ4400e Quick installation guide

ALCON ALink-5801a user manual

ALCON

ALCON ALink-5801a user manual

Cisco AIR-LAP1142N-A-K9 Getting started guide

Cisco

Cisco AIR-LAP1142N-A-K9 Getting started guide

DCN WL8200-I2 Quick installation guide

DCN

DCN WL8200-I2 Quick installation guide

H3C WA6620X installation guide

H3C

H3C WA6620X installation guide

NX NX-100AP user manual

NX

NX NX-100AP user manual

NETGEAR WG102 - ProSafe Wireless Access Point installation guide

NETGEAR

NETGEAR WG102 - ProSafe Wireless Access Point installation guide

Quantum QN-I-220 Quick setup guide

Quantum

Quantum QN-I-220 Quick setup guide

Ubiquiti NanoStation M2 manual

Ubiquiti

Ubiquiti NanoStation M2 manual

Aruba 300 series install guide

Aruba

Aruba 300 series install guide

manuals.online logo
manuals.online logoBrands
  • About & Mission
  • Contact us
  • Privacy Policy
  • Terms and Conditions

Copyright 2025 Manuals.Online. All Rights Reserved.