Oce fx2081 User manual

DA7-92350-60

Contents
Basic Copy ...............................................................................................................1
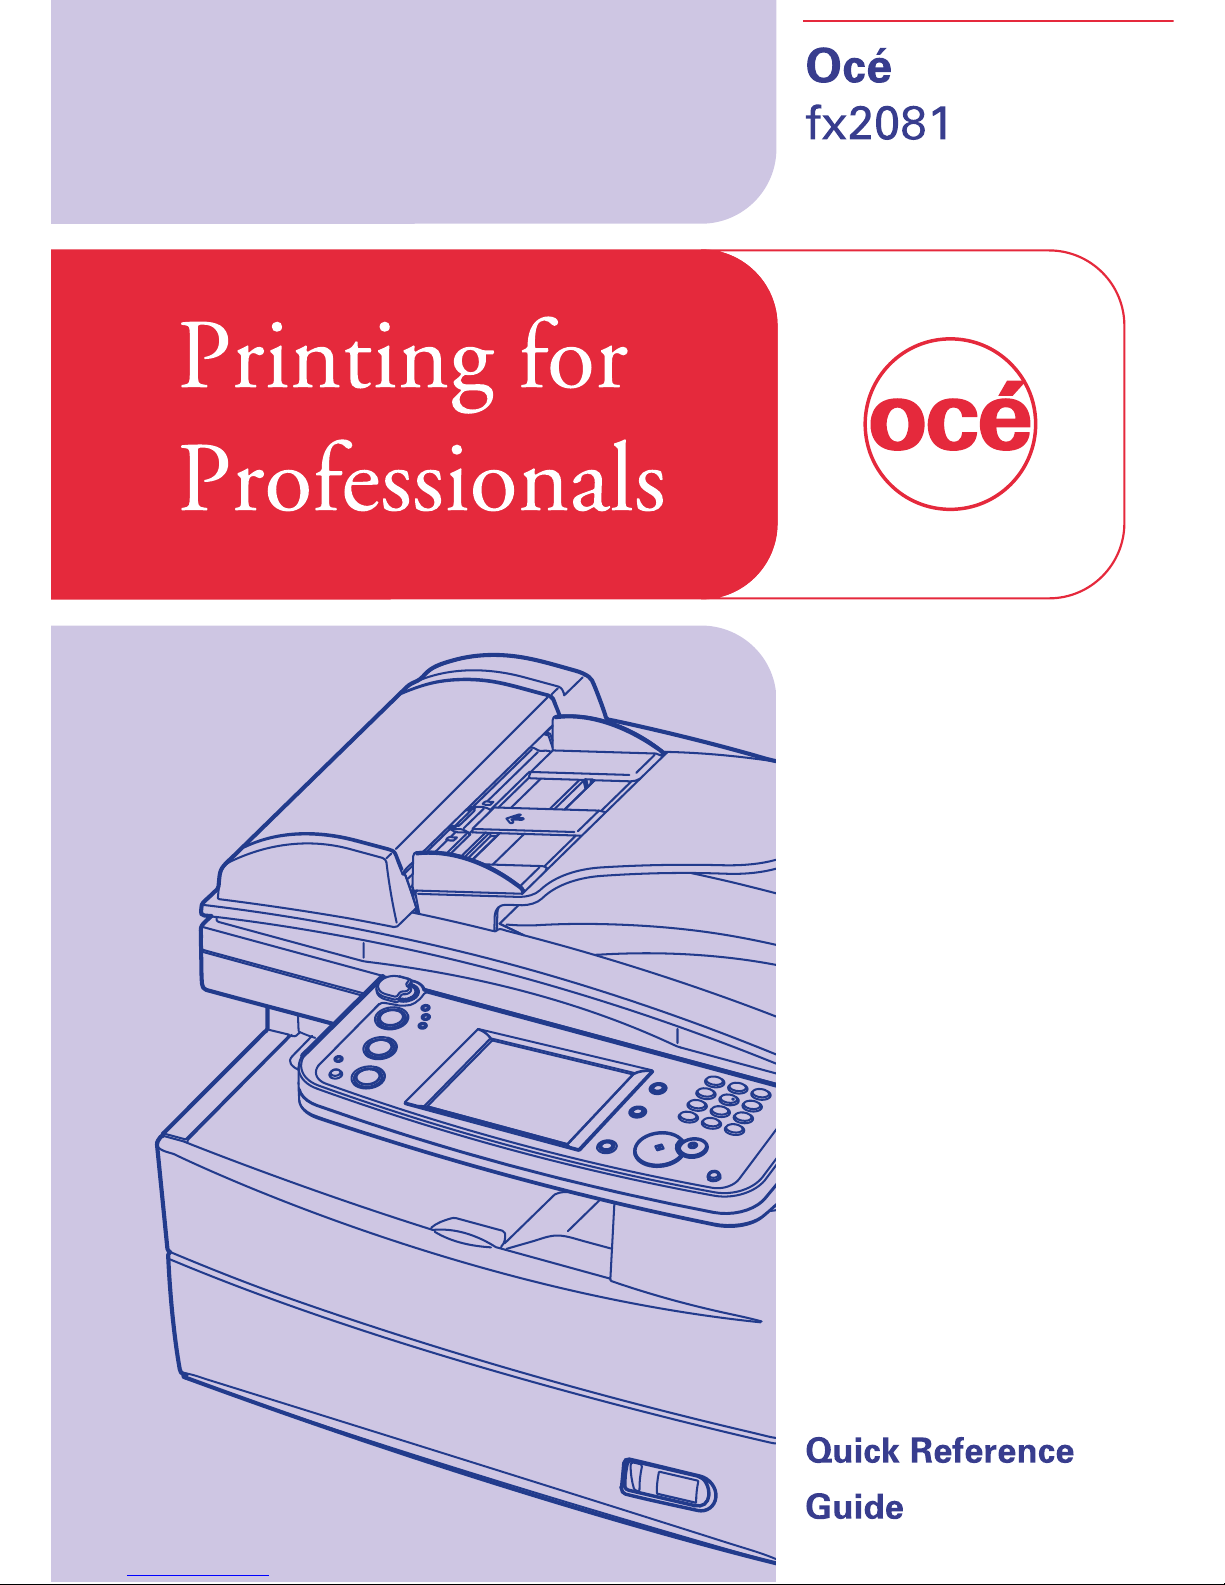
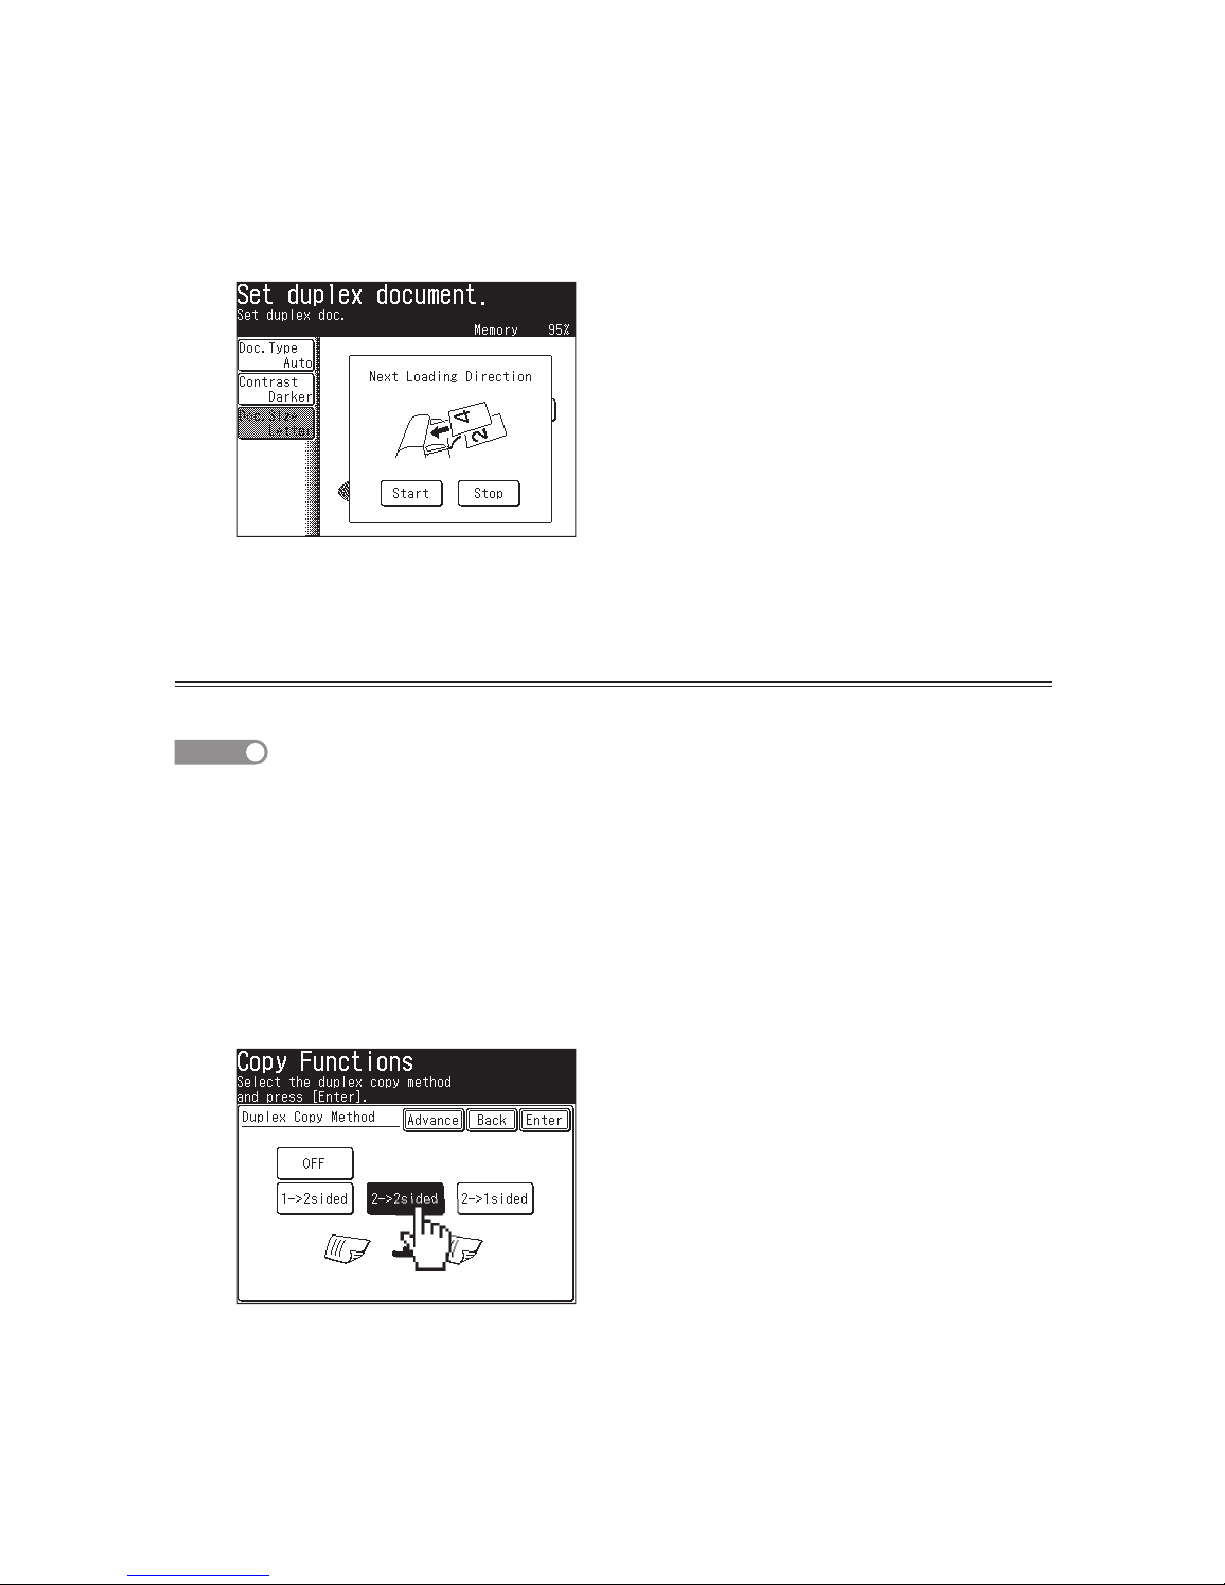
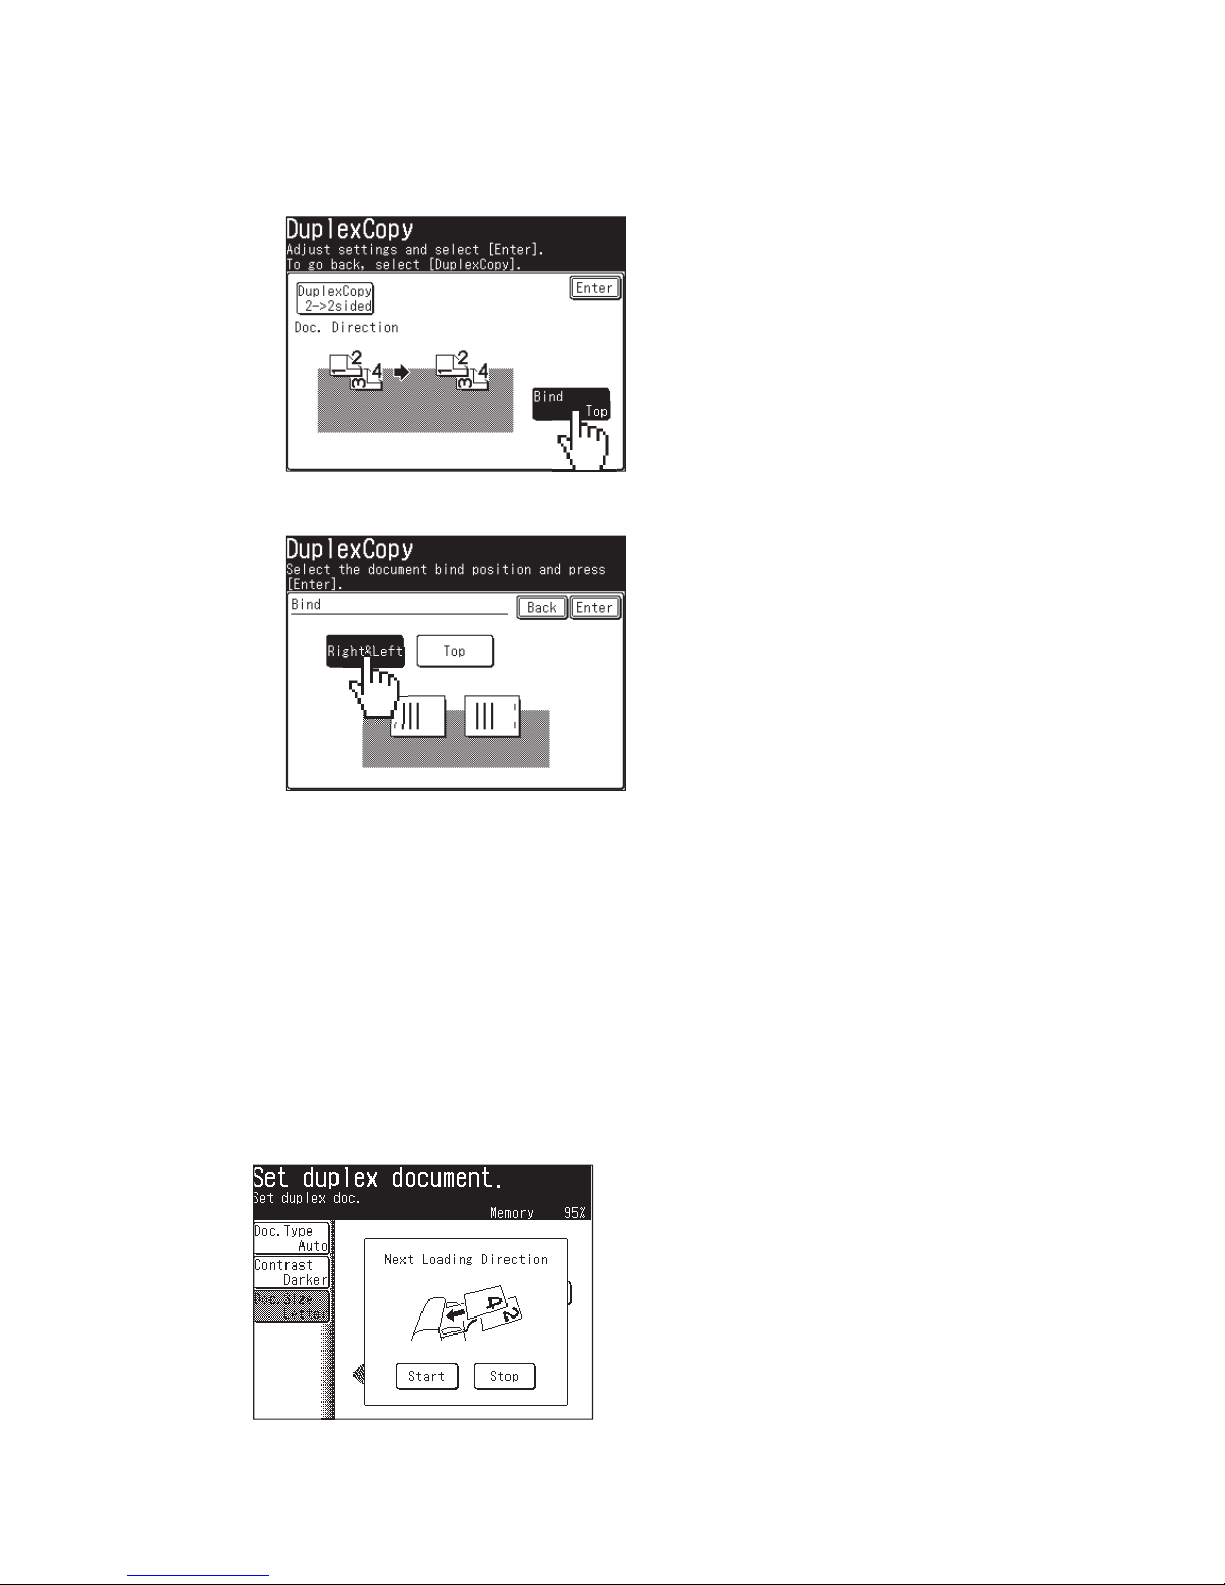
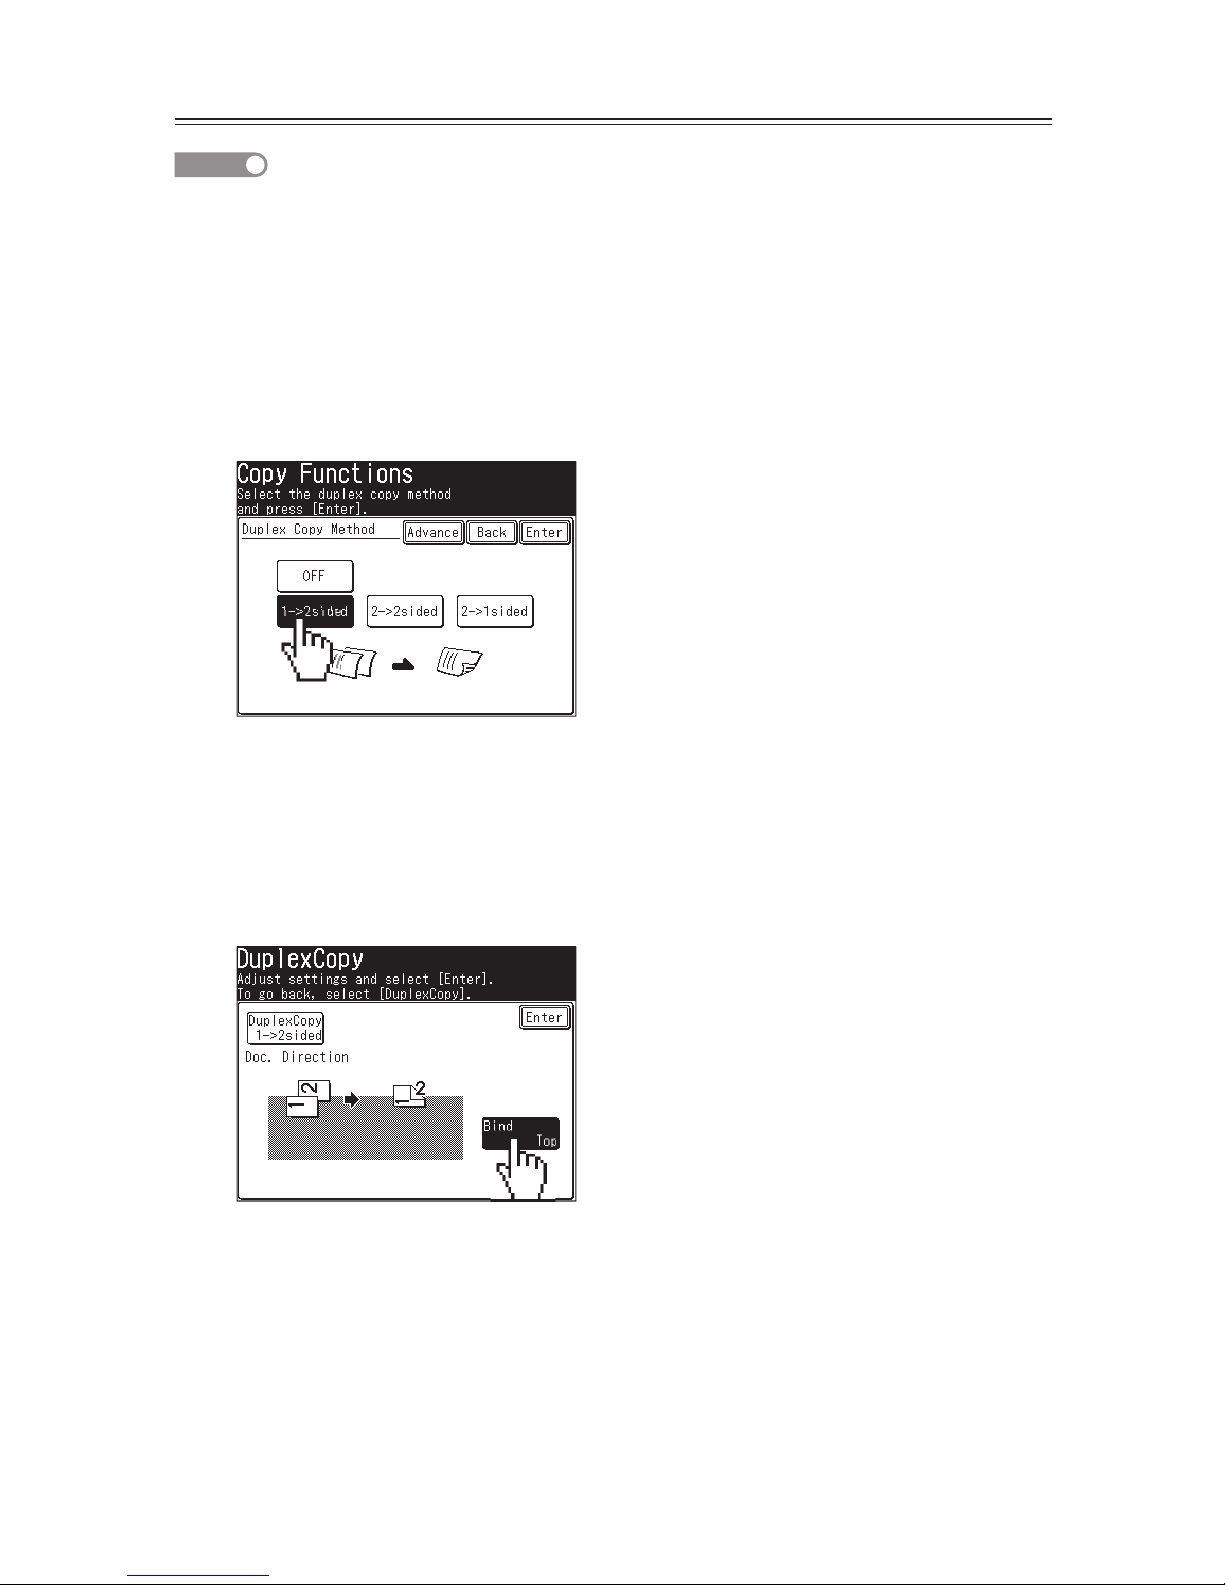
Duplex Copying.......................................................................................................2
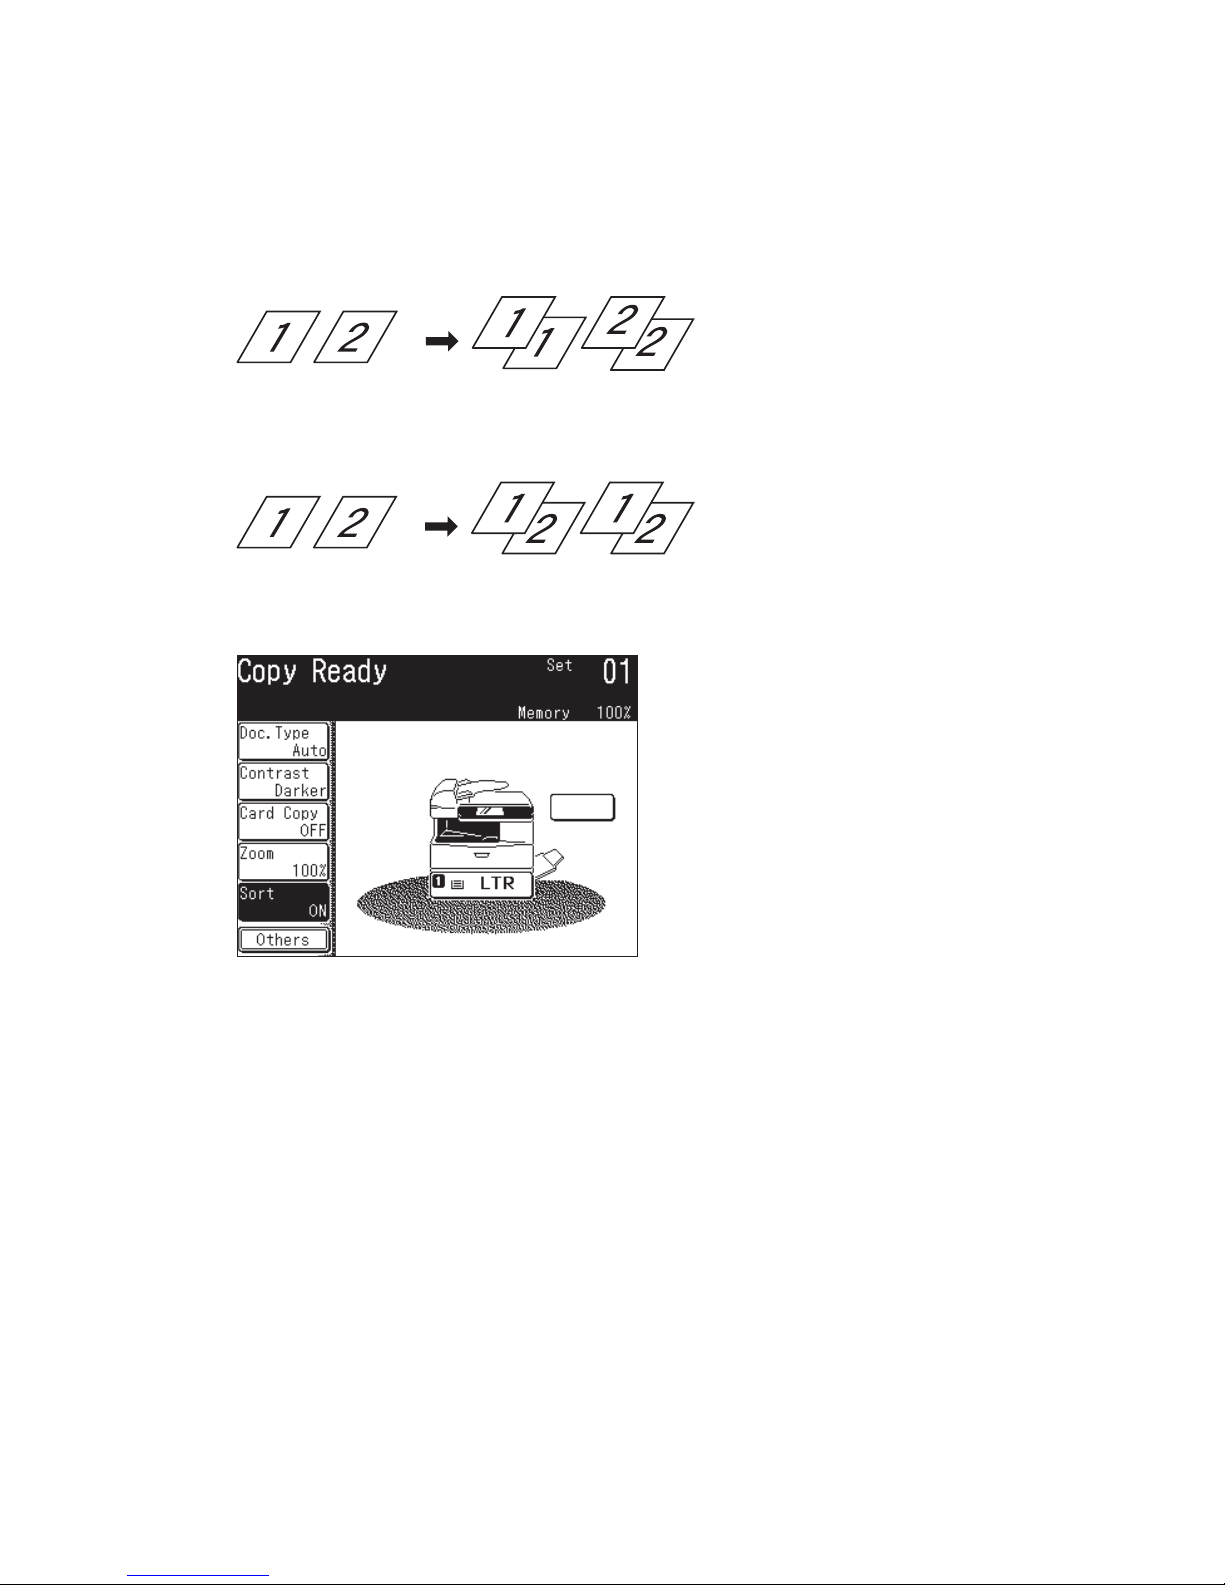
Sorting .....................................................................................................................7
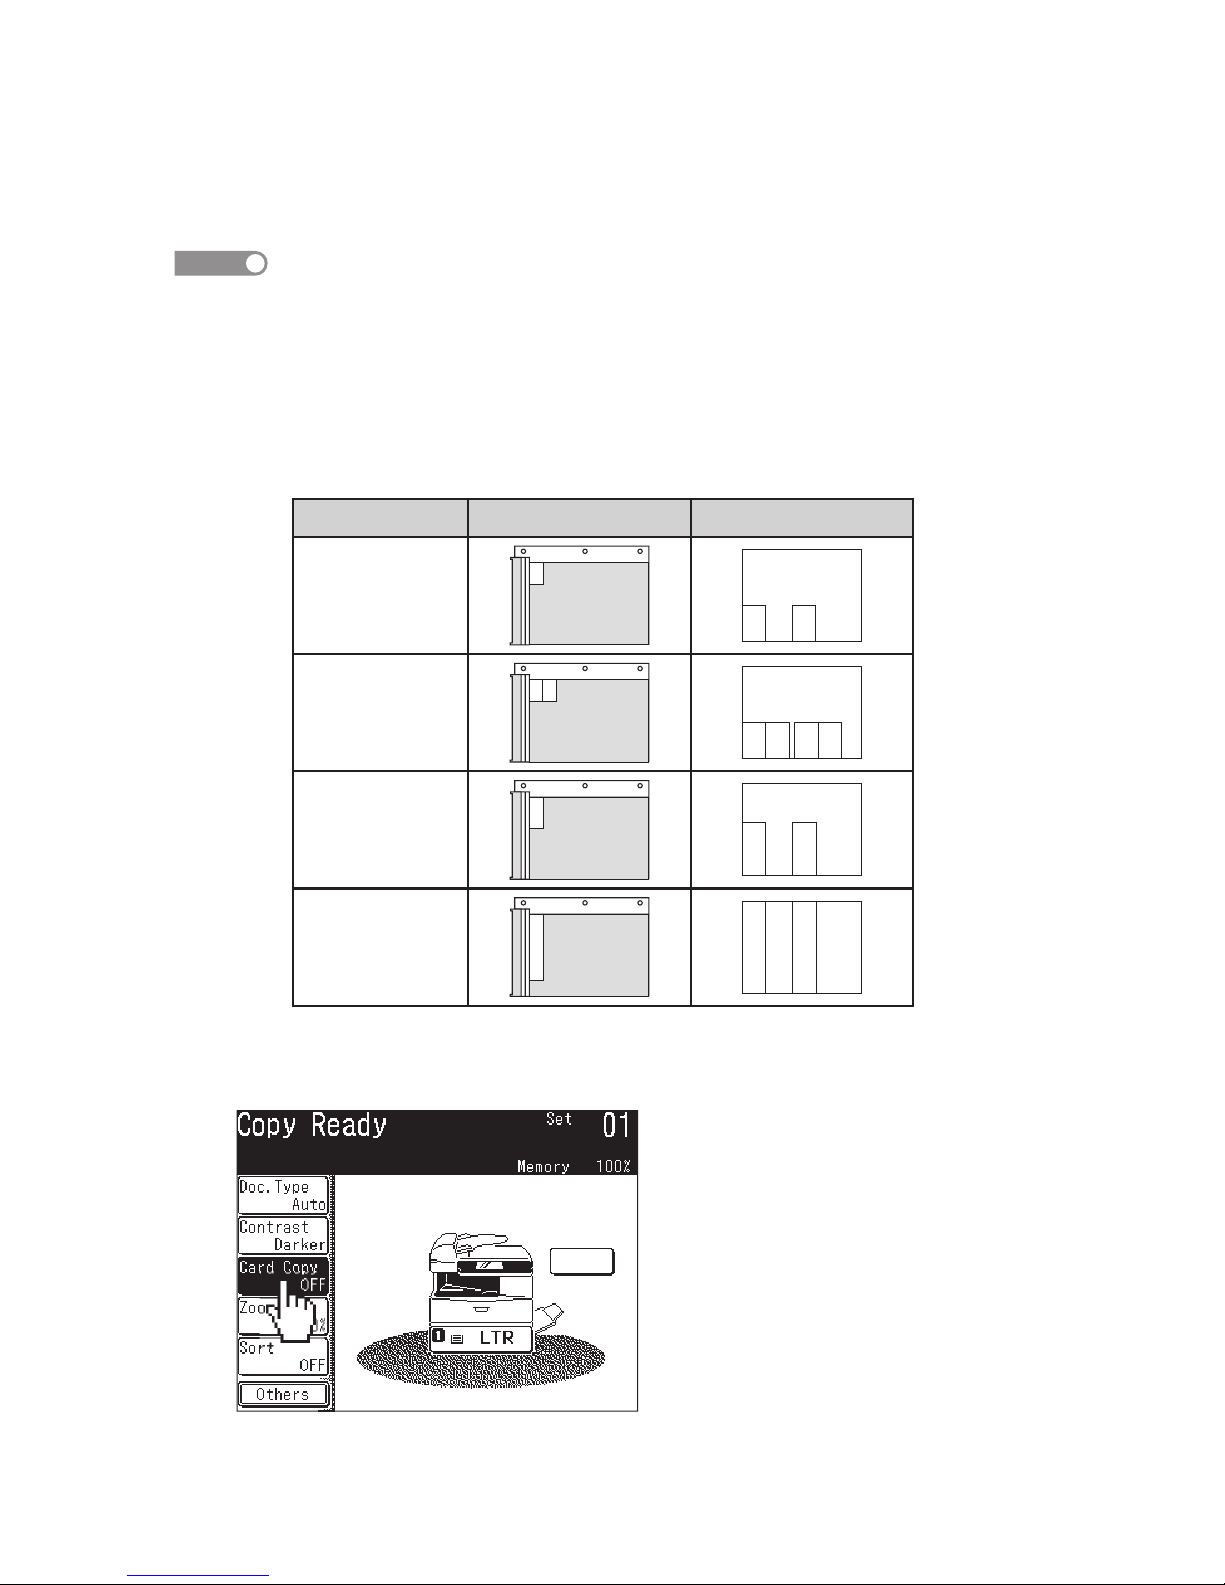
Card copy.................................................................................................................8
Soft Key Programming .........................................................................................10
Registering an Address Book location .................................................................12
Sending a fax.........................................................................................................17
Sending to an e-mail address ...............................................................................20
Adding a text message to your e-mail..................................................................23
Scanning to a network folder................................................................................26
Scanning to an FTP server ...................................................................................30
Color scan to print.................................................................................................34
Clearing a document jam in ADF.........................................................................35

1
Basic Copy
1
Set the document.
ADF �Face UP Document glass �Face DOWN
2
Press <COPY>.
3
Set each copy setting as necessary (ex. Document type, Contrast).
4
Enter the number of copies using the numeric keys.
You can set up to 99 copies. If you make an incorrect entry, overwrite it
with the correct entry.
5
Press <Start>.
NOTE
To stop copying, press <Stop>.
Mixed Original Copying
Letter and legal-sized paper can be inserted into the ADF and the scanner
will automatically detect the paper size. The output will match the origi-
nal paper size if the appropriate paper has been loaded into the cassettes.

2
Duplex Copying
One-sided copying of a duplex document (2 -->1 sided)
1
6
1
5
1
4
1
3
2
6
4
1Scan the front side. 2Turn over the document
and scan the backside. 3The scanned data temporarily
saved in the memory will be
sorted and printed.
5
5
1
3
2
2
4
4
6
6
5
1
1
To ADF To ADF
1
Set the front side of the duplex document in the ADF.
ADF �Face UP Document glass �Face DOWN
2
Press <COPY>.
3
Press [Others], [DuplexCopy]. Then press [2 -> 1 sided].

3
4
Press [Enter] twice to complete the setting.
5
Press <Start>.
The front side of the duplex document will be scanned.
6
When the following display is shown, place the backside of the duplex
document in the same direction as the front side and press <Start>.
Duplex copying of a duplex document (2 --> 2 sided)
This mode will convert two-sided originals into two-sided documents.
NOTE
For details of duplex copy, please see Chapter 2, “Copy Functions” in the
MFP User’s Guide.
1
Press <Copy>
2
Set the front side of the duplex document in the ADF.
3
Press [Others], [DuplexCopy].
4
Press [2 -> 2 sided].
•If you set any advanced functions, proceed to step 5.
•If you do not set any advanced functions, proceed to step 7.

4
5
Press [Advance].
6
(1) Press [Bind] to set document bind position.
• Press [DuplexCopy] to return to the duplex copy display.
(2) Press [Right&Left] or [Top].
(3) Press [Enter].
7
Press [Enter] twice to complete the setting.
Press <Reset> to cancel the duplex copy settings.
8
Press <Start>.
Scan the front side of the duplex document.
9
When the following display is shown, set the document in the correct direc-
tion and press <Start>.
•Be sure to set the document in the correct direction (see the table on
page 2-17 in the MFP User’s Guide).

5
Duplex copying of a one-sided document (1 --> 2 sided)
NOTE
For details of duplex copy, please see Chapter 2, “Copy Functions” in the
MFP User’s Guide.
1
Press <COPY>.
2
Set the document.
3
Press [Others], [DuplexCopy].
4
Press [1 -> 2 sided].
•If you set any advanced functions, proceed to step 5.
•If you do not set any advanced functions, proceed to step 7.
5
Press [Advance].
6
(1) Press [Bind] to set the binding position.
• Press [DuplexCopy] to return to the duplex copy display.

6
(2) Press [Right&Left] or [Top].
(3) Press [Enter].
7
Press [Enter] twice to return to complete the setting.
8
Press <Start>.
9
Press [Yes] while the document is being scanned.
Selecting [No] will cause one-sided document output.
10
After the document has been scanned, set the next document.
11
Press [Next Doc].
•The Next Doc setting can be deleted by pressing [Complete].
•To scan another document, press [Yes] while the document is being
scanned.

7
Sorting
Copied documents can be collated into proper page order. This eliminates
the need to manually sort documents after copying.
Sort OFF
The paper is sorted by page.
Sort ON
The paper is collated into sets.
To enable/disable automatic sorting:
“ON” and “OFF” toggle every time you press [Sort].

8
Card copy
The front and back of an ID card or check-sized original can be copied onto
one sheet of paper. Two ID card-sized originals can be also copied at the
same time.
NOTE
• Card Copy is available only from the document glass.
• In this function, zoom ratio is fixed to 100%.
• Use the letter or legal-sized paper for this function. If using paper
smaller than letter-sized paper, the copy image may be lacked.
• Copying can be done with the platen cover open. Avoid looking at the
light while copying. Looking at the light could cause eye damage.
Document orientation Copy result
ID Card
(3.4 × 2.2 in.)
Two ID Cards
(3.4 × 2.2 in.) × 2
Personal Check
(6.2 × 2.8 in.)
Business Check
(8.5 × 3.5 in.)
1
Press <Copy>.
2
Press [Card Copy].
3
Set the card or check face-down on the document glass.

9
(ID Card) (Two ID Cards) (Business or personal check)
4
Select the type of object you want to copy.
5
Press <Start>.
6
Once scanning is complete, turn over all of the placed originals and press
[Next Doc].
7
To complete the scanning, press [Complete].

10
Soft Key Programming
You may replace the function keys on each standby mode with functions
you utilize most often.
For this example we will replace the [Zoom] key with [Combine] on the
copy standby mode.
1
Press <Setting>.
2
Press [Management] and then [Soft Key].
3
Select the mode which contains the screen you want to change.
Here we select [Copy Functions].

11
4
The machine shows the function currently assigned to the soft key.
Select the soft key you want to change. Here we select [Zoom].
5
(1) Select the function you want to assign to a soft key.
Here we select [Combine].
(2) Press [Enter].
The selected function is assigned to the corresponding soft key.
6
Press <Reset> to return to the standby mode. The new key will now be
displayed.

12
Registering an Address Book location
The machine provides the “Shared address book” and “Personal address
book”. The “Shared address book” can be used by all users of the machine,
and the “Personal address book” is a private address book for the currently
logged-in user only.
To use the personal address book, you need the OfficeBridge user setting.
For details of address book, see Chapter 3, “Using the Address Book,” in
the MFP User’s Guide.
Registering the shared address book location
1
Press <Setting>.
2
Press [Address Book Entry].
3
Press [Enter/Edit].
4
Press the address book number you want to register or edit.

13
5
Enter the destinations name, then press [Enter].
The name field must be registered. Up to 30 characters can be entered.
6
(1) Press [Fax No.].
(2) Use the numeric keys to enter the destinations fax number (up to 40
digits).
(3) Press [Enter].
7
(1) Press [e-mail].
(2) Enter the e-mail address. Up to 50 characters can be entered.
(3) Press [Enter].

14
8
If you want to add this destination to a pre-existing call group:
Call groups must be registered in advance (for details on registering
call groups, see Chapter 3, “Using the Address Book,” in the MFP User’s
Guide).
(1) Press [Group].
(2) Select the applicable group(s).
(3) Press [Enter].
9
Press [Enter] to save the setting.
10
The registration destinations will be displayed.
11
Press <Reset> to exit the operation and return to the standby mode.
NOTE
To print a list of address book entries, press <Setting>, [List], [Address
Book], then [Yes].
Registering a personal address book location
NOTE
To register a destination into the personal address book, you must set the
number of destination in the “Personal Available Address” setting from a
web browser.
About the “Personal Available Address” setting, see “User Registration” in
Chapter 4, “Using the Admin Tools,” in the PC User’s Guide.
1
Press <Setting>.
2
Press [Personal Settings].

15
3
Login to OfficeBridge.
NOTE
If you are already logged-in as an OfficeBridge user, the login screen will
not appear.
(1) Select your user name.
(2) Enter your password and press [Enter].
If you have not set a password, press [Enter] without entering any
character.
4
Press [Address Book Entry].
5
Follow the operation from step 3 in “Registering the shared address book
location” on page 12.

16
For more information of address book entry, see Chapter 3, “Using the
Address Book,” in the MFP User’s Guide.
6
After you finish the setting changes, press [Enter]
7
Press <Reset> to return to the standby mode.

17
Sending a fax
1
Set the document in the ADF or on the document glass.
ADF �Face UP Document glass �Face DOWN
2
Press <FAX> to display the Fax standby mode.
3
Set each function as necessary (ex. Resolution, Contrast).
4
Specify the destination fax number.
NOTE
When you enter the fax number, [Location] is displayed on the display. To
check or delete the entered number, press [Location].
Using the numeric keys
Enter the destination number using the numeric keys and press [Enter].
• Up to 40 digits can be entered.
• If you enter an incorrect number, press [Clear] and delete it.
• You can enter the dialing characters.

18
— or —
Using the address book
(1) Press [Page Up] or [Page Down] to display the desired destination.
(2) Press the destination. The document is scanned immediately and
transmission starts.
If you want to specify multiple destinations, use broadcast transmission
or call group dialing.
NOTE
• To use the address book, you need to register the destinations in
advance.
• For details on using the address book, see Chapter 3, “Using the
address book,” in the MFP User’s Guide.
— or —
Search the destination from an LDAP server
(1) Press [Search].
(2) Enter the destination name and then press [Execute].
NOTE
• To search the destination from an LDAP server, the network settings
must be configured by your network administrator.
• For details on searching the destination from the LDAP server, see
“Using [Search]” in Chapter 3, “Using the Address Book,” in the MFP
User’s Guide.
Other manuals for fx2081
5
Table of contents
Other Oce All In One Printer manuals

Oce
Oce cm2510 Installation and operating manual

Oce
Oce im2330 Configuration guide

Oce
Oce VarioPrint 6250 Quick reference guide

Oce
Oce OP33 User manual

Oce
Oce cm3521 User manual

Oce
Oce VarioPrint 1055 User manual

Oce
Oce VarioPrint 1055 User manual

Oce
Oce CS7400 Series User manual

Oce
Oce VarioPrint 2045-65 DC User manual

Oce
Oce cm2520 User manual
Popular All In One Printer manuals by other brands

Epson
Epson C11CA49201 - WorkForce 310 Color Inkjet Brochure & specs

Xerox
Xerox Document Centre 240 ST Quick install

Lexmark
Lexmark C500N Menus and messages guide

KB ELECTROMETRY
KB ELECTROMETRY SibER 64?15 instruction manual

Ricoh
Ricoh GR-C1 Series Service training

Brother
Brother MFC-J4310DW Product safety guide