Oce TDS400 Service manual

Océ TDS400
Quick Reference Manual

Copyright
© 2003 Océ-Technologies B.V. Venlo, The Netherlands
All rights reserved. No part of this work may be reproduced, copied, adapted,
or transmitted in any form or by any means without written permission from
Océ.
Océ-Technologies B.V. makes no representation or warranties with respect to
the contents hereof and specifically disclaims any implied warranties of
merchantability or fitness for any particular purpose.
Further, Océ-Technologies B.V. reserves the right to revise this publication and
to make changes from time to time in the content hereof without obligation to
notify any person of such revision or changes.
Edition 2003-7
Océ-Technologies B.V.
GB
This manual contains an abridged functional and task oriented description of
the Océ TDS400 multifunctional digital system release 2.0
Trademarks
Products in this manual are referred to by their trade names. In most, if not all
cases, these designations are claimed as trademarks or registered trademarks of
their respective companies.
Safety information
This manual contains the following safety information:
■Appendix B lists ‘Instructions for safe use’. You are advised to read this
information before you start to actually use the system. Technical safety
information such as safety data sheets can also be found in appendix B.
■Where applicable, cautions and warnings are used throughout this manual to
draw your attention to safety precautions to be taken.
Internet
Check Océ on the internet at www.oce.com for:
■the latest drivers
■product development
Contents 3
Contents
Chapter 1
Introduction
The Océ TDS400 Quick Reference Manual 8
The parts of the Océ TDS400 9
The parts 9
Turning the printer and scanner on or off 11
Chapter 2
The Océ TDS400 to print
Print on the Océ TDS400 printer 14
The printer operator panel 14
The keys 14
The display 15
The selection of the language 20
Print the configuration report 20
Print the menu card 20
Print a demo print 21
Cancel a print 21
Print with Océ Print Exec® Workgroup 22
Introduction 22
Options 22
Connect to Océ Print Exec® Workgroup 23
The documentation set 23
Print with Océ Repro Desk 24
Introduction 24
The documentation set 24
Chapter 3
The Océ TDS400 to copy
Copy on the Océ TDS400 26
The scanner operator panel 27
The keys 27
The display 28
Manual feed 29
To copy sets 29

4 Océ TDS400 Quick Reference Manual
Chapter 4
Océ Scan logic®
How to scan to file 34
The scan settings 35
Océ Scan Manager 36
The tree view 36
The table view 37
The keys 37
Chapter 5
Océ Account Center
Océ Account Logic and Océ Account Console 40
Océ Power Logic® controller setup for Océ Account Logic 41
Chapter 6
Supplies and maintenance
Media 44
The paper rolls 44
How to cut the paper to get a straight leading strip 49
How to program media settings 49
How to refill the toner 51
Clean the glass platen and the reference roller of the scanner 53
Maintenance of the reinforcement unit 55
Insert a new tape roll 55
Empty he waste box 62
Clean the reinforcement knives 63
Appendix A
Summary and tables
Product specifications Océ TDS400 66
Material types 71
Material sizes 71
Automatic format selection 72
Reinforcement strips 73
Overview of standard zoom formats 74

Contents 5
Appendix B
Safety information
Instructions for safe use 78
Safety data sheets 80
Safety data sheet Océ TDS400 printer 81
Safety data sheet Océ TDS400 printer and scanner 82
Safety data sheet Océ B5 toner 83
Safety data sheet Océ D5 Developer 85
Safety data sheet Océ OPC drum 87
Safety data sheet Océ Cleaner A 89
EPA Energy Star® 91
Appendix C
Miscellaneous
Notation conventions 94
Reader’s comment sheet 95
Addresses of local Océ organisations 97
Index 99

6 Océ TDS400 Quick Reference Manual

7
Océ TDS400
Quick Reference Manual
Chapter 1
Introduction
This chapter contains a general introduction to the
Océ TDS400. It includes a general description of the main
features, delivery options and software applications
provided with the system.

8 Océ TDS400 Quick Reference Manual
The Océ TDS400 Quick Reference
Manual
In this Quick Reference Manual you find the information to work with the Océ
TDS400. Find more information in the Océ TDS400 user manual on the
CD-ROM. Check ‘www.oce.com’ for new version of the documentation and
the drivers.

Introduction 9
The parts of the Océ TDS400
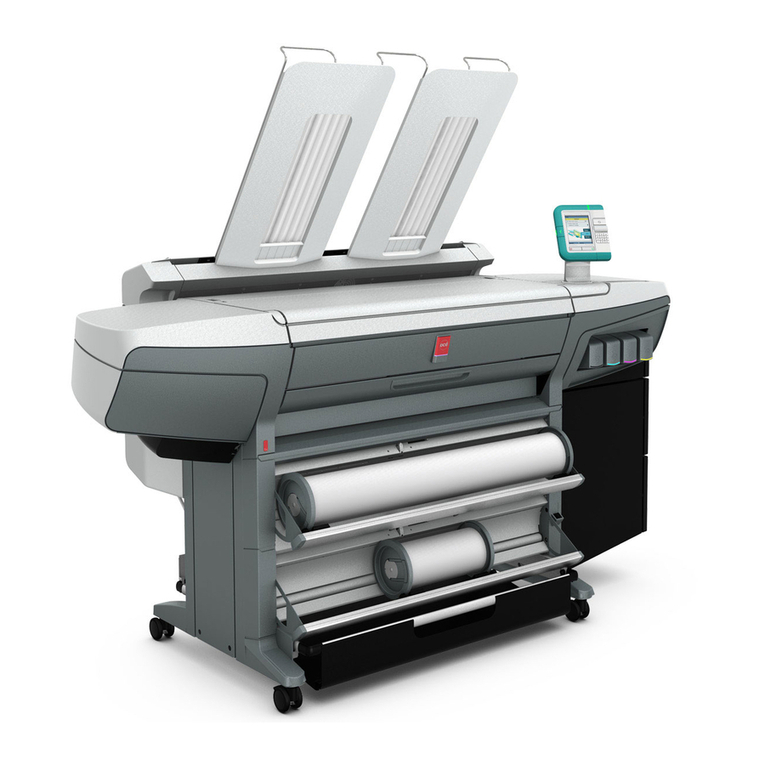
The Océ TDS400 is a multifunctional system to print, to scan to file and to
copy wide format documents. The total system has standard parts and optional
parts.
The parts
The printer (part 5 on the front flap) makes the output.
The Océ Power Logic®controller (part 9 on the front flap) Processes the print
jobs and the copy jobs. It also processes the optional scan-to-file jobs.
The scanner (part 1 on the front flap) Scans your originals. You can print the
originals (copy job) or you can store the scanned original in a file (Océ Scan
Logic®).
The output delivery tray (part 3 on the front flap) Collects a number of copies
behind the printer, as they are printed.
The folder folds the output and adds reinforcement strips with optional
reinforcement unit.
Note: you can only use the output delivery tray or the folder.
The rolls (part 11 on the front flap). You can have one or two rolls.
The compact output stacker Collects prints and copies. The compact output
stacker is optional.
The graphical user interface (GUI) (part 8 on the front flap) Enables you to
check the Océ TDS400 system. The GUI includes a monitor, a keyboard and a
mouse which connect to the controller. A controller cabinet is available to store
the controller and GUI.
Océ Remote Logic®A suite of applications to monitor and manage the
TDS400 from any networked location.
Drivers and Job submission software: Enables you to print from
AutoCAD®, Windows or Macintosh applications. For job submission you
can use also Océ Print Exec Workgroup (optional).

10 Océ TDS400 Quick Reference Manual
Océ Scan Logic®You can scan your originals to a file to use the files in other
applications or to print the files.
Adobe®PostScript®3™Enables you to print the Postscript level 3™
files and Portable Document Files (PDF).
Océ Account Center enables you to manage the account information of the
print, copy and scan-to-file jobs with Océ Account Logic and Océ Account
Console.

Introduction 11
Turning the printer and scanner on or off
▼Turn the printer on
1Set the power switch on the back of the printer to position ‘1’ (see figure 1).
The green light lights up if the you correctly connect the power supply.
▼Turn the printer off
1Set the power switch on the back of the printer to position ‘0’ (see figure 1).
The green light expires.
Note: The compact output stacker receives the power from the printer. It does
not have a separate power supply.
[1] The power switch on the printer
▼Turn the scanner on
1Set the power switch on the back of the scanner to position ‘1’ (see figure 2).
The green light lights up if you correctly connect the power supply.
▼Turn the scanner off
1Set the power switch on the back of the scanner to position ‘0’ (see figure 2).
The green light expires.

12 Océ TDS400 Quick Reference Manual
[2] The power switch on the scanner
▼Turn the controller on
1Press the button on the front of the controller.
The controller turns on.
▼Turn the controller off
1Select the ‘Shut down’ option from the Océ System Control Panel. You can do
this through both the controller and through Océ Remote Logic .
2Switch off the controller and the monitor.
3Set the power switch at the rear of the printer to position ‘0’ (see figure 1).
Note: If you turn off the printer during a print job, you can loose
information or get a paper jam.
Note: If you turn the printer off, wait at least 5 seconds before you restart the
system.

13
Océ TDS400
Quick Reference Manual
Chapter 2
The Océ TDS400 to print
This chapter shows you how to print with the Océ TDS400.
Find more information in the Océ TDS400 user manual on
the CD-ROM.

14 Océ TDS400 Quick Reference Manual
Print on the Océ TDS400 printer
Before you can print, the service technician must install and set the Océ
TDS400 printer according to the connectivity manual. Print the files from your
application through a driver or through programs like Océ Print Exec
Workgroup (optional).
The Océ TDS400 holds the following protocols with TCP/IP:
■Line Printer Daemon (LPD)
■File Transfer Protocol (FTP)
■Server message blocks (SMB)
See the user manual how to use these protocols.
The printer operator panel
Operate the printer through the printer operator panel. The printer operator
panel has a display and six keys as shown on the back flap.
The keys
The red ‘stop’ key enables you to cancel a print or copy job.
▼Stop a print job
1Press the red ‘stop’ key on the printing operator panel.
The current print job stops.
Note: You can stop the print jobs with Océ Queue Manager (See the user
manual).
The green ‘on-line’ key The ‘on-line’ key lets you enter the settings mode of
the printer. See the user manual for all the settings.
▼Set the printer off-line
1Press the green ‘on-line’ key.
The upper line on the display reads ‘off-line’. The printer is in ‘off-line’ mode.
The ‘on-line’ light is off.

The Océ TDS400 to print 15
▼Set the printer on-line
1Press the green ‘on-line’ key.
The printer is prepared to print. The ‘on-line’ light is on.
The ‘next/select’ key To select an option in the menu. If a submenu is present,
enter a menu on a lower level.
The ‘previous’ key Press this key to go one level up in the menu.
The browse keys (left , right ) Use these two keys to display the next or
previous option.
The display
The display shows the feedback about print job status (see tables below) in
normal mode. In off-line mode it shows the ‘off-line’ menu (see figure 3 on
page 19).
Status Messages
Status messages Explanation
Off-line The printer is off-line.
Change options.
Reset printer Turn the printer off and turn the printer on.
Connecting..... There is no communication between the controller and the
printer.
Wait until there is communication.
Printer asleep The printer is in low power mode.
The energy is saved.
Please wait The printer downloads the language.
Wait until the printer is prepared to operate.
Printer ready The printer is prepared to print.
Preparing job The printer prepares a print or copy job.
Printing The printer prints.
Load roll 1
A2
Paper
The printer detects that the required media is not available on
roll 1.
Fill roll 1 with the indicated media.
Load roll 2
A2
Paper
The printer detects that the required media is not available on
roll 2.
Fill roll 2 with the indicated media.
Manual feed
A2
Paper
The printer detects that the required media is not available in
the manual feed.
Put the required media in the manual feed.

16 Océ TDS400 Quick Reference Manual
Open left cover
Refill toner
Press <on-line>
The toner container is empty.
Refill the toner container.
Conditioning The toner concentration is too low.
Wait until the toner concentration is at the correct level.
Printer ready
Roll 1 empty
The paper roll 1 is empty.
Reload roll 1.
Printer ready
Roll 2 empty
The paper roll 2 is empty.
Reload roll 2.
Printer running
Roll 1 empty
The paper roll 1 is empty.
Reload roll 1 after the printers stops printing.
Printer running
Roll 2 empty
The paper roll 2 is empty.
Reload roll 2 after the printers stops printing.
Job cancelled The current print or copy job is cancelled
Close roll unit The roll unit is open.
Close the roll unit.
Sensor not free
Remove paper
Press <on-line>
The paper of one of the rolls is transferred after the marker
(see ‘The paper rolls’ on page 44) when power is applied to
the printer.
Take the paper back.
Press <on-line>
Paper retracted
Press <on-line>
Put the paper into the manual feed.
Press <on-line>
Copy too short
Remove paper
Press <on-line>
The length of the print material is less than 420 mm. This can
occur with the manual feed.
Use an original longer than 420 mm.
Inputflap open
Close inputflap
The input flap is open.
Close the input flap.
Inputflap open
Remove paper
Press <on-line>
The input flap is open during the print process
Remove the paper and press <on-line>.
Roll 1 empty
Open roll unit
The paper on roll 1 is empty.
Open the roll unit and replace it.
Roll 2 empty
Open roll unit
The paper on roll 2 is empty.
Open the roll unit and replace it.
Wait for folder The communication between the printer and the folder starts up.
Folder is off The communication between the printer and the folder was
not established.
Folder belt full The belt of the folder is full.
Empty the belt of the folder.
RU tape empty The tape roll of the reinforcement unit is empty.
Open the reinforcement unit and replace the empty tape roll.
Status Messages
Status messages Explanation

The Océ TDS400 to print 17
Error Messages
Error messages Explanation
Copy too late
Remove paper
Press <on-line>
The copy is too late at the paperpath output sensor
Remove the print material.
Speed failure
Remove paper
Press <on-line>
A paper jam occurred.
Remove the paper jam and press <on-line>
Knife 1 error
Remove paper
Press <on-line>
An error occurred during the cut of the roll.
Check the paper in the roll unit and remove if necessary.
Press <on-line>.
Knife 2 error
Remove paper
Press <on-line>
An error occurred during the cut of the roll.
Check the paper in the roll unit and remove if necessary.
Press <on-line>.
Roll retract err
Press <on-line>
Print material error when the roll unit takes back the printer.
Roll init error
Open roll unit
Press <on-line>
A sensor of the roll unit is activated when power is applied to
the printer.
Open the roll unit.
Guide the paper to the marker (see ‘The paper rolls’ on
page 44).
Press <on-line>
Input too late
Open roll unit
Press <on-line>
The input sheet is too late.
Open the roll unit
If necessary, withdraw roll and rewind
Press <on-line>
Deposit error
Press <on-line>
An error in the compact output stacker occurred.
The compact output stacker stops.
The print process continues.
Press <on-line>.
Illegal language on
controller
using UK English
Press <on-line>
The controller has an illegal language.
The controller uses the English language instead of the se-
lected language.
Call service.
Press <on-line>
Close roll unit
Rewind paper
Press <on-line>
While you printed, the roll unit opened.
Rewind the paper.
Close the roll unit.
Press <on-line>
Error 1st fold A paper jam occurred in the first fold section of the folder.
Clear the paper jam.
Press <on-line>

18 Océ TDS400 Quick Reference Manual
Error in folder A tape jam occurred in the reinforcement unit or a paper jam oc-
curred in the folder. A paper jam can occur in the transport sec-
tion of the folder or in the reinforcement unit of the folder.
Clear the tape jam or clear the paper jam.
Press <on-line>
Error 2nd fold A paper jam occurred in the second fold section of the folder.
Clear the paper jam.
Press <on-line>
Wrong format The folder detected a paper format other than specified at the
printer operator panel.
Correct the format the printer operator panel.
Press <on-line>
Error Messages
Error messages Explanation

The Océ TDS400 to print 19
[3] Menu structure printer operator panel
A0 (841x1189mm)
A1 (594x841mm)
A2 (420x594mm)
A3 (297x420mm)
B1+ (707x1000mm)
B2+ (500x707mm)
B1 (700x1000mm)
Width B2 (500x700mm)
E (34x44”)
D (22x34”)
C (17x22”)
B (11x17”)
Roll 1
E+ (36x48”)
D+ (24x36”)
C+ (18x24”)
Roll 2
B+ (12x18”)
30x42”
Media settings
Paper 64g
Paper 75g
Transparent 75 g
Transparent 90 g
Material Transparent 110g
Vellum
Material Film 3.5
Film 4.5
Manual feed Translucent
Time out 67 seconds
Cut media Cutting...
Configuration Printing...
Print info Menu card Printing...
Demo print Printing...
UK English
Language Nederlands
more...
Configuration
DIN
Paper series DIN CARTO
ONLY 8.5”
MIX 8.5/9”
Clear setmem Yes
No
System Enter
password
Diagnostic
mode
Yes
No
Use DHCP
server
Yes
No
Network sett. adapter 1 IP address 123.456.789.123
Subnetmask 123.456.789.123
Default
gateway
123.456.789.123
Use DHCP
server
Yes
No
adapter 2 IP address 123.456.789.123
Subnetmask 123.456.789.123
Default
gateway
123.456.789.123
Installation Enter password start install.
Stacker
Delivery First Fold
Belt
Trailing
Legend
Leading
Input
Standard
Method Afnor
Ericsson
Off
Binding On
Reinforce
Binding edge (15 .. 30)
Package Length (276..310)
Width (186..230)
Clean RU knife Cleaning RU...
Folding
Paper 110g

20 Océ TDS400 Quick Reference Manual
The selection of the language
On the operator panel of the Océ TDS400 Printer you indicate which language
you use to display the printer information. For example status and error
messages.
▼Select a language
1Press the ‘on-line’ key to put the printer off-line.
2Select the ‘Configuration’ item with the or key.
3Press ‘next/select’ to enter the ‘Configuration’ menu.
4Select ‘Language’ with the or key.
5Press ‘next/select’ to enter the ‘Language’ menu.
6Select the needed language with the or key.
7Press ‘next/select’ to confirm the selected language.
8Press ‘on-line’ to put the printer on-line.
9Turn the printer off and on to download the selected language.
Print the configuration report
The configuration report shows the configuration and the settings of the
system.
1Press the ‘on-line’ key to put the printer off-line.
2Select the ‘Print info’ item with the or key.
3Press ‘next/select’ to enter the ‘Print info’ menu.
4Select the ‘Configuration’ item with the or key.
5Press ‘next/select’ to print the configuration report.
6Press ‘on-line’ to put the printer on-line.
Note: You can change the settings of the Océ TDS400 through the Océ Settings
Editor. See the user manual for complete information.
Print the menu card
You can print the menu of the printer, to guide you through the menu.
1Press the ‘on-line’ key to put the printer off-line.
2Select the ‘Print info’ item with the or key.
3Press ‘next/select’ to enter the ‘Print info’ menu.
Other manuals for TDS400
3
Table of contents
Other Oce All In One Printer manuals

Oce
Oce VarioLink 4522c User manual

Oce
Oce FX3000 SERIES User manual

Oce
Oce fx2081 User manual

Oce
Oce VarioPrint 6000 MICR series Technical Document

Oce
Oce VarioLink 2222c User manual

Oce
Oce VarioPrint 2045 User manual

Oce
Oce VarioLink 5022 User manual

Oce
Oce 31 5E Series Parts list manual

Oce
Oce 9400-II User manual

Oce
Oce OP33 User manual