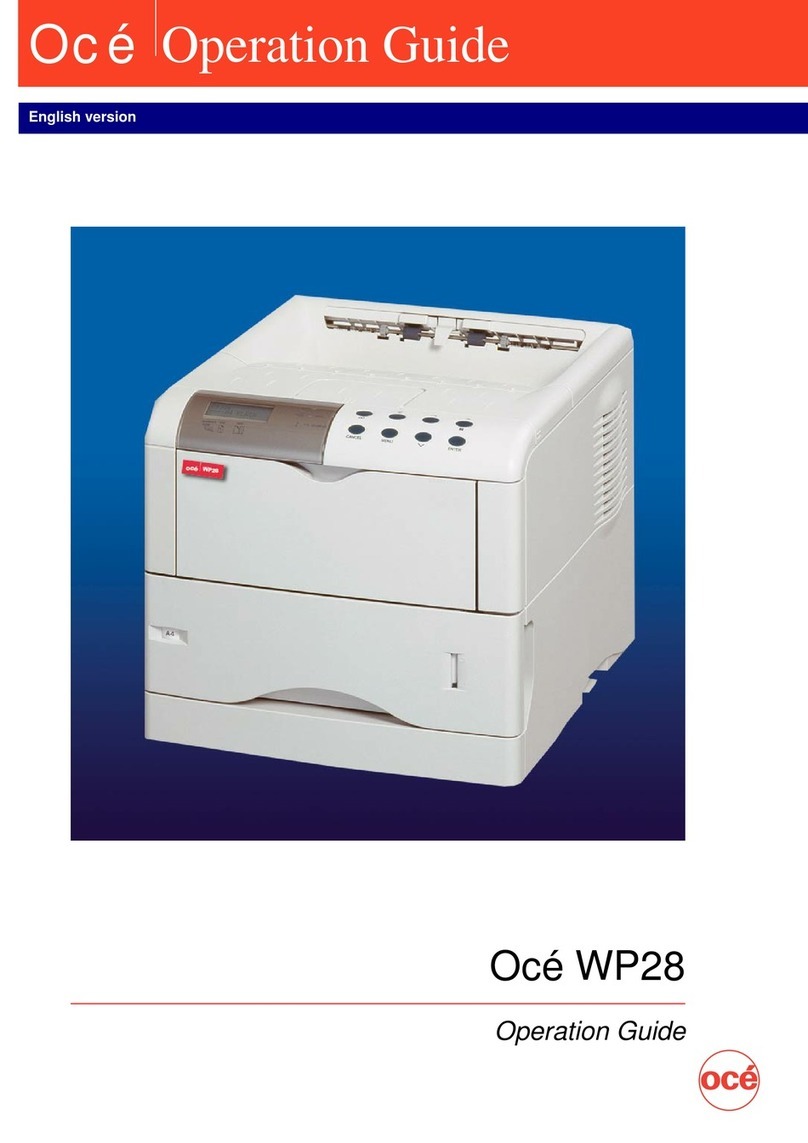
Oce fx2081 User manual


Trademarks
• Océ, the Océ logo and all Océ product names contained herein are trademarks of Océ N.V.
•
Microsoft
®
, the Windows logo, Windows
®
, Windows Server
®
, Windows Vista
®
, Windows
®
7 and Internet
Explorer
®
are registered trademarks of the Microsoft Corporation in the United States and/or other coun-
tries. Screen shots reprinted by permission from the Microsoft Corporation.
• PCL is a registered trademark of the Hewlett Packard Company.
• Monotype is a trademark of Monotype Imaging, Inc. registered in the United States Patent and Trademark
Office and may be registered in certain jurisdictions. The Monotype Imaging logo is a trademark of Mono-
type Imaging, Inc. and may be registered in certain jurisdictions.
• UFST is a trademark of Monotype Imaging, Inc. and may be registered in certain jurisdictions.
All other company names and product names referenced are trademarks or registered trademarks of their
respective companies.

I
Contents
How to read this manual ......................................................................................... iv
1 Installation (Local) ............................................................................................. 1-1
1.1 System requirements ..................................................................................1-1
1.2 Installing the driver through a USB..........................................................1-2
1.2.1 Summary of installation procedure ...................................................1-2
1.2.2 Installing the driver............................................................................1-3
For Windows 7 / Vista / Server 2008 users .................................................1-5
For Windows XP/Server 2003 users............................................................1-7
For Windows 2000 Professional users.......................................................1-10
1.3 Updating the driver...................................................................................1-17
1.4 Uninstalling the driver .............................................................................1-18
1.5 Preparation for Windows 7 users .............................................................1-19
2 Installation (Network) ....................................................................................... 2-1
2.1 System requirements ..................................................................................2-1
2.2 Summary of the installation procedure .....................................................2-2
2.3 Cable connection..........................................................................................2-3
2.4
Setting the IP address.................................................................................2-4
2.5 Installing the driver....................................................................................2-5
2.5.1 Configuring the network printer port................................................2-6
2.5.2 Activating the device option(s) ...........................................................2-8
2.6 Printing the test page .................................................................................2-9
2.7 Updating the driver...................................................................................2-10
2.8 Uninstalling the driver ............................................................................2-10
3
Configuring printer driver settings..............................................................................3-1
3.1 Open the printer properties........................................................................3-1
3.1.1 From an application software.............................................................3-1
3.1.2 From the “Printers” folder ..................................................................3-1
3.2 Common operations ....................................................................................3-2
3.3 Paper tab......................................................................................................3-3
3.3.1 Zoom ....................................................................................................3-3
3.3.2 Copies ..................................................................................................3-3
3.3.3 Paper Size............................................................................................3-4
3.3.4 Paper Source .......................................................................................3-5
3.3.5 Paper Type...........................................................................................3-5
3.3.6 Sort ......................................................................................................3-5
3.4 Page Layout tab...........................................................................................3-6
3.4.1 Duplex..................................................................................................3-6
3.4.2 Combine...............................................................................................3-6
3.4.3 Watermark...........................................................................................3-7
3.4.4 Booklet.................................................................................................3-8

II
3.5 Quality tab...................................................................................................3-9
3.6 Device Option tab......................................................................................3-11
3.6.1 Installed Options...............................................................................3-11
3.7 Using the bypass tray ...............................................................................3-12
3.7.1 Loading paper into the bypass tray .................................................3-12
3.8 Various printing.........................................................................................3-15
3.8.1 Combine printing ..............................................................................3-15
3.8.2 Duplex printing.................................................................................3-17
3.8.3 Booklet printing ................................................................................3-19
3.8.4 Printing on custom size paper..........................................................3-21
3.8.5 Printing watermarks ........................................................................3-25
3.8.6 Printing on specified size paper .......................................................3-28
4 Cancelling a print job......................................................................................... 4-1
Job cancel using Windows.................................................................................4-1
Job cancel from the machine ............................................................................4-1
5 Scanning a document......................................................................................... 5-1
5.1 Scanning a doucment..................................................................................5-1
6 Troubleshooting................................................................................................... 6-1
6.1 Cannot install the local print driver ..........................................................6-1
6.2 Cannot install the network print driver ....................................................6-2
6.3 Error Messages............................................................................................6-3
6.4 Printer trouble.............................................................................................6-4
7 Specifications ....................................................................................................... 7-1
Printer................................................................................................................7-1
Scanner ..............................................................................................................7-3

Iv
How to read this manual
Symbols
In this manual, the following symbols are used with items where important
operational and safety information must be observed.
For safe operation, please carefully read the “Safety Information” supplied
with this product.
Describes warnings to protect yourself and others
from serious or potentially fatal injury if you handle
the machine incorrectly. For safe operation, please
follow instructions carefully.
Describes cautions to protect yourself and others
from personal injury or damage to property if you
handle the machine incorrectly. For safe operation,
please follow instructions carefully.
IMPORTANT
Describes important conditions or restrictions you
should carefully observe to avoid problems caused
by incorrect operations.
NOTE
Describes reference information and additional
notes for operations.
Key descriptions
In this manual, the operating keys are described as follows:
The key names on the control panel are shown in < >, and the key names on
the touch panel are in [ ].
Keys on the control panel
Enclosed in < >, for example, <Setting>.
Touch panel keys
Enclosed in [ ], for example, [Enter].

1-1
1 Installation (Local)
1.1 System requirements
The following operating environment is required in order to use the printer
and scanner drivers.
Item Requirements
PC Type IBM’s PC-AT compatible machine loaded with one of
the following operating systems.
Operating System • Windows 7 Home Premium (x86/x64)
• Windows 7 Ultimate (x86/x64)
• Windows 7 Professional (x86/x64)
• Windows 7 Enterprise (x86/x64)
• Windows Vista Home Basic (x86/x64)
• Windows Vista Home Premium (x86/x64)
• Windows Vista Ultimate (x86/x64)
• Windows Vista Business (x86/x64)
• Windows Vista Enterprise (x86/x64)
• Windows XP Home Edition
• Windows XP Professional
• Windows XP Professional x64 Edition
• Windows 2000 Professional
• Windows Server 2008 Standard (x86/x64)
• Windows Server 2008 Enterprise (x86/x64)
• Windows Server 2008 Datacenter (x86/x64)
• Windows Server 2003 Standard Edition
• Windows Server 2003 Enterprise Edition
• Windows Server 2003 Datacenter Edition
* Only English version operating systems are guaranteed.
* Not compatible with command prompt of MS-DOS and
Windows and DOS prompt.
* Only the printer driver is available for Windows Server
2003 and Windows Server 2008.
CPU and Memory Depends on the operating system
Disk space 10 MB for driver install
Interface port USB 2.0 (full mode)
CD-ROM CD-ROM drive
USBcable

1-2
1.2 Installing the driver through a USB
• For applicable environment, refer to “System requirements” on page 1-1.
• For network installation, refer to the chapter 2 “Installation (Network)”.
1.2.1 Summary of installation procedure
See page 1-3.
1
After installing the driver,
connect your machine to the PC using the USB cable.
2
See page 1-7.
See page 1-10.
For Windows XP/ Server 2003
For Windows 2000
Install the driver
Do not connect USB to PC before installing the driver.
Follow the instructions that appear on the window to complete
the installation.
For Windows 7 / Vista / Server 2008 See page 1-5.
NOTE
• The supplied CD-ROM has 2 types of printer drivers, PCL5e and PCL6.
For maximum performance we recommend installing the PCL6 driver.
• If you want to keep compatibility with your old PCL printer, use PCL5e.
• If installing both PCL6 and PCL5e, refer to page 1-13.

1-3
1.2.2 Installing the driver
Do NOT connect the USB cable before installing the driver
NOTE
• You need to log on as an administrator to install the driver.
•
When you are a Windows 7 user, please change the Windows setting in advance
to installation. For details, see “Preparation for Windows 7 users” on page 1-19.
1 Turn on your PC and insert the supplied CD into your CD-ROM drive.
The driver installation window will appear automatically. If not, run the
“setup.exe” located on the root directory of the supplied CD-ROM.
NOTE
For Windows 7 / Vista / Server 2008 users:
1. If the “AutoPlay” dialog box appears, click [Run Setup.exe].
2. When the “User Account Control” dialog box appears, enter an
administrator password or provide confirmation.
2 Click [Next].
3After reading and accepting the License Agreement, click [Yes].
Otherwise, click [No] to cancel the installation.
4Select “fx2081”, then click [Next].
5Select “Local”, then click [Next].
6Click [Next].
If you want to install the driver into another location, click [Browse] and
locate the preferred file location.
NOTE
Both PCL5e and PCL6 drivers cannot be installed simultaneously.
If you want to install both drivers, first finish the installation of one
driver and go to the other through “Add Printer Wizard” (see “Install-
ing both PCL5e and PCL6 drivers” on page 1-13).

1-4
7 Confirm the displayed contents and click [Next]. The driver files will be
copied to your PC.
NOTE
For Windows 7 / Vista / Server 2008 users:
During the driver installation, the “Windows Security” dialog box
will appear two times. Please click [Install this driver software
anyway].
8 Follow the instructions that appears on your window until you can click
[Finish].
9 After installing the driver, you can connect a USB cable. Go to one of the
following pages according to your Windows version.
• Windows 7 / Vista / Server 2008 users Go to page 1-5.
• Windows XP / Server 2003 users Go to page 1-7.
• Windows 2000 Professional users Go to page 1-10.

1-5
For Windows 7 / Vista / Server 2008 users
IMPORTANT
Make sure that you followed installation steps 1 to 9 described on pages
1-3 through 1-4.
10 Plug the USB cable into your machine and then connect it to your com-
puter.
Connect
NOTE
Be sure to use a shielded USB cable. Use of an unshielded cable
may result in radio interference.
11 Turn on your machine.
12 The driver software will be installed automatically.
13 When the drivers have been installed correctly, the following message
will appear.
The driver installation is completed.
NOTE
If your machine has a device option(s), go to “Activating the device
option(s) on Windows 7 / Vista / Server 2008” on the next page.

1-6
Activating the device option(s) on Windows 7 / Vista / Server 2008
After driver installation, if your machine has a device option(s), you need
to set the “Device Option” to activate either or both the 2nd Paper Cassette
or/and Duplex Unit.
To activate the device option(s):
1 Click [Start] g“Control Panel”.
2 Click “Hardware and Sound”.
3 Click “Printers”.
NOTE
In Windows 7, click “Devices and Printers”.
4 Right-click the Océ fx2081 PCL printer icon, then select “Printing Prefer-
ences…”.
NOTE
If you logged on as a standard user (limited user), you need to use
the “Run as administrator” command to change the printing prefer-
ences. To use the administrator account:
1. Right-click the printer, select “Run as administrator” , and click
“Properties”.
2. Select the account that you want to use, and then enter the pass-
word and click [OK].
3. Click [Printing Preferences] on the “General” tab.
5 Select the “Device Option” tab.
6 Select the device(s) installed on your machine.
NOTE
The duplex unit has been selected as default.
7 Click [OK] and close the printing preferences.

1-7
For Windows XP/Server 2003 users
IMPORTANT
Make sure that you followed installation steps 1 to 9 described on pages
1-3 through 1-4.
10 Plug the USB cable to your machine and then connect it to your com-
puter.
Connect
NOTE
Be sure to use a shielded USB cable. Use of an unshielded cable
may result in radio interference.
11 Turn on your machine.
12 The “Found New Hardware Wizard” will appear.
NOTE
If the following message appears. Select “No, not this time” and click
[Next].
13 Select “Install from a list or specific location (Advanced)” and click [Next].
14 Select “Include this location in the search:” and clear any other choices.
Click [Browse] to specify the folder you have located in step 6 on page
1-3. Then click [OK].
If you did not change the location, navigate to your hard disk: “C:\Oce_
fx2081\PCL” .

1-8
15 Click [Next].
If the “Windows Logo testing” dialog box appears, click [Continue Any-
way] to install the driver.
16 Click [Finish].
17 The “Found New Hardware Wizard” appears again. Repeat the same
procedures from steps 13 to 16. The driver installation is completed.
NOTE
If your machine has a device option(s), go to the following “Activating
the device option(s) on Windows XP/Server 2003”.
Activating the device option(s) on Windows XP/Server 2003
After driver installation, if your machine has a device option(s), you need
to set the “Device Option” to activate either or both the 2nd Paper Cassette
or/and Duplex Unit.
NOTE
You need to log on as an administrator.
To activate the device option(s):
1Click [Start] g“Printer and Faxes”.
In Windows XP Home Edition, click [Start] g“Control Panel” g“Printers
and Other Hardware” g“Printers and Faxes”.
2Right-click the Océ fx2081 PCL printer icon, then select “Printing Prefer-
ences…”.
3Select the “Device Option” tab.
4Select the device(s) installed on your machine.
NOTE
The duplex unit has been selected as default.
5Click [OK] and close the printing preferences.

1-9
If “Found New Hardware Wizard” does not appear
on Windows XP/Server 2003
1Confirm that your machine is connected to the computer with a USB
cable.
2Click [Start], then right-click “My Computer”.
3Select “Properties” to open the “System Properties” window.
4Select the “Hardware” tab, then click [Device Manager].
5Right-click the Océ device displayed under the “Other devices”. Then
select “Uninstall”.
If “Other devices” is not displayed, select “Show hidden devices” from
the “View” menu. The Océ device name will be shown under “Imaging
devices” and “Printers”. Right-click the device and select “Uninstall”.
6The confirmation dialog box opens. Click [OK] to uninstall the device.
7Repeat steps 5 to 6 to uninstall the scanner and printer.
8Click [OK] to close the “System Properties” window.
9Unplug the USB cable and restart your computer.
10 Refer to the “Summary of the installation procedure” on page 1-2 for
proper installation.

1-10
For Windows 2000 Professional users
IMPORTANT
Make sure that you followed installation steps 1 to 9 described on pages
1-3 through 1-4.
10 Plug the USB cable to your machine and then connect it to your com-
puter.
Connect
NOTE
Be sure to use a shielded USB cable. Use of an unshielded cable
may result in radio interference.
11 Turn on your machine.
12 The “Found New Hardware Wizard” will appear. Click [Next].
13 Select “Search for a suitable driver for my device (recommended)” and
click [Next].
The “Locate Driver Files” dialog box appears.
14 Select “Specify a location” and clear any other choices, then click [Next].
15 Click [Browse] to specify the folder you have located in step 6 on page
1-3. Then click [OK]. If you did not change the location, navigate to your
hard disk: “C:\Oce_fx2081\PCL”.
16 Click [Next].
NOTE
If the “Digital Signature Not Found” dialog box appear, click [Yes] to
install the driver.
17 Follow the instructions that appear on the window until you can click
[Finish].
18 The “Found New Hardware Wizard” appears again. Repeat the same
procedures from steps 13 to 17. This will complete the installation.
NOTE
If your machine has a device option(s), go to “Activating the device
option(s) on Windows 2000 Professional” on the next page.

1-11
Activating the device option(s) on Windows 2000 Professional
After driver installation, if your machine has a device option(s), you need
to set the “Device Option” to activate either or both the 2nd Paper Cassette
or/and Duplex Unit.
NOTE
You need to log on as an administrator.
To activate the device option(s):
1Click [Start] g“Settings” g“Printers”.
2Right-click the Océ fx2081 PCL printer icon, then select “Printing Prefer-
ences…”.
3Select the “Device Option” tab.
4Select the device(s) installed on your machine.
NOTE
The duplex unit has been selected as default.
5Click [OK] and close the printing preferences.

1-12
If “Found New Hardware Wizard” does not appear
on Windows 2000 Professional
1Confirm that your machine is connected to the computer with the USB
cable.
2Click [Start] g“Settings” g“Control Panel”.
3Double-click “System” to open the “System Properties” window.
4Select the “Hardware” tab, then click [Device Manager…].
5Right-click the Océ device displayed under the “Other devices”. Then
select “Uninstall”.
If “Other devices” is not displayed, click “Show hidden devices” from
the “View” menu. The Océ device name will be shown under “Imaging
devices” and “Printers”. Right-click them and select “Uninstall”.
6The confirmation dialog box opens. Click [OK] to uninstall the device.
7Repeat steps 5 to 6 to uninstall the scanner and printer. The printer may
be displayed as “Unknown device”.
8Click [OK] to close the “System Properties” window.
9Unplug the USB cable and restart your computer.
10 Refer to the “Summary of the installation procedure” on page 1-2 for
proper installation.

1-13
1.3 Installing both PCL5e and PCL6 drivers
If you want to install both drivers connecting with the USB interface, first
finish installation of one driver and then go to the other through “Add Printer
Wizard”.
NOTE
You need to log on as an administrator to update the driver.
For Windows 7 users
1 Click [Start]
g
“Control Panel”
g
“Hardware and Sound”
g
“Devices and
Printers]”.
2 Select “Add a printer” from the menu and select [Add a local printer].
On Windows Server 2008, if you logged on as a standard user (limited user), right
-click the Add Printer icon, click “Run as administrator”. Select the account that
you want to use, and enter the password then click [OK].
3 Select the USB port for printer and click [Next].
4 Click [Have Disk…].
5 Insert the supplied PCL printer driver CD into your CD-ROM drive, then
click [Browse].
6 Browse to your choice of one of the following locations on the CD, and
then click [Open]
g
[OK]
g
[Next].
To install PCL5e driver, browse to:
“Win7_Vista_2008\Win_x86\Driver\fx2081\Win7_Vista_x86\PCL5e”
“Win7_Vista_2008\Win_x64\Driver\fx2081\Win7_Vista_x64\PCL5e”
To install PCL6 driver, browse to:
“Win7_Vista_2008\Win_x86\Driver\fx2081\Win7_Vista_x86\PCL6”
“Win7_Vista_2008\Win_x64\Driver\fx2081\Win7_Vista_x64\PCL6”
NOTE
Win_x86 is for the 32 bit, and Win_x64 is for the 64 bit PC operating
system. To confirm your PC system type, click [Start]
g
“Control Panel”
g
“System and Security”
g
“System”.
7 Confirm the printer name that you have selected and click [Next].
8
Follow the instructions that appear on the window until you can click [Finish].
NOTE
If the “User Account Control” window appears, click [Continue]. If the “Win-
dows Security” window appears, click [Install this driver software anyway].
9
After installation finishes, the printer icon can be found on the “Printers” folder.

1-14
For Windows Vista / Server 2008 users
1 Click [Start]
g
“Control Panel”
g
“Hardware and Sound”
g
“Printers”.
2 Select “Add a printer” from the menu and select [Add a local printer].
On Windows Server 2008, if you logged on as a standard user (limited user), right
-click the Add Printer icon, click “Run as administrator”. Select the account that
you want to use, and enter the password then click [OK].
3 Select the USB port for printer and click [Next].
4 Click [Have Disk…].
5 Insert the supplied PCL printer driver CD into your CD-ROM drive, then
click [Browse].
6 Browse to your choice of one of the following locations on the CD, and
then click [Open]
g
[OK]
g
[Next].
To install PCL5e driver, browse to:
“Win7_Vista_2008\Win_x86\Driver\fx2081\Win7_Vista_x86\PCL5e”
(Windows Vista)
“Win7_Vista_2008\Win_x86\Driver\fx2081\Win2008_x86\PCL5e”
(Windows Server 2008)
“Win7_Vista_2008\Win_x64\Driver\fx2081\Win7_Vista_x64\PCL5e”
(Windows Vista)
“Win7_Vista_2008\Win_x64\Driver\fx2081\Win2008_x64\PCL5e”
(Windows Server 2008)
To install PCL6 driver, browse to:
“Win7_Vista_2008\Win_x86\Driver\fx2081\Win7_Vista_x86\PCL6”
(Windows Vista)
“Win7_Vista_2008\Win_x86\Driver\fx2081\Win2008_x86\PCL6” (Win-
dows Server 2008)
“Win7_Vista_2008\Win_x64\Driver\fx2081\Win7_Vista_x64\PCL6”
(Windows Vista)
“Win7_Vista_2008\Win_x64\Driver\fx2081\Win2008_x64\PCL6” (Win-
dows Server 2008)
NOTE
Win_x86 is for the 32 bit, and Win_x64 is for the 64 bit PC operating
system. To confirm your PC system type, click [Start]
g
“Control Panel”
g
“System and Maintenance”
g
“System”.
7 Confirm the printer name that you have selected and click [Next].
8
Follow the instructions that appear on the window until you can click [Finish].
NOTE
If the “User Account Control” window appears, click [Continue]. If the “Win-
dows Security” window appears, click [Install this driver software anyway].
9
After installation finishes, the printer icon can be found on the “Printers” folder.

1-15
For Windows XP and Windows Server 2003 users
1 Click [Start]
g
“Printers and Faxes”.
In Windows XP Home Edition, click [Start]
g
“Control Panel”
g
“Printers
and other Hardware”
g
“Printers and Faxes”.
2 Select “Add Printer” from the “File” menu to start the “Add Printer Wiz-
ard” and on the first window click [Next].
3 Select “Local printer attached to this computer” and clear the check box
for “Automatically detect and install my Plug and Play printer”, then
click [Next].
4 Select [USB port] for printer and click [Next].
5 Click [Have Disk].
6 Insert the supplied PCL printer driver CD into your CD-ROM drive, then
click [Browse].
7 Browse to your choice of one of the following locations on the CD, and
then click [OK].
To install PCL5e driver, browse to:
“LegacyOS\Win_x86\Driver\fx2081\WinXP\PCL5e” for Windows XP.
“LegacyOS\Win_x64\Driver\fx2081\WinXP_x64\PCL5e” for Windows
XP x64 Edition.
“LegacyOS\Win_x86\Driver\fx2081\Win2003\PCL5e” for Windows
Server 2003.
To install PCL6 driver, browse to:
“LegacyOS\Win_x86\Driver\fx2081\WinXP\PCL6” for Windows XP.
“LegacyOS\Win_x64\Driver\fx2081\WinXP_x64\PCL6” for Windows
XP x64 Edition.
“LegacyOS\Win_x86\Driver\fx2081\Win2003\PCL6” for Windows
Server 2003.
8 Follow the instructions that appear on the window until you can click
[Finish].
NOTE
When the Windows Logo testing window appears, click [Continue
Anyway].
For Windows 2000 users
1 Click [Start]
g
“Settings”
g
“Printers”.
2 Double-click “Add Printer”.
3 Click [Next].
4 Select “Local printer” and clear the check box for “Automatically detect
and install my Plug and Play printer”, then click [Next].
Other manuals for fx2081
5
Table of contents
Other Oce Printer manuals

Oce
Oce TDS400-CS User manual

Oce
Oce Arizona T220UV User manual

Oce
Oce ColorWave 600 User manual

Oce
Oce VarioPrint 2045-65 NC User manual

Oce
Oce TCS400 Installation instructions

Oce
Oce Arizona 360 GT User manual

Oce
Oce CS9065 User manual

Oce
Oce VarioPrint i Series User manual

Oce
Oce VarioPrint 6180 User manual

Oce
Oce VarioLink 3550pd User manual

Oce
Oce LightJet 430 Operating instructions

Oce
Oce OP30C User manual

Oce
Oce PlotWave 750 User manual

Oce
Oce WP36/50 User manual

Oce
Oce PlotWave 750 Installation and operating manual

Oce
Oce TDS400 Service manual

Oce
Oce ColorWave 600 User manual

Oce
Oce Imagistics ix 2701 User manual

Oce
Oce TDS100 User manual

Oce
Oce CS171 User manual