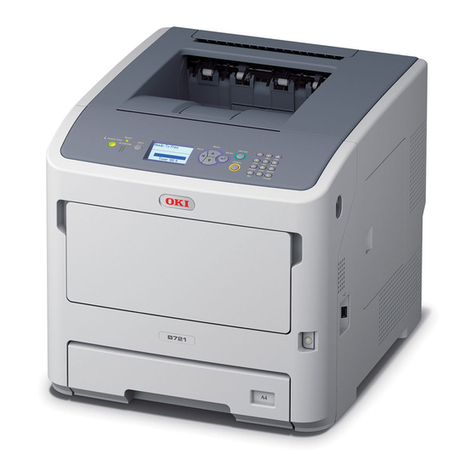
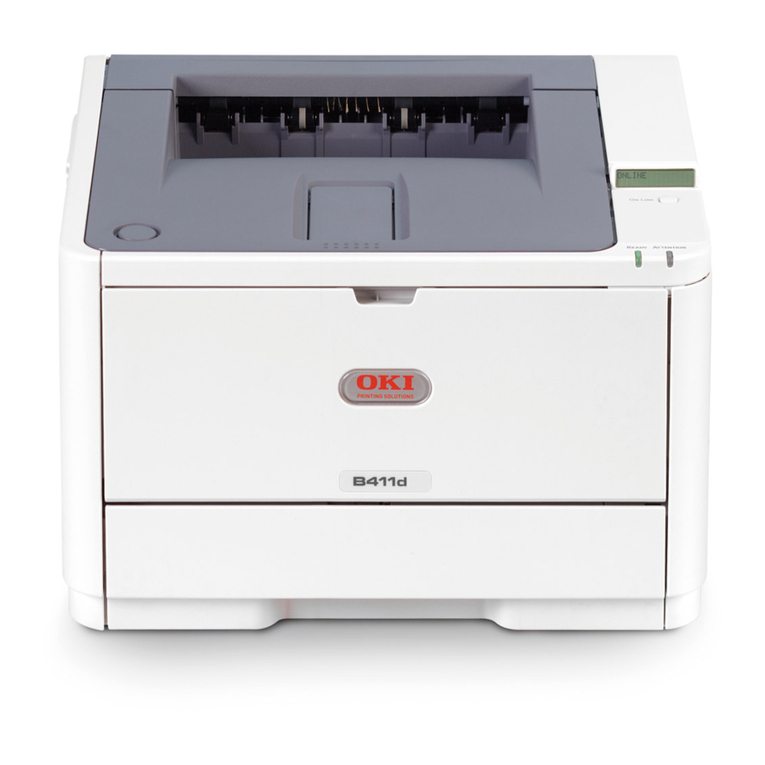
Oki C710dn User manual


C710 Setup Guide
1
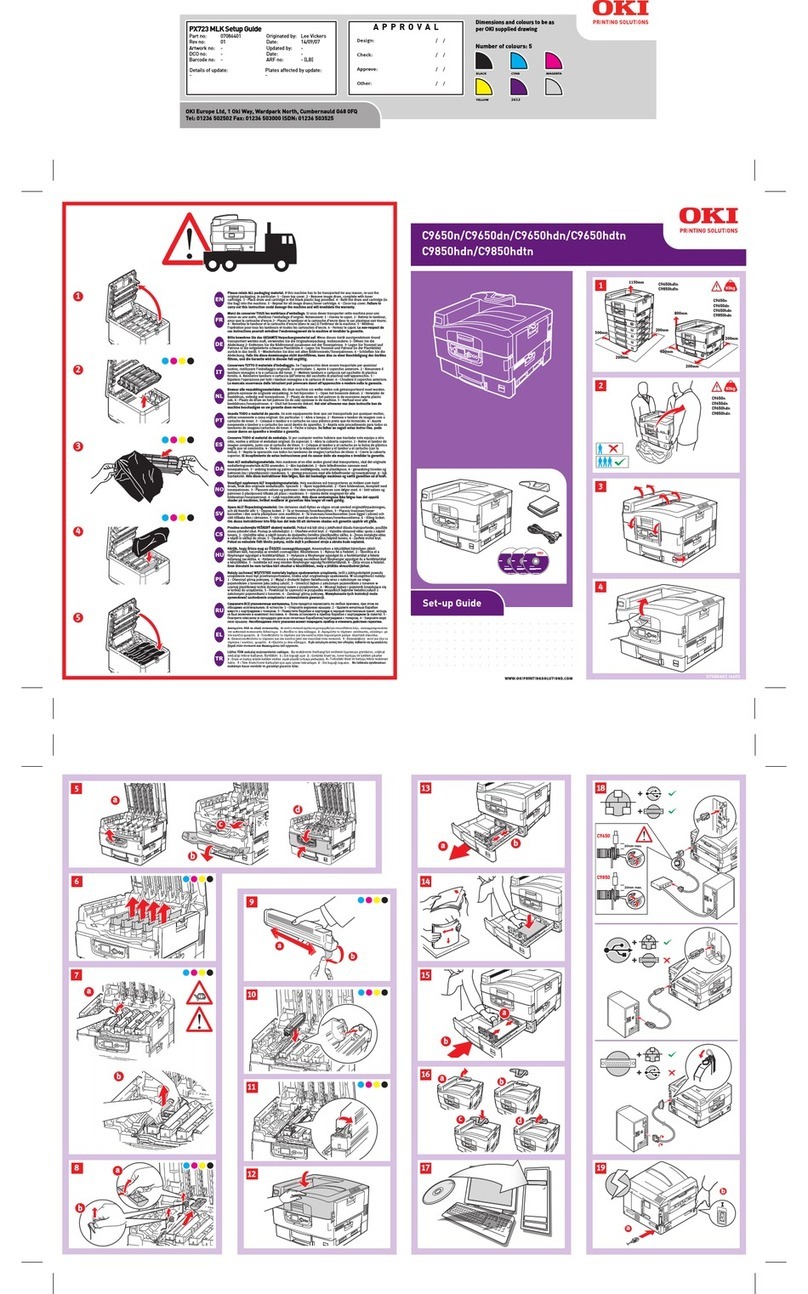
Check Package Contents
1 Printer
2 Black light-shield bags (to protect
drum/toner cartridge if unit is shipped)
3 Power Cable
4 CD-ROM
5 This Setup Guide; Safety, Warranty,
Regulatory Information booklet
Note: Drum/Toner Cartridge is inside the
printer.
Note: We recommend you keep your
packing materials and carton in case
you need to ship or transport the
unit.
Prepare a Location
Note: Space requirements are
approximate.
Select a location for your printer.
Set Up the Printer
Lift printer and place it on the selected
location. The printer is very heavy and
should always be lifted by two people.
Never attempt to lift the printer alone.
With consumables installed the printer
weighs
C710n - 61 lbs. (28 kg)
C710dn - 68 lbs. (31 kg)
C710dtn - 81 lbs. (37 kg)
IMPORTANT!
Other safety information is contained in the
Safety, Warranty and Regulatory
Information booklet supplied with this
product and should be read prior to setting
up the printer.
1 Remove all shipping tape.
100cm
40in.
20cm
8in.
20cm
8in.
70cm
27in.
60cm
23in.
C710n
28kg
61lbs.

C710 Setup Guide
2
Remove Fuser
Shipping Restraint
Press button (a) and lift the top cover
(b).
1 Press firmly on the blue lock (a) to
release the orange transport restraint.
2 Pull the transport restraint out in the
direction of the arrow (b).
Prepare Image Drum/
Toner Cartridges
1 Lift the Black drum/toner cartridge
from printer.
Note: Do not expose cartridge to light for
more than 5 minutes.
Note: Do not touch shiny green surface at
bottom of drum cartridge.
2 Lift tape (a), then pull out protective
paper as shown below (b).
b
a
a
b
a
b

C710 Setup Guide
3
3 Reinstall drum/toner cartridge in
printer.
4 Lock toner cartridge with colored lever.
5 Repeat steps 1-4 for remaining drum/
toner cartridges.
6 Close the top cover.
Load Paper
1 Pull out the paper tray (a).
2 Set guides (b,c) to paper size.
3 Fan the paper to be loaded then tap
the edges of the stack on a flat surface
to make it flush.
a
b
c

C710 Setup Guide
4
4 Load paper (face down and top edge
towards the front for letterhead
paper), adjust the guides for a snug fit
to the paper.
Note: Do not fill the paper tray above the
paper full mark (a).
5 Adjust the Paper Size Dial for the paper
size installed.
6 Close the paper tray.
Install Reference
Manual
Remove the backing from the VELCRO®
strip on the back of the Handy Reference
Guide and apply the guide to the printer.
a

C710 Setup Guide
5
Insert Power Cable
Insert the power cable (a) and turn the
printer ON (b).
WARNING!
Be sure to use the 15A AC power cord
supplied with the printer. Use of a power
cord NOT supplied with this printer, or an
extension cord, may result in overheating,
and could be a safety hazard.
CAUTION!
To prevent fire or shock hazards, connect
the power plug only to a properly rated
power outlet.
CAUTION!
Do not connect this product to an
uninterruptible power supply (UPS). For
further information please contact Oki Data
at 1-800-OKIDATA or www.okidata.com.
Print a Demo Page
1 Press Menu on the control panel.
2 Press the down arrow to select Print
Information.
3 Press Enter.
4 Press the down arrow to select Demo
Page.
5 Press Enter.
6 Demo1 appears. Press Enter.
7 Execute appears. Press Enter.
Computer Connection
Install Network Cable
Connect the network cable between the
printer network port (a) and the Ethernet
hub or router.
Install Parallel Cable
Connect the IEEE 1284 parallel cable
between the printer parallel port (a) and
the host computer.
USB Connection
Note: Install the printer software BEFORE
installing the USB cable. See
“Windows - USB Setup” on page 7.
a
OI
b
a
a
a

C710 Setup Guide
6
Install Software
Selecting a Printer Driver
PostScript®printer driver
Use this driver for high-resolution color
graphics applications and pre-press
graphic proofing. This driver also includes
advanced features which may only be
used by a network administrator.
PCL printer driver
PCL 5c and PCL6e printer drivers are
included mainly for compatibility with
legacy systems.
XPS PCL Driver for Windows Vista®
Note: This driver is currently available
only on the Oki web site.
This driver is for use with Vista systems if
you require Vista premium logo
certification.
You can install and use any of these
drivers depending on your application.
However, each driver must be installed
individually.
Windows
®
- Network Setup
Print the Configuration Sheets
1 Press Menu on the control panel.
2 Press the down arrow to select Print
Information.
3 Press Enter.
4 Press the down arrow to select
Network.
5 Press Enter.
6 Execute appears.
7 Press Enter.
Keep these sheets handy: they contain
information you need to set up the
printer on your network.
Install the Driver
1 Insert the CD in the CD-ROM drive. The
CD will autorun.
2 Select your language.
3 Accept the license agreement.
4 Click Install Driver.
5 Select network printer.
6 Select Directly to the network using
TCP/IP.
7 Enter the IP Address.The IP address
can be found on the Configuration
Sheets.
8 Follow the on-screen instructions.
Test the Printer Driver Installation
To make sure the printer driver is
correctly installed, print a page from any
program. Reinstall the driver if the
installation failed.
Using a Web Browser (optional)
Use your web browser to configure print
server and printer menu settings on an
embedded web page.
1 Activate your web browser (Microsoft
Explorer®/™, Netscape Navigator™ 4.4
or higher, Mozilla®, Firefox®).
2 Enter the IP Address for the printer.
(Locate the address on the network
Configuration Sheets.)
3 Click on a tab to select a category.
Install Utilities and Downloads
Note: You must be connected to the
internet to install Internet
downloads.
1 Select Optional Utilities or Internet
Downloads from the CD installer menu
bar.
2 Click on the utilities and downloads you
want to install and follow the
instructions.
Install Documentation
Note: To open the on-line manuals, you
must have Adobe®Acrobat®Reader
5.0 or higher installed.

C710 Setup Guide
7
1 Select the Driver Setup tab from the
CD installer menu bar.
2 Click Install User’s Guide.
3 Follow the on-screen instructions to
complete the installation.
4 To view the manuals, click
Start>Programs>OkiData C710 User
Guide.
Activate Printer Options
You can configure the options manually
or, for TCP/IP network connections, you
can configure the options automatically
using the Two-Way Communications
feature.
To Configure PostScript Driver
Options Automatically
If you have a TCP/IP enabled network,
you can automatically update your
printer driver to reflect the options
currently installed on the printer.
1 Click Start> Settings> Printers.
2 Right click the OKI C710 icon.
3 Click Properties.
4 Click the Installable Options tab.
5 Select Two-Way Communications.
6 Type the IP address or DNS name.
7 To display the printer’s current default
setting when opened, select Update
Fiery Driver When Opened.
8 Click Update. Click OK.
To Configure PostScript and PCL
Options Manually
1 Click Start>Settings>Printers on the
Windows task bar.
2 Right-click the printer icon and choose
Properties.
3 Click on the Installable Options tab in
the PS driver or the Device Options tab
in the PCL driver.
4 In the PS driver, scroll to Installable
Options and select options; in the PCL
driver select the appropriate check box
in Available Options.
5 Click OK to activate the current
settings.
Windows - USB Setup
Install the Driver
1 Turn the Printer OFF.
2 Insert the CD in the CD-ROM drive. The
CD will autorun.
3 Select your language.
4 Accept the license agreement.
5 Click Install Driver.
6 Select local printer.
7 when prompted to select the port you
want your printer to use, select USB.
8 When prompted, select printer
emulation (PS or PCL).
9 When prompted, connect the USB
cable and switch the printer ON.
Test the Printer Driver Installation
To make sure the printer driver is
correctly installed, print a page from any
program. Reinstall the driver if the
installation failed.
Install Utilities and Downloads
Note: You must be connected to the
internet to install Internet
downloads.
1 Select Optional Utilities or Internet
Downloads from the CD installer menu
bar.
2 Click on the utilities and downloads you
want to install and follow the
instructions.
Activate Optional Accessories
If your printer has an optional second
paper tray, or duplex unit, you must open
the printer driver and activate the device.
1 Click Start>Settings>Printers on the
Windows tasteable.
2 Right-click the printer icon and choose
Properties.
3 Click on the Installable Options tab in
the PS driver or the Device Options tab
in the PCL driver.
4 In the PS driver, scroll to Installable
Options and select options; in the PCL
driver select the appropriate check box
in Available Options.

C710 Setup Guide
8
5 Click OK to activate the current
settings.
Windows - Parallel
Connection
Follow the instructions for USB Setup.
During printer driver installation, when
prompted to select the port you want
your printer to use, select LPT1.
Macintosh®
Connect the USB cable
Note: Printer operation is not assured if
another USB compatible device is
connected concurrently with it.
1 Turn the printer OFF.
2 Connect the USB cable to the USB port
on the computer, then to the USB port
on the printer.
Install the Printer Driver
1 Turn on the printer, then turn on the
computer.
2 Place CD in the CD-ROM drive.
3 Double-click the CD icon that appears
on the desktop.
4 Open the MAC folder.
5 Open the OSX folder. Driver Installer
appear.
6 Select the appropriate OS folder.
7 Follow the on-screen instructions.
8 Select any utilities you want to install.
Click Install.
Add the Printer
1 Run the Print Center or Print Setup
Utility. Click Add.
2 Click More Printers.
3 Select OKI USB, OKI TCP/IP, or
Rendezvous/Bonjour from the drop-
down menu.
Note: If you are using USB, select OKI
USB and disregard step 4.
4 Enter the printer’s IP address.
5 Select the printer model. Click Add.
6 Quit the Print Center.
Use the Web Page to Configure the
Printer
If you are working in a TCP/IP-enabled
environment, you can use a web browser
to display the printer or job printing
status and to change settings. Settings
for the system and network ports can be
configured under [Printer], [Network]
and [Maintenance] on the web page.
Note: The web page facility is only
available when the printer is
connected to the network.
Install the Utilities
1 Insert CD in the CD-ROM drive.
2 Double-click the CD icon that appears
on the desktop.
3 Double-click User Software.
4 Double-click the OSX icon.
5 Double-click the utility you want to
install.
6 Follow the on-screen instructions.
Install the Documentation
Note: Adobe®Acrobat®Reader 5.0 or
higher is required to view the
manuals.
1 Insert the CD into your CD-ROM drive.
2 Double-click the CD icon that appears
on the desktop.
3 Scroll to the C710_UG_ae.pdf file in
the root directory.
To load: drag the .pdf file to the desk-
top
To view: double-click it.
Service and Support
Available 24 hours a day, 7 days a
week.
• Visit our website:
www.okiprintingsolutions.com
• Call 1-800-654-3282.

C710 Guide d’installation
Français 1
Vérification du contenu
de l’emballage
1 Imprimante
2 Sacs en plastique noirs (pour protéger
les cartouches tambour/toner si
expédiées)
3 Cordon d’alimentation
4 CD-ROM
5 Le présent Guide de configuration;
livret Sécurité, garantie et
réglementation
Remarque : Les cartouches tambour/toner
sont à l'intérieur de l'imprimante.
Remarque : Conservez les matériaux
d'emballage et le carton en cas où
vous auriez besoin d'expédier ou de
transporter l'appareil.
Préparation d'un
emplacement
Note: Les exigences concernant l'espace
requis sont approximatives.
Sélectionnez un emplacement pour
l'imprimante.
Configuration de
l'imprimante
Soulevez l'imprimante et déposez-la à
l'endroit sélectionné. L'imprimante est
très lourde et doit toujours être déplacée
par deux personnes. Ne tentez pas de la
déplacer vous-même.
Poids avec les consommables installés
dans l'imprimante :
C710n – 61 lb (28 kg)
C710dn – 68 lb (31 kg)
C710dtn – 81 lb (37 kg)
IMPORTANT!
D'autres renseignements de sécurité sont
indiqués dans le livret Sécurité, garantie et
réglementation fourni avec l'imprimante et
devraient être consultés avant l'installation
de l'imprimante.
1 Retirez tous les rubans d'expédition.
100cm
40in.
20cm
8in.
20cm
8in.
70
cm
27in.
60cm
23in.
C710n
28kg
61lbs.

C710 Guide d’installation
Français 2
Retrait du dispositif de
blocage de l'unité de
fusion
Appuyez sur la touche (a) et soulevez le
couvercle supérieur (b).
1 Appuyez fermement sur le levier de
verrouillage bleu (a) pour déverrouiller
le dispositif de blocage orange (2).
2 Tirez le dispositif de blocage dans la
direction indiquée par la flèche (b).
Préparation des
cartouches tambour/
toner
1 Sortez la cartouche tambour/toner noir
de l'imprimante.
Note: N'exposez pas les cartouches à la
lumière pendant plus de cinq
minutes.
Note: Ne touchez pas à la surface verte
glacée au bas des tambours.
2 Retirez le ruban (a), puis tirez la feuille
de protection comme montré ci-
dessous (b).
b
a
a
b
a
b

C710 Guide d’installation
Français 3
3 Réinstallez la cartouche tambour/toner
noir dans l'imprimante.
4 Verrouillez la cartouche en place à
l'aide du levier.
5 Répétez les étapes 1 à 4 pour les
autres cartouches tambour/toner.
6 Fermez le capot supérieur.
Chargement du papier
1 Sortez le bac à papier (a).
2 Réglez les guides (b et c) pour convenir
au format du papier.
3 Ventilez le papier à charger, puis
tapotez les bords de la pile de papier
sur une surface plane pour aligner les
feuilles.
a
b
c

C710 Guide d’installation
Français 4
4 Chargez le papier (face imprimée vers
le bas, bord supérieur vers l'avant du
bac d'alimentation pour le papier à en-
tête), puis réglez les guides afin que le
papier soit bien maintenu en place.
Note: Ne remplissez pas le bac à papier au-
delà du repère de papier (a).
5 Réglez la molette de format papier
pour le format de papier installé.
6 Fermez le bac à papier.
Installation du Guide
de référence
Retirez l’endos de la bande VELCRO®à
l’arrière du Guide de référence pratique
et apposez le guide sur l’imprimante.
a

C710 Guide d’installation
Français 5
Insertion du cordon
d’alimentation
Insérez le cordon d'alimentation (a) et
mettez l'imprimante sous tension (b).
AVERTISSEMENT!
Utilisez uniquement le cordon
d'alimentation CC de 15 A fourni avec
l'imprimante. L’utilisation d’un cordon
AUTRE que celui fourni avec le produit ou
d’une rallonge peut entraîner une
surchauffe de l’appareil et constituer un
danger.
MISE EN GARDE!
Afin de prévenir les risques d'incendie et
d'électrocution, branchez le cordon
d'alimentation uniquement dans une prise
électrique appropriée.
MISE EN GARDE!
Ne raccordez pas l'appareil à un dispositif
d'alimentation sans coupure. Pour plus
d'information, communiquez avec Oki Data
au 1-800-OKIDATA ou visitez
www.okidata.com.
Impression d’une page de
démonstration
1 Appuyez sur la touche Menu du
panneau de commande.
2 Appuyez sur la touche fléchée vers le
bas pour sélectionner « Print
Information » (Information
imprimante).
3 Appuyez sur Enter (Entrée).
4 Appuyez sur la touche fléchée vers le
bas pour sélectionner « Demo Page »
(Page démo).
5 Appuyez sur Enter (Entrée).
6 « Demo1 » (Démo1) s'affiche. Appuyez
sur Enter (Entrée).
7 « Execute » (Exécuter) s'affiche.
Appuyez sur Enter (Entrée).
Connexion à
l'ordinateur
Installation du câble réseau
Branchez le câble réseau dans le port
réseau de l'imprimante (a) et au
concentrateur ou routeur Ethernet.
Installation du câble
parallèle
Branchez le câble parallèle IEEE 1284
dans le port parallèle de l'imprimante (a)
et dans l'ordinateur hôte.
Connexion USB
Remarque : Installez les logiciels de
l'imprimante AVANT d'installer le
a
OI
b
a
a

C710 Guide d’installation
Français 6
câble USB. Voyez « Windows –
Configuration USB » à la page 8.
Installation des
logiciels
Sélection du pilote
d'imprimante
Pilote d’impression PostScript®
Utilisez ce pilote pour les applications
graphiques couleur haute résolution et
l’épreuvage graphique prépresse. Ce
pilote inclut également des fonctions
évoluées qui doivent être uniquement
utilisées par un administrateur système.
Pilote d’impression PCL
Les pilotes PCL 5c et PCL 6e sont inclus
pour assurer la compatibilité avec les
systèmes moins récents.
Pilote PCL XPS pour Windows
Vista®
Remarque : Le pilote est disponibles
actuellement les sites Web d’Oki
Data uniquement.
Ce pilote est destiné aux systèmes Vista
si vous nécessitez la certification « Vista
Premium Logo Certification ».
Vous pouvez installer et utilisez le pilote
qui correspond à vos besoins. Cependant,
chacun des pilotes doit être installé
individuellement.
Windows
®
– Installation
réseau
Impression des feuilles de
configuration
1 Appuyez sur la touche Menu du
panneau de commande.
2 Appuyez sur la touche fléchée vers le
bas pour sélectionner « Print
Information » (Information
imprimante).
3 Appuyez sur Enter (Entrée).
4 Appuyez sur la touche fléchée vers le
bas pour sélectionner « Network »
(Réseau).
5 Appuyez sur Enter (Entrée).
6 « Execute » (Exécuter) s'affiche.
7 Appuyez sur Enter (Entrée).
Conservez ces feuilles sous la main : elles
contiennent des renseignements dont
vous aurez besoin pour configurer
l’imprimante sur le réseau.
Installation du pilote
1 Insérez le CD dans l'unité CD-ROM. Le
CD est lancé automatiquement.
2 Sélectionnez la langue d’installation.
3 Acceptez le contrat de licence.
4 Cliquez sur « Install Driver » (Installer
le pilote).
5 Sélectionnez « Network Printer »
(Imprimante réseau).
6 Sélectionnez « Directly to the network
using TCP/IP » (Directement au réseau
en utilisant TCP/IP).
7 Entrez l'adresse IP; celle-ci est
indiquée dans les feuilles de
configuration.
8 Observez les directives à l’écran.
Essai du pilote d'imprimante
Afin de s'assurer que le pilote
d'imprimante a bien été installé,
imprimez une page depuis une
application. Réinstallez le pilote en cas de
problème.
a

C710 Guide d’installation
Français 7
Utilisation d’un navigateur Web
(optionnel)
Utilisez un navigateur Web pour accéder
à une page Web intégrée pour configurer
les paramètres du serveur d'impression
et des menus d'imprimante.
1 Lancez votre navigateur Web
(Microsoft Explorer®/MC, Netscape
NavigatorMC 4.4 ou version ultérieure,
Mozilla®, Firefox®).
2 Entrez l’adresse IP de l'imprimante.
(Celle-ci est indiquée dans les feuilles
de configuration réseau.)
3 Cliquez sur un onglet pour sélectionner
une catégorie.
Installation des utilitaires et
téléchargements
Remarque : Un accès à Internet est requis
pour effectuer les téléchargements.
1 Sélectionnez « Optional Utilities »
(Utilitaires optionnels) ou « Internet
Downloads » (Téléchargements
Internet) dans le menu d'installation
du CD.
2 Cliquez sur les utilitaires et les
téléchargements que vous désirez
installer, puis observez les directives à
l'écran.
Installation de la documentation
Remarque : Pour accéder aux guides en
ligne, la version 5.0 ou une version
ultérieure d'Acrobat®Reader
d'Adobe®doit être installée.
1 Sélectionnez l'onglet « Driver Setup »
dans le menu d'installation du CD.
2 Cliquez sur « Install User’s Guide »
(Installer le Guide de l’utilisateur).
3 Observez les directives à l’écran pour
terminer l’installation.
4 Pour consulter les guides, cliquez sur
Start (Démarrer)>Programs
(Programmes)>OkiData C710 User
Guide (Guide de l'utilisateur).
Activation des options de
l'imprimante
Vous pouvez configurer manuellement les
options ou, pour les connexions réseau
TCP/IP, utilisez la fonction « Two-Way
Communication » (Communications
bidirectionnelles) pour configurer
automatiquement ces options.
Configuration automatique des
options du pilote d'imprimante
PostScript
Si vous utilisez un réseau TCP/IP, il est
possible de mettre automatiquement à
jour le pilote d’imprimante pour indiquer
les options installées sur l’imprimante.
1 Cliquez sur Start (Démarrer )>
Settings (Paramètres)> Printers
(Imprimantes).
2 Cliquez avec le bouton droit de la
souris sur l’icône OKI C710.
3 Cliquez sur « Properties » (Propriétés).
4 Cliquez sur l’onglet « Installable
Options » (Options installables).
5 Sélectionnez « Two-Way
Communications » (Communications
bidirectionnelles).
6 Entrez l’adresse IP ou le nom DNS.
7 Pour afficher les paramètres par défaut
courants de l'imprimante lorsque
ouvert, sélectionnez « Update Fiery
Driver When Opened » (Mettre à jour
le pilote Fiery lorsque ouvert).
8 Cliquez sur « Update » (Mettre à jour).
Cliquez sur « OK ».
Configuration manuelle des options
PostScript et PCL
1 Cliquez sur Start (Démarrer)> Settings
(Paramètres)> Printers (Imprimantes).
2 Cliquez avec le bouton droit de la
souris sur l’icône de l'imprimante et
sélectionnez « Properties »
(Propriétés).
3 Cliquez sur l'onglet « Installable
Options » (Options installables) du
pilote PS ou sur l'onglet « Device
Options » du pilote PCL.
4 Dans le pilote PS, défilez jusqu'à
« Installable Options » (Options
installables) et sélectionnez les
options; dans le pilote PCL, cochez les
cases appropriées dans la section
« Available Options » (Options
disponibles).

C710 Guide d’installation
Français 8
5 Cliquez sur « OK » pour valider les
paramètres courants.
Windows – Configuration
USB
Installation du pilote
1 Mettez hors tension l’imprimante.
2 Insérez le CD dans l'unité CD-ROM. Le
CD est lancé automatiquement.
3 Sélectionnez la langue d’installation.
4 Acceptez le contrat de licence.
5 Cliquez sur « Install Driver » (Installer
le pilote).
6 Cliquez sur « Local printer »
(Imprimante locale).
7 Lorsqu'on vous demandera de
sélectionner le port à utiliser pour
l'imprimante, choisissez USB.
8 À l'invite, sélectionnez l'émulation
d'imprimante (PS ou PCL).
9 À l’invite, branchez le câble USB et
mettez sous tension l’imprimante.
Essai du pilote d'imprimante
Afin de s'assurer que le pilote
d'imprimante a bien été installé,
imprimez une page depuis une
application. Réinstallez le pilote en cas de
problème.
Installation des utilitaires et
téléchargements
Remarque : Un accès à Internet est requis
pour effectuer les téléchargements.
1 Sélectionnez « Optional Utilities »
(Utilitaires optionnels) ou « Internet
Downloads » (Téléchargements
Internet) dans le menu d'installation
du CD.
2 Cliquez sur les utilitaires et les
téléchargements que vous désirez
installer, puis observez les directives à
l'écran.
Activation des accessoires
optionnels
Si votre imprimante est munie de l’unité
recto-verso ou du deuxième bac à papier
optionnels, vous devez accéder au pilote
d'imprimante et les activer.
1 Cliquez sur Start (Démarrer)> Settings
(Paramètres)> Printers (Imprimantes).
2 Cliquez avec le bouton droit de la
souris sur l’icône de l'imprimante et
sélectionnez « Properties »
(Propriétés).
3 Cliquez sur l'onglet « Installable
Options » (Options installables) du
pilote PS ou sur l'onglet « Device
Options » du pilote PCL.
4 Dans le pilote PS, défilez jusqu'à
« Installable Options » (Options
installables) et sélectionnez les
options; dans le pilote PCL, cochez les
cases appropriées dans la section
« Available Options » (Options
disponibles).
5 Cliquez sur « OK » pour activer les
paramètres courants.
Windows – Connexion
parallèle
Observez les directives pour la
configuration USB. Au cours de
l'installation du pilote d'imprimante,
lorsqu'on vous demandera de
sélectionner le port à utiliser pour
l'imprimante, choisissez LPT1.
Macintosh®
Branchement du câble USB
Remarque : Le fonctionnement de
l’imprimante n’est pas garanti si un
autre périphérique compatible USB
est connecté en même temps avec
l’imprimante.
1 Mettez hors tension l’imprimante.
2 Branchez le câble USB dans un port
USB de l'ordinateur et dans le port USB
de l'imprimante.
Installation du pilote d’impression
1 Mettez sous tension l’imprimante, puis
l’ordinateur.
2 Insérez le CD dans l’unité de CD-ROM.

C710 Guide d’installation
Français 9
3 Double-cliquez sur l’icône de CD qui
figure sur le bureau.
4 Ouvrez le dossier MAC.
5 Ouvrez le dossier OSX. « Driver
Installer » (Installation du pilote)
s'affiche.
6 Sélectionnez le dossier de SE
approprié.
7 Observez les directives à l’écran.
8 Sélectionnez tout utilitaire à installer.
Cliquez sur « Install » (Installer).
Ajout de l'imprimante
1 Lancez « Print Center » (Centre
d’impression) ou « Print Setup Utility »
(Utilitaire de configuration
d’impression). Cliquez sur « Add »
(Ajouter).
2 Cliquez sur « More Printers » (Autres
imprimantes).
3 Sélectionnez « OKI USB », « OKI TCP/
IP » ou « Rendezvous/Bonjour » dans
le menu déroulant.
Note: Si vous utilisez USB, sélectionnez «
OKI USB » et ignorez l’étape 4.
4 Entrez l'adresse IP de l'imprimante.
5 Sélectionnez votre modèle
d’imprimante. Cliquez sur « Add »
(Ajouter).
6 Quittez « Print Center » (Centre
d’impression).
Utilisation de la page web pour
configurer l'imprimante
Si vous œuvrez dans un environnement
TCP/IP, vous pouvez utiliser un
navigateur Web pour afficher l'état de
l'imprimante ou des travaux d'impression
ainsi que modifier des paramètres. Les
paramètres du système et des ports
réseau peuvent être configurés dans les
sections « Printer » (Imprimante),
« Network » (Réseau) et « Maintenance »
(Entretien) de la page Web.
Remarque : Cette page est accessible
uniquement lorsque les imprimantes
sont raccordées à un réseau.
Installation des utilitaires
1 Insérez le CD dans l'unité CD-ROM.
2 Double-cliquez sur l’icône de CD qui
figure sur le bureau.
3 Double-cliquez sur « User Software »
(Logiciels utilisateur).
4 Double-cliquez sur l’icône OSX.
5 Double-cliquez sur l'utilitaire à installer.
6 Observez les directives à l’écran.
Installation de la documentation
Remarque : La version 5.0 ou une version
ultérieure d'Acrobat®Reader
d'Adobe®5.0 est requise pour
consulter les guides.
1 Insérez le CD dans l'unité de CD-ROM.
2 Double-cliquez sur l’icône de CD qui
figure sur le bureau.
3 Accédez au fichier C710_UG_ae.pdf
dans le répertoire racine.
Pour charger le fichier, glissez le
fichier PDF sur le bureau.
Pour le consulter, double-cliquez
dessus.
Service et soutien
Disponibles 24 heures par jour et 7
jours par semaine
•Visitez notre site Web :
www.okiprintingsolutions.com
•Composez le 1-800-654-3282

C710 Guía de Instalación
Español 1
Verifique el contenido
de la caja
1 Impresora
2 Bolsas negras de protección contra la
luz (en caso de que tenga que
transportar el cartucho de cilindro/
tóner)
3 Cable de alimentación
4 CD-ROM
5 Esta Guía de Instalación; folleto con
información sobre Seguridad, Garantía
y Regulaciones
Nota: El cartucho de cilindro/tóner viene
dentro de la impresora.
Nota: Guarde los materiales de embalaje y
la caja en caso de que tenga que
despachar o transportar la unidad.
Prepare el lugar
Note: Los requisitos de espacio son
aproximaciones
Seleccione el lugar para su impresora.
Instale la impresora
Levante la impresora y colóquela en el
lugar seleccionado. La impresora es muy
pesada y se necesitan dos personas para
levantarla. Nunca intente levantar la
impresora solo.
Peso de la impresora con los consumibles
instalados, modelo:
C710n - 61 lbs. (28 kg)
C710dn - 68 lbs. (31 kg)
C710dn - 81 lbs. (37 kg)
¡IMPORTANTE!
Puede encontrar información adicional
sobre Seguridad, Garantía y Regulaciones
en el folleto que viene con este producto y
debería leerlo antes de instalar la
impresora.
1 Retire todas las cintas de protección.
100cm
40in.
20cm
8in.
20cm
8in.
70cm
27in.
60cm
23in.
C710n
28kg
61lbs.
Other manuals for C710dn
5
This manual suits for next models
2
Table of contents
Languages:
Other Oki Printer manuals