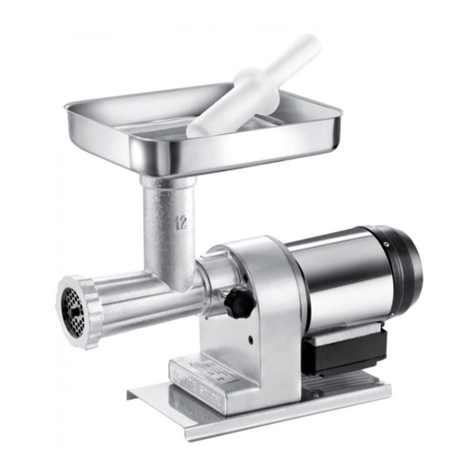
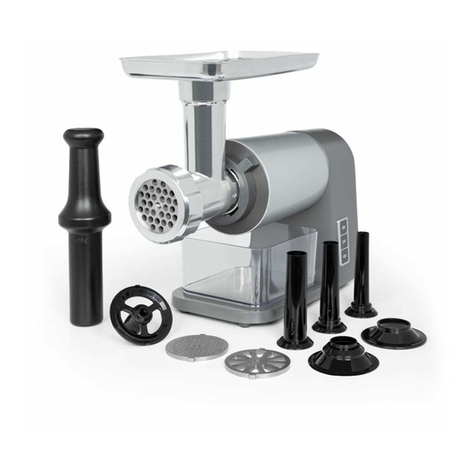
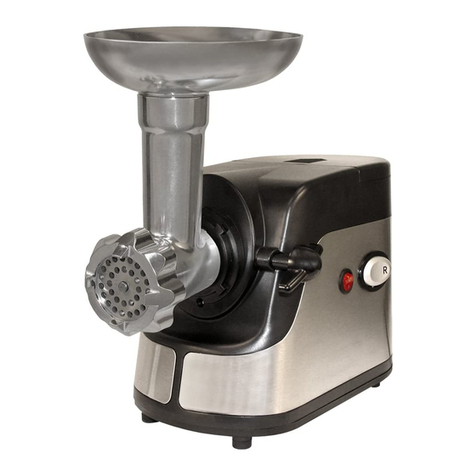
Omcan MG-CN-0032-E User manual

Revised - 06/05/2023
Toll Free: 1-800-465-0234
Fax: 905-607-0234
Email: [email protected]
www.omcan.com
Meat Grinder
Model MG-CN-0032-E
Item 48888
Instruction Manual

2
Page
--------------------------------------------------------------------------- 3 - 4
--------------------------------------------------------------------------- 4 - 8
-------------------------------------------------------------------------- 8
--------------------------------------------------------------------------------------- 8 - 9
--------------------------------------------------------------------------------------------- 9
--------------------------------------------------------------------------------------- 10
----------------------------------------------------------------------------- 11 - 12
---------------------------------------------------------------------------- 13 - 14
---------------------------------------------------------------------------- 15
------------------------------------------------------------------------------------------- 16 - 18
---------------------------------------------------------------------------- 19
Table of Contents
Section
General Information
Safety and Warranty
Technical Specications
Installation
Operation
Maintenance
Figure Drawings
Parts Breakdown
Electrical Schematics
Notes
Warranty Registration
Model MG-CN-0032-E

3
General Information
Omcan Manufacturing and Distributing Company Inc., Food Machinery of America, Inc. dba Omcan
and Omcan Inc. are not responsible for any harm or injury caused due to any person’s improper or
negligent use of this equipment. The product shall only be operated by someone over the age of 18, of
sound mind, and not under the inuence of any drugs or alcohol, who has been trained in the correct
operation of this machine, and is wearing authorized, proper safety clothing. Any modication to the
machine voids any warranty, and may cause harm to individuals using the machine or in the vicinity of
the machine while in operation.
CHECK PACKAGE UPON ARRIVAL
Upon receipt of an Omcan shipment please inspect for external damage. If no damage is evident on the
external packaging, open carton to ensure all ordered items are within the box, and there is no concealed
damage to the machine. If the package has suered rough handling, bumps or damage (visible or concealed),
please note it on the bill of lading before accepting the delivery and contact Omcan within 24 hours, so we may
initiate a claim with the carrier. A detailed report on the extent of the damage caused to the machine must be
lled out within three days, from the delivery date shown in the shipping documents. Omcan has no recourse
for damaged products that were shipped collect or third party.
Before operating any equipment, always read and familiarize yourself with all operation and safety
instructions.
Omcan would like to thank you for purchasing this machine. It’s of the utmost importance to save
these instructions for future reference. Also save the original box and packaging for shipping the
equipment if servicing or returning of the machine is required.
---------------------------------------------------------------------------------------------------------------------------------------------------
Omcan Fabrication et distribution Companie Limité et Food Machinery d’Amerique, dba Omcan et
Omcan Inc. ne sont pas responsables de tout dommage ou blessure causé du fait que toute personne
ait utilisé cet équipement de façon irrégulière. Le produit ne doit être exploité que par quelqu’un de
plus de 18 ans, saine d’esprit, et pas sous l’inuence d’une drogue ou d’acohol, qui a été formé pour
utiliser cette machine correctement, et est vêtu de vêtements de sécurité approprié. Toute modication
de la machine annule toute garantie, et peut causer un préjudice à des personnes utilisant la machine
ou des personnes à proximité de la machine pendant son fonctionnement.
VÉRIFIEZ LE COLIS DÈS RÉCEPTION
Dès réception d’une expédition d’Omcan veuillez inspecter pour dommages externes. Si aucun dommage
n’est visible sur l’emballage externe, ouvrez le carton an de s’assurer que tous les éléments commandés
sont dans la boîte, et il n’y a aucun dommage dissimulé à la machine. Si le colis n’a subi aucune mauvaises
manipulations, de bosses ou de dommages (visible ou cachée), notez-le sur le bond de livraison avant
d’accepter la livraison et contactez Omcan dans les 24 heures qui suivent, pour que nous puissions engager
une réclamation auprès du transporteur. Un rapport détaillé sur l’étendue des dommages causés à la machine
doit être rempli dans un délai de trois jours, à compter de la date de livraison indiquée dans les documents
d’expédition. Omcan n’a aucun droit de recours pour les produits endommagés qui ont été expédiées ou cueilli
par un tiers transporteur.

4
General Information
Safety and Warranty
When using electrical appliances, always follow basic safety precautions including the following:
1. READ All OPERATING INSTRUCTIONS AND PRODUCT SAFETY LABELS!
2. CHECK FOR DAMAGED PARTS: Before using the grinder, checks that all parts are operating properly and
performing the intended functions. Check for alignment of moving parts, binding of moving parts, mounting
and any other conditions that may aect the operation. If any parts, the power cord or the grinder are
damaged, call the customer service number shown in this manual.
3. Always unplug power cord from outlet when not in use, before putting on or taking o parts or accessories,
Avant d’utiliser n’importe quel équipement, toujours lire et vous familiariser avec toutes les opérations
et les consignes de sécurité.
Omcan voudrais vous remercier d’avoir choisi cette machine. Il est primordial de conserver ces
instructions pour une référence ultérieure. Également conservez la boîte originale et l’emballage pour
l’expédition de l’équipement si l’entretien ou le retour de la machine est nécessaire.
---------------------------------------------------------------------------------------------------------------------------------------------------
Omcan Empresa De Fabricacion Y Distribucion Inc. Y Maquinaria De Alimentos De America, Inc. dba
Omcan y Omcan Inc. no son responsables de ningun daño o perjuicío causado por cualquier persona
inadecuada o el uso descuidado de este equipo. El producto solo podra ser operado por una persona
mayor de 18 años, en su sano juicio y no bajo alguna inuencia de droga o alcohol, y que este ha sido
entrenado en el correcto funcionamiento de esta máquina, y ésta usando ropa apropiada y autorizada.
Cualquier modicación a la máquina anúla la garantía y puede causar daños a las personas usando la
máquina mientras esta en el funcionamiento.
REVISE EL PAQUETE A SU LLEGADA
Tras la recepcion de un envio Omcan favor inspeccionar daños externos. Si no hay daños evidentes en el
empaque exterior, Habra el carton para asegurararse que todos los articulos solicitados ésten dentro de la
caja y no encuentre daños ocultos en la máquina. Si el paquete ha sufrido un manejo de poco cuidado, golpes
o daños (visible o oculto) por favor anote en la factura antes de aceptar la entrega y contacte Omcan dentro
de las 24 horas, de modo que podamos iniciar una reclamación con la compañia. Un informe detallado sobre
los daños causados a la máquina debe ser llenado en el plazo de tres días, desde la fecha de entrega que se
muestra en los documentos de envío. Omcan no tiene ningun recurso por productos dañados que se enviaron
a recoger por terceros.
Antes de utilizar cualquier equipo, siempre leer y familiarizarse con todas las instrucciones de
operación y seguridad.
Omcan quisiera darles las gracias por la compra de esta máquina. Es de la máxima importancia para
guardar estas instrucciones para referencias en el futuro. También guarde la caja original y el embalaje
para envío del equipo si el mantenimiento o la devolución de la máquina es necesaria.

5
Safety and Warranty
and before cleaning. After unplugging the unit, turn power switch ON, then OFF to ensure that all power
has been discharged from the grinder.
4. This appliance is NOT intended for use by children or by persons (including children) with reduced
physical, sensory or mental capabilities, or lack of experience and knowledge. This appliance is not to be
used by children!
5. NEVER LEAVE GRINDER UNATTENDED WHILE IT IS RUNNING!
6. ALWAYS USE THE PROVIDED STOMPER, NEVER FEED FOOD BY HAND. KEEP FINGERS CLEAR OF
THE AUGER AND CUTTING BLADES AT ALL TIMES. NEVER REACH INTO THE GRINDER, doing so
may cause serious injury.
7. Always keep the tray guard in place while operating.
8. AVOID contact with moving parts. NEVER USE YOUR FINGERS TO SCRAPE FOOD AWAY FROM THE
CUTTING BLADE WHILE IT IS IN OPERATION. While the grinder is in operation. SEVERE INJURY MAY
RESULT.
9. Wait until all moving parts have stopped and turn o power before removing any part from the grinder or
before switching the grinder in reverse.
10. TIE BACK loose hair, clothing, or any loose object and roll up long sleeves before operating the grinder.
11. REMOVE ties, rings, watches, bracelets, or other jewelry before operating the grinder.
12. DO NOT operate grinder, or any other electrical equipment, with a damaged cord or plug or after the unit
malfunctions. DO NOT ATTEMPT TO REPLACE THE CORD. Call customer service to arrange to return
the grinder for examination, repair, or adjustment.
13. DO NOT use outdoors, this product is intended for INDOOR USE ONLY.
14. DO NOT let cord hang over the edge of a table or counter, come into contact with sharp edges, or touch
hot surfaces.
15. DO NOT let cord become kinked, trapped under unit or let it wind around the grinder.
16. DO NOT pull the power cord to disconnect.
17. DO NOT USE WITH EXTENSION CORD. Always plug directly into a grounded wall receptacle.
18. This grinder uses a grounded, three prong plug (hot, neutral and ground), that should be connected directly
to a grounded 110-120 Volt, 60Hz three prong grounded wall outlet receptacle. Grounded plugs are used
on metal-encased electric appliances in order to provide protection from an electric shock. DO NOT change
or alter the plug in any way. NEVER break o a grounding prong from a 3-conductor plug. Doing so voids
the warranty and can result in electric shock.
19. Place the grinder on a rm and stable surface. Ensure that the grinder is not placed near the edge of the
work top, where it can be easily pushed o or fall.
20. The gear housing and the motor cover may become HOT during operation. This is normal. DO NOT
TOUCH these parts while operating.
21. DO NOT attempt to operate the grinder if the grinder, motor and gear box are cold. Grinder, motor and gear
box temperature should be at least 45˚F (7˚C) before beginning.
22. To reduce the risk of unintentional starting, check that the control is OFF before plugging the cord into wall
outlet. To disconnect, turn the control to OFF, then remove plug from wall outlet.
23. DO NOT operate your grinder under a wall cabinet. When storing, always unplug the unit from the electrical
outlet. Not doing so could create a risk of re, especially if the appliance touches the walls of the garage or
the door touches the unit as it closes.
24. NEVER plug the grinder in where water may ood the area.
25. To protect against risk of electrical shock, DO NOT submerge the grinder in water or other liquids. Be sure
the grinder is disconnected from the power source before cleaning. NEVER rinse the grinder motor under


6
Safety and Warranty
running water, only use a moist cloth to clean the grinder motor unit.
26. DO NOT operate grinder with wet hands or while standing on a wet oor.
27. The use of attachments or parts not specically recommended or sold by the manufacturer for this grinder
will void the warranty and may cause re, electric shock or injury.
28. HAND WASH ALL PARTS! DO NOT USE DISHWASHER. Never put the unit near a hot burner, in an oven,
or in a dishwasher.
29. NEVER use abrasive cleaning agents or abrasive cloths when cleaning the grinder.
30. DO NOT use the grinder for other than intended use.
31. DO NOT RUN grinder without meat in the grinder head. Severe damage to the head and auger may occur.
32. Never turn on and run the meat grinder for more than 10 seconds dry with no meat inside the machine. The
friction between the auger and grinder head will result with high heat causing the meat to stick to the inside
of the grinder assembly. NEVER OPERATE DRY. Damage from dry operation will void the warranty.
33. Be sure the grinder is on a stable work surface. Be sure all the grinder feet are stable.
34. DO NOT attempt to grind bones, nuts or other hard items.
35. WEAR EYE PROTECTION. Wear safety glasses. Everyday eye glasses are not safety glasses. Safety
glasses conform to ANSI Z87.1 requirements. Note: approved safety glasses have Z87 printed or stamped
on them.
36. The manufacturer disclaims any responsibility in the case of improper use of grinder. Improper use of the
grinder voids the warranty.
37. DO NOT use grinder while under inuence of drugs or alcohol.
SAVE THESE INSTRUCTIONS
FOOD SAFETY
WHEN HANDLING FOOD, THE BASIC RULES TO FOLLOW ARE: COOK, SEPARATE CLEAN AND CHILL
COOK
It’s crucial to cook food to a safe internal temperature to destroy bacteria that is present. The safety of
hamburgers and other foods made with ground meat has been receiving a lot of attention lately, and with good
reason. When meat is ground, the bacteria present on the surface are mixed throughout the ground mixture.
If this ground meat is not cooked to at least 160˚F to 165˚F (71˚C to 74˚C), bacteria will not be destroyed and
there’s a good chance you will get sick. Solid pieces of meat like steaks and chops don’t have dangerous
bacteria like E. coli on the inside, so they can be served more rare. Still, any beef cut should be cooked to an
internal temperature of at least 145˚F (63˚C) (medium rare). The safe temperature for poultry is 180˚F (82˚C)
and solid cuts of pork should be cooked to 160˚F (71˚C). Eggs should be thoroughly cooked too. If you are
making a meringue or other recipe that uses uncooked eggs, buy specially pasteurized eggs or use prepared
meringue powder.
SEPARATE
Occurs when raw meats or eggs come in contact with foods that will be eaten uncooked. This is a major
source of food poisoning. Always double-wrap raw meats and place them on the lowest shelf in the refrigerator
so there is no way juices can drip onto fresh produce. Then use the raw meats within 1-2 days of purchase, or
freeze for longer storage. Defrost frozen meats in the refrigerator, not on the counter. When grilling or cooking
raw meats or sh, make sure to place the cooked meat on a clean platter. Don’t use the same platter you used

7
Safety and Warranty
to carry the food out to the grill. Wash the utensils used in grilling after the food is turned for the last time on the
grill, as well as spatulas and spoons used for stir-frying or turning meat as it cooks. Make sure to wash your
hands after handling raw meats or raw eggs. Washing hands with soap and water, or using a pre-moistened
antibacterial towel is absolutely necessary after you have touched raw meat or raw eggs. Not washing hands
and surfaces while cooking is a major cause of cross-contamination.
CLEAN
Wash your hands and work surfaces frequently when you are cooking. Washing with soap and warm water for
at least 15 seconds, then dry with a paper towel.
CHILL
Chilling food is very important. The danger zone where bacteria multiply is between 40˚F and 140˚F (4˚C
and 6˚C). Your refrigerator should be set to 40˚F (4˚C) or below; your freezer should be 0˚F (-17˚C) or below.
Simple rule: serve hot foods hot, cold foods cold. Use chang dishes or hot plates to keep food hot while
serving. Use ice water baths to keep cold foods cold. Never let any food sit at room temperature for more
than 2 hours - 1 hour if the ambient temperature is 90˚F (32˚C) or above. When packing for a picnic, make
sure the foods are already chilled when they go into the insulated hamper. The hamper won’t chill food - it just
keeps food cold when properly packed with ice. Hot cooked foods should be placed in shallow containers and
immediately refrigerated so they cool rapidly. Make sure to cover foods after they are cool.
NOTE: Special considerations must be made when using venison or other wild game, since it can
become heavily contaminated during eld dressing. Venison is often held at temperatures that could
potentially allow bacteria to grow, such as when it is being transported. Refer to the USDA Meat and
Poultry Department for further questions or information on meat and food safety.
RESIDENTIAL USERS: Vendor assumes no liability for parts or labor coverage for component failure
or other damages resulting from installation in non-commercial or residential applications. The right
is reserved to deny shipment for residential usage; if this occurs, you will be notied as soon as
possible.
1 YEAR PARTS AND LABOR WARRANTY
Within the warranty period, contact Omcan Inc. at 1-800-465-0234 to schedule a drop o to either
an Omcan authorized service depot in the area, or to an Omcan Service warehouse to repair the
equipment.
Unauthorized maintenance will void the warranty. Warranty covers electrical and part failures, not
improper use.
Please see https://omcan.com/disclaimer for complete info.
WARNING:
The packaging components are classied as normal solid urban waste and can therefore be disposed of
without diculty.

8
Installation
ASSEMBLING
IMPORTANT: BEFORE ASSEMBLING, MAKE SURE THE GRINDER IS NOT PLUGGED IN.
1. Loosen the black grinder head locking knob until the threads are not exposed inside the motor housing
opening and insert the grinder head into the motor housing with the feed chute facing straight up. Turn
clockwise until the slot on the top of the grinder head aligns with the pin inside the motor housing. Be sure
the head is seated fully into the motor housing (Figure 1). Tighten the grinder head locking knob to lock the
grinder head into place (Figure 2).
2. Insert the auger by aligning the auger spline with the drive shaft of the grinder. Slightly turn the auger
clockwise until seats into gear housing (Figure 3).
Technical Specications
Model MG-CN-0032-E
Power 1.5 HP / 1100 W
Capacity per Hour 720 - 750 lbs. / 326.6 - 340.2 kgs.
Hub Size #32
Gear Driven Yes
RPM 110 / 150 RPM
Plate Sizes 4.5mm, 10mm
Number of Stung Tubes 3
Electrical 110-120V / 60Hz / 1
Meat Tray Dimensions 15.5” x 11” x 3” / 394 x 279 x 76mm
Dimensions 25.8” x 12.2” x 19.2” / 655 x 310 x 488mm
Packaging Dimensions 26” x 16.6” x 16.8” / 660 x 420 x 425mm
Weight 65.7 lbs. / 29.8 kgs.
Packaging Weight 71.5 lbs. / 32.4 kgs.
Item Number 48888
Safety and Warranty
In any case, for suitable recycling, we suggest disposing of the products separately (dierentiated
waste) according to the current norms.
DO NOT DISCARD ANY PACKAGING MATERIALS IN THE ENVIRONMENT!

9
Installation
Operation
3. Place the cutting knife onto the square portion of the auger pin (Figure 4). Note that the cutting knife is a
ONE-WAY-FIT design that ensures that the at side of the blade edges will face outward.
4. Place the grinder plate onto the auger pin and align the slotted notch in the grinder plate with the bottom
notch in the grinder head opening.
NOTE: The cutting plate will only t one way and will protrude approx. 1/8” out of the grinder head).
NOTE: IT IS RECOMMENDED TO ALWAYS USE THE COARSE (10mm) PLATE FOR THE FIRST
GRIND. (Figure 5).
5. Attach front head ring nut and turn the front ring nut clockwise until it is snug against the grinder plate
(Figure 6).
6. Place the neck of the meat tray into the grinder feed chute opening and press down until secure (Figure 7).
IMPORTANT: While one person can stu sausage with this grinder, it is recommended that two people
perform this operation. One person to operate the grinder and push meat into the chute with the
stomper while the other person manages the output into the sausage casing.
TO BEGIN STUFFING:
1. Place seasoned ground meat into the meat tray. Do not overll the tray, place just enough meat to leave
the feed chute area open (Figure 8).
2. Slide a sausage casing over the stung funnel (Figure 9).
3. Pull 4-6” (10-15cm) of casing out at of the end of the stung funnel tube and tie a knot in the end of the
casing (Figure 10).
4. Make sure the grinder is in the “OFF” position. Attach the grinder to the power supply.
5. Press grinder “ON” button or turn grinder switch the to the forward “FWD” position. Carefully start feeding
ground meat into the feed chute. ONLY USE THE STOMPER TO PUSH MEAT INTO THE HEAD, DO NOT
USE YOUR FINGERS OR ANY OTHER OBJECT.
6. Hold the casing in place with one hand while feeding the sausage mixture through the grinder. As the meat
lls the casing, gently lay it on a clean, dry surface (Figure 11).
7. Do not ll the last 4-6” (10-15.24cm) of casing. After the entire length of casing has been stued, twist the
open end to close, then tie o the ends of the casing tightly to close. Twist into links if desired.
8. Whenever stung sausage, ll the casing slowly to avoid air pockets. If air pockets do appear in the
sausage use a pin to prick the bubbles. The small holes will seal naturally.
WARNING! NEVER RUN GRINDER DRY WITHOUT MEAT! It can cause damage to the unit, meat
becomes a lubricant when passing through the grinder, if you run out of meat, turn the grinder o
immediately.

10
Maintenance
WARNING! Before cleaning, assembling or disassembling the grinder, make sure the PLUG IS
REMOVED FROM THE OUTLET POWER SOURCE! ALWAYS unplug the grinder when not in use. After
unplugging the unit, turn power switch ON, then OFF to ensure that all power has been discharged
from the grinder.
CLEANING INSTRUCTIONS
IMPORTANT: BEFORE CLEANING MAKE SURE THE POWER IS TURNED OFF AND THE UNIT IS
UNPLUGGED.
Disassemble the grinder head and wash parts that come in contact with meat thoroughly in hot soapy water,
taking particular care to remove all grease and oil from surfaces. Rinse and dry all parts thoroughly before re-
assembling.
1. Wash all parts that have come in contact with meat in hot soapy water. BE SURE TO CLEAN
IMMEDIATELY AFTER USE. DO NOT IMMERSE THE MOTOR IN WATER OR OTHER LIQUIDS!
2. Rinse the grinder parts with clear hot water, and then dry them IMMEDIATELY.
3. Fully lubricate the head, auger, plates and the knife with a food-grade silicone spray before and after each
use.
4. Clean the motor cover and gear housing with a damp towel and wipe dry. DO NOT IMMERSE THE
MOTOR IN WATER OR OTHER LIQUIDS!
IMPORTANT: Any metal parts must be coated with a food-safe silicone spray to prevent rusting; if not
properly protected; these parts will begin to rust very quickly. DO NOT use rusted parts.

11
Figure Drawings
4 5
1 2 3
6 7

12
Figure Drawings
10
11
98

13
Parts Breakdown
Model MG-CN-0032-E 48888

14
Parts Breakdown
Model MG-CN-0032-E 48888
Item No. Description Position Item No. Description Position Item No. Description Position
AN110 Housing for 48888 1 AN115 Stufng Plate for 48888 6 AN120 Stufng Tube for 48888 11
AN111 Grinder Head for 48888 2 AN116 Cutting Plate (4.5 mm) for 48888 7 AN121 Stufng Tube for 48888 12
AN112 Knob for 48888 3 AN117 Cutting Blade for 48888 8 AN122 Stufng Tube for 48888 13
AN113 Auger Washer for 48888 4 AN118 Cutting Plate (10 mm) for 48888 9 AN123 Meat Pan for 48888 14
AN114 Auger for 48888 5 AN119 Hand-piece Nut for 48888 10 AN124 Meat Pestle for 48888 15

15
Electrical Schematics
Model MG-CN-0032-E 48888

16
Notes
________________________________________________________________________________________
________________________________________________________________________________________
________________________________________________________________________________________
________________________________________________________________________________________
________________________________________________________________________________________
________________________________________________________________________________________
________________________________________________________________________________________
________________________________________________________________________________________
________________________________________________________________________________________
________________________________________________________________________________________
________________________________________________________________________________________
________________________________________________________________________________________
________________________________________________________________________________________
________________________________________________________________________________________
________________________________________________________________________________________
________________________________________________________________________________________
________________________________________________________________________________________
________________________________________________________________________________________
________________________________________________________________________________________
________________________________________________________________________________________
________________________________________________________________________________________
________________________________________________________________________________________
________________________________________________________________________________________
________________________________________________________________________________________

17
Notes
________________________________________________________________________________________
________________________________________________________________________________________
________________________________________________________________________________________
________________________________________________________________________________________
________________________________________________________________________________________
________________________________________________________________________________________
________________________________________________________________________________________
________________________________________________________________________________________
________________________________________________________________________________________
________________________________________________________________________________________
________________________________________________________________________________________
________________________________________________________________________________________
________________________________________________________________________________________
________________________________________________________________________________________
________________________________________________________________________________________
________________________________________________________________________________________
________________________________________________________________________________________
________________________________________________________________________________________
________________________________________________________________________________________
________________________________________________________________________________________
________________________________________________________________________________________
________________________________________________________________________________________
________________________________________________________________________________________
________________________________________________________________________________________

18
Notes
________________________________________________________________________________________
________________________________________________________________________________________
________________________________________________________________________________________
________________________________________________________________________________________
________________________________________________________________________________________
________________________________________________________________________________________
________________________________________________________________________________________
________________________________________________________________________________________
________________________________________________________________________________________
________________________________________________________________________________________
________________________________________________________________________________________
________________________________________________________________________________________
________________________________________________________________________________________
________________________________________________________________________________________
________________________________________________________________________________________
________________________________________________________________________________________
________________________________________________________________________________________
________________________________________________________________________________________
________________________________________________________________________________________
________________________________________________________________________________________
________________________________________________________________________________________
________________________________________________________________________________________
________________________________________________________________________________________
________________________________________________________________________________________

19
Warranty Registration
Gracias por comprar un producto Omcan usted. Para registrar su garantía para este producto, complete la información a continuación,
cortar la tarjeta en la perforación y luego enviarlo a la dirección indicada a continuación. También puede registrarse en línea en:
Merci d’avoir acheté un produit Omcan. Pour enregistrer votre garantie pour ce produit, complétez les informations ci-dessous, détachez la
carte au niveau de la perforation, puis l’envoyer à l’adresse spécié ci-dessous. Vous pouvez également vous inscrire en ligne en visitant:
Thank you for purchasing an Omcan product. To register your warranty for this product, complete the information below, tear o the card at
the perforation and then send to the address specied below. You can also register online by visiting:
OMCAN
PRODUCT WARRANTY REGISTRATION
3115 Pepper Mill Court,
Mississauga, Ontario
Canada, L5L 4X5
https://omcan.com/warranty-registration/
Purchaser’s Information
Name: Company Name:
Address:
Telephone:
City: Province or State: Postal or Zip: Email Address:
Country: Type of Company:
Restaurant Bakery Deli
Dealer from which Purchased: Butcher Supermarket Caterer
Dealer City: Dealer Province or State: Institution (specify):
Invoice: Other (specify):
Model Name: Model Number: Serial Number:
Machine Description:
Date of Purchase (MM/DD/YYYY): Date of Installation (MM/DD/YYYY):
Would you like to extend the warranty? Yes No
Por correo en Canadá
Pour postale au Canada
For mailing in Canada
Por correo en los EE.UU.
Pour diusion aux États-Unis
For mailing in the US
OMCAN
PRODUCT WARRANTY REGISTRATION
4450 Witmer Industrial Estates, Unit 4,
Niagara Falls, New York
USA, 14305
Thank you for choosing Omcan | Merci d’avoir choisi Omcan | Gracias por elegir Omcan

Since 1951 Omcan has grown to become a leading distributor of equipment and supplies to the North
American food service industry. Our success over these many years can be attributed to our commitment
to strengthen and develop new and existing relationships with our valued customers and manufacturers.
Today with partners in North America, Europe, Asia and South America, we continually work to improve
and grow the company. We strive to offer customers exceptional value through our qualied local sales
and service representatives who provide convenient access to over 6,500 globally sourced products.
Depuis 1951 Omcan a grandi pour devenir un des “leaders” de la distribution des équipements et
matériel pour l’industrie des services alimentaires en Amérique du Nord. Notre succès au cours de ces
nombreuses années peut être attribué à notre engagement à renforcer et à développer de nouvelles
et existantes relations avec nos clients et les fabricants de valeur. Aujourd’hui avec des partenaires en
Amérique du Nord, Europe, Asie et Amérique du Sud, nous travaillons continuellement à améliorer et
développer l’entreprise. Nous nous efforçons d’offrir à nos clients une valeur exceptionnelle grâce à
nos ventes locales qualiées et des représentants de service qui offrent un accès facile à plus de 6500
produits provenant du monde entier.
Desde 1951 Omcan ha crecido hasta convertirse en un líder en la distribución de equipos y suministros
de alimentos en América del Norte industria de servicios. Nuestro éxito en estos años se puede atribuir
a nuestro compromiso de fortalecer y desarrollar nuevas relaciones existentes con nuestros valiosos
clientes y fabricantes. Hoy con socios de América del Norte, Europa, Asia y América del Sur, que trabajan
continuamente para mejorar y crecer la empresa. Nos esforzamos por ofrecer a nuestros clientes valor
excepcional a través de nuestro local de ventas y representantes de los servicios que proporcionan un
fácil acceso a más de 6,500 productos con origen a nivel mundial.
This manual suits for next models
1
Table of contents
Other Omcan Meat Grinder manuals

Omcan
Omcan MG-IT-0012-C User manual

Omcan
Omcan MG-CN-0012-S User manual

Omcan
Omcan MG-BR-0022 User manual

Omcan
Omcan FA12 User manual

Omcan
Omcan MG-IT-0032 User manual

Omcan
Omcan MG-CN-0012-C User manual

Omcan
Omcan MG-IT-0012-C User manual

Omcan
Omcan MG-CN-0032-M User manual

Omcan
Omcan MG-CN-0008-E User manual

Omcan
Omcan MG-IT-0008 User manual