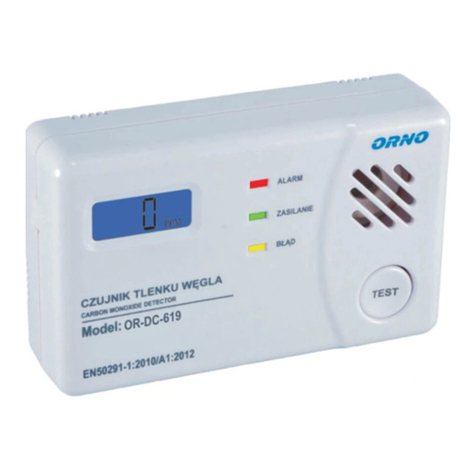
Orno OR-DC-619 User manual

1
Carbon Monoxide Detector (Digital Display)
Model Number: OR-DC-619
Specifications:
Alarm Condition: EN50291 -1:2010 +A1:2012
Sensor: “ECO-cell” Electrochemical carbon monoxide sensor with more than 7
years lifetime
Power: 3 x1.5V AA alkaline batteries
Temperature: Operating range -20°C to 50°C
Humidity: Operating range 5%-100% relative humidity.
Mounting: Accessories supplied for wall mounting
Alarm: 85+ dB on 1m @ 3.4 ± 0.5 KHz pulsing alarm
Test/Reset Button: Test button verifies proper unit operation.
Accuracy of Digital Display: 25-999 ppm (±15%) when measured in condition
of 20˚C (±5˚C). Atmosphere pressure ±10% and 40% (±5%) relative humidity.
Size & Weight: 122mm×77mm×35mm /120g without battery
Sensor Life Time: six years from first powered on but no longer then seven
years from production date printed on back side of unit.
Warranty: Six-year limited warranty from date of purchase against defects in
material and workmanship on CO detector unit.
Quick Set Up
Caution: Please do not press the test/reset button when you
install the batteries!!!
Remove the three enclosed AA batteries
and install them into the battery box.
Observe the battery polarity markings at
the bottom of the battery box.
When the batteries are first installed, the unit will beep one time and
the red , green and yellow LEDs will flash one by one. “888 ppm”will
be displayed with blue backlight. After approximately 1 minute -2
minutes, the display and backlight will be off and the green light will
flash every 4 seconds indicating that the unit is operational. Fit on
battery cover. Your CO detector is now operational.

2
Operating and Alarm Characteristics
LCD Display
LCD Display
Shows
Alarm Sound
Units Status
Recommendation
“for example”
A display of CO
concentration
from 30-999 ppm.
Blue backlight is
lighted. Red LED
flashes.
4 quick beeps,
Repeated every
5 seconds.
Concentration
of CO
detected.
Alarm
condition.
Refer to “What to
do When the
Alarm
Sounds”.
“ttt”displayed on
the LCD. Red
LED, Green LED,
Yellow LED will
flash one by one.
One short beep
on the beginning
of self-test.
“ttt”means the
detector is on
self-testing.
If the status of the
detector is normal,
the LCD will
display “PAS”.
If the status is
unnormal, “Err”will
be displayed with
two short beeps
every 60 seconds.
Brief “888 ppm”
for
approximately
1minute~2minute
s. Blue backlight
led is lighted at
the same time.
None.
(beep one time
when install
batteries is
normal )
Self test when
first powered
up.
CO has not been
detected.
Numbers shown
for test purpose
only.
Display is blank.
Green LED
flashes every 4
seconds.
None.
Normal DC
operation with
good batteries.
(now detecting
CO)
None.
“Lb” displayed.
Yellow LED
flashes every 60
seconds.
One quick beep
every 60
seconds
Batteries need
to be replaced.
Replace all three
AA batteries
immediately.
“Err” displayed
Yellow LED
flashes every 60
seconds.
Two quick beeps
every 60
seconds.
Unit is Error
condition.
Unit has
malfunctioned.
Replace
immediately.
“HHH” displayed
Blue backlight is
lighted. Red LED
flashes.
4 quick beeps,
Repeated every
5 seconds.
Concentration
s of CO is
more than 999
ppm.
MOVE TO
FRESH AIR
IMMEDIATELLY!!!
“End” displayed.
Red LED flashes
every 20 seconds.
Two quick beeps
every 20
seconds.
End of unit life.
About 72
months
from first
powered
on.
Replace unit
immediately.

3
PRESS TEST BUTTON:
(1)Press the test/reset button, the blue back light will be lighted. And the unit
beeps four times with red led flashes four times. Then it will display the highest
CO concentration which have been detected by the detector since it was tested
from the last time to press TEST button.
(2) Then the unit will beep one time with red LED flashes one time. The the LCD
will display “t t t”with the three LEDs flash one by one. This means that the units is
on self-testing.
(3)When the self-test is completed, the LCD will display “PAS”with three beeps
and three LEDs flash three times in the same time if the unit is working well. Then
the LCD will display “CO”with no backlight and then display “0ppm”.
If the unit was tested with fault working status, the LCD will display “Err”with
yellow LED flash two times and the buzzer will beep two times in the same time.
And this will circulate every 60 seconds.
HUSH:
When the CO detector is alarming for the danger concentration of CO, you can
press the test button and the detector will be hushed for 5 minutes. The alarm
sound will be pulsed with blue back light turned off. And the green LED is lighted.
The detector will resume to normal monitor status after 5 minutes. If the CO is still
in dangerous level, the detector will continue to alarm.
Installation Location:
Where To Install Your CO Detector
If you have only one detector,
place it near sleeping areas, not
near fuel burning appliances,
such as fireplaces, furnaces or
hot water heaters.

4
The following suggestions are intended to help you with the placement and
installation of your CO detector.
• Place out of the reach of children. Under no circumstance should children be
allowed to handle the CO detector.
• Install in a bedroom or hallway located close to the sleeping area. Take special
care to verify the alarm can be heard in sleeping areas.
• It is recommended that a CO detector be installed on each level of a multilevel
home.
• Locate at least 5 feet away from all fuel burning appliances.
• Placing at eye level (around 150cm -300cm from the floor) allows for optimum
monitoring of the red and green indicator lights.
• It is permissible to mount the detector on the height of bed in the bedroom or lay
it on the bedside night table (CAUTION ! - please take into account the very loud
alarm!)
• In exceptional circumstances, the detector can be used as a portable device and
take it where you want to detect a threat. The detector should move with caution.
Moving the sensor can cause damage and void the warranty.
Where Not To Install Your CO Detector !
Do not install in kitchens, garages or furnace rooms that may expose the sensor to
substances that could damage or contaminate it.
Do not install within 60cm of heating or cooking appliances.
Do not install near vents, flues, chimneys or any forced/unforced air ventilation openings.
Do not install near ceiling fans, doors, windows or areas directly exposed to the weather.
Do not install in dead air spaces, such as peaks of vaulted ceilings or gabled roofs, where
CO may not reach the sensor in time to provide early warning.
Do not install this unit near deep-cell large batteries. Large batteries have emissions that
can cause the alarm to perform at less than optimum performance.
Do not obstruct the vents located on the alarm. Do not place the alarm where drapes,
furniture or other objects block the flow of air to the vents.
Installation Instructions
Mounting
1. Using the template provided. Mark the position of the two mounting holes by using the
template.
2. Drill two holes using a 6mm drill for the plastic plugs supplied, (ensure you don’t drill into
the house wiring).
3. Screw the unit to the wall.

5
Danger CO Levels
Concentration of CO in Air
(ppm = parts per million)
Approximate Inhalation Time and Symptoms Developed
50 ppm
The maximum allowable concentration for continuous exposure for
healthy adults in any 8-hour period.
200 ppm
Slight headache, fatigue, dizziness, nausea after 2-3 hours.
400 ppm
Frontal headaches within 1-2 hours, life threatening after 3 hours.
800 ppm
Dizziness, nausea and convulsions within 45 minutes.
Unconsciousness within 2 hours. Death within 2-3 hours.
1,600 ppm
Headache, dizziness and nausea within 20 minutes. Death within 1
hour.
3,200 ppm
Headache, dizziness and nausea within 5-10 minutes. Death within
25-30 minutes.
6,400 ppm
Headache, dizziness and nausea within 1-2 minutes. Death within
10-15 minutes.
12,800 ppm
Death within 1-3 minutes.
Your detector detects a threat only where it is installed. Carbon
monoxide must reach detector in described level and time to start
alarming.
Caring for your Carbon Monoxide Detector
To keep your CO detector in good working order, you must follow these simple
steps:
•Test the detector once a month by pressing the Test/Reset button
•Vacuum the detector cover once a month to remove accumulated dust. Use the
soft brush attachment of your vacuum cleaner, and unplug the detector from the
electrical outlet before vacuuming.
•Instruct children never to touch, unplug or otherwise interfere with the unit. Warn
children of the dangers of CO poisoning.
•Never use detergents or solvents to clean the detector. Chemicals can
permanently damage or temporarily contaminate the sensor.
•Avoid spraying air fresheners, hair spray, paint or other aerosols near the CO
detector.
This CO alarm meets these alarm response times (As required in EN50291)
At 50 PPM, the unit must alarm within 60-90 minutes
At 100 PPM, the unit must alarm within 10-40 minutes
At 300 PPM, the unit must alarm within 3 minutes

6
•Do not paint the CO detector. Paint will seal the vents and interfere with proper
sensor operation.
•Do not mount the CO detector directly above or near a diaper pail, as high
amounts of methane gas can cause temporary readings on the digital display.
What to do When the Alarm Sounds
(1) Operate the Test/Reset button;
(2) Call your emergency services;
(3) Immediately move to fresh air - outdoors or by an open door/window. Do a head count to
check that all persons are accounted for. Do not reenter the premises nor move away from
the open door/window until the emergency services responders have arrived, the premises
have been aired out, and your alarm remains in its normal condition.
(4) After following steps 1-3, if the alarm reactivates within a 24 hour period, repeat steps 1-3
and call a qualified appliance technician to investigate sources of CO from fuel burning
equipment and appliances, and to inspect for proper operation of equipment.
If problems are identified during this inspection, have the equipment serviced immediately.
Note any combustion equipment not inspected by the technician and consult the
manufacturer’s instructions, or contact the manufacturer’s directly for more information about
CO safety and the equipment. Make sure that motor vehicles are not, or have not been,
operating in a garage attached or adjacent to the residence.
If the alarm is sounding, pressing the test/reset button will terminate the alarm. If the CO
condition that caused the alert in the first place continues, the alarm will reactivate. If the unit
alarms again within five minutes, it is sensing high levels of CO which can quickly become a
dangerous situation.
Other manuals for OR-DC-619
1
Table of contents
Other Orno Security Sensor manuals

Orno
Orno OR-CR-265 User manual

Orno
Orno VIRONE DV-1 User manual

Orno
Orno OR-CR-240 User manual

Orno
Orno OR-CR-211 User manual

Orno
Orno OR-CR-261 User manual

Orno
Orno OR-CR-220 User manual

Orno
Orno OR-CR-205 User manual

Orno
Orno CALYPSO II AC User manual

Orno
Orno OR-GB-431 User manual

Orno
Orno OR-DC-619 User manual

Orno
Orno OR-CR-216 User manual

Orno
Orno OR-CR-208 User manual

Orno
Orno OR-CR-250 User manual

Orno
Orno OR-CR-214 User manual

Orno
Orno OR-MA-705: OR-MA-710 User manual
Orno
Orno OR-DB-KH-123 User manual

Orno
Orno OR-MA-701 User manual
Orno
Orno OR-MA-712 User manual

Orno
Orno OR-AK-1202 User manual

Orno
Orno OR-CR-203 User manual