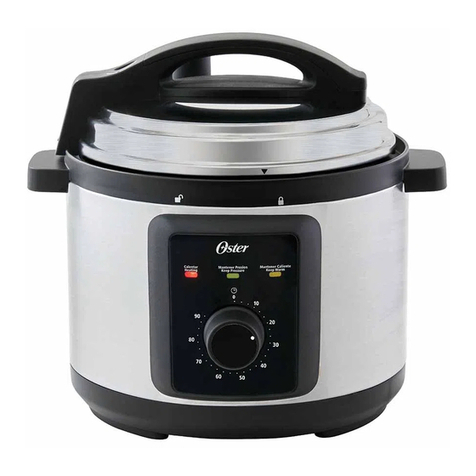
Oster 4801 User manual

MODEL/MODÈLE
MODELO
MODEL/MODÈLE
MODELO 4801
Instruction Manual
MULTI-COOKER
READ ALL INSTRUCTIONS BEFORE USING THIS APPLIANCE
Manuel d’Instructions
COCOTTE ÉLECTRIQUE
LIRE TOUTES LES INSTRUCTIONS AVANT D ’ UTILISER CET APPAREIL
Manual de Instrucciones
MULTIOLLA RAPIDA
LEA TODAS LAS INSTRUCCIONES ANTES DE USAR ESTE APARATO
Manual de Instruções
PANELA MULTIUSO RÁPIDA
LEIA TODAS AS INSTRUÇÕES ANTES DE USAR ESTE APARELHO
4801

1
IMPORTANT SAFEGUARDS
When using electrical appliances, basic safety precautions should always be followed
including the following:
READ ALL INSTRUCTIONS BEFORE USING YOUR OSTER®MULTI-COOKER.
1. DO NOT touch hot surfaces. Use handles or knobs.
2. To protect against fire, electric shock or injuries, DO NOT immerse cord, plug or
appliance in water or other liquids.
3. Unplug unit from outlet when not in use and before cleaning. Allow it to cool
completely before putting on or taking off accessories and before cleaning.
4. Always attach power cord into the appliance first, and then plug it into the electrical
outlet. To disconnect, turn any control to the off position “O”, then remove plug from
electric outlet.
5. DO NOT operate this appliance if power cord or plug are damaged or if the appliance
malfunctions, is dropped or has been damaged in any manner. Return it to the nearest
Authorized Oster® Service Center for examination, repair, electric or
mechanical adjustment.
6. The use of accessories or attachments not recommended by the appliance
manufacturer may result in fire, electric shock or personal injuries.
7. DO NOT use outdoors.
8. DO NOT let cord hang over edge of table or counter, or touch hot surfaces.
9. DO NOT place on or near a hot gas or electric burner, or a heated oven, or flammable
material.
10. A short power cord has been provided in order to reduce the risk resulting from
becoming entangled or tripping over a long cord.
11. DO NOT use appliance for other than its intended use.
12. When moving the product, DO NOT hold it by the lid, please ensure to use the
appliance handles in order to prevent from dropping the unit.
13. Extreme caution must be used when moving the multi-cooker containing hot liquids.
14. Use carefully. DO NOT damage the airproof ring or use another one to replace it.
DO NOT use a tensile ring to increase the airproof.
15. Wash the lid and jam-preventive inner cover often, i.e. after every use. This will keep
the exhaust and safety valves clear and free to operate properly.
16. DO NOT force to open the lid unless the safety valve is down.
17. DO NOT apply any weight upon the safety and valves.
18. Keep hands and face away when pressure exhaust valve is releasing pressure.
DO NOT touch the housing while cooking.

2
19. Use only plastic paddle/spatula on the inner pot in order to keep the non-stick finish
from scratches. The inner pot cannot be heated in a stove or oven. DO NOT block up
the lid with a dishcloth.
20. This appliance cooks under pressure. Improper use may result in scalding injury.
Make certain unit is properly closed before operating. See “Operating Instructions.”
21. DO NOT fill the unit over the 2/3 marking. When cooking foods that expand during
cooking such as rice or dried vegetables, do not fill the unit over ½ full. Over filling
may cause clogging unit and developing excess pressure. See “Operating
Instructions.”
22. Be aware that certain foods, such as applesauce, cranberries, pearl barley, oatmeal
or other cereals, split peas, noodles, macaroni, rhubarb, or spaghetti can foam, froth,
and sputter, and clog the pressure release device (steam vent). These foods should
not be cooked under pressure in the multi-cooker.
23. Always check the pressure release valves for clogging before use.
24. DO NOT open the multi-cooker until the unit has cooled and all internal pressure has
been released. If the lid is difficult to turn, it indicates that the cooker is still
pressurized – do not force it open. Any pressure in the cooker can be hazardous. See
“Operating Instructions.”
25. DO NOT use this multi-cooker for pressure frying with oil. Do not place oil into inner
pot or close lid in browning mode.
26. This appliance is not intended for use by persons (including children) with reduced
physical, sensory or mental capabilities, or lack of experience and knowledge, unless
they have been given supervision or instruction concerning use of the appliance by a
person responsible for their safety. Children should be supervised to ensure that they
do not play with the appliance.
27. Close supervision is necessary when any appliance is used by or near children, or
incapacitated individuals.
THIS UNIT IS FOR HOUSEHOLD USE ONLY.
The appliance has a polarized plug (one blade is wider than the other). To reduce the risk
of electric shock, this plug is intended to fit into a polarized outlet only one way. If the plug
does not fit fully into the outlet, reverse the plug. If it still does not fit, contact a qualified
electrician. Do not attempt to modify the plug in any way.
SPECIAL CORD SET INSTRUCTIONS
1.A short power supply cord is provided to reduce the hazards resulting from becoming
entangled in or tripping over a longer cord.
2.An extension cord may be purchased and used if care is exercised in its use.
3.If an extension cord is used the marked electrical rating of the extension cord must be
the same as the product. The extended cord must be arranged so that it will not drape
over the counter top or tabletop where it can be pulled on by children or tripped over
accidentally.

3
1. Steam Valve
2. Lid
3. Lid Handle
4. Safety Pressure Valve
5. Lid Safety Lock
6. Airproof Gasket
7. Inner Cover
8. Non-Stick Inner Pot
9. Heating Plate
10. Steam/ Water Collector
11. Unit Side Handles
12. Control Panel
a.LED Display
b.Function Button
c.6-Program Indicator Lights
(Browning , Fish/Vegetables ,
Rice , Poultry , Soups/Stews ,
Meats/ Beans )
d.Cooking Level Button
e.Start/Stop Button
f.Red Cooking Indicator Light
g.Delay Timer Button (Up to 2 hours)
h.Yellow Timer Indicator Light
i.Green Keep Warm Indicator Light
(Automatic up to 3 hours)
13. Base/Housing
14. Detachable Power Cord
15. Paddle
1
DESCRIPTION OF THE APPLIANCE
2
3
11
9
4
c
ghaf
e
d
b
10
13
11
12
14
i
8
15
6
5
7

4
IMPORTANT SAFETY INSTRUCTIONS BEFORE USING YOUR APPLIANCE
Before using your Multi Cook, it is very important to CAREFULLY review the following
IMPORTANT SAFEY INSTRUCTIONS:
CLOSING THE LID
When closing the lid, it is very important to ensure it is placed correctly on top of the unit
and well locked. The following instructions illustrate step by step how to ensure proper
closing of the lid.
CAUTION: from the moment the lid is placed on top of the appliance and the unit is
turned on, even if the lid is not properly placed or locked, it will start generating pressure
inside the cooking chamber. Make sure to lock it immediately after placing it on top of the
unit.
OPERATING INSTRUCTIONS
1. Place lid on top of the
unit ensuring it is well
fitted in its place.
4. Make sure the base of
the lid handle is touching
the tab in the unit as
indicated in the
illustration below.
2. Align the arrow on the lid
“ ” with the open lock
symbol “ ” on the unit.
5. Ensure lid is well fitted in
place.
3. While holding the lid
handle, turn it counter
clockwise until the arrow
on the lid “ ” is aligned
with the closed lock
symbol “ ” on the unit.
6. While holding the lid
handle, pull lid lightly
with your hand upwards
to ensure that it is
properly closed and
fitted in place.

5
RELEASING THE PRESSURE
(BEFORE OPENING THE LID)
After using the Multi Cook, it is important to release all pressure prior to opening the lid.
Follow the steps below to ensure a safe operation:
1. In order to release the pressure, turn the upper portion of the valve (located in the lid)
clockwise or counter clockwise.
2. The valve should be position as indicated in the illustration above to release the
pressure. You should see the steam coming out of it. Let all pressure be release
before opening the lid.
CAUTION: keep hands and face away from the to of the valve since the steam that will
be release is hot and can cause personal injuries.
NOTE: if you prefer, use a heat resistant utensil to turn the valve.
WARNING: DO NOT TOUCH THE METAL PARTS OF THE APPLIANCE OR ITS LID
SINCE THEY MIGHT BE HOT. USE HANDLES LOCATED ON THE UNIT AND LID.
OPENING THE LID
CAUTION: Make sure to carefully follow the instructions on the section “RELEASING
THE PRESSURE” before opening the lid.
WARNING: USE PROTECTION IF UNIT IS HOT.
1. While holding the lid
handle, turn it clockwise.
2. Lid will be open when
arrow on the lid “ ” is
aligned with the open
lock symbol on the unit.
3. Pull lid upwards to
remove it.

6
PLACING THE FOOD
1.Place the food into the inner pot. Do not fill the unit over the 2/3 marking. When
cooking foods that expand during cooking such as rice or dried vegetables, do not fill
the unit over ½ full.
NOTE: Never heat up an empty pot. DO NOT cook food below the min level. If there is
not enough food inside, the pressure will rise too fast during cooking, the
pressure may go beyond the normal setting or cause steam to escape through the
Steam Valve.
2. Always clean the bottom of the inner pot and heating plate before placing the inner pot
inside the unit. Make sure there is no foreign matter inside the unit. Make sure inner
pot sits directly on heating plate.
3.Before closing the lid, please ensure the Airproof Ring is its in place around the Inner
Cover and that the Inner Cover is in its place under the lid. Hold Lid Handle tightly and
place it on top of the unit turning it until it falls into place and it stops next to the lid
stop (please follow the diagrams illustrated below). Then turn Lid Handle counter
clockwise until it locks firmly as indicated below. Please note that in the locked position
the Lid Handle should be aligned with the unit side handles in the base.
2
3
3
31
3Min.

7
PLACING THE STEAM vALvE
Place the Steam Valve in its place on top of the Lid. The rib of the Steam Valve and its
base on the Lid should be aligned for unit to pressurize properly.
NOTE: If the Steam Valve is not closed correctly, unit will not function.
NOTE: It is common for some steam condensation to appear at the bottom of the valve.
This is part of the regular operation of the unit.
CAUTION: Be careful with the steam that comes out of the valve.
WARNING: HOT STEAM UNDER PRESSURE WILL ESCAPE FROM THE TOP OF
THE VALVE.
OPERATION OF THE CONTROL PANEL
Operation of the Control Panel:
1.a. Connect the unit to an electric outlet, you will hear a beep sound, all indicator lights
of the intelligent programs will start blinking and the LED Display will lit up showing
0:00. If no action is taken for a few minutes, the lights and LED Display will turn off
until any button is pressed.
b. To get started, press the “Function” button to select the desired intelligent cooking
program. Once a function is selected, the indicator light of that program will light up
and the LED Display will show the time it will take to cook once unit starts cooking
under pressure. For each function, the pressure-cooking time will only initiate after
the pre-heating time of approximately 14 minutes. Please note that this time will vary
depending on the size, quantity, weight and temperature of the food to be cooked.
Please refer to the “COOKING GUIDE” for cooking times by type of food. Heat up
time during the pre-heating stage might also be shorter if unit is used back to back
several times without letting it cool down between operations.
c. Once you have selected the function, you should select the cooking level, which
includes five levels from min to max by pressing the Cooking Level Button. When
selecting the cooking level, the LED Display will show the pressure-cooking time for
each level. Please follow the table below in order to select the desired/required
cooking level:
Browning N/A Will stay on for 30 minutes max or stopped by user
Fish/Vegetables Low 2 4 6 8 10
Rice Low 6 8 10 12 14
Poultry High 12 16 20 24 28
Soup/Stew High 15 20 25 30 35
Beef/Beans High 20 25 30 35 40
CAUTION: HOT

8
d.If you wish to use the delay timer function, press the Delay Timer Button to adjust
to your desired delayed start time. Please note that the delay timer can only be set
for up to 2 hours and in intervals of 30 minutes. The LED Display will show the sum
of the selected delay time and the pressure-cooking time. For example, if the
selected function is Chicken at the minimum cooking level (pressure cooking time of
12 minutes), and the delay time chosen is 1:00 hour, the LED Display will show 1:12.
e. To start cooking, press the Start/Stop Button.
i.If no delay time has been set, the multi-cooker will automatically add 14 minutes
of pre-heating time to the pressure-cooking time of the selected program.
For example, if the selected function is Chicken at the minimum cooking level
(pressure-cooking time of 12 minutes), the LED Display will show 26 minutes
(14 minutes for pre-heating + 12 minutes for pressure cooking). Once the
Start/Stop Button is pressed, unit will start pre-heating at once and the Red
Cooking Indicator Light will start blinking. The Red Cooking Indicator Light will
continue blinking while the unit is in the pre-heating mode and the LED Display will
start counting down the first 14 minutes. Once the pre-heating is completed and the
unit starts pressure-cooking, the Red Cooking Light will turn on solid and the LED
Display will continue counting down the pressure-cooking time of the selected
program. When the count down time is over at “0:00”, the multi-cooker will stop
cooking and it will automatically change to the keep warm mode. The Red Cooking
Indicator Light will turn off and the Green Keep Warm Indicator Light will light up.
NOTE: 14 minutes is an average pre-heat time. If food is larger or really cold,
pre-heat may take slighty longer.
ii.If the delay timer has been set, the LED Display will start counting down the
total time (selected delay time + pre-heat time + pressure-cooking time for the
selected program). The Delay Timer Indicator Light will light up. Once the count
down on the delay timer is completed, the Delay Timer Indicator Light will go off
and the unit will start pre-heating. The Red Cooking Indicator Light will start
blinking. When pre-heating is complete, pressure-cooking will start and the Red
Cooking Indicator Light will remain on (solid). Once pressure-cooking is
completed, the LED Display will show “0:00”, the Red Cooking Indicator Light will
turn off and the Green Keep Warm Light will light up.
NOTE: At any time, press the Start/Stop Button once if you desire to interrupt the
pre-cooking or pressure-cooking process.
2.Please note that air pressure will be generated inside the multi-cooker and therefore,
the Safety Pressure Valve will rise and lock the lid. This is an important safety feature
to avoid the unit from being opened while there is pressure inside.
WARNING: PLEASE DO NOT DEFEAT THIS IMPORTANT SAFETY FEATURE BY
FORCING LID OPEN.
3.Make sure Steam Valve is placed correctly in its place, otherwise the steam inside the
unit will escape during operation and the multi-cooker will not work properly.
4.If multi-cooker does not pressurize after 60 minutes from the time it starts heating, e.g.
if the unit is not covered, the multi-cooker will warn with a continuous beeping sound
until the Start/Stop Button is pressed.
5. When in the keep warm stage, if you don’t need to keep the food warm, pull the plug
from the electrical outlet to turn off the unit completely.
9
6. Do not open multi-cooker until all internal pressure has been released. Do not force
lid open. Any pressure in the multi-cooker can be hazardous. To release pressure,
move the steam valve to the open position with the help of an utensil (see figure).
This will allow the steam to escape until the pressure safety valve falls so you can
safely open the lid to get the food.
IMPORTANT: MAKE SURE TO USE AN UTENSIL TO OPEN THE STEAM VALVE TO
RELEASE THE STEAM KEEPING YOUR HANDS AND FACE AWAY
FROM IT. ALSO, WHILE COOKING, NEVER PLACE HAND/FACE
DIRECTLY ON THE TOP OF THE STEAM VALVE. HOT STEAM UNDER
PRESSURE WILL ESCAPE FROM THE TOP OF THE VALVE.
FOR BROWNING
The multi-cooker has a browning function, which allows you to sauté/brown the food
before using the pressure-cooking function. This function was designed to cook without
pressure and therefore the unit should not be covered with the lid.
1.Remove lid and place food inside unit.
2.Connect power cord to an electrical outlet and select the browning function.
The multi-cooker will heat up the inner pot and cook/sauté the food inside.
3.This function should be controlled manually. When browning is done, unit should be
stopped by using the Start/Stop Button.
IMPORTANT: For safety, unit will shut off after 60 minutes.
NOTE: Do not use a metal spoon to stir the food inside the inner pot since that might
damage the non-stick coating, which could affect the unit performance in the long
term.

10
COOKING GUIDE
BEANS
Green Pea (Dry) Vary by Quantity and Recipe 30
Lentils Vary by Quantity and Recipe 20
Beans Vary by Quantity and Recipe 35
Garbanzo Beans Vary by Quantity and Recipe 40
FRESH VEGETABLES
Chard 150 ml 4
Celery 150 ml 4
Asparagus 150 ml 2
Spinach 125 ml 2
Mushrooms 150 ml 4
Whole Potatoes 250 ml 15
Small Potatoes 250 ml 10
Green Beans 250 ml 10
Beets 500 ml 20
Cabbage 150 ml 4
Whole Tomatoes 125 ml 2
Chopped Carrots 125 ml 3
Whole Carrots 125 ml 6
Green Peas 150 ml 4
Broccoli 150 ml 2
Corn on the Cob 250 ml 4
Whole Cauliflower 375 ml 4
Cauliflower in Pieces 150 ml 2
Beans 150 ml 6

11
Ribs 150 ml 25
Pork Loin 200 ml 20
“Mondongos” (Tripe Soup) Enough to cover food 40
Meat Balls with Sauce 150 ml 15
Meat Balls with Rice 750 ml 15
Beef Tenderloin 150 ml 10
Round Beef 500 ml 20
Roast Beef 500 ml 25
Chicken Stew 250 ml 16
Chicken Breast 250 ml 16
Pork Leg 250 ml 12
Chicken Thighs or Legs 250 ml 12
Salmon 125 ml 3
Trout 125 ml 2
Dry Codfish * 500 ml 10
Tuna 125 ml 3
Octopus 750 ml 25
Crab 250 ml 5
Lobster Enough to cover food 6
Soak it in water the day before:
Pressure-Cooking time does not include pre-heating time.

12
CARE AND CLEANING
1.Unplug unit from the electric outlet before cleaning.
2.Remove the inner pot and lid and wash them with soapy water, rise and wipe them dry
with a soft cloth after each time you use the appliance.
3.Cleaning the lid: Make sure to remove the inner cover by pulling the knob inside. This
will allow you to clean the airproof gasket, the support axis, steam valve protective
cover and the core of the safety pressure valve (see figure). It is also important to
clean the handle, the steam valve and the safety pressure valve on top of the lid.
a. Cleaning the valve jam-preventive cover: Remove the jam-preventive cover from
under the steam valve to clean it and press it back it its place under lid after cleaning
is complete.
b. Cleaning the safety pressure valve: From the inside of the lid, move the core of the
safety pressure valve up and down as indicated in the diagram and make sure
to clean it well with water.
c. Cleaning the steam valve: Lift it up to remove it and wash it with water before
placing it back on its base. On the inside of the Lid, remove the protective cover by
pulling it out, clean it well with water and then place it back under the lid by pushing it
down until it locks into place.
4.Carefully remove the steam/water collector by pulling it backwards. Discard the water
after each use. Clean and place it back on the unit.
5.Do not wash the inner body with water.
6.Do not use any similar hard material and steel wool for cleaning.
7.Store the multi-cooker in the dry place after wiping it clean.
Valve’s
Jam-Preventive
Cover
Core of the
Safety Pressure Valve

13
PROBLEMS AND SOLUTIONS
PROBLEM
Unit will not turn on
Unit will not heat up and pressurize
Red Start/Stop LED is blinking
LED Screen is blinking and showing the
cook time
Unit is plugged in but has no lights on
Unit takes too long to heat up
The food cooked too much or got burned
The food did not cook well enough
Steam is leaking out
Unit takes too long to cook
The Lid does not come off
Unit is beeping
Unit overflowed
SOLUTION
• Make sure the power cord is connected to both the unit and the electrical
outlet.
• Safety Pressure Valve has not been placed correctly in its place (the rib on
the valve has to be aligned with the rib on its base on top of the lid).
• The internal areas of the Safety Pressure Valve or the Steam Valve have
particles. These two valves should be cleaned to have all residue removed
after each use.
• Lid has not been closed correctly.
• Unit has not been programmed properly.
• This is not a problem, this means unit is heating and pressurizing
• This is not a problem, this means the heating and pressurizing time was
longer than the given 14 minutes. When foods are larger or colder then
usual, the heat up time will take longer.
• When the unit is first plugged in, all the lights are on and blinking. If no action
is taken after 1 minute, unit goes to sleep. Pressing any of the buttons will
turn the unit back on.
• When foods are larger or colder then usual, the heat up time will take longer.
• Check and make sure Delay Timer function was not activated.
• Everyone’s tastes are different. Use the cooking level button to reduce the
cooking time to suit your cooking preference.
• If the unit is used back to back, the unit will not cool down and cooking time
or heat up may be faster.
• Everyone’s tastes are different. Use the cooking level button to increase the
cooking time.
• A small amount of steam is allowed to come out of the Safety Pressure Valve
or the Lid Handle Pressure Valve when they are just about the close shut.
• If steam is coming out from the perimeter of the Lid, the Lid has not been
closed properly.
• If constant steam is coming out of the Safety Pressure Valve (longer than
1 min), The Safety Pressure Valve is not closed properly.
• The unit takes an average of 14 minutes to heat up. These 14 minutes will
be added to the chosen cook time. In addition, if any start delay is chosen,
this time will also be added to the cooking time. The final cooking time is
delay time + 14 min heat up time + chosen pressure cook time.
• There is safety feature to keep Lid from being removed while the unit is
under pressure. Please make sure to de-pressurize unit by opening the
Safety Pressure Valve to be able to remove the Lid.
• The unit will beep when cooking is finished and it will automatically go into
the keep warm mode. The green keep warm mode indicator light shall be on
in this case.
• The unit will beep while user is pressing the buttons on the control panel.
• The unit will beep if there is a malfunction of some kind, this means the unit
did not pressurize or heat.
• This means too much food was placed inside of the unit. Please check the
instructions on this manual for maximum amounts of food that can be placed
inside the unit.

14
IMPORTANTES MESURES DE SECURITE
L’utilisation d’appareils électriques nécessite certaines précautions élémentaires d’emploi, en
particulier :
LIRE SOIGNEUSEMENT TOUTES LES INSTRUCTIONS AVANT D’UTILISER VOTRE COCOTTE
ELECTRIQUE
• NE PAS toucher les surfaces chaudes. Se servir des poignées ou des boutons.
• Pour éviter tout risque d’incendie, d’électrocution ou blessures, ne pas plonger le câble
d’alimentation, la fiche électrique ou l’appareil dans l’eau ou tout autre liquide
• Il est recommandé de surveiller vos enfants lorsque vous utilisez votre cocotte à pression à
proximité. Ne pas laisser votre enfant utiliser cet appareil.
• Débrancher votre appareil après usage et avant de le nettoyer. Laisser le refroidir complètement
avant de retirer ou d’ajouter des accessoires et avant de les nettoyer.
• Brancher d’abord le câble d’alimentation à l’appareil, puis brancher sur la prise électrique
murale. Pour débrancher, éteindre l’appareil en tournant le bouton sur la position d’arrêt « o »,
puis débrancher le cordon de la prise murale.
• NE PAS utiliser cet appareil lorsque le câble d’alimentation ou la fiche électrique est
endommagé, ni lorsque cet appareil ne fonctionne pas normalement ou qu’il a subi quelque
dommage que ce soit. En cas de réparation, veuillez retourner cet appareil uniquement au
Centre de Service autorisé Oster® le plus proche de chez vous.
• L’utilisation d’accessoires non recommandés par le fabricant peut entraîner des risques
d’incendie, d’électrocution et de blessures.
• NE PAS utiliser à l’extérieur
• NE PAS laisser le cordon électrique pendre sur le bord d’une table ou d’un comptoir, ni le mettre
en contact avec des surfaces chaudes.
• NE PAS placer l’appareil sur ou à proximité d’une cuisinière électrique ou à gaz, ni dans un four
chaud, ou tout autre matériau inflammable.
• Afin de réduire les risques de chutes, l’appareil est pourvu d’un câble d’alimentation court.
• NE PAS se servir de cet appareil pour d’autres usages que ceux pour lesquels il a été conçu.
• Pour déplacer l’appareil, NE PAS le soulever par le couvercle. Assurez-vous de saisir les
poignées afin d’éviter de le faire tomber.
• Faire très attention lorsque vous déplacez un appareil de cuisson à pression qui contient des
liquides à haute température.
• Se servir de l’appareil avec précaution. NE PAS endommager l’anneau et ne pas le remplacer
par un autre. NE PAS utiliser d’anneau extensible avec l’intention d’accroître son étanchéité.
• Laver fréquemment le couvercle et l’intérieur du couvercle, c’est-à-dire après chaque usage. De
cette façon, la soupape et les valves de sécurité se maintiendront propres et sans obstruction
pour un parfait usage
• Attendre que la valve de sécurité soit au repos avant d’ouvrir le couvercle.
• NE PAS appuyer sur la soupape et les valves.

15
• Maintenir mains et visage loin de la valve pendant que la pression est relâchée. Ne pas toucher
le corps de l’appareil pendant la cuisson.
• Utiliser seulement la spatule en plastique dans la marmite afin d’éviter de railler la surface non
adhérente. La marmite qui se trouve à l’intérieur ne peut pas être utilisée sur une cuisinière ou
dans un four. NE PAS bloquer le couvercle avec un torchon.
• Cet appareil utilise la cuisson sous pression. Un usage inapproprié de cet appareil peut causer
de sérieuses brûlures. Assurez-vous que l’appareil est bien fermé avant de le mettre en service.
Vous reporter au paragraphe « Recommandations d’usage »
• NE PAS remplir l’appareil au delà de la marque indiquant les 2/3. Lorsque vous faites cuire des
aliments qui prennent du volume comme par exemple du riz ou des légumes secs, ne pas
remplir l’appareil au delà de la marque indiquant 1/2. Le remplir excessivement peut provoquer
obstruction et surpression. Vous reporter au paragraphe “Recommandations d’usage”.
• Sachez que certains aliments, tels que la purée de pomme, les groseilles, l’orge, l’avoine ou
autres céréales, les pois cassés, nouilles, macaronis, rhubarbe ou spaghetti peuvent créer de
l’écume et crachoter, obstruant la valve à pression. Ces aliments ne devraient pas être cuits
sous pression.
• Toujours s’assurer que la valve à pression n’est pas obstruée avant d’utiliser l’appareil.
• NE PAS ouvrir le couvercle de la cocotte avant que l’appareil ne soit complètement refroidi
et que toute la pression ait été relâchée. Si le couvercle est difficile à ouvrir, cela indique que
l’appareil est encore sous pression – ne pas forcer l’ouverture. Toute pression à l’intérieur de la
cocotte est dangereuse. Vous reporter au paragraphe « instructions d’usage »
• NE PAS se servir de cette cocotte pou cuire sous pression à l’huile. Ne pas verser d’huile dans
la marmite et ne pas fermer le couvercle en phase de brunissage.
CET APPAREIL EST UNIQUEMENT DESTINE À UN USAGE MENAGER.
CONSERvER CES INSTRUCTIONS
Cet appareil est muni d’une fiche électrique polarisée (l’une des lames est plus large que
l’autre). Afin d’éviter tout risque d’électrocution, ce type de fiche ne peut s’insérer dans
une prise murale polarisée que dans un seul sens.
Si la fiche ne rentre pas parfaitement dans la prise, tournez-la dans l’autre sens. Si elle
ne rentre toujours pas, faites appel à un électricien professionnel. Ne pas essayer de
modifier la prise.
RECOMMANDATIONS D’USAGE DU CABLE D’ALIMENTATION
1. Le câble d’alimentation est court afin de réduire les risques d’enchevêtrement et de
chute.
2. Si vous utilisez une rallonge, faites preuve de prudence lors de son utilisation.
3. Si vous utilisez une rallonge, assurez-vous que le cordon a une puissance équivalente
à celle de l’appareil. Ne pas laisser pendre le câble d’alimentation sur le bord d’un
comptoir ou d’une table, un enfant pourrait tirer dessus ou s’y accrocher
involontairement.

16
1. Valve à pression
2. Couvercle
3. Poignée
4. Valve de sécurité
5. Fermeture de sécurité du couvercle
6. Joint d’étanchéité
7. Couvercle intérieur
8. Marmite intérieure à surface non
adhérente
9. Base chauffante
10. Réceptacle à vapeur/eau
11. Poignées de côté
12. Tableau de fonctions
a. Voyants lumineux LED Display
b. Bouton de fonction
c. 6 voyants de programmation
( Brunissage , Poisson/légumes ,
Riz , volaille ,
soupes/ragoûts
,
viande/haricots )
d. Bouton de niveau de cuisson
e. Bouton de marche /arrêt
f. Voyant rouge de cuisson
g. Bouton de cuisson différée (jusqu’à 2
heures)
h. Voyant jaune du chronomètre
i. Voyant vert de maintien de chaleur
(automatique jusqu’à 3 heures)
13. Base
14. Câble d’alimentation détachable
15. Spatule
DESCRIPTION DE L’APPAREIL
1
2
3
11
9
4
c
ghaf
e
d
b
10
13
11
12
14
i
8
15
6
5
7

17
1. Pour ouvrir le couvercle : tenir fermement la poignée et la tourner dans le sens des
aiguilles d’une montre pour la desserrer.
ATTENTION: VOUS PROTÉGERAVEC UN LINGE SI L’APPAREIL EST ENCORE CHAUD.
2. Mettre les aliments dans la marmite intérieure. Ne pas remplir au delà de la marque
des 2/3. Si vous cuisinez des aliments qui prennent du volume en cuisant tels
que du riz ou des légumes secs, ne pas remplir au delà de la moitié.
REMARQUE: Ne jamais faire chauffer une marmite vide. NE PAS cuisiner les aliments
au dessous du niveau minimum. S’il n’y a pas assez d’aliments à l’intérieur,
la pression s’élèvera trop rapidement pendant la cuisson, il est possible
qu’elle s’élève au delà du niveau normal et que la vapeur s’échappe alors
au travers de la valve à pression
3. Toujours laver le fond de la marmite et la base chauffante avant de placer la marmite
à l’intérieur de l’appareil. Assurez-vous que rien ne se trouve à l’intérieur de l’appareil.
Assurez-vous que la marmite se trouve bien au centre de la base chauffante.
4. Avant de fermer le couvercle, assurez-vous que l’anneau d’étanchéité est bien en
place autour du couvercle intérieur et que le couvercle intérieur est bien en place
sous le couvercle de l’appareil. Tenir la poignée du couvercle fermement et le placer
au dessus de l’appareil, tourner jusqu’à ce qu’il soit bien en place et bloqué (veuillez
suivre les schémas ci-dessous). Puis tourner la poignée du couvercle dans le sens
inverse des aiguilles d’une montre jusqu’à ce que le couvercle soit bien fermé dans la
position indiquée ci-dessous. En position fermée, la poignée du couvercle devrait être
alignée avec les poignées de l’appareil qui se trouvent sur le côté.
RECOMMANDATIONS D’USAGE
2
3
3
31
3Min.

18
5. Placer la valve à pression sur le couvercle: la rainure de la valve et sa base sur le
couvercle doivent être alignées pour que l’appareil puisse pressuriser correctement.
NOTE: Si la valve à pression n’est pas fermée correctement, l’appareil ne se mettra pas
en marche.
REMARQUE: il est commun de voir apparaitre un peu de condensation sur le fond de la
valve. Cela fait partie de la marche normale de l’appareil
6. Tableau de fonctions:
a) Brancher l’appareil sur la prise murale, l’appareil émettra un son, tous les voyants
lumineux des différents programmes commenceront à clignoter et le LED s’allumera
et marquera 0:00. Si aucune action n’est prise pendant les quelques minutes qui
suivent, les voyants et le LED s’éteindront jusqu’à ce qu’à ce qu’on appuie sur une
touche.
b) Pour commencer, appuyer sur la touche “Fonction” et sélectionner le programme de
cuisson désiré. Une fois le programme sélectionné, le voyant lumineux de ce
programme s’allumera et le LED montrera le temps que prendra la cuisson une
fois que l’appareil est sous pression. Pour chaque programme, le temps de cuisson
commencera seulement après la préchauffe qui prend environ 14 minutes. Le temps
de préchauffe varie en fonction du volume, de la quantité, du poids et de la
température des aliments à cuire. Veuillez-vous reporter au tableau ci-dessous
pour les temps de cuisson selon les différents aliments. Le temps de préchauffe
peut être écourté si l’appareil est utilisé plusieurs fois de manière consécutive sans
le laisser refroidir.
LEGUMES SECS
Pois cassés Varie selon la quantité et la recette 30
Lentilles Varie selon la quantité et la recette 20
Haricots Varie selon la quantité et la recette 35
Pois chiches Varie selon la quantité et la recette 40
LEGUMES FRAIS
Blettes 150 ml 4
Céleri 150 ml 4
Asperges 150 ml 2
Epinards 125 ml 2
Champignons 150 ml 4
Pommes de terre entières 250 ml 15
Petites pommes de terre 250 ml 10
Haricots verts 250 ml 10
Haricots 500 ml 20

19
LEGUMES FRAIS
Chou 150 ml 4
Tomates entières 125 ml 2
Carottes coupées 125 ml 3
Carottes entières 125 ml 6
Petits pois 150 ml 4
Brocoli 150 ml 2
Mais entier 250 ml 4
Chou-fleur 375 ml 4
Chou-fleur en morceaux 150 ml 2
Haricots 150 ml 6
Cotes de porc 150 ml 25
Echine de porc 200 ml 20
Tripes Couvrir la viande 40
Boulettes de viande 150 ml 15
Boulettes de viande avec du riz 750 ml 15
Filet de bœuf 150 ml 10
Viande hachée 500 ml 20
Rôti de boeuf 500 ml 25
Ragoût de poulet 250 ml 16
Poulet 250 ml 16
Porc 250 ml 12
Cuisses de poulet 250 ml 12
Saumon 125 ml 3
Truite 125 ml 2
Morue sèche* 500 ml 10
Thon 125 ml 3
Poulpe 750 ml 25
Crabe 250 ml 5
Homard Couvrir le homard 6
Laisser tremper une journée auparavant
Le temps de cuisson à la vapeur n’inclus pas le temps de préchauffe
Table of contents
Languages:
Other Oster Kitchen Appliance manuals

Oster
Oster FPSTEMM803 User manual

Oster
Oster CKSTSKFM05 User manual

Oster
Oster CKSTSM2222 User manual

Oster
Oster CKSTSKSH12 User manual

Oster
Oster CKSTSKRM20 User manual

Oster
Oster CKSTPA3883 User manual

Oster
Oster CKSTSCMC6 User manual

Oster
Oster Multicook EXPRESS BVSTKT4071 User manual

Oster
Oster 3165 Technical specifications

Oster
Oster 4798 User manual

Oster
Oster CKSTSKRM20 User manual

Oster
Oster 4786 User manual

Oster
Oster 2614 User manual

Oster
Oster OS-WC04SC User manual

Oster
Oster 3890 User manual

Oster
Oster 3850 Quick guide

Oster
Oster CKSTSM2900B User manual

Oster
Oster OS-WC06SC User manual

Oster
Oster Juice & Blend 2 Go FPSTJE3166 User manual

Oster
Oster CKSTPCECOV57 User manual