p. 5
FAUCET INSTALLATION ON THE BATHTUB (OPTIONAL)
浴缸的龍頭安裝(可選)
INSTALACIÓN DEL GRIFO EN LA BAÑERA (OPCIONAL)
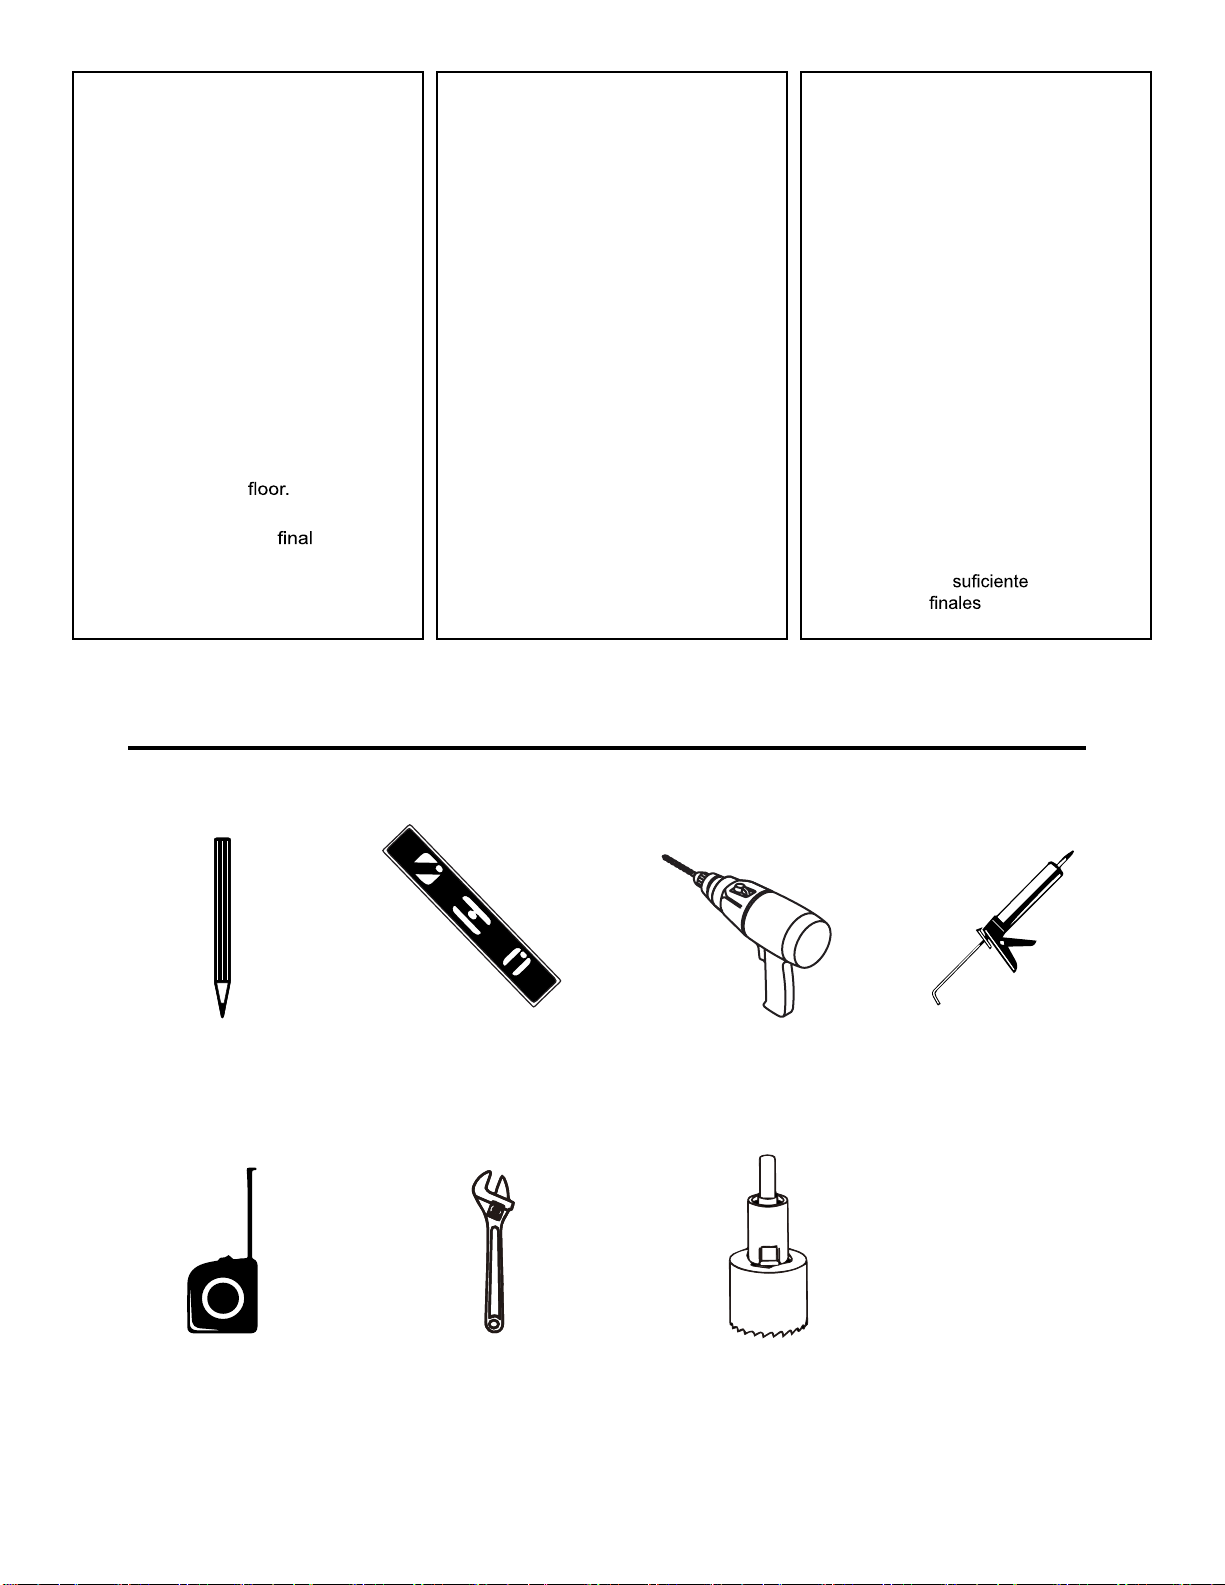
1. Locate where you will drill the holes into
the acrylic, and stick masking tape onto
that area. This will prevent the acrylic
from chipping.
2. Drill holes for the faucets on the bathtub
at the desired location.
3. Unscrew the bolts at the bottom of the
bathtub using an adjustable key. Then
carefully take out the top of the tub and
place it on a throw rug or other protective
covering to prevent damage to the
bath and the
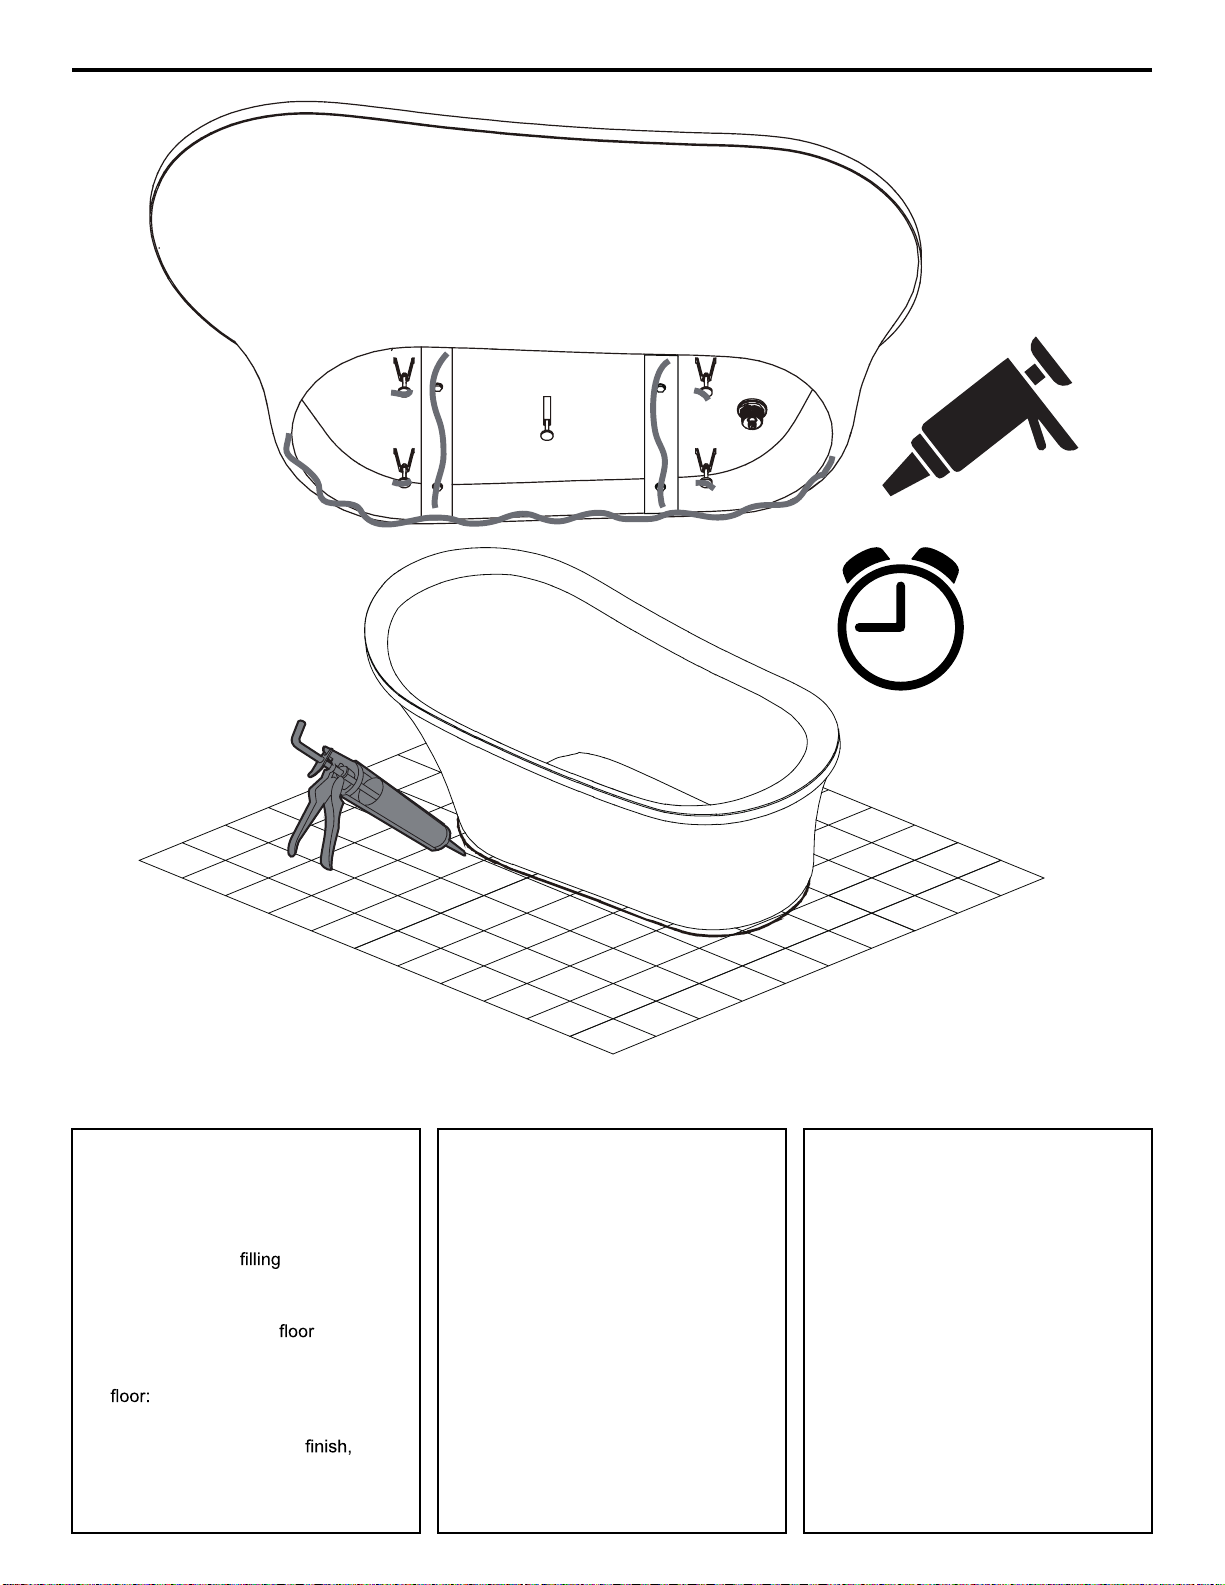
4. Install the faucets according to the
faucets’ manufacturer instructions.Then
assemble the top of the bathtub with the
skirt, and secure the bolts at the bottom
as shown in the illustration.
5. Connect the faucet supply lines with
hot and cold water supply and check for
leaks.
Notes: Verify all pipe connections to
ensure no leakage occurs.
1. Localizar donde se perforarán las torres
y aplicar cinta adhesiva en esta
Esto evitará astillado de acrílico.
2. Perfore los agujeros para los grifos en
la bañera en el sitio deseado.
3. Desenrosque los pernos que se
encuentran debajo de la bañera usando
una llave ajustable. Luego saque
cuidadosamente la parte de arriba de la
bañera y colóquela sobre un cubrecama
u otro material protector para evitar daños
a la bañera o al piso.
4. Instale los grifos según las
instrucciones del fabricante de los grifos.
Luego ensamble la parte superior de la
bañera con el faldón, y los pernos en
la parte de abajo como se muestra en la
ilustración.
5. Conecte la manguera del grifo con
agua caliente y agua fría y si
hay fugas.
Notas: todas las conexiones
de la tubería para asegurarse de que
no haya fugas.
1. Localiser l’endroit où les tours seront
percés et appliquer du ruban à masquer
sur cette surface. Cela préviendra
l’écaillage de l’acrylique.
2. Percez les trous de la robinetterie dans
l’emplacement désiré sur la baignoire à
l’aide d’une scie à emporte pièce.
3. Dévissez les boulons en bas de la
baignoire à l’aide d’une clé ajustable.
Ensuite, démontez doucement la partie
supérieure de la baignoire et placez-la sur
une protection pour éviter d’endommager
le sol ou la baignoire.
4. Ensuite installez la robinetterie selon
les instructions du fabricant du robinet.
5. Connectez la robinneterie aux tuyaux
d’alimentation d’eau froide et d’eau
chade, puis qu’il n’y ai pas de
fuites.
Notes: Avant de poursuivre
l’assemblage de la baignoire,
l’étanchéité de tous les raccords de la
robinetterie.
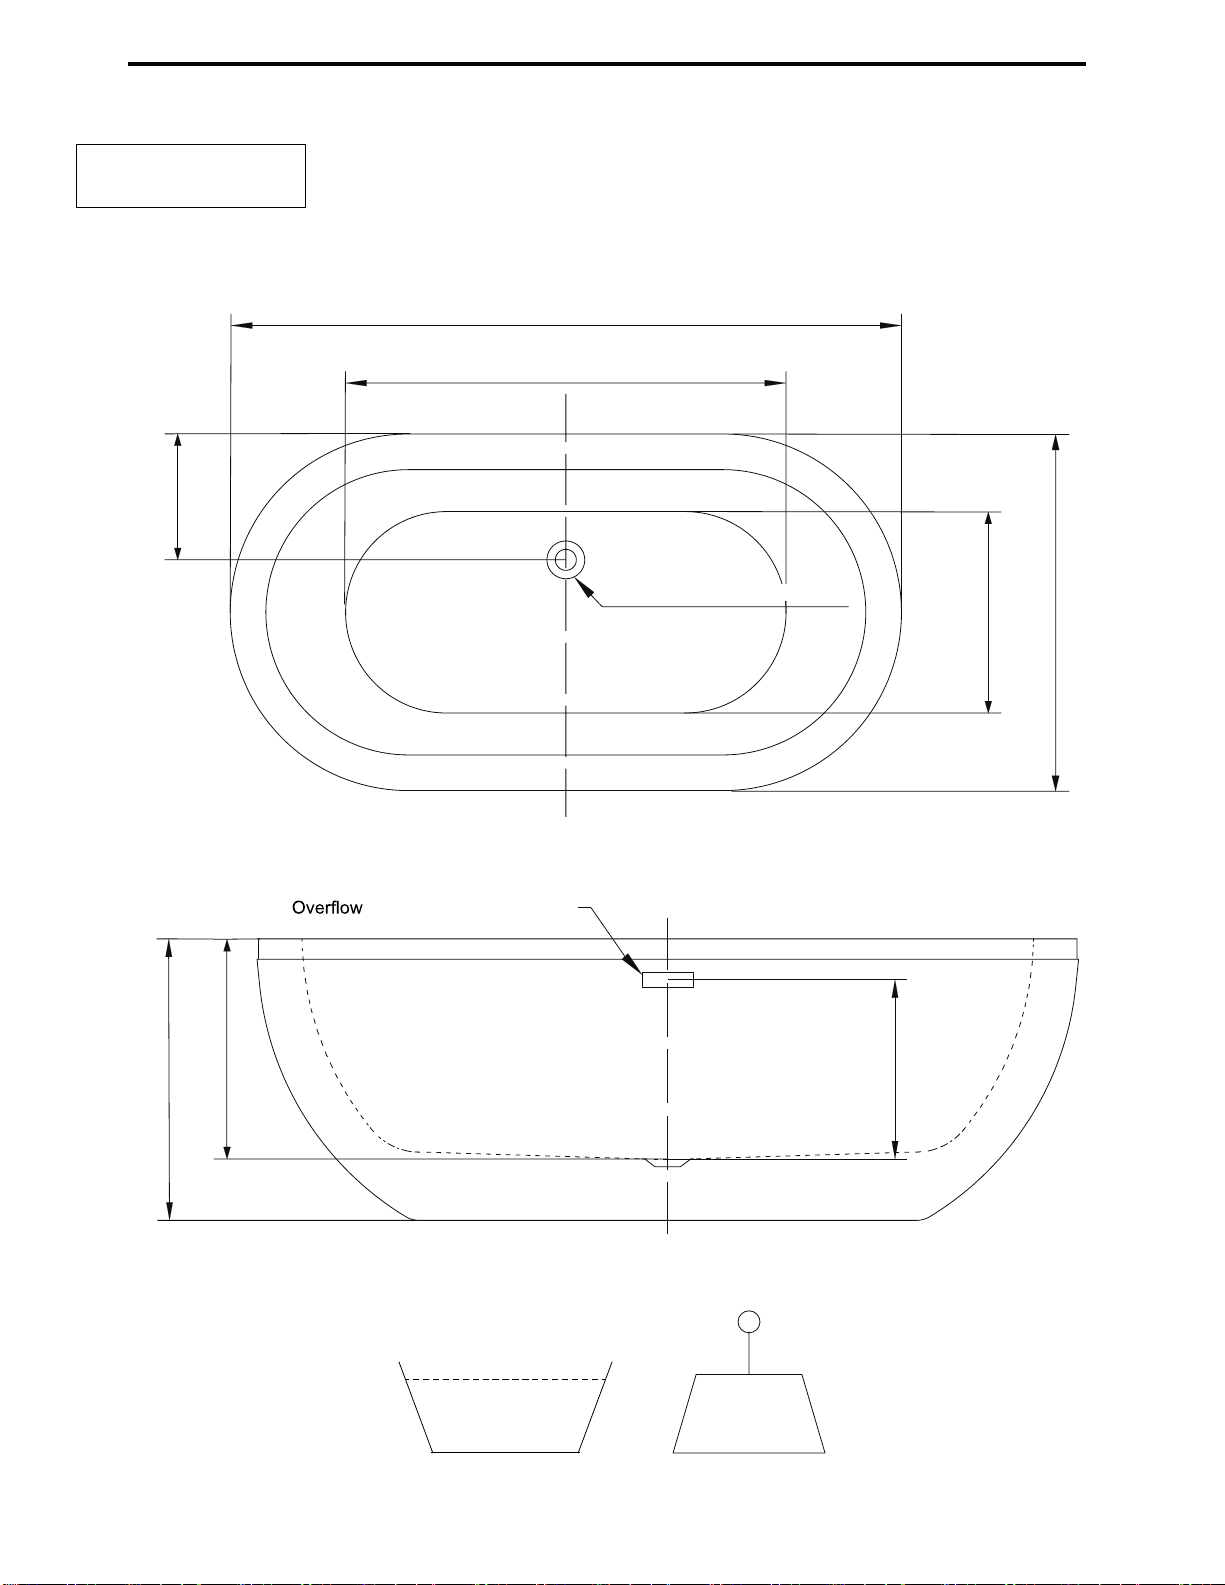
100[4”]100[4”]
57[2 1/4”]
50[2”]
Measures: inch [millimeter]
測量單位:公釐[英寸]
Medidas: pulgadas [milímetros]
1.找到需要在壓克力鑽孔的位置,並在
該區域貼上封口膠帶。這樣才能防止壓
克力剝離。
2.在浴缸上欲安裝龍頭的位置鑽孔。
3.以可調式扳手將浴缸底部的螺栓拆下
。之後小心地將浴缸的上層取出並置於
小地毯或是其他可保護地板的覆蓋物上
,以預防浴缸或是地板受損。
4.遵照龍頭製造商的指示說明安裝龍頭
。將浴缸上層與擋板安裝貼合,並依圖
面所示將底部的螺栓鎖緊固定。
5.將龍頭的供水管與冷、熱水的供水管
相接並檢查是否有漏水的狀況。
注意:確認所有水管接點都已接合不會
造成漏水的狀況。