6
Слив: боковой/донный
MA55-29R
РУССКИЙ
5
1
2 2
3
4
6
7
8
9
10
This documentanditscontentsaretheexclusive
propertyofPahlénsandmaynotbecopied,
reproduced,transmittedorcommunicatedtoathird
party,orusedforanypurposewithoutwrittenpermission.
Art.no.
Rev.no.
Scale
Designed by: Approved by:
Revised by: Date
Drawn by: Date
Drawing number
Assembly drawing no.
Surface treatment
part of ISO 2768-1
The tolerance class in accordance with this
E
Box 728, SE-194 27 Upplands Väsby, Sweden
Phone +46 8 59411050, Fax +46 8 59086880
ASA 2014-11-21
Installation betong
Bottenavl rakt betong MA55 29
10
2
11
12
Art.no.
Rev.no.
Scale
Designed by: Approved by:
Revised by: Date
Drawn by: Date
Drawing number
Assembly drawing no.
Surface treatment
part of ISO 2768-1
The tolerance class in accordance with this
E
Box 728, SE-194 27 Upplands Väsby, Sweden
Phone +46 8 59411050, Fax +46 8 59086880
TS 2011-12-05
för pool med duk
Installationsbild bräddavlopp
Bottenavl rakt liner 0
This documentanditscontentsaretheexclusive
propertyofPahlénsandmaynotbecopied,
reproduced,transmittedorcommunicatedtoathird
party,orusedforanypurposewithoutwrittenpermission.
Sid 1(2)
4
1
2
3
5
7
8
6
9
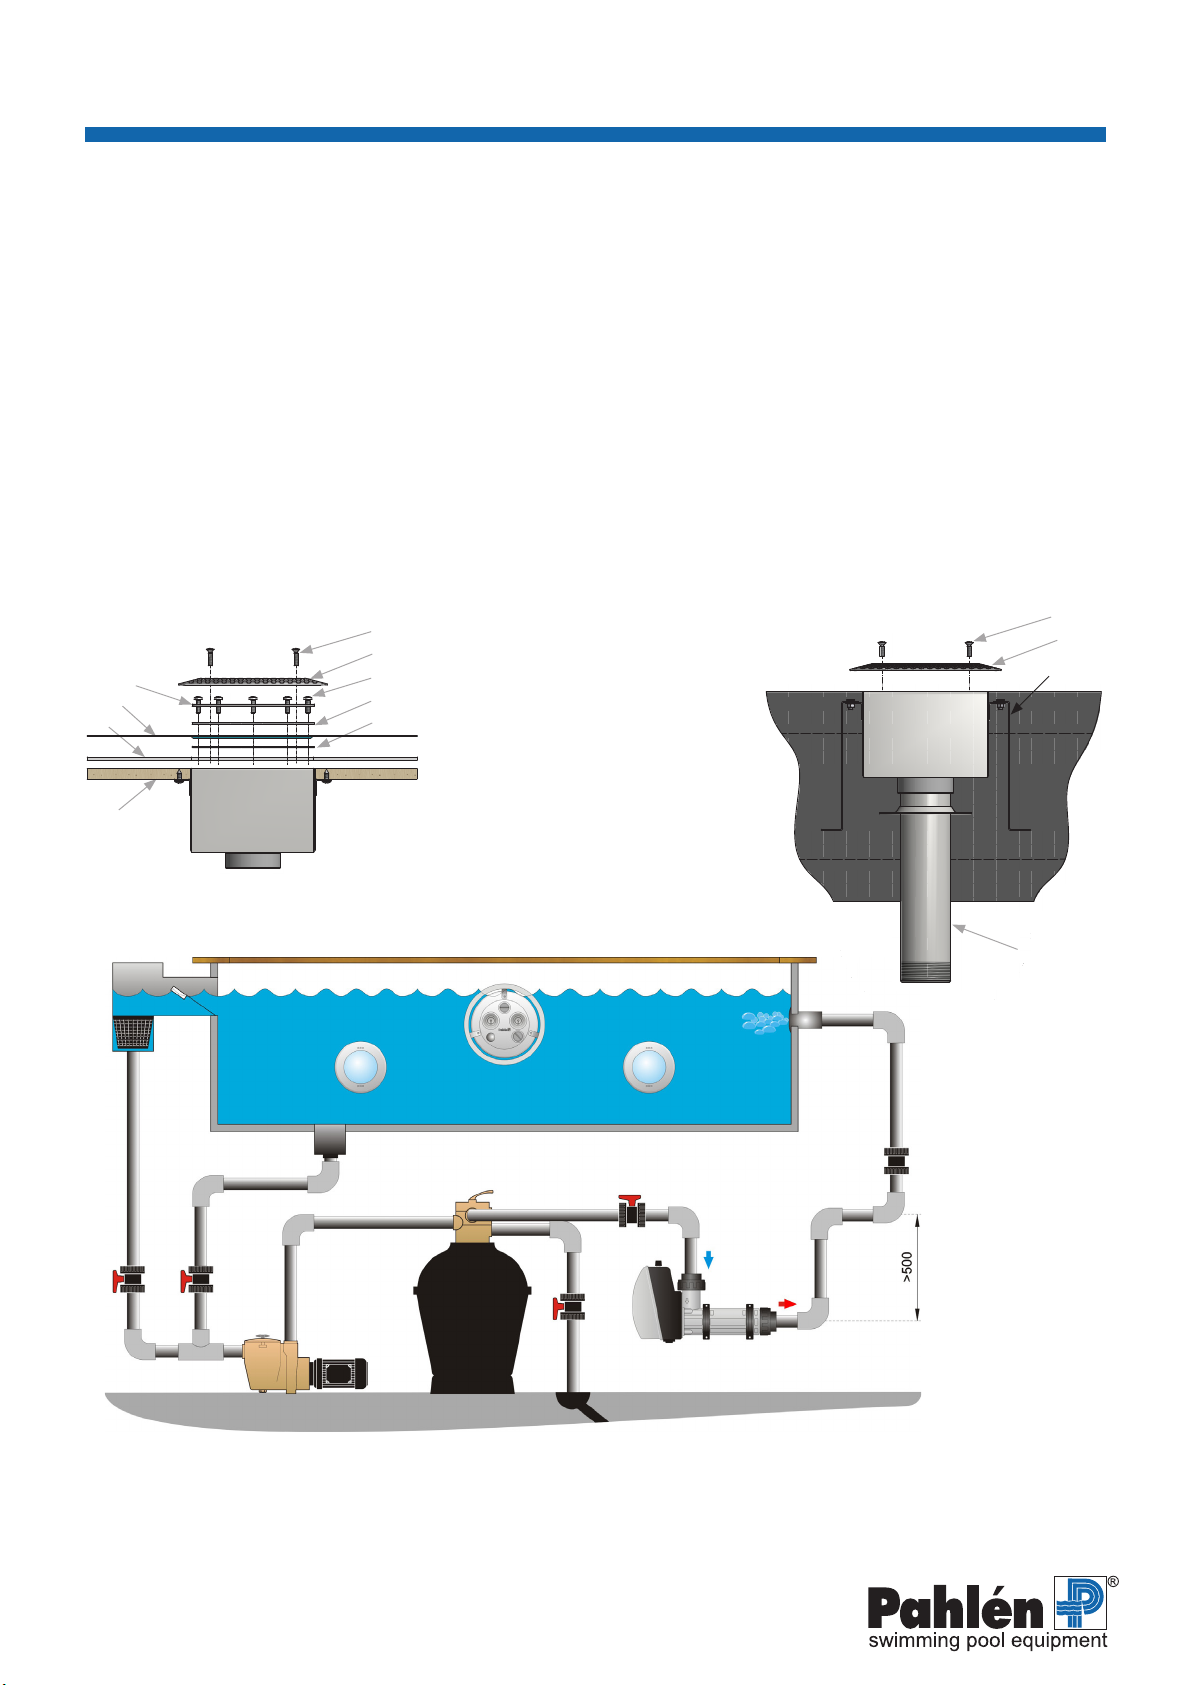
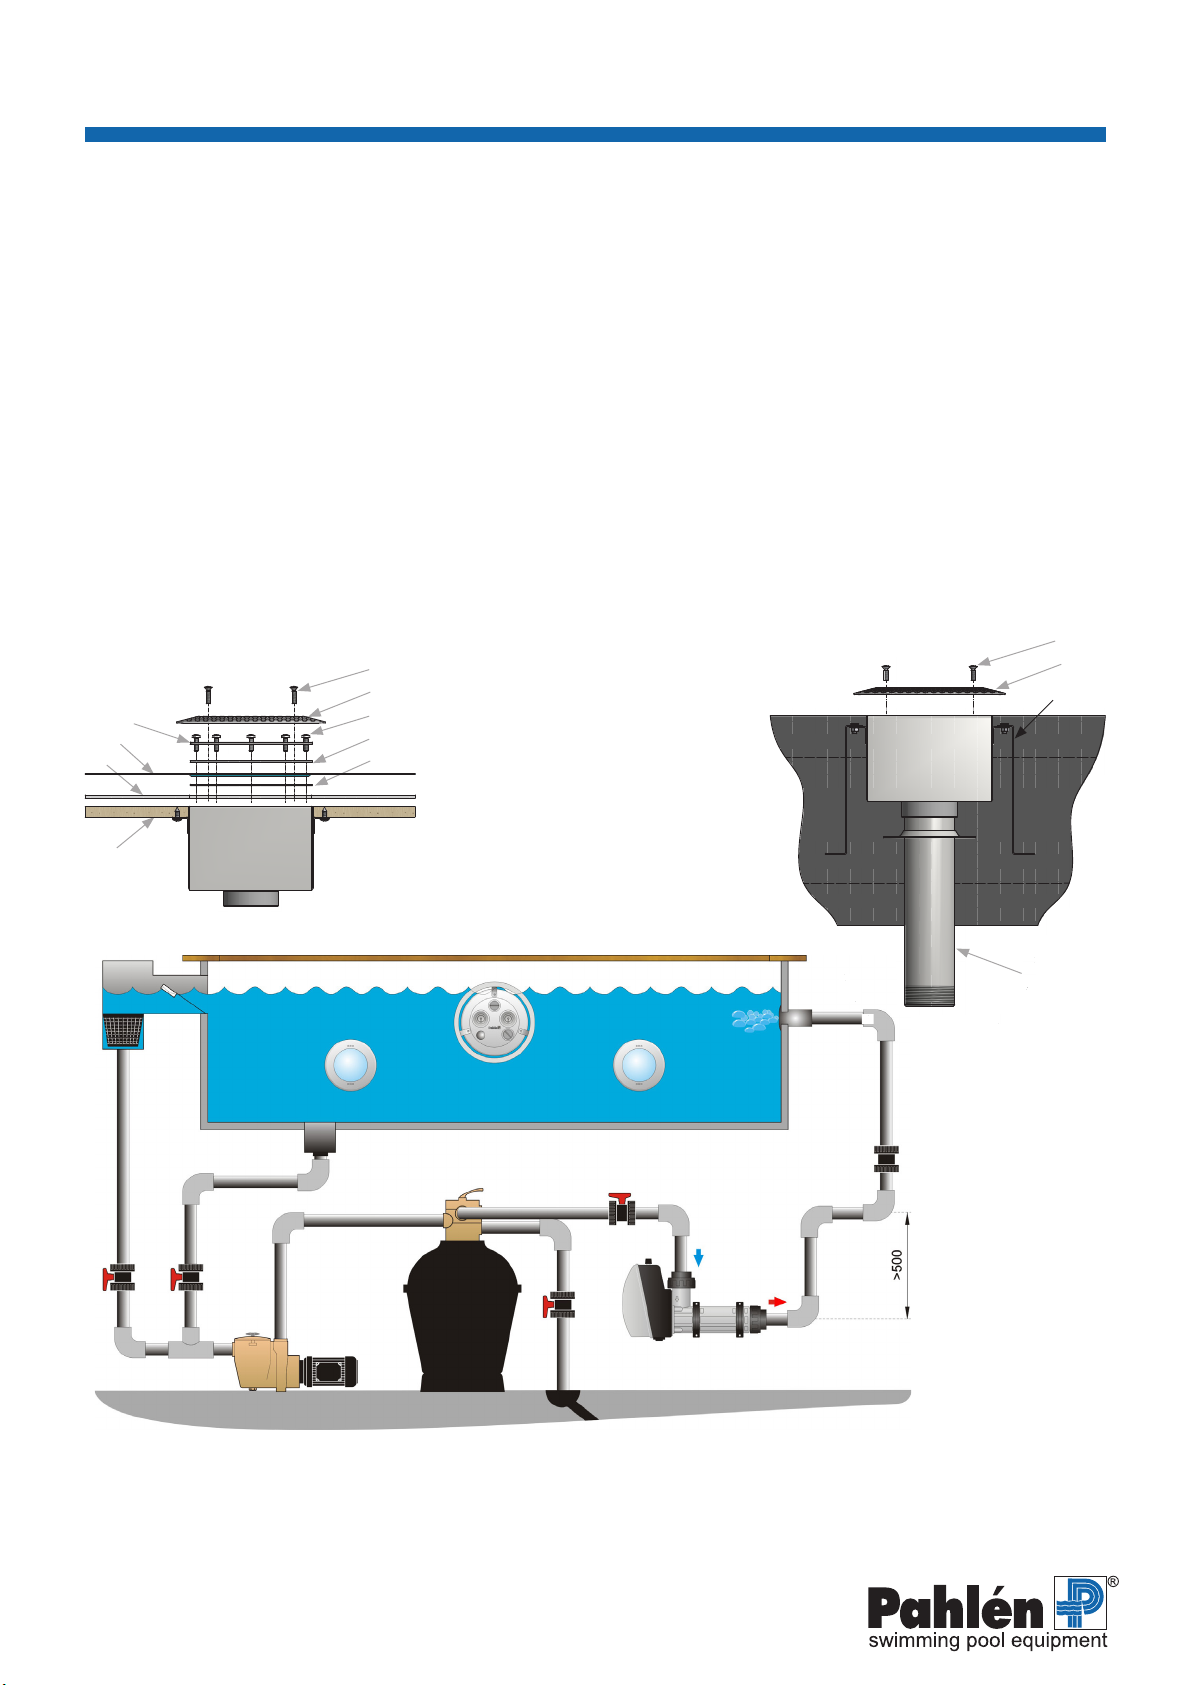
РУССКИЙ
1. Скиммер
2. Подсветка
3.Jet Swim
4. Форсунка
5. Слив
6. Обратный клапан
7.Hacoc
8. Фильтр
9. Электронагреватель
10. Водосток
Номер арт. 125931 Номер арт. 125936
1. Болт M5x20 (2x)
2. Решетка
3. Болт M5x16 (12x)
4. Лицевая рама
5. Уплотнитель
6. Пленка ПВХ (лайнер)
7. Самоприклеивающийся
уплотнитель
8. Пенопласт
9. Фанера
10. Болт M5x16
11. Крепежная закладная деталь (4x)
12. Закладная труба прохода
Качество воды должно удовлетворять следующим значениям
Содержание хлора: макс 3 мг/л (ppm)
Содержание хлоридов (соли): макс. 250 мг/л (ppm)
Значение pH: 7,2 –7
Щелочность: 60 –120 мг/л (ppm)
Кальциевая жесткость: 100 –300 мг/л (ppm)
Номер арт. 125931 (для бассейнов пленкой ПВХ (лайнером)) и 125936 (для бетонных бассейнов).
Технические данные Макс.поток: 22 м3 /ч.
Монтаж
Разместить слив в бассейне, следуя инструкциям производителя бассейна. В бассейнах с пленкой (лайнером) и
песчаным дном слив при размещении на дне бассейна следует закрепить при помощи бетона. Если слив будет
размещен в бассейне, например, с водопадом, то 2 слива следует монтировать на расстоянии 2 метров друг от друга (в
целях безопасности).
Монтаж в бетонном бассейне
В качестве принадлежностей имеется крепежная закладная деталь (номер арт. 112900) для фиксации слива в бетоне
и закладная труба прохода (номер арт. 121953). Используйте подходящие уплотнительные материалы для резьбового
соединения. Перед заливкой защитите фланец и отверстие донного слива, чтобы избежать попадания в них бетона.
Фланец слива должен находиться заподлицо с облицовкой дна или стены бассейна. Поместите слив в форму для
заливки и залейте бетоном. После облицовки бассейна установите решетку.
Монтаж в бассейнах с пленкой (лайнером)
См.рис.ниже.
Фланец слива монтируется заподлицо с поверхностью дна или стены бассейна. Самоприклеивающийся уплотнитель
прикрепляется к фланцу. После установки пленки монтируется уплотнитель и лицевая рама. После затягивания болтов
аккуратно вырежьте пленку и затем установите решетку.
2” внутренняя резьба