manuals.online logo
Brands
  1. Home
  2. •
  3. Brands
  4. •
  5. Palram
  6. •
  7. Greenhouse Kit
  8. •
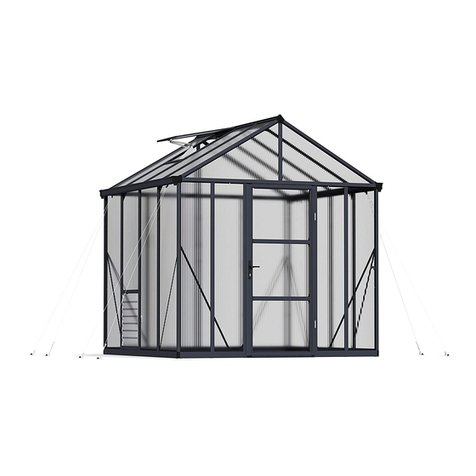
  9. Palram Glory 8'x8' User manual

Palram Glory 8'x8' User manual

IGIoryTM 8'x8'
Glory' 8'x4' Extension Module
Snow Load
1 00 kg/m2
20ibsifc
IWind Resistance
1 00km/hr
60m1/hr
Light Transmission
'11 79%
Extension K't
x2 411
-'V7 mrn1/4"
O
L
Caulk/
Silicon
Extension
Kit
Optional:
J
19 Find After Sales Service Info inside package 1 of 2
CI Les informations sur le Service Apres-Ventes se trouvent dans I'emballage 1 de
Hinweise zum Kundendienst sind in Paket 1 von 2 zu finden.
Busque la informaciOn del Servicio Posventa dentro del paquete 1 de 2
Glory 8'- Extending the Greenhouse
8'x8'
8'x16'
8'x8'
8' x 8'
Index
8' x 8'
8' x 8'
4' Ext.
8' x 4'
8'x12'
8'x8'
8'x20'
8'x16'
8'x 8'
8'x8'
8'x 8'
4' Ext.
8' x 4'
4' Ext.
8' x 4'
8'x12'
8'x20'
4' Ext. S1111111.11
AFTER SALE SERVICE
palramapplications.com/after-sales-service
LOCATIONS
USA
England
France
Germany
International
[email protected]
[email protected]
[email protected]
[email protected]
[email protected]
www.palramapplications.com
877-627-8476
01302-380775
0169-791-094
0180-522-8778
+972 4-848-6816
FOUNDATION
Site Preparation!
Base or foundation must be flattened, leveled
and prepped prior to installing the product!
The product must be built on a solid level
surface in order to perform properly. We
recommend using concrete or wood deck as base.
* We recommend checking for restrictions or
covenants for building this product in your area.
In addition we advise you to check if you need to
sumbit any forms or if any permits are required
prior to building the product.
Clear the surface of loose empediments
Level the ground surface
* See below 2 recommended options
A Solid Base (Concrete / Concrete Wall /
Pressure Treated Wood / Wood Deck) (drawing)
B Ground Surface (grass / soil) (drawing)
In order to allow easy access during assembly,
make sure you clear the surface around the
product's assembly site.
Make sure you have at least 5 cm (2 in.)
between the product's base and the edge of your
foundation.
A
Secure the product to the solid base of your
choosing using suitable screws and plugs or
masonry anchors. (Not supplied)
B
Secure the product to the ground surface using
suitable pegs. (Not supplied)
La preparation du terrain !
La base ou la fondation doivent etre aplaties,
nivelees et preparees avant !Installation du
produit !
Le produit doit etre construit sur une surface de
niveau solide afin de fonctionner correctement.
Nous recommandons !'utilisation de beton ou le
plancher en bois comme fondation.
* Nous recommandons la verification des
restrictions ou les accords de construction de
cette produits dans votre region. Nous vous
recommandons de verifier si vous avez besoin de
soumettre des formulaires ou si des permis sont
requis avant la construction du produit.
Degagez la terrain des obstacles libres
Niveler la surface du terrain
* Voir deux options recommandees ci-dessous
A Base Solide (beton / mur en beton / bois
traits sous pression / terrasse en bois) (dessin)
B Surface au Sol (gazon / sol) (dessin)
Afin de permettre un acces facile pendant
!'assemblage, assurez-vous de &gager la surface
autour du site de montage du produit.
Assurez-vous d'avoir au moins 5 cm (2 po) entre
la base du produit et le bord de votre fondation.
A
Fixez le produit a la dalle de beton a !'aide de
vis et de chevilles appropriees ou d'ancres de
maconnerie. (Les vis et les chevilles ou les ancres
de maconnerie ne sont pas fournis)
B
Fixez le produit a la surface du sol en utilisant des
chevilles appropries. (Non fourni)
Baustellenvorbereitung!
Der Boden oder das Fundament mussen vor
der Montage des Produkt planiert, nivelliert und
vorbereitet werden!
Der Produkt muss auf einem festen, ebenen
Untergrund errichtet werden, um seine Funktion
einwandfrei leisten zu konnen. Wir empfehlen die
Verwendung von Beton oder eines Holzdecks als
Untergrund.
* Wir empfehlen die Prufung auf Einschrankungen
oder Verpflichtungen an I hrem Wohnort hinsichtlich
dem Erbau dies Produkt. Daruber hinaus empfehlen
wir Ihnen, vor dem Bau des Produkt zu prufen, ob
Sie irgendwelche Formulare ausfullen mussen oder
ob Genehmigungen erforderlich sind.
Entfernen Sie die jegliche Hindernisse von der
Oberflache.
Bodenoberflache nivellieren
* Siehe unten zwei empfohlene Optionen
A Massiver Untergrund (Beton / Betonwand /
Druckbehandeltes Holz / Holzdeck) (Zeichnung)
B Bodenoberflache (Gras / Erde) (Zeichnung)
Um einen leichten Zugang wahrend der Montage
zu ermoglichen, ist darauf zu achten, dass die
Oberflache um den Montageort des Produkt herum
frei ist.
Stellen Sie sicher, dass Sie mindestens 5 cm (2
in.) zwischen dem Schuppenboden und dem Rand
Ihres Fundaments haben.
ABefestigen Sie das Produkt mit geeigneten
Schrauben und Dubeln, oder Mauerwerksdubeln
an einem festen Untergrund Ihrer Wahl. (nicht
mitgeliefert)
BBefestigen Sie das Produkt mit geeigneten Dubeln
am Boden. (nicht mitgeliefert)
iPreparacion del Sitio!
iLa base o cimentaci6n debe estar aplanada,
nivelada y lista antes de instalar el producto!
El producto debe construirse sobre una superficie
sOlida y nivelada para funcionar correctamente.
Recomendamos usar una plataforma de concreto o
madera como base.
* Recomendamos verificar restricciones u
ordenanzas para la construcci6n de esbo producto
en su area. Adernas, le aconsejamos que verifique
si necesita enviar aligun formulario o si se requieren
permisos antes de construir el producto.
Despeje la superficie de obstaculos sueltos
Nivele la superficie del suelo
* Abajo, yea 2 opciones recomendadas
A Base Salida (Hormigon / Panel de HormigOn /
Madera Prensada / Deck de Madera) (dibujo)
B Superficie del suelo (cesped / tierra) (dibujo)
Para permitir un facil acceso durante el montaje,
asegurese de despejar la superficie alrededor del
sitio de montaje del producto.
Asegurese de tener al menos 5 cm (2 pulgadas)
entre la base del producto y el borde de su cimiento.
AAsegure el producto a una base sOlida de su
elecciOn, utilizando tornillos y tacos adecuados o
anclajes de mamposteria. (No incluido)
B
Asegure el producto a la superficie del suelo,
utilizando estacas adecuadas. (No incluido)
:15n5 n1N5nan nprivnx *
p -r / 50avn yy / yva mein / lava) pxan snva A
(vav-iv) (yv
(mow) (yxn/ nn-rx / Nen) vp-ip B
+31x1» ,naannn 15nn1 n5p rIVP2 WOW; '133
'Num ma 3,31, nvvn nx nnn,n
vnaa pa n" s nan1,5 pn-in no', +11x111
.no5v na-rnam nNprn "Num
A
nn-ia myNnx3 man nvvn 5x 1Ymn nx aprn
1:1,321Y1 nn-ia) pv35 nnaxnan13,321Y IN nna,xnn
(n,pnavn nrx
B
nna,xnn myNnx3 yp-ipn 5x 1Ylnn nx aprn
(n,pnavn nrx 3111T')
!warn man
n95 nrravm lx v,D3rInx nvv51 nem5 .
InNann napnn
3,Yrl1Tartn nvvn 5y naa npn5 -iNvan
n,N,5nn 131i nmxn arn 'Nana Kinv '133
.17,1,33 yyn p11 lava myna vnnvn5
"Num n,n35 n151an p-ranv n,N,5nn 131i *
wan', nx p1115 mamn lax p ana .1:131117i3
31,,33 '305 ,Yr113 "Num nn35 -irpn nx ax 1:1,1,01)
mann
nnnpn nnnann nvvn ,30 nx npa
.nvvn ,30 nx v5v
Platsforberedelse!
Basen eller grunden maste vara tillplattad,
utjamnad och forberedd innan du monterar
produkten!
Produkten maste byggas pa en fast och slat yta
for att kunna fungera ordentligt.Vi rekommenderar
att du am/ander betong eller tradack som bas.
* Vi rekommenderar att du kontrollerar
restriktioner eller overenskommelser for bygga
denna produkt i ditt omracle.Vi rekommenderar
dessutom att du kontrollerar om du behover skicka
in nagra blanketter eller om nagra tillstand krays
innan du bygger produkten.
Rensa ytan fran losa hinder.
Jamna ut markytan
* Se nedan 2 rekommenderade alternativ
A Fast grund (Betong/ Betongvagg /
Tryckbehandlat tra /Tradack) (ritning)
B Markgrund (gras/ jord) (ritning)
F6r att mojliggora enkel Mkomst vid montering,
se till att du rensar ytan runt produktens
monteringsplats.
Se till att du har minst 5 cm (2 turn) mellan
produktens bas och och kanten pa din grund.
A
Sakra produkten till den valfria fasta grunden
med hjalp av lampliga skruvar och pluggar eller
murareankare. (Medfoljer ej)
B
Sakra produkten till markytan med hjalp av
lampliga tappar. (Medfoljer ej)
Klargjoring!
Sokkelen eller underlaget ma bearbeides,
jevnes ut og klargjores for produktet monteres!
Produktet ma monteres pa et fast og jevnt
underlag slik at den kan sta stott. Vi anbefaler
a bruke betong eller plattform av tre som
fundament.
* Vi anbefaler at du undersoker om det finnes
restriksjoner for oppsett av dette produktet der
du bor. I tillegg er det lurt a undersoke om du ma
sende inn soknad eller om det er nodvendig med
eventuelle tillatelser for du oppset produktet.
Rydd omradet for soppel og skrot
Jevn ut bakken
* Se under 2 Anbefalte alternativer
A Solid fundament (betong / betongvegg /
trykkbehandlet tre / tredekk) (tegning)
B Fundament av jord (gress / jord) (tegning)
For at det skal vre lett a komme til for
montering, ma du sorge fora rydde bade pa og
rundt omradet.
Sorg for at det er minst 5 cm mellom bodens
sokkel og kanten pa fundamentet.
AFest produktet til det fundamentet du velger
ved hjelp av egnede skruer og plugger eller
murankre. (Ikke levert)
B
Fest produktet til jordoverflaten ved hjelp av
egnede pinner. (Ikke levert)
Kohteen valmistelu!
Pohja tai perustus on tasoitettava, oikaistava ja
valmisteltava ennen vajan asennustal
Vaja on rakennettava kiintealle, tasaiselle
pinnalle, jotta se toimii oikein. Suosittelemme
betonin tai puulattian kayttamista pohjana.
* Suosittelemme selvittamaan alueesi vajojen
rakentamiseen liittyvat rajoitukset tai toimenpiteet.
Lisaksi kehotamme selvittamaan, onko tarve
toimittaa erityisia lomakkeita tai vaaditaanko vajan
rakentamiseen luvan hakemista.
Tyhjenna irtopaallysteen pinta
Tasaa pohjapinta
* Katso alta 2 suositeltua vaihtoehtoa
A Kiintea alusta (betoni / betoniseina/
painekasitelty puu / puulattia) (piirustus)
B Maa-alusta (ruoho/maa) (piirustus)
Jotta tyoskentely kokoamisen aikana on helppoa,
varmista, etta vajan kokoamispaikan ymparisto on
vapaa.
Varmista, etta sinulla on vahintaan 5 cm (2") tilaa
vajan alaosan ja perustuksen reunan valilla.
A
Kiinnita tuote valitsemaasi kiinteaan alustaan
sopivilla ruuveilla ja tulpilla tai muurausankkureilla.
(Eivat sisally toimitukseen)
B
kiinnita tuote alustaan sopivilla tapeilla. (Eivat
sisally toimitukseen)
Forberelse af opsaetningstedet!
Din base eller grundlag skal vre fladt, jvnt og
forberedt, for produktet installeres.
Produktet skal opsttes pa en solid base for at
fungere.Vi anbefaler at anvende beton eller et
trgulv som base.
* Vi anbefaler at tjekke regler og lign. omkring
opstning af produktet i dit omr6cle.Vi anbefaler
desuden at tjekke, hvorvidt du vil skulle indsende
formularer, eller om tilladelser krves, for
opstning af produktet.
Rengor overfladen for lose genstande, som
kunne komme i vejen
Gor overfladen jvn
* Se to anbefalede muligheder herunder
A solid base (beton / betonvaeg /
trykbehandlet trae / traedaek) (tegning)
B Jordoverflade (grass / jord) (tegning)
For nemt at kunne tilga omr6clet, hvor
produktet sttes sammen, sa sorg for at du
rydder op omkring samlingsstedet.
Sorg for at du har mindst 5 cm mellem
produktet base og kanten af dit grundlag.
AFastgor produktet til den solide base, du vIger,
ved hjlp af passende skruer og stik eller
murvrk ankre. (Medfolger ikke)
BFastgor produktet til jordoverfladen ved hjlp af
passende stifter. (Medfolger ikke)
NL/BE
Voorbereiding van de site!
De basis of de fundering moet worden
afgemalen, geegaliseerd en geprepareerd
voorafgaand aan het installeren van de het
product!
De het product moet op een solide, vlakke
ondergrond worden gebouwd om goed te
kunnen functioneren. We raden aan om beton of
een houten dek als basis te gebruiken. De loods
* We raden u aan te controleren of er
beperkingen of convenanten zijn voor het
bouwen van een het product in uw regio.
Daarnaast adviseren wij u om te controleren of u
formulieren moet insturen of dat er vergunningen
vereist zijn voordat u de het product gaat
bouwen.
Ontruim het oppervlak van losse voorwerpen
Breng het grondoppervlak waterpas
* Zie hieronder 2 aanbevolen opties
A Een stevige basis (beton / betonnen muur
/ met druk behandeld hout / houten terras)
(tekening)
B Grondoppervlak (gras/grond) (tekening)
Om tijdens de montage gemakkelijk toegang
te krijgen, moet u het oppervlak rondom de
montageplaats van de het product schoonmaken.
Zorg ervoor dat u ten minste 5 cm (2 in.) tussen
de basis van de het product en de rand van uw
fundering zit.
A
Bevestig het product aan de solide basis van uw
keuze met geschikte schroeven en pluggen of
bevestigingsklauwen. (Niet meegeleverd)
B
Bevestig het product aan de grond met behulp
van geschikte pluggen. (Niet meegeleverd)
Come preparare it sito:
La piattaforma o le fondamenta devono essere
appiattite, livellate e preparate prima di installare it
prodotto!
II it prodottodeve essere costruito su una
superficie solida per garantire una resa adeguata.
Si raccomanda l'uso di piattaforme in cemento o in
legno.
* Si prega di verificare le restrizioni e le
convenzioni vigenti nella vostra zona, per quanto
riguarda la costruzione dei questo prodotto.
Inoltre, si raccomanda di verificare se sia necessario
inviare dei moduli e/o ottenere dei permessi prima
di iniziare la costruzione del prodotto.
Rimuovere qualunque ostacolo dalla superficie
scelta
Livellare la superficie del terreno
* Si prega di far riferimento alle 2 seguenti opzioni
consigliate:
A Base solida (calcestruzzo / muro di cemento/
legno trattato a pressione/ piano di legno)
(disegno)
B Superficie del terreno (erba/terreno) (vedi
immagine)
Per consentire un comodo accesso durante
l'assemblaggio, assicurarsi di ripulire la superficie
attorno al sito di assemblaggio del prodotto.
Assicurarsi di avere a disposizione almeno 5 cm
(2 pollici) tra la base del it prodottoe it bordo delle
fondamenta.
AAncorare it prodotto alla solida base di vostra scelta
utilizzando viti e tasselli adeguati o ancoraggi in
muratura. (Non forniti)
B
Fissare it prodotto alla superficie del terreno
usando dei pioli adatti. (Non forniti)
Priprava miesta!
Ne2 zathete Produkt stavatje potrebne si pred
pripravit, zarovnat a uhladit podklad alebo zaklady!
produkt musi byt postavena na pevnej
rovnej ploche, aby sa mohla spravne pouZivat.
OdporuCame varn ako podklad pouZit bet6n alebo
drevo.
* OdporuCame varn skontrolovat obmedzenia
alebo nariadenia na vystavbu produkt vo va'Som
okolf. Taktie2 varn odporikame, aby ste si zistili, Ci
potrebujete vypinit akekol'vek formulare, alebo Ci
potrebujete povolenie pred vystavbou produkt.
VyCistite povrch od roznych prekaZok
Zarovnajte plochu
* Pozri ni ie na 2 odporikane moZnosti
A Pevne zaklady (beton / betonova stena /
tlakom oietrene drevo / drevena podlaha)
(obrazok)
B Povrch zeme (trava / pada) (vykres)
Uistite sa, Ze ste vyCistili okolie miesta na monta2
produkt, aby ste k montaZi mali l'ahky pristup.
Uistite sa, Ze mate najmenej 5 cm medzi
podkladom produkt a okrajom zakladov.
AZaistite vyrobok pomocou vhodnych skrutiek a
hmokliniek na pevnom zaklade podl'a vlastneho
vyberu. (Nie su v baleni)
B
Vyrobok zaistite pouZitim vhodnych kolikov do
zeme. (Nie su v baleni)
Priprava terena!
Pred postavitvijo izdelek je treba osnovno
povr'Sino ali podlago zravnati!
Zaradi pravilnosti izvedbe je treba izdelek
postaviti na trdno in ravno povr'Sino. Za osnovo
priporoCamo betonsko ali leseno podlago.
* PriporoCamo, da preverite omejitve ali zahteve
glede gradnje lop na va'Sem obmoCju. Poleg tega
yam svetujemo, da preverite, ali je potrebna kakr'Sna
koli priglasitev ali dovoljenje, preden izdelek
zgradite.
5 povr'Sine odstranite vse ovire
Izravnajte povr'Sino tal
* Spodaj si oglejte 2 priporoCeni moZnosti
A Trdna osnova (Beton / Betonska stena / Preian
les / Lesen podest) (risba)
B Povriina tal (trava / zemlja) (risba)
Da bi med montaZo omogoCili enostaven dostop,
poskrbite za cisto povr'Sino okrog mesta montane.
Zagotovite vsaj 5 centimetrov razdalje med
osnovo izdelek in robom va'Sih temeljev.
A
Izdelek pritrdite na trdno podlago po va'Si izbiri
s primernimi vijaki in vtiCi ali zidnimi sidri.
(niso priloleni)
B
Izdelek pritrdite na povr'Sino tal s pomoCjo ustreznih
klinov. (niso priloleni)
Koha ettevalmistamine
Alus voi vundament peab olema tasandatud ja
ette valmistatud enne toodet paigaldamist!
Toodet tuleb ehitada tugevale tasapinnale, et
see oigesti toimida saaks. Me soovitame alusena
kasutada betoon- voi puittekki.
* Me soovitame kontrollida piiranguid voi
reeglistikke, sella toote ehitamiseks piirkonnas
reguleerivad. Lisaks soovitame teil kontrollida, kas
peate enne toodet ehitamist taitma vorme voi on
tarvis lube.
Puhastage pind lahtistest takistustest
Tasandage maapind
* Tutvuge alljargnevalt 2 soovitusliku valikuga
A Tahke alus (Betoon / Betooni sein / R6huga
toodeldud puit/ Puidust tekk) (joonis)
B Maapind (rohi / muld) (joonis)
Voimaldamaks kerget ligipaasu kokkupaneku
ajal, veenduge, et puhastate toodet umbritseva
kokkupanekuala pinna.
Veenduge, et on vahemalt 5 cm ruumi toodet
aluspinna ja vundamendi acre vahel.
A
Kinnitage toode enda valitud tahkele alusele,
kasutades sobivaid kruvisid ja pistikuid voi
mairitise ankruid. (Ei kuulu komplekti)
B
Kinnitage toode maapinnale kasutades sobivaid
juhtposte. (Ei kuulu komplekti)
Epitesi Wallet elokeszitese!
Az alapnak simanak es vizszintesnek kell lennie, s
elo kell kesziteni a felepftese a termek!
A termeks szilard feluletre kell felepfteni annak
erdekeben, hogy funkciOjat megfeleloen lassa el.
Javasoljuk, hogy a beton vagy a hajOpadlO alapot
hasznaljon.
* Javasoljuk, hogy ellenorizze, hogy milyen
korlatozasok vagy elorrasok vannak ervenyben
lakOhelyen a termeks epitesere vonatkozOan.
Ezenkivul azt tanacsoljuk, hogy ellenorizze, nincs-e
szukseg valamilyen formanyomtatvany, vagy
engedely benyujtasara a epitese a termek.
Minden akadalyt tavolftson el a talajfelszinrol
A talaj legyen vizszintes
* Alabb megtalal 2 altalunk javasolt opciOt
A Szilard alap (beton / beton fal / nyomaskezelt
fa /fa pad16) (rajz)
B Talajfeliilet (fil / fold) (rajz)
Annak erdekeben, hogy konnyu legyen az
osszeszereles, gyozodjon meg rOla, hogy a termek
koruli teruleten sincsenek akadalyozO tenyezok.
Gyozodjon meg rOla, hogy legalabb 5 cm (2
hilivelyk) k6z6tt van a termek alapja es az alapitvany
szele kozott.
AA termeket csavarokkal, tiplikkel vagy
falazOhorgokkal rogzitse a valasztott szilard alapra.
(Nincs mellekelve)
BMegfelelo csapokkal rogzitse a termeket a talaj
felszfnehez. (Nincs mellekelve)
Przygotowanie miejsca budowy!
Przed montaZem produkt podlole lub
fundamenty naleZy wyrOwnaO, wypoziomowaO i
przygotowaO.
Aby zapewniO prawidlowefunkcjonowanie, ten
produkt musi byO zbudowana na solidnej poziomej
powierzchni. Zalecamy zastosowanie betonowej
lub drewnianej podstawy.
* Zalecamy sprawdzenie ograniczeri lub um6w
dotyczacych budowy ten produkt w okolicy.
Ponadto zalecamy sprawdziO, czy naleZy dostarczy
jakiekolwiek formularze lub zgody przed
rozpoczeciem budowy produkt.
OczySciO powierzchnie z przeszk6d
WyrOwnaO podlole
* Patrz poniZej 2 zalecane opcje
A Podstawa stata (beton / sciana betonowa
/ sciana betonowa / drewno impregnowane
cisnieniowo) / Poktad drewniany) (rysunek)
B Nawierzchnia gruntowa (trawa / gleba)
(rysunek)
A by umoZliwiO latwy dostop podczas monta2u,
naleZy oczySciO powierzchnie wokeil miejsca
montaZu produkt.
Pomiedzy podstawa produkt a krawedzia
fundamentu naleZy zapewniO co najmniej 5 cm.
AZamocuj produkt do podstawy stalej za pomoca
odpowiednich wkretOw i zaSlepek lun kotew
murarskich. (Nie sa dostarczane)
B
Zabezpiecz produkt na powierzchni ziemi
przy uZyciu odpowiednich kolkOw. (Nie sa
dostarczane)
nCHVOTOBKa nnouwino!
OCHOBaHMe HBO (1)yFigamem- ROFIlKHbl 6bITb
co6paHbi, Bblp0BHeHbl M 11011HOCTbF0 11OR1OTOBBeHbl
K yCTaHOBKe npORyKT!
ripopykr npe,gHa3Ha HeH,gnH yCTaHOBKM Ha
eepetioci M poeHotii noeepxHocro. Mbl pekomeHgyem
OeTOHHOe/RepeBAHHOe OCHOBaHMe.
* PekomeHmem nepeg yCTaHOBKOlil 03HaKOMMTb01
CBOKaBbHbIMM npaeonamo M orpaHoHeHoemo
no CTpOOTeribCTBy npORyKT. PekomeHmem TaKlKe
npegeaporenbHo BblACHMTb, fpe6yerce nM
cnetioanbHoe pa3peweHoe Ha ycfaHoeky fakoro
poga coopmeH of?).
OHOCTOTb nnowagky OT HeycrotimoBbIX 3FleMeHTOB
npenercreoci.
3apoeHem noeepxHocm.
* CM. HmKe 2 pekomeHgyembix eapoaFrra
A TBeRaa51 OCHOBa (BeT0H / 6aTOHHaSI CTeHa /
O6pa6oTaHHaa no"; Aaonennem ApeBeama /
AepeBaHHaa nany6a) (HeRrexc)
nOBBOXHOCTb 3eMBH (TpaBa / BOLIBa) (pocyHok)
gne o6nerHeHoe pa6oHero npotiecca
pekomeHgyerce OHOCTOTb repporopo10 Bokpyr
mecra c6opko.
Y6eRMTecb B HaTIVIHMVI MOHVIMaBbHOTO paccroe Hoe
B 5CM (2 RF&Ma) mexcgy onoparoo koHcfpyktioo
Kpaem OCHOBaHMA.
A
3aKpenMTe npogykr Ha npoHHoti) ocHoee no eawemy
ebi6opy ocnonb3ye no,fixogewoe BOHTbl M 3anlyWKVI
ono flicorm knagko. (He nocraeneerce)
B
3aKpenMTe npogykr Ha noeepxHocro 3emno
ocnonb3ye nogxogewoe KOBbIWKO. (He
nocraeneerce)
Vietnes sagatavoiana!
Pirms produkts uzstadiSanas atbalsta punktam
vai pamatam ir jabut nolidzinatam, izgludinatam
un sagatavotam!
Lai veiktu pareizi, produkts ir jabut uzceltai uz
cietas virsmas. Mes iesakam izmantot betonu vai
koka klaju ka atbalsta punktu.
* Mes iesakam parbaudit ierobekijumus vai
noliguma noteikumus Si produkta bOvniecibai
celSanai jusu apgabala.Turklat mes iesakam
parbaudit, vai jums ir jaiesniedz jebkadas veidlapas,
vai, ja pirms produkts celtniecibas, ir nepiecieSama
kada atlauja.
Attiriet virsmu no Skersliem
Nogludiniet zemes virsmu
* Skatiet zemak 2 ieteiktas iespejas
A Stingra virsma (betons / betona siena /
apstradata koksne / koka klajs) (zimejums)
B Zemes virsma (zale / grunts) (rasejums)
Lai nodroSinatu ertu piekluvi montaZas laika,
parliecinieties, vai virsma ir attirita virs produkts
montaZas vietas.
Parliecinieties, lai starp produkts atbalsta punktu
un pamatnes malu ir vismaz 5 cm (2 collas).
ANostipriniet produktu pie izveletas pamatnes,
izmantojot piemerotas skruves un aizbaZous vai
mura enkurskruves. (Nav ieklautas komplekta)
B
Nostipriniet produktu uz grunts virsmas,
izmantojot piemerotas tapas. (Nav ieklautas
komplekta)
Priprava mista!
Baze nebo zakladna musi byt zploStela, vyrovnana
a opravena pied vybudovanim produkt!
Pro spravnou funkci, produkt musi byt postavene
na pevnern povrchu. DoporuCujeme pouNvat beton
nebo dtevo jako bazi.
* DoporuCujeme zkontrolovat omezeni nebo
zavazky tykajicise vystavby produkt ye vaS1
oblasti.Take varn doporuCujeme zkontrolovat pied
vystavbou produkt zda je pottebne vypinit nejake
formulate nebo poskytnout ptipadne povoleni.
VyCistete povrch od nanosu
Vyrovnejte povrch zerne,
* Viz nine 2 doporuCene moZnosti
A Pevny podklad (beton / betonova zed'/
lisovane drevo / drevena palubka) (vykres)
B Zemni podklad (trava / pada) (vykres)
Abyste behem montane meli snadny ptistup,
ujistete se, Ze je vyCisteny povrch kolem mista
montane.
Ujistete se, Ze je alespon 5 cm (2 palce) mezi
zakladnou Chaty a okrajem zakladny.
APtipevnete vyrobek k pevnernu podkladu dle
vlastn(ho volby pomod vhodnych Sroubu a kotev.
(Nen( souCas6 doclavicy)
B
Ukotvete vyrobek do zerne, pomod vhodnych
koliku. (Nen( souCas6 doclavicy)
FOUNDATION GLORY 8'
A
0
Solid Base
(Concrete / Concrete Wall / Pressure
Treated Wood /Wood Deck)
Base Solide
(Beton /mur en beton bois
traits sous pression /terrasse en bois)
Massiver Untergrund
(Beton // Betonwand /
Druckbehandeltes Holz / Holzdeck)
Base Salida
(Hormigon / Panel de Hormigon
Madera Prensada / Deck de Madera)
pyin vwa
5Diun pua num / ma)
(1/9 pT /
0
0
Fast grund
(Betong/ Betongvagg
Tryckbehandlat tra /Tradack)
Solid fundament
(betong / betongvegg /
trykkbehandlet tre / tredekk)
Kiintea alusta
(betoni ibetoniseinai
painekasitelty puu puulattia)
00
Solid base
(beton / betonvg
trykbehandlet tr&trdk)
Een stevige basis
(beton / betonnen muur / met
druk behandeld hout / houten terras)
Base solida
(calcestruzzo muro di cemento/
legno trattato a pressione/ piano di legno)
Pevne zaklady
(beton / betonova stena /tlakom
oSetrene drevo drevena podlaha)
B0
0
Ground Surface
(grass / soil / gravel)
Surface au Sol
(gazon / sol)
Bodenoberflache
(Gras / Erde)
Superficie del suelo
(cesped tierra)
dill 191p
(yNni nn-rx rurr)
0
0
Markgrund
(gras/ jord)
Fundament av jord
(gress jord)
Maa-alusta
(ruoho/maa)
000
Jordoverflade
(grs jord)
Grondoppervlak
(gras/grond)
Superficie del terreno
(erba/terreno)
Povrch zeme
(trava pada)
L
239c'7117'i 2'?
8'x8'
239`17117'io-
0
0
Trdna osnova
(Beton / Betonska stena / PreSan
les / Lesen podest)
Tahke alus
(Betoon / Betooni sein / R6huga
toodeldud puit/ Puidust tekk)
Szilard alap
(beton / beton fal /
nyomaskezelt fa / fa padlo)
Podstawa stata
(beton / betonova zed/
lisovane drevo drevena palubka)
00
Taepgam ocHoBa
(5eT0H / 6eTOHFlan cTeHa
06pa6crrauuan nog ganneumem
gpenecinua igepennuuan nany6a)
Stingra virsma
(betons / betona siena /
apstradata koksne / koka klajs)
Pevrijf podklad
(beton / betonova zed/
lisovane drevo drevena palubka) 4
Pov(Sina tal
(trava / zemlja)
Maapind
(rohi / muld)
0TalajfelUlet
(hi) /fold)
Nawierzchnia gruntowa
(trawa / gleba)
110BepXHOCTb aemri
(Tana nonna)
OZemes virsma
(zale / grunts)
Zemni podklad
(trava pgda)
8'x 12'
(8'x8'+ Extension)
IMPORTANT
Please read these instructions carefully before you start to assemble this product .
Please carry out the steps in the order set out in these instructions.
Keep these instructions in a safe place for future reference.
Safety Advice
For safety purposes we strongly recommend the product to be assembled by at least two people.
Some parts may have sharp edges. Please be careful when handling components. Always wear
gloves, eye protection, and long sleeves when assembling or performing any maintenance on your
product.
Do not attempt to assemble the product in windy or wet conditions.
Do not attempt to assemble the product if you are tired, have taken drugs,
medications or alcohol, or if you are prone to dizzy spells.
Dispose of all plastic bags safely - keep them away from children's reach.
Keep children away from the assembly area.
When using a stepladder or power tools, make sure that you are following
the manufacturer's safety advice.
Keep roof and gutters clear of snow, dirt & leaves.
Heavy snow load on the roof can make it unsafe to stand below or nearby.
Do not lean against or push the product during construction.
Hot items such as recently used grills, blowtorches etc. must not be stored inside the product.
Heavy or sharp articles should not be leaned against the wall panels.
Make Sure there are no hidden pipes or cables in the ground before inserting the pegs (not supplied)
Do not touch overhead power cables with the aluminum profiles.
If color was scratched during assembly it can be fixed.
Note:This product must be anchored on to a leveled surface and solid foundation to ensure its
stability.
Make sure that screws and anchors are compatible with foundation type. Make sure that there are no
obstructions between the assembly area and the final position.
Cleaning Instructions
In order to clean the product, use a mild detergent solution and rinse with cold clean
water.
Do not use acetone, abrasive cleaners, or other special detergents to clean the panels.
Clean the product once assembly is complete.
Before Assembly
Choose your site carefully before beginning assembly.
The ground surface must be perfectly flat and leveled.
Choose a sunny area, away from overhanging trees.
Do not position your product in an area exposed to excessive winds.
The product must be positioned and fixed onto a flat leveled surface.
We strongly recommend to secure this product directly onto a solid foundation.
Use the pre -drilled holes in the steel base.
Complete site preparation before unpacking parts and beginning assembly.
Sort the parts and check against the content parts list.
Parts should be laid out close at hand. Keep all small parts (screws etc.) in a bowl so they
do not get lost.
Please consult your local authorities if any permits are required prior to constructing the
product.
The drawings in this manual are designed for 8' x 8' product + 4' Extension Kit.
Please note that content list refers only for 8' x 8' product.
Note: All the extension module steps are marked with a dashed
outline, should be performed during the product's assembly process.
During Assembly
Make sure the base is square by measuring the diagonals and level by using a spirit level.
You may use silicone lubricant spray in order to help you slide the panels into the profiles.
Do not spray the polycarbonate panels.
Use a rubber mallet if necessary.
All panels with the stamped words "THIS SIDE OUT" must be facing out to create
full UV protection. Remove plastic sticker as panels are locked in place.
When encountering the information icon, please refer to the relevant
assembly step for additional comments and assistance.
This icon indicates
that the installer should
be inside the product.
This icon indicates that
11 the installer should be
outside the product.
elAttention
During assembly use a soft surface below the parts to avoid scratches and damages.
Steps
Step 4: Refers only for the extension kit! The extension kit contains a base connector, either part
#8447 or #7601
Step 11: Please make sure the screw connection is made exactly as illustrated.
A - Connect the screw in the left hole.
B - Connect the screw in the right hole.
Step 13: Peel the film covering the panel. Make sure you install it with the UV protected side out.
Step 23: Side Louver Window: can be located only on one of the two central panels.
* If you assemble the greenhouse with an extension module, the window can be placed on all
panels, except for the last two end panels.
* Note: The selected placing will affect the next assembly steps.
Step 31: It is highly recommended to paste the sealing tape at the bottom edge of
panels 7903 + 7904 is order to prevent moisture seepage.
Step 38: Roof window can be located only on one of the two central roof panels.
* If you assemble the greenhouse with an extension module, the roof windows must be placed on
panels only as specified in the manual.
* Note: The selected placing will affect the next assembly steps.
Step 43: Please tighten screws from inside the greenhouse. In addition, please tighten the
remaining loose screws.
Step 48: As mentioned at the 'Before Assembly' section, prior to fitting the Automatic
Vent Opener, the power -tube has to be cooled by placing it in a refrigerator for
approximately 30 minutes.
Step 57: Door can be installed as a left hand door or right hand door as per your decision.
These instructions show a right hand door assembly. Please determine door opening
direction. This decision will affect the next assembly steps.
Step 59: Please adjust the hinges height in accordance with the upper post and lower ramp
of the door aperture, as specified in Level C.
Step 63:Threading parts 7888 exactly as specified in Level B, is very important in order to
create good drainage.
Step 67: Anchor the greenhouse on to a solid surface such as concrete or asphalt, use
suitable screws and plugs. (Screws and plugs are not supplied).
* Please tighten all screws when completing assembly.
Screws 411 and nuts 412 & 466 are used thruoghout the assembly process.
Screws 411 are to be assembled from the outside and nuts 412 & 466 from the inside of
the greenhouse.
Do not fasten screws and nuts (411,412 & 466) more than 2-3 turns only. Do not tighten
them until completion of the panels'assembly, if not specified otherwise.
However, in some steps, temporary tightening of a few screws may be needed to
prevent a profile from falling.
Note: Firmly connect the product to a level surface immediately after completion of the
assembly.
Anchoring this product to the ground is essential to its stability and rigidity. It is required
to complete this stage in order for your warranty to be valid.
IMPORTANT
Veuillez lire attentivement ces instructions avant de debuter le montage du produit.
Veuillez suivre les etapes dans l'ordre indique dans ces instructions.
Conservez ces instructions en lieu sur pour reference ulterieure.
Consignes de securite
Pour des raisons de securite, nous recommandons vivement que le produit soit assemble par au
moins deux personnes.
Certaines pieces presentent des bords metalliques. Veuillez manipuler les composants avec
precaution. Portez des gants, des chaussures et des lunettes de securite tout au long de l'assemblage.
N'essayez pas d'assembler le produit en cas de vent ou de conditions humides.
Jetez precautionneusement tous les sacs plastiques - tenez-les hors de portee des enfants.
Tenez les enfants a distance de la zone de montage.
N'essayez pas d'assembler le produitsi vous etes fatigue, avez pris des medicaments ou
consommé de l'alcool, ou si vous etes enclin aux vertiges.
Si vous utilisez un escabeau ou des outils electriques, assurez-vous de respecter les consignee de
securite du fabricant.
Eliminez la neige, la terre et les feuilles du toit et des gouttieres.
Une lourde charge de neige sur le toit peut rendre dangereux le fait de se tenir debout en dessous ou
a proximite.
Ne vous appuyez pas contre le produit ou ne le poussez pas pendant sa construction.
Les objets lourds ou coupants ne doivent pas etre appuyes contre les panneaux muraux.
Assurez-vous qu'il n'y a aucun tuyau ou cable cache dans le sol avant thinserer les piquets (non
fournis).
Ne touchez pas les cables electriques aeriens avec des profiles en aluminium.
Si la couleur a ete rayee lors du montage, elle peut etre corrigee.
Remarque : ce produit doit etre ancre sur une surface nivelee et une base solide pour assurer sa
stabilite.
Assurez-vous que les vis et les ancrages sont compatibles avec les fondations.
Instructions de nettoyage
Pour nettoyer le produit, utilisez une solution detergente douce et rincez a l'eau claire
froide.
N'utilisez pas d'acetone, de nettoyants abrasifs, ou autres detergents speciaux pour
nettoyer les panneaux.
Nettoyez le produit une fois le montage termine.
Avant l'Assernblee
Choisissez votre site avec soin avant de commencer l'assemblage.
La surface du sol doit etre parfaitement plate et nivele.
Choisissez un endroit ensoleille, loin des arbres en surplomb.
Ne placez pas votre produit dans une zone exposee a des vents excessifs.
Le produit doit etre positionne et fixe sur une surface plate et nivelee. Nous vous
recommandons fortement de fixer ce produit directement sur une base solide. Utilisez les
trous pre-perces dans la base en acier.
Terminez la preparation du site avant de deballer les pieces et de commencer l'assemblage.
Le produit doit etre positionne et fixe sur une surface plate et nivelee.
Nous vous recommandons fortement de fixer ce produit directement sur une base solide.
Utilisez les trous pre-perces dans la base en acier.
Ordonnez les pieces et verifiez-les avec la liste des pieces contenues.
Les pieces doivent etre disposees a portee de main. Rangez toutes les petites pieces (vis,
etc.) dans un bol pour ne pas les egarer.
Veuillez consulter les autorites locales au cas ou des permis sont necessaires pour la
construction du produit.
Les dessins de ce manuel correspondent a un produit 8'x 8' + un kit d'extension 4.
Veuillez prendre en note que la liste du contenu fait uniquement reference a produit 8'x 8.
Remarque: Toutes les etapes de module d'extension sont marquees avec un contour en
pointilles dans l'integralite du processus &assemblage du produit.
Pendant l'assemblage
Assurez-vous que la base soit bien carree en mesurant les diagonales et le nivelage a l'aide d'un
niveau a bulle.
Vous pouvez utiliser un spray de silicone lubrifiant afin de vous aider a glisser les panneaux dans
les profils.
Ne pulverisez pas les panneaux en polycarbonate.
Utilisez un maillet en caoutchouc si necessaire.
Tous les panneaux estampilles "THIS SIDE OUT" doivent etre orientes vers l'exterieur
pour assurer une protection UV integrale. Retirez les stickers en plastique alors que
les panneaux sont verrouilles en place.
ra)
an.
Lorsque vous rencontrez l'icone Informations, veuillez vous referer a l'etape
d'assemblage pertinente afin d'obtenir davantage de commentaires et d'aide.
Cette icone indique Cette icone indique que
que l'installateur doit 1l'installateur doit etre
etre a l'interieur du produit en dehors du produit.
Atencion
Pendant le montage, placez une surface souple sous les pieces pour eviter de les erafier ou de les
endommager.
Etapes
Etape 4 : Concerne seulement le kit d'extension ! Le kit d'extension contient un connecteur de base,
soit la piece n° 8447 ou la piece n° 7601.
Etape 11 :Veuillez verifier que ('insertion des vis est effectuee exactement comme illustre.
A - Inserez la vis dans le trou de gauche. B - Inserez la vis dans le trou de droite.
Etape 13: Assurez-vous que cette face est bien tournee vers le haut lors de ('installation, car c'est la
seule a etre enduite d'un vernis anti-UVs.
Etape 23: Fenetre persienne du cote: peut etre placee seulement sur un des deux panneaux
centraux.
* Pour assembler le serre de jardin avec un module d'extension, la fenetre peut etre placee sur les
panneaux, a ('exception des deux derniers panneaux d'extremite.
* Remarque: L'emplacement selectionne aura des consequences sur les prochaines etapes de
montage.
Etape 31: it est fortement conseille de coller le ruban d'etancheite sur les bords inferieurs des
panneaux 7903 + 7904 afin d'eviter ('infiltration d'humidite.
Etape 38: La fenetre du toit peut etre placee uniquement sur l'un des deux panneaux centraux
du toit.
* Si vous assemblez le serre de jardin avec un module d'extension, les fenetres de toit doivent
etreplacees sur des panneaux seulement comme specifie dans le manuel.
* Remarque : L'emplacement selectionne aura des consequences sur les prochaines etapes de
montage.
Etape 43: Veuillez serrer les vis de l'interieur du serre de jardin. En outre, veuillez serrer les vis
desserrees restantes.
Etape 48: Comme mentionne dans la section "Avant d'assembler", avant de poser le
mecanisme d'ouverture automatique, le tube de puissance dolt etre refroidi en le placant
dans un refrigerateur pendant environ 30 minutes.
Etape 57: La porte peut etre installee et ouverte a gauche ou a droite selon votre preference.
Ces instructions montrent l'assemblage d'une porte a droite. Veuillez determiner le sens
d'ouverture de la porte. Cette decision aura des consequences sur les prochaines etapes de
montage.
Etape 59: Veuillez ajuster la hauteur des charnieres en conformite avec le poste superieur et la
rampe inferieure de l'ouverture de la porte, comme specifie dans le niveau C.
Etape 63: Threading des pieces 7888 exactement comme specifie dans le niveau B est tres
important pour creer un bon drainage.
Etape 67: Ancrez l'abri sur une surface solide comme du beton ou de l'asphalte, utilisez des vis
et des chevilles adaptees. (Les vis et les chevilles ne sont pas fournies).
* Serrez toutes les vis une fois l'assemblage termine.
Les vis 411 et emus 412 & 466 servent tout au long de la procedure.
Les vis 411 se placent l'exterieur et les emus 412 & 466 a l'interieur de la serre.
Ne serrez les vis et emus (411, 412 & 466) que de 2 a 3 tours, pas plus. Ne les serrez pas tant
que l'assemblage nest pas completement termine, sauf indication contraire.
Cependant, la realisation de certaines etapes peut necessiter le serrage provisoire de
quelques vis pour empecher un profile de tomber en attendant qu'il soit entierement integre
a ('ensemble de la structure dans les etapes suivantes.
Remarque: Cette etape d'ancrage du produit au sol est essentielle a sa stabilite eta sa rigidite,
elle est de plus necessaire pour assurer la validite de votre garantie.
Connectez fermement le produit a une surface nivelee immediatement apres la fin de
l'assemblage.
WICHTIG
Bitte lesen Sie die vorliegenden Anweisungen sorgfaltig durch, bevor Sie mit dem Zusammenbau
dieses Schuppens beginnen. Bitte fuhren Sie die Schritte in derin der vorliegenden Anleitung
aufgefuhrten Reihenfolge aus. Bewahren Sie die Anleitung fur eine spatere Bezugnahme an einem
sicheren Ort auf.
Pflege- und Sicherheitshinweise
Aus Sicherheitsgrunden empfehlen wir, das Produkt nicht alleine zusammenzubauen.
Einige Teile besitzen Kanten aus Metall. Seien Sie vorsichtig, wenn Sie diese Teile zusammenbauen.
Tragen Sie wahrend des Aufbaus immer Handschuhe, Schuhe und Schutzbrillen.
Versuchen Sie nicht, den Produkt bei windigen oder feuchten Wetterverhaltnissen
zusammenzubauen.
Entsorgen Sie die Plastikbeutel vorschriftsgemass - und achten Sie darauf, dass sie nicht in
Reichweite von Kindern kommen.
Halten Sie Kinder wahrend des Aufbaus vom Produkt fern.
Versuchen Sie nicht, den Produkt aufzubauen, wenn Sie mude sind, Drogen, Medikamente oder
Alkohol zu sich genommen haben oder zu Schwindelanfallen neigen.
Wenn Sie eine Stufenleiter oder Elektrowerkzeuge benutzen, achten Sie darauf, die
Sicherheitshinweise des Herstellers zu befolgen.
Halten Sie das Dach und die Dachrinnen frei von Schnee, Dreck und Blattern.
Grosse Mengen von Schnee auf dem Dach kOnnen den Produkt beschadigen und dazu fiihren, dass
es nicht mehr sicher ist, unter oder neben ihm zu stehen.
Wahrend der des Zusammenbaus, sich nicht an das Produkt anlehnen oder dies schieben.
Keine heiBe Gegenstande wie z.B. kurzlich benutzte Grills, Lotlampen etc. in den produkt stellen.
Schwere oder scharfe Gegenstande sollten nicht an die Wandpaneele gelehnt werden.
Stellen Sie sicher, dass sich keine versteckten Rohre oder Kabel im Boden befinden, bevor Sie die
Bolzen einsetzen (nicht im Lieferumfang enthalten).
Beruhren Sie keine freiliegende Leitungen mit den Aluminiumprofilen.
Wenn die Farbe bei der Montage zerkratzt wurde, so kann dies in Ordnung gebracht werden.
Hinweis: Dieses Produkt muss auf einer ebenen Flache und auf einem festen Untergrund verankert
werden, damit es nicht beschadigt wird und dessen Stabilitat zu gewahrleistet wird.Vergewissern
Sie sich, dass die Schrauben und Dubel mit dem Fundament kompatibel sind. Achten Sie darauf, dass
sich keine Hindernisse zwischen dem Montagebereich und dem endgultigen Platz des Produktes
befinden.
Reinigungsanweisungen
Saubern Sie das Produkt nach dem Aufbau.
Um die produkt zu reinigen, verwenden Sie ein mildes Reinigungsmittel und spulen Sie es
mit kaltem,
sauberem Wasser ab.
Verwenden Sie fur die Reinigung der Paneele kein Azeton, keine Scheuermittel oder andere
spezielle Reinigungsmittel.
Bevor Sie beginnen
Wahlen Sie lhren Standort sorgfaltig, bevor Sie mit dem Aufbau beginnen.
Die Bodenflache muss absolut Flach und eben sein.
Wahlen Sie eine sonnige Stelle, abseits von Oberhangenden Baumen.
Stellen Sie Ihr Produkt nicht in einem Bereich auf, der ObermaBigen Winden ausgesetzt ist.
Das Produkt muss positioniert und auf einer flachen und ebenen Flache fixiert werden.
Wir empfehlen lhnen, dieses Produkt direkt auf einem stabilen Fundament zu befestigen.
Verwenden Sie die vorgebohrten Locher im StahlfuB.
Vor dem Auspacken der Teile und dem Beginn der Montage muss jene Stelle, wo Sie das
Produkt aufbauen
vorbereitet werden.
Der Untergrund muss vollkommen flach und eben sein und einen festen Untergrund haben,
wie Beton, Asphalt,
Fliesen etc.
Sortieren Sie die Teile und prufen, ob alle Teile, die auf der Inhaltsliste stehen enhalten sind.
Die Teile sollten in lhrer unmittelbarer Nahe liegen.
Bewahren Sie alle Kleinteile (Schrauben etc.) in einer Schussel auf damit sie nicht verloren
gehen.
Die Zeichnungen in diesem Handbuch beziehen sich fur den 8'x 8'Schuppen mit dem
+ 4' Extension Kit.
Bitte beachten Sie, dass sich die Inhaltsliste nur auf 8'x 8'Schuppen bezieht.
Hinweis: alle Erweiterungsmodul Schritte sind mit gestrichelter Umriss markiert sein sollte im
Gewachsmontageprozess durchgefuhrt wird.
Wahrend der Montage
Vergewissern Sie sich, dass die Basis sowohl quadratisch als auch waagrecht ist, indem Sie die
Diagonalen messen und die Basis mit einerWasserwaage
* Hinweis: Die zur Befestigung gewahlte Platte beeinflusst die folgenden Montageschritte.
Schritt 43: Ziehen Sie die Schrauben bitte von innen fest. Ziehen Sie auBerdem alle
verbleibenden losen Schrauben fest.
Urn das Einfuhren der einzelnen Platten in die Profile zu vereinfachen, konnen Sie Silikon-Gleitspray Schritt 48: Wie im Abschnitt Vor der Montage beschrieben, muss der Stromkanal vor der
verwenden. Montage des automatischen Beltiftungsoffners zum AbkOhlen fur ca. 30 Minuten in den
BesprOhen Sie nicht die Polycarbonat-Platten. KOhlschrank gelegt werden.
Nehmen Sie - falls notig - einen Gummihammer zur Hilfe. Schritt 57: Die -Mr kann nach Belieben sowohl links- als auch rechtsoffnend installiert
Alle mit den Worten THIS SIDE OUT versehenen Platten mussen nach auBen zeigen, werden. In der Anleitung wird die Installation einer linksoffnenden Tur beschrieben. Bitte
damit der voile UV -Schutz garantiert werden kann. entscheiden Sie sich fur eine Offnungsrichtung. Von dieser Entscheidung hangen die folgenden
Beim Aufbau wird lhnen das Informationssymbol begegnen. Fur zusatzliche Kommentare Montageschritte ab.
und Unterstutzung beziehen Sie sich bitte auf die entsprechende Aufbaustufe. Schritt 59: assen Sie die Befestigungshohe der Scharniere - wie in Teil C beschrieben -
entsprechend dem oberen Pfostenteil und der Rampe der Turoffnung an.
Dieses Symbol zeigt an, dass sich die Dieses Symbol zeigt an, dass die Step 63: Das Einziehen der Teile 7888 entsprechend den Anweisungen in Teil B ist auBerst
installierende Person sich im Inneren
des Produktes befinden sollte installierende Person sich auBerhalb des
Produktes befinden sollte. wichtig,
urn einen funktionierenden Abfluss zu gewahrleisten.
Step 67: Verankern Sie die Witte auf einem festen Untergrund wie Beton oder Asphalt mittels
gi- Achtung: anmessener Schrauben und Dubeln. (Schrauben und Dubel sind nicht mitgeliefert).
Legen sie wahrend des Aufbaus eine weiche Unterlage unter die einzelnen Teile, urn Kratzer und
Schaden zu vermeiden. *Ziehen Sie alle Schrauben fest, sobald die Montage beendet ist.
Schritte
Schritt 4: Betrifft nur den Verlangerungsbausatz! Im Verlangerungsbausatz befindet sich ein
Verbindungsstuck mit Artikel # 8447 oder # 7601
Schritt 11: Bitte stellen Sie sicher, dass die Schraubverbindung exakt gemaB der Abbildung erfolgt.
A - Stecken Sie die Schraube in die linke Offnung.
B - Stecken Sie die Schraube in die reche Offnung.
Schritt 13: Diese Seite soil nach oben zeigend angebracht werden. Sie ist die Einzige mit einer UV -Schutz
Lackierung.
Schritt 23: seitliches Liiftungsfenster kann ausschlieBlich in einer der beiden mittleren Platten
montiert werden.
* Falls Sie das Gewachshaus zusammen mit einem Erweiterungsmodul aufbauen, kann das Fenster - bis
auf die beiden Endplatten - aufjeder beliebigen Platte installiert werden.
* Hinweis: Die zur Befestigung gewahlte Platte beeinflusst die folgenden Montageschritte.
Schritt 31: Es wird sehr empfohlen das Dichtungsband and das untere Ende der Panels 7903 + 7904
zu kleben, urn das Durchsickern von Feuchtigkeit zu verhindern.
Schritt 38: Dachfenster kann nur auf einem der beiden mittleren Dachpaneele angeordnet sein.
* Wenn Sie das Gewachshaus mit einem Erweiterungsmodul montieren, mussen die Dachfenster auf
Panels nur, wie im Handbuch angegeben platziert werden.
Schrauben 411 and Muttern 412 & 466 werden wahrend des gesamten Aufbauvorgangs
benutzt.
Schrauben 411 werden von der Aussenseite des Gewachshauses eingesetzt und Muttern
412 & 466 von der Innenseite.
Ziehen Sie die Schrauben und Muttern (411,412 & 466) nicht mit mehr als 2 -3
Umdrehungen fest. Ziehen Sie sie erst nach Beendigung derVerglasung weiter fest, falls dies
nicht ausdrucklich anders festgelegt ist.
Bei einigen Schritten mussen allerdings eventuell ein paar Schrauben vorObergehend
angezogen werden, urn zu vermeiden dass ein Profil fallt.
Note: Die Verankerung di- -Produkts im Untergrund ist wesentlich fur seine Stabilitat und
Festigkeit.
Sie ist unablasslich, urn diesen Arbeitsschritt zu beenden, damit lhre Garantie gultig bleibt.
Das Produkt unmittelbar nach Fertigstellung fest an einer flachen und ebenen Flache
anbringen.
ce
IMPORTANTE
Le rogamos lea con atencion las siguientes instrucciones antes de empezar a montar este producto.
Siga los distintos pasos en el mismo orden de las instrucciones.
Guarde las instrucciones en un lugar seguro para poder consultarlas en el futuro.
Consejos de cuidado y seguridad
Por motivos de seguridad, recomendamos encarecidamente que el producto sea montado al menos por
dos personas.
Algunas piezas pueden tener bordes afilados. Por favor, tenga cuidado al manipular los componentes.
Lleve siempre guantes, proteccion ocular y mangas largas al montar o realizar cualquier mantenimiento
de su producto.
No intente montar el producto en condiciones de viento o humedad.
Tire todas las bolsas de plastico con seguridad; mantengalas fuera del alcance de los ninos pequenos.
Mantenga a los ninos lejos del area de montaje.
No intente montar el producto si esta cansado, ha tornado drogas, medicamentos o alcohol o si es
propenso a ataques de mareo.
Cuando utilice una escalera de mano o herramientas electricas, asegurese de seguir los consejos
de seguridad
del fabricante.
Mantenga el tejado y el canal& sin nieve, suciedad ni hojas.
No es seguro pararse debajo o cerca cuando hay gran cantidad de nieve sobre el techo.
No se apoye ni empuje el producto durante la construccion.
Articulos calientes, como parrillas recientemente usadas, sopletes, etc. no deben ser almacenados
dentro del producto.
Los articulos pesados o afilados no deben apoyarse contra los paneles de la pared.
Asegurese de que no haya tuberias o cables ocultos en el suelo antes de insertar las estacas
(no suministradas).
No toque cables electricos en altura con los perfiles de aluminio.
Si se ray6 el acabado de color durante el montaje, el mismo puede ser arreglado.
Nota: Este producto debe estar anclado a una superficie nivelada y a una base solida.
Asegurese de que los tornillos y los anclajes sean compatibles con el tipo de base.
Asegurese de que no haya obstrucciones entre el area de ensamblaje y la posicion final.
Instrucciones de limpieza
Limpie el producto una vez terminado el montaje.
Cuando necesite limpiar su producto, use una solucion de detergente suave y aclarelo con
agua limpia fria.
No utilice acetona, limpiadores abrasivos ni otros detergentes especiales para limpiar los
paneles.
Antes de empezar:
Elija su sitio cuidadosamente antes del ensamblaje inicial.
La superficie del terreno debe ser perfectamente plana y estar nivelada.
Elija un area soleada, lejos de &boles que puedan cubrir la estructura.
No coloque su producto en un area expuesta a vientos excesivos.
El producto debe colocarse y fijarse sobre una superficie plana y nivelada.
Recomendamos encarecidamente asegurar este producto directamente sobre una base
solida. Utilice los orificios pre-perforados en la base de acero.
Complete la preparaciOn del sitio antes de desempacar las piezas y comenzar el ensamblaje.
Las partes deben disponerse al alcance de la mano.
Mantenga todas las piezas pequenas (tornillos, etc.) en un recipiente para que no se pierdan.
Consulte las limitaciones, requisitos, permisos y a las autoridades locales para la construed&
de este cobertizo de jardin.
Los dibujos en este manual estan disenados para cobertizos de 8'x 8'+ Kit de Ampliacion de 4.
Tenga en cuenta que la lista de contenido es solo para cobertizos de 8'x 8.
Nota: Todos los pasos del modulo de ampliacion estan marcados integramente con un contorno
de trazos en el proceso de montaje del invernadero.
ceDurante la instalacion
Asegurese de que la base es cuadrada, midiendo las diagonales y el nivel mediante el use
de un nivel de burbuja.
Es posible utilizar un aerosol lubricante de silicona con el fin de ayudar a deslizar los paneles
en los perfiles.
No pulverice los paneles de policarbonato.
Utilice un martillo de goma si es necesario.
Todos los paneles con las palabras estampadas THIS SIDE OUT" deben estar
mirando hacia afuera para crear una proteccion UV completa. Quite la etiqueta de
plastico a medida que bloquee los paneles en su lugar.
Cuando encuentre el icono de informacion, por favor lea con cuidado dicho
paso con comentarios y asistencia adicionales.
Este icon° indica que el
instalador debe estar dentro
del producto.
Atencion
Este icon° indica que el
111 instalador debe estar fuera
del producto.
Durante el montaje, ponga algo suave por debajo de las piezas, para evitar que se rayen
o estropeen.
Pasos
Paso 4 : junicamente se refiere al kit de extension!
El kit de extension contiene un conector base, tanto la parte #8447 o la #7601
Paso 11: Por favor, asegurese de que la conexion del tornillo se hace exactamente como se muestra.
A - Conecte el tornillo en el orificio izquierdo.
B - Conecte el tornillo en el orificio derecho.
Paso 13: Pele la pelicula que cubre el panel. Asegurese de instalarla con el lado con proteccion UV hacia
afuera.
Paso 23: ventana lateral con lamas: solo puede colocarse en uno de los dos paneles centrales.
* Si monta el invernadero con un modulo de ampliacion, la ventana se puede colocar en todos los
paneles, excepto los dos ultimos paneles del final.
* Nota: la colocacion elegida afectara a los pasos de montaje siguientes.
Paso 31: se recomienda encarecidamente que se coloque la cinta selladora en el extremo inferior
de los paneles 7903 + 7904 con el fin de evitar filtraciones de humedad.
Paso 38: la ventana del tejado puede localizarse en uno de los dos paneles centrales del tejado.
* Si monta el invernadero con un modulo de ampliacion, las ventanas del tejado deben
colocarse sobre paneles solo segun se especifica en el manual.
* Nota: la colocacion elegida afectara a los pasos de montaje siguientes.
Paso 43: por favor, apriete los tornillos desde el interior del invernadero. Adernas apriete,
por favor, los tornillos que esten flojos.
Paso 48: Como se ha mencionado en la seccion de Antes del montaje, antes de encajar la
apertura de ventilacion automatica, se debe enfriar el tubo de la corriente durante unos 30
minutos en el refrigerador.
Paso 57: La puerta se puede instalar ya sea al lado izquierdo o al derecho, es su decision. En
estas instrucciones se ve el montaje de la puerta en el lado derecho. Por favor, determine la
direccion de apertura de la puerta. Esta decision afectara a los pasos del montaje siguientes.
Paso 59: Por favor, ajuste la altura de los goznes de acuerdo al poste superior y la rampa inferior
de la apertura de la puerta, como se especifica en el nivel C.
Paso 63: Ensartar las piezas 7888 exactamente como se especifica en el nivel B; es muy
importante, para asi crear un buen desague.
Paso 67: Ancle el cobertizo a una superficie solida como hormigon o asfalto, utilice tornillos
y tapones adecuados. (No se su ministran los tornillos y tapones).
*Por favor, tenga en cuenta: Anclar este producto al suelo es esencial para su estabilidad
y rigidez. Es necesario completar esta fase para que su garantia sea valida.
* Apriete todos los tornillos una vez este completado el montaje.
Los tornillos 411 y las tuercas 412 & 466 son usados durante todo el proceso de montaje.
Los tornillos 411 deben ser montados desde el exterior y las tuercas 412 & 466 desde el
interior del invernadero.
No apriete los tornillos y tuercas (411,412 y 466) mas de 2- 3 vueltas. No los apriete hasta
terminar el montaje de los paneles, a menos que orientado de otra manera.
Sin embargo, en algun paso puede ser necesario apretar de forma temporal algunos tornillos
para evitar que se caiga un perfil.
Note: Inmedia . -to despues de co letar el ensamblaje, vincule firmemente el producto
a una superficie nivelada.
Ancle firmemente el producto a una superficie nivelada inmediatamente despues de finalizar
el ensamblaje.
LUNC4C1C,CilXUcOIL'LAIN
raNcl
U5KcC1UUltaClcaNU
ULLLCA
MILUULCCU4CCALUUM51-U. U6LU:a
Cial
CURL1UC,CMC1UcraLleiceilL
CURd
CCLcC,LILNNUcRcEllieLAINr1IZELCcI1LUACCcEl NaURC6uaLci
cuuc,L
uLcuu'
uulc,udci.. ml.
c,C6I1CCEC,cUraCAC,6cCicca6C1GLL.51.4UNC,LCAcCclEr
LLB!
raNcl
KcCLIALIXLCa,c1=1CCULcClENLCAUC,GCcUCCCLUUcULLU
(NcCC1CAMGdca
cUL61:1
LULL) NclC,NCCil
CULLU5KcC1UCAcC1
CUL
CLI-C,raucrauCl.racCUra
C,NULLCU'
CALM_
LULL
la; NC,
LiciA6l.
(CC,UCURLINC,
ULU,
NitaC6UULCCUe NclC,Ura6cl
U5KcC1CELcC1XLULcC1(CC,C,LULLI
UdcL(UC,LL(C41.1).
ACACi.racieCUL(CC,UCC64C,C,GC1.6ECC1cUlLIUM.CALcC1CALCUUcl.XLCeitcCUI: cal
ciuukd(cce.ci'ciccLL
vacieCAUCAL1CLUCC NclC,Ura6cl
(CRUZCELcC1(CC,U6CULcCr 'McCaraCeilC,C1XLCC,C4(CELLUUraC(Cica
Ci6d.
LENULULLNLUUCC1cULLI
rac,u,RLI:
CN
c,ULLIcd.
cC,LcC1
&MCI
Milt
uut_cdcu.
CNC,UcGC1LECC1UU
ClradclUUGC,Ci.C1cd
r1CNLc112
-
C,ULUcd
ClUcraCcLC1rac,GaC11..U.
NlNaNUC1C64CC1ccUC,CLULULLII Ncl
C,ULCcENUUCLDtraLmita
6ccGcCC
LCUUuraurci_cULLGLUCANC,UralUNl
NC,CLULC,'
Ncl
C,CCilLIC,ULCcENUUCLCCUNlicLMCINlLLULLI
UldlLr CNC,U(AUCUACC551.11
(Critu'uradu,uel
it,eit
NULcurk
cc,uuLCC12. C,UCidca
CleilcC4C1a
dalli
CAUCLI
-
CNC,C15C,
CUCidca
NC,L.ClUcLUIucLuair CleicallCC1cUlUclU
CALCAC,A.
GNU_C,ULCcENUUCL(CC,cLcrac,NCracCr
12CLIALLICIMLC,LECIUILLI:
CNcouLLNuULLNUIUULCCU
CCAdl.C1
'EMUCifacCara611cLe
CNC,CKANUfaCitcUULCCUCOILUCAL.K.0CULLNI.UNC,U.
CN
CidLl.NCdGcLU
NUULLNUIUULCCUC,GfcLCUcC,UULCCUUCA.K.L.
wauc
UtCLU:
CC,(Up.cUcLUIULUCUCALLCACLU
Cdl.Cldlldl
lila
C,CMC1
CCAUC,L
ULCCUUCALKI: a
cixa
rai_cac,i_cULfacCAUClUccUCLULC42CCUU-8
(CC,
8LC(,' UULfacC4C1
CCALLcL
1UClcl6LcClC,CAXLrac,8(CC,8LCC,±6LCUULUCUrac,-17LC(,'
NCN
ELld
CAJLULfalclUENDa?t
ALL
CUcULcC1CcirauciC1LC1ULCCUUCALKI:
(CC,
CACUrac,NcNCLI: ac,ucalNu
Lic,d,
uuLcuu
EdLcuc,udin
UULCCU(awl_Nu
uuc,d,ciudnucicd(cLu
cal
civa
Nu
UUCidcaLC,CLld
CCAlclUNC,CRCLfacCAULULL,U UUCidca
LULCUC,UULCCU. CUR&
NCNUraLICAraCULLcC1
UdLlUcC1
CALNraEttactaUGC,LU.NCN
UCL
NUUNULC,Gfc
5LcdU a
ciuda
NUUCL
lCidE6
MLR
(CC,
CCUraMU'NELCACACicKcC1
CidUK
NUUCAXLcracLlUC,Ceicei Na.c,uda
NuLULLEN11.1_
Ural,
C,LLULU
Uldllc aC,CULLNUL(1r
C11.1.7
-(1r
CW
LULL
ClU6KcCr
(cc,
udi_d6
c,uauracuuuLuacoau
cpc,Lcia.
Lurcc,u
Dada
ui.xdCul:ad'
Nauc,c-i'
LLCUCA
la,' CUL'CUMULICFNu
Clcdla
UULCCUC,GfcLCUcC,UUULCCU. CpC41212LCC12:
a
Cicdlll
NUUCAXLCeicla
UULcdcu. Na
ciuraLICAra
ENRC10!
ULCALc
Ccdlcraudda
leiaft-CIClclULcCr
CLI.
Cicd.l.0
NUUClctl.aCiUraLICAra
rata(cLa.LC,LULA.
CCDAc
d.U.11CdccIT
ULLNLLI
Ccdlc
.aroinn an nin15 nvn -mx3 p1 »n 115n nx npn5 lynx :38 35W
703 pm -ix mm5n 5v »n n1]15n nx Dpnb ,n3ninn 1731 DV nnnnn m1107311'3 nnx nx
.171111 1)110M)
.13,x3n n33inn 735v.) 5v pnv.)7 in= n1p7nn :n3375 ma1vn5
n7nnnn nn -on nx1p-rn rox .nnnnn 5v.) 'anon -rNnn nn -on nx1p-rn rox :43 3517
177-rvv.)
nnynn5 Ivnivixn ipnnn nnnn nth ,rminn 1=5 pi93 -onnv 7n3 :48 35W
.mp-r 30-3 -pn5 -npn5 nmonn nivNiox3 n551vn nxiip5
-1p135 ,5xnv 171R 1717 nivNiox3 nnnn) n5v) rp-pnv 15-173 n5-rn nx rpnn5 lynx :57 35v)
11173 nx1v3p rox .rn7 nivNiox3 num) n'r'n Toy) n5 -r nnnn mrNn 155n =inn .133n
.13,x3n n3pnnn 735v 5v v7nvn 1T nthnn .n5-rn 5v nrminn
11)13V nnnn 5v.onnnn vin7v51 mr5vn 11p35 nxnn3 13717Nn nal) nx1yrxnn rox :59 3517
.LEVEL C-1 umnnv 7n3 ,n5 -r5
.amnpn my,5 ,111,3 7111V.111 LEVEL B-1 ITI1OV 703 pr -r3 7888 n7p5nn nron :63 35W
177)N5011 nn133 lynnvni ,u5nvx1x.ou3 ,a,N71 imx nuvn5 nnnnn nx Inv :67 35W
.(1R palm) -rrN3 n75533 x5 nnx5nm nn -on) nnyxnn
.n33inn 171771131rn nn -on nx p-rnn"5u
.n33inn -175nn 53 -15nr33 cpvinvin 4661 412 anaimi 411 nn13
.nr3r3nn 5vi 7r3nnn np5m3 113117 466 1 412 EPY31N1 yin3r3 133117 411 nn13
nnix 1115 17R .1151 1771117D 3-2 ivxn n7n1xm nn -on nx p1n5 ,ninx TYIN N5 nx
.N5 1R pn,n nxn 13,377Nn n5x ntnv 2 .ninf2n n33 -in nry nth
1n57n) nx vnn5 n.33 rm nrn5 nn -on pn,n ,13,35vnn p5n3 ,51N
:35 cpw
nx pv5 ,133111 nn5vn 1nx5 pn ..iimpnvl m37N75 nrn vp195 iyinn Tiry
.m 35v nn5vn3 715n mnnxn qp.in 1NY31 Vpipnv3 1u7n nnnnn
:n23-mn 15nna
.v5n np713 inx5 mrn v519n111n35xn n-p-rn 7r7 5v vrnin v7v3nv xm
.13,57minn -on 5x mm5n nx 57nvn5 v77v5 7133 11p757v vnnvn5 in'
.un31p 75.inn nin15 5v 11p757v nnn5 rx
.7n1) vun3 vnnvn n1pn3
y1n'n5n UV -rn inion p5 nn 1VN3 n733mn imm5nv 35 nv5 R
nlinn mm5n 1VN3 nproon m01101 95p51 ("THIS SIDE OUT r5v inNn)
.nn1pn3 137511m
.inn v-pai nnvn xlip5 713 TiNnn n33inn 15.1 rv5 ,minm IPOln 1VN3
nn nrn5 .iyinn -pm nrn5
1731117151)V177Nn ni 51117 1731117151M 177Nn ni 51117
:25 Dm
vnn5 7133 n7p5n5 nnnn -n nvvn3 vnnvn ,n33inn nv3
#76011R #8447 75n ,v7v3 1117Y3 7157311 7111117171n3iv !7111117171 n3iv5 p1 vrrmn :4 351.)
.117x5 nxnn3 pr -r3 nvv) nronn maTiv lx -n rox :1135W
75xnvn m13 nronn nx ron -x
'Nam m13 nronn nx ron -3
mon INTIV3 1mR nwnn nnxv1x-n .m5n nx nv3nn nn7Nn ropy nx 1n5p :13 35W
.731N7 nn -113 xNr33 UV mnp non
.1377i3inn mm5n nvn Imo npn5 lynx :7-r-rNn mnnin 115n :23 35W
,mm5n 533 115nn nx npn5 ivnx ,n3ninn am nv nnnnn nx Damn nnx nx
.nNpn imm5 uvn5
.13,x3n n33inn 735v 5v pow, 1n33n n1p7nn :n3375 ma1vn5
,7904 + 7903 mm5n nNp3 an.rxn IrE0 nx pmn5 inr3 y5a1n :31 3517
imn5 n-p-rn vnn5 713
VI KTI GT
Var vanlig las instruktionerna noggrant innan du be.rjar montera produkten.
Vanligen utfOr instruktionerna enligt de steg som angivits i dessa instruktioner.
Spara dessa instruktioner pa ett sakert stalle for framtida referens.
Aktsamhets - och sakerhetsrad
Av sakerhetsskal rekommenderar vi starkt att produkten monteras av minst tyS personer.
Vissa delar har metallkanter. Var forsiktig vid hanteringen av de olika delarna.
Anvand alltid handskar, skor och sakerhetsglasogon under monteringen.
Forsok inte montera ihop Gazebo i bISsigt eller Mt vaderforhSllande.
Forsok inte montera Gazebo om du ar trott, tagit droger, mediciner eller alkohol, eller om du ar
benagen att bli yr.
Gar dig av med alla plastpSsar pS ett sakert satt - Wall dem borta fran barn.
HMI barnen borta fran monteringsomrSdet.
Nar du anvander en stege eller motordrivna verktyg, sakerstall att du foljer tillverkarens sakerhetsrSd.
HMI tak och takrannor rena fran sno, smuts och
Ett tungt snolager kan Ora det farligt att stS under, eller i narheten av taket.
Luta eller tryck inte pa vaxthuset under montering.
Heta foremSI som en nyligen anvand grill, bISslampa eller dylikt fSr inte forvaras
i produkt.
Tunga foremSI bar inte lutas mot stolparna.
FOrsakra att det inte finns n'agra dolda rOr eller kablar i marken innan du sl'ar ner metallfastena for att
forankra produkt. (ej levererad)
Var noga med att inte komma i kontakt med elkablar da metallprofiler hanteras.
Om fargen repades under montering kan den fixas.
Obs.: Denna produkt m'aste forankras pS en plan yta och en fast grund for att sakra dess stabilitet.
Se till att skruvar och ankare ar lampliga for typen av grund. Se aven till att det inte finns hinder
mellan monteringsomrSdet och den slutliga positionen.
Rengoringsinstruktioner
Vid rengoring av produkt, anvand ett milt rengoringsmedel och skolj med kallt rent vatten.
Anvand inte aceton, rengoringsmedel innehSllande slipmedel, eller andra specialmedel for att
rengora panelerna.
Gar ren produkten nar ihopsattningen ar klar.
F8re montering
Valj plats noggrant innan du pSborjar monteringen.
Markytan m'aste vara helt platt och jamn och ha en fast bas s'asom betong, asfalt, dack etc.
Valj en solig plats utan Overhangande trad.
Valj omsorgsfullt platsen for produkt sS att det inte pSfrestas av kraftig vind eller extra sno.
produkt m'aste placeras pS en fast och plant underlag.
Vi rekommenderar absolut att detta produkt sakras direkt pS en solid cementgrund. Nar
detta gars bar man anvanda de forborrade hSlen i metallramen.
FOrbered byggplatsen klart, innan du packar upp delar och pSbOrjar montering.
Sortera delarna och kontrollera mot komponentlistan.
Delarna bar laggas ut nara dig. Ha alla smS delar (skruvar etc.) i en skSI sS att de inte
forsvinner.
Kontakta diva lokala myndigheter hurvida tillst'and krays innan byggnation av produkten.
Ritningarna i den har manualen ar konstruerade for YY x YY product +Y Extension Kit.
Notera att innehSlIsforteckningen enbart hanfor till YY xYY product.
Obs.: Alla steg i forlangningsmodulen markerade med en streckad kontur bar
genomforas under montering av produkten.

Other manuals for Glory 8'x8'

2

This manual suits for next models

2

Other Palram Greenhouse Kit manuals

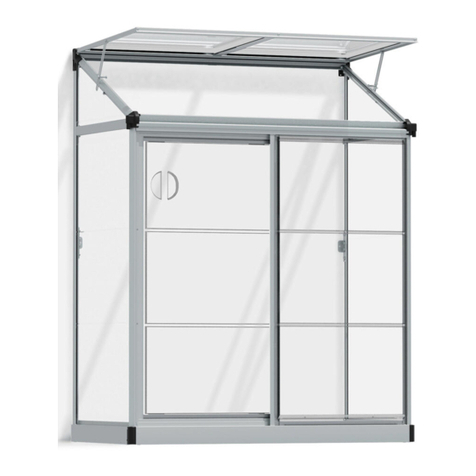
Palram Grand Gardener Prestige 8x8 User manual

Palram

Palram Grand Gardener Prestige 8x8 User manual

Palram Harmony 6'x4' - Clear Glazing User manual

Palram

Palram Harmony 6'x4' - Clear Glazing User manual

Palram Mythos 6'x14' User manual

Palram

Palram Mythos 6'x14' User manual

Palram Lean To Grow House 4x2 User manual

Palram

Palram Lean To Grow House 4x2 User manual

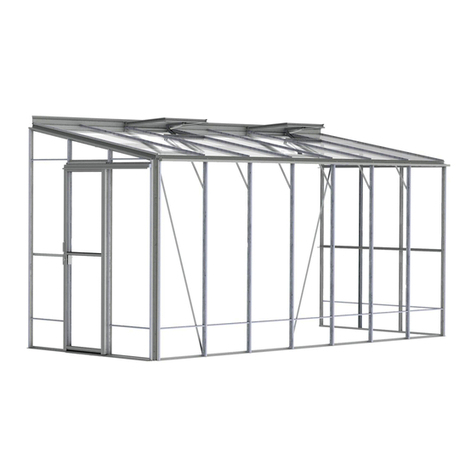
Palram Lean-To Inter User manual

Palram

Palram Lean-To Inter User manual

Palram Bella 8'x8'- TwinWall Glazing User manual

Palram

Palram Bella 8'x8'- TwinWall Glazing User manual

Palram Americana 12'x12' Hybrid Glazing User manual

Palram

Palram Americana 12'x12' Hybrid Glazing User manual

Palram Octave 8x12 User manual

Palram

Palram Octave 8x12 User manual

Palram GLORY 6'x8' User manual

Palram

Palram GLORY 6'x8' User manual

Palram CANOPIA HARMONY Administrator Guide

Palram

Palram CANOPIA HARMONY Administrator Guide

Palram Bella Series User manual

Palram

Palram Bella Series User manual

Palram CANOPIA SUNROOM VENT KIT Administrator Guide

Palram

Palram CANOPIA SUNROOM VENT KIT Administrator Guide

Palram Snap & Grow 8' Series User manual

Palram

Palram Snap & Grow 8' Series User manual

Palram Eco Grow User manual

Palram

Palram Eco Grow User manual

Palram Glory Standard 8'x 8' User manual

Palram

Palram Glory Standard 8'x 8' User manual

Palram CANOPIA TURINO 3x4,25 Administrator Guide

Palram

Palram CANOPIA TURINO 3x4,25 Administrator Guide

Palram Victory Orangery User manual

Palram

Palram Victory Orangery User manual

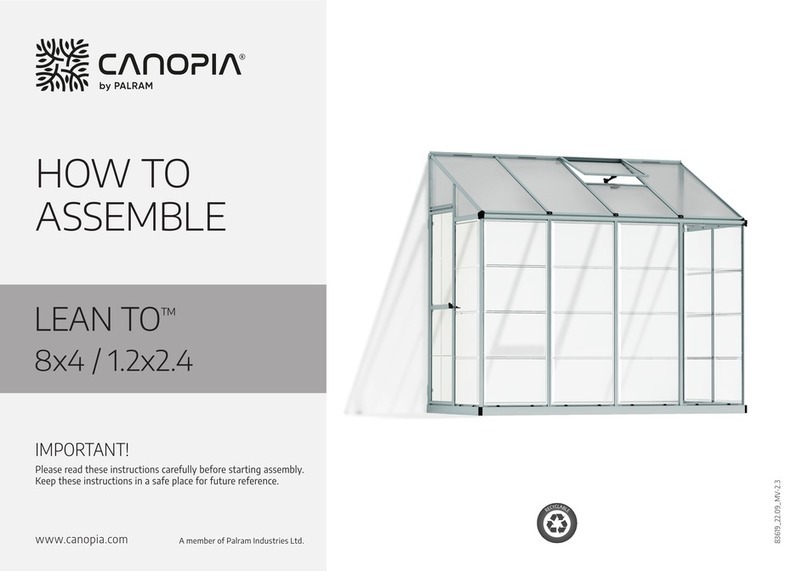
Palram Lean To 8x4 Hybrid User manual

Palram

Palram Lean To 8x4 Hybrid User manual

Palram Plant Inn Compact - Clear Glazing User manual

Palram

Palram Plant Inn Compact - Clear Glazing User manual

Palram Mythos 6x4 User manual

Palram

Palram Mythos 6x4 User manual

Palram CANOPIA MARTINIQUE 10x14/3x4.3 Administrator Guide

Palram

Palram CANOPIA MARTINIQUE 10x14/3x4.3 Administrator Guide

Palram CANOPIA AMERICANA 12x12/3.7x3.7 Administrator Guide

Palram

Palram CANOPIA AMERICANA 12x12/3.7x3.7 Administrator Guide

Palram Victory Orangery - Garden Chalet User manual

Palram

Palram Victory Orangery - Garden Chalet User manual

Palram CANOPIA RUBICON 6x10 / 2x3 Administrator Guide

Palram

Palram CANOPIA RUBICON 6x10 / 2x3 Administrator Guide

Popular Greenhouse Kit manuals by other brands

Juliana Premium Wall Assembly instruction

Juliana

Juliana Premium Wall Assembly instruction

ACD S310 manual

ACD

ACD S310 manual

AeroGarden Salad Series Tending & Harvesting Guide

AeroGarden

AeroGarden Salad Series Tending & Harvesting Guide

FirstBuild Mella quick start

FirstBuild

FirstBuild Mella quick start

GREEN PROTECT 36287 Assembly instructions

GREEN PROTECT

GREEN PROTECT 36287 Assembly instructions

AeroGarden AeroGarden 507320-0000 quick start guide

AeroGarden

AeroGarden AeroGarden 507320-0000 quick start guide

Vitavia VM0023-S Assembly instructions

Vitavia

Vitavia VM0023-S Assembly instructions

Gabriel Ash essential Series Assembly instructions

Gabriel Ash

Gabriel Ash essential Series Assembly instructions

ClearSpan PB00250R4 manual

ClearSpan

ClearSpan PB00250R4 manual

Juliana 05112019-CH manual

Juliana

Juliana 05112019-CH manual

Hanover HANGRNHSP8X6-GRN Assembly instruction

Hanover

Hanover HANGRNHSP8X6-GRN Assembly instruction

Vitavia VA0002-DM Assembly instructions

Vitavia

Vitavia VA0002-DM Assembly instructions

Vente Unique OTERIA Assembly instruction

Vente Unique

Vente Unique OTERIA Assembly instruction

Rion Eco Grow Assembly guide

Rion

Rion Eco Grow Assembly guide

ClearSpan 104458 manual

ClearSpan

ClearSpan 104458 manual

Quictent 1302 manual

Quictent

Quictent 1302 manual

ACD R308XH manual

ACD

ACD R308XH manual

Halls Universal 108 manual

Halls

Halls Universal 108 manual

manuals.online logo
manuals.online logoBrands
  • About & Mission
  • Contact us
  • Privacy Policy
  • Terms and Conditions

Copyright 2025 Manuals.Online. All Rights Reserved.