manuals.online logo
Brands
  1. Home
  2. •
  3. Brands
  4. •
  5. Palram
  6. •
  7. Outdoor Furnishing
  8. •
  9. Palram Monaco HG9160 User manual

Palram Monaco HG9160 User manual

15.01_English_Spanish_78920_V1
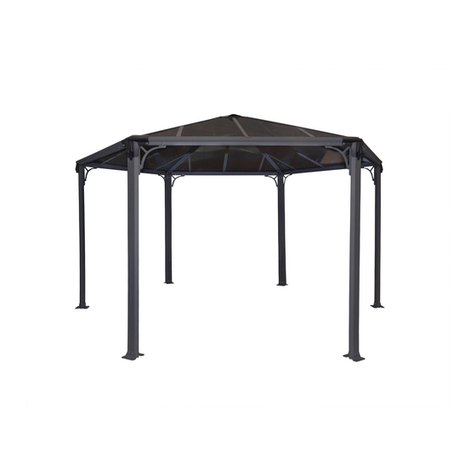
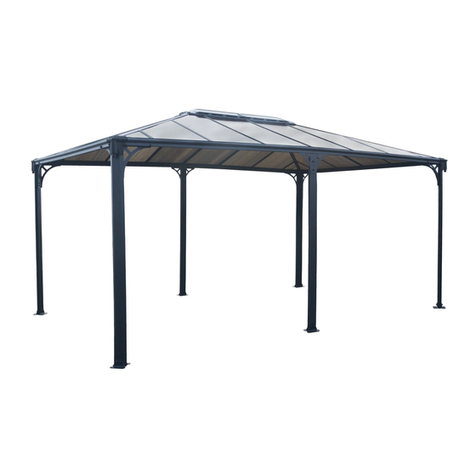
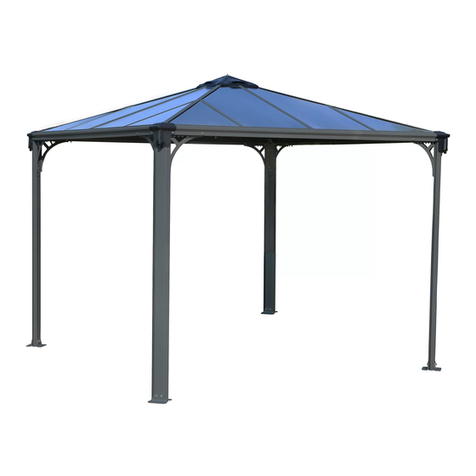
Monaco™
Hexagonal Garden Gazebo
Approx. Dim.
438 L x 438 W x 289.5 H cm / 172.4” L x 172.4”W x 114” H
Assembly Instructions
13mm
1/2”
5mm
3/16”
x2
10mm
25/64”
SILICON \
CAULK
www.palramapplications.com
After Sales Service:
E-Mail: customer.ser[email protected]
Toll Free: (877) 627-8476
» Tools & Equipment
 During Assembly
During assembly use a soft surface below the parts to avoid scratches and damages.
Step 8: Optional - if you wish to add curtains / mosquito netting -
Please thread the plastic clips through the rail in each profile.
(Curtains / mosquito netting are not supplied).
Add clips according to the specific quantity of curtain rings.
Step 10: It is recommended to use a carton or other soft material under the lowered
corner in order to avoid scratches and peeling of paint.
Steps 10a+12a: Please note that screws insertion should be done from the outside.
Steps 11+13: Please note that screws insertion should be done from the bottom up.
Afterwards please use the tool T001.
Step 14: Please add silicone on the inner area of part #7661 as illustrated.
Step 19: Please drill holes in the panels, parallel to the holes in profiles #7663.
Step 20d: Press the drainage pipe into part #8098 until it clicks and locks inside.
Step 21: Please level the profiles’ legs and adapt screws and plugs to your specific
ground type.
Please tighten all screws when completing assembly.
IMPORTANT
Please read these instructions carefully before you start to assemble this product.
Please carry out the steps in the order set out in these instructions.
Keep these instructions in a safe place for future reference.
 Care & Safety Advice
•Please follow the instructions as listed in this manual.
•Sort the parts and check against the contents list.
•For safety purposes we strongly recommend the product to be assembled by
at least two people.
•Some parts have metal edges. Please be careful when handling components.
Always wear gloves, shoes and safety goggles during assembly.
•Do not attempt to assemble the Gazebo in windy or wet conditions.
•Dispose of all plastic bags safely – keep them away from children’s reach.
•Keep children away from the assembly area.
•Do not attempt to assemble the Gazebo if you are tired, have taken drugs,
medications or alcohol, or if you are prone to dizzy spells.
•When using a stepladder or power tools, make sure that you are following the
manufacturer’s safety advice.
•Do not climb or stand on the roof.
•Heavy articles should not be leaned against the poles.
•Keep roof and gutters clean of snow, dirt & leaves.
•Heavy snow load on roof can damage the Gazebo making it unsafe to
stand below or nearby.
•This product was designed and produced for it’s aimed purpose only.
If color was scratched during assembly it can be fixed with the following tints:
Grey – RAL 7012
 Cleaning Instructions
In order to clean the Gazebo, use a mild detergent solution and rinse with
cold clean water.
Do not use acetone, abrasive cleaners, or other special detergents to clean
the panels.
EN
When encountering the information icon, please refer to the
relevant assembly step for additional comments and assistance.
13mm
5mm
3/16”
10mm
25/64”
SILICONE \
CAULK
TOO1(Supplied)
14.12_V1
10 cm / 4”
40 cm / 15.7”
40 cm / 15.7”
Pavement Stone
Concrete
Concrete
Concrete
Concrete
Concrete
Concrete
Asphalt / Soil
40 cm / 15.7”
40 cm / 15.7”
40 cm / 15.7”
220 cm / 86.5” 220 cm / 86.5”
435 cm / 171.2” 435 cm / 171.2”
x4x4
Concrete
Concrete
Concrete
Concrete
Concrete
Concrete
» Herramientas y equipo
 Durante el montaje
Durante el montaje, ponga algo suave por debajo de las piezas, para evitar que se
rayen o estropeen.
Paso 8: Opcional: si desea añadir cortinas / malla antimosquitos, inserte los clips
de plástico en el raíl en cada perfil. (Cortinas y malla antimosquitos no incluidos).
Ponga clips según la cantidad específica de anillas de cortina que desee instalar.
Paso 10: Le recomendamos poner un cartón o una lámina de material blando
bajo la esquina que toque el suelo para evitar arañazos o descascarillamiento de la
pintura.
Pasos 10a+12a: Recuerde que los tornillos deben ser insertados desde fuera.
Pasos 11+13: Recuerde que los tornillos deben ser insertados de abajo arriba.
Después, use la herramienta T001.
Paso 14: Ponga silicona en la parte interna de la pieza #7661, como se muestra.
Paso 19: Perfore agujeros en los paneles paralelos a los agujeros en los perfiles
#7663.
Paso 20d: Inserte la tubería de drenaje en la pieza #8098 hasta que haga clic y se
quede bloqueada dentro.
Paso 21: Baje las patas de los perfiles y adapte los tornillos y clavijas al tipo de
suelo específico.
Apriete todos los tornillos una vez finalizado el montaje.
IMPORTANTE
Le rogamos lea con atención las siguientes instrucciones antes de empezar a
montar este producto.
Siga los distintos pasos en el mismo orden de las instrucciones.
Guarde las instrucciones en un lugar seguro para poder consultarlas en el futuro.
 Advertencia de seguridad y para realizar el mantenimiento
•Siga las instrucciones tal y como se indican en este manual.
•Clasifique las piezas y compruebe están todas las de la lista de contenido.
•Por un tema de seguridad, recomendamos un mínimo de dos personas para
montar este producto.
•Algunas de las piezas tienen rebordes metálicos. Tenga mucho cuidado al
manejar los componentes.
•Durante el montaje, lleve puestos en todo momento guantes, zapatos y gafas
de seguridad.
•No intente montar la carpa si hay viento o mucha humedad.
•Guarde las bolsas de plástico en un lugar seguro, fuera del alcance de los niños.
•Mantenga a los niños fuera de la zona de montaje.
•No intente montar la carpa si está cansado, ha tomado medicación, drogas o
alcohol; o si es propenso a mareos.
•Cuando utilice la escalera o herramientas eléctricas, asegúrese de cumplir con
las instrucciones de seguridad del fabricante.
•No se suba o permanezca sobre el techo.
•No apoye artículos pesados contra los postes.
•Mantenga el techos y los desagües sin nieve, suciedad y/u hojas.
•Una gran cantidad de nieve sobre el techo puede dañar la carpa y sería
peligroso permanecer debajo o cerca-
•Es un producto diseñado y fabricado únicamente para el propósito para el que
fue creado.
Si durante el montaje se rayara el color, se puede arreglar con los siguientes tintes:
Gris – RAL 7012
 Instrucciones de limpieza
Para poder limpiar la carpa, utilice una solución con un detergente suave y
enjuáguela después con agua fría y limpia.
No utilice acetona, limpiadores abrasivos u otros detergentes especiales para
limpiar los paneles.
ES
Cuando vea el icono de información, consulte el paso de montaje
a que se refiera para obtener comentarios y ayuda en mayor detalle.
13mm
5mm
3/16”
10mm
25/64”
SILICONE \
CAULK
T001 (Suministrados)
14.12_V1
10 cm / 4”
40 cm / 15.7”
40 cm / 15.7”
40 cm / 15.7”
40 cm / 15.7”
40 cm / 15.7”
220 cm / 86.5” 220 cm / 86.5”
435 cm / 171.2” 435 cm / 171.2”
x4x4
Empedrado
Cemento
Cemento
Cemento
Cemento
Cemento Cemento
Cemento Cemento
Cemento
Cemento
Cemento
Cemento
Asfalto / tierra
Contents
26
)+3(
26
)+3(
180
)+10(
1
1
36
)+4(
36
)+4(
36
)+4(
1
6
6
6
6
1
6
12
1
6
24
)+1(
24
12
79
)+4(
30
24
)+1(
12
)+2(
72
12
1
Item ItemItemItem Qty. Qty.Qty.Qty.
8027
411
8028
426
7121
427
466
8029
8082
421
8026
7024
8025
8098
4000
8031
7119
212
T001
8030
7679
414
7680
4010
4008
5000
7567
7579
7829
Option
70
Contents
Item ItemQty. Qty.
8023
8034
8021
8035
8024
8033
7664
8032
8022
8081
6
6
6
6
6
6
6
6
12
6
1
a
a
x1
13mm
1/2”
414
7680 426
8024 1
2
4
2
414
426
8024
8024
8029
8029
8029
8029
4267680
2
8029
2
a
13mm
1/2”
8024
8024
8024
8024
8024
414
7680 426
10
20
10
8024 5
4
8029
3
c
b
13mm
1/2” a
411
411
466
2
2
1
8025
1
7579
1
7121
8025
8025
8025
7579
466
466
466
7121
4
b
a
13mm
1/2”
b
ax6
x6
414
7680 426
6
12
6
411
466
6
6
6
8026
8026
8026
8026
8026
8026
8026
8026
8026 8026
8026
8026
8026
411
466
7680
426
426
414
5
a
13mm
1/2”
414
7680 426
12
24
12
7680
426
426
414
6 6
8027
8027
8028
8028
426
426
6
a
414
414
7119
7119 - Outside
414 - Inside
7119
13mm
1/2”
426
426
426
426
8023
8023
8023
8023
8023
8023
8023
6
414
7119 426
24
48
24
7
a
b
13mm
1/2”
b
b
b
b
b
b
a
411
466
6
6
1
8031
8031
414
414
1
1
8082
8082
411
466
8
Option
40
7829
9
a
b
414
414
12 12
6
12
426
426
426
24 7567
7567
212
212
212
7664
7664
b
a
x6
13mm
1/2”
12
411
411
10
a
414
414
4
4426
426
426
8
7679
7679
13mm
1/2”
x2
Carton / Karton
a
a
11
x2
b
a
466
466
466
466
411
411
466
4
12
13mm
1/2”
x2
414
414
8
8426
426
426
16
7679
7679
a
ab
13
x2
466
466
466
411
411
466
466
8
a
ab

Other Palram Outdoor Furnishing manuals
Palram GARDA 17x20 Administrator Guide

Palram

Palram GARDA 17x20 Administrator Guide

Palram Palermo 3600 User manual

Palram

Palram Palermo 3600 User manual

Palram 706596 User manual

Palram

Palram 706596 User manual

Palram Martinique 4300 User manual

Palram

Palram Martinique 4300 User manual

Palram CANOPIA MARTINIQUE 10x14/3x4.3 Administrator Guide

Palram

Palram CANOPIA MARTINIQUE 10x14/3x4.3 Administrator Guide

Palram Palermo Gazebo 3000 User manual

Palram

Palram Palermo Gazebo 3000 User manual

Palram Arcadia 4300 User manual

Palram

Palram Arcadia 4300 User manual

Palram CANOPIA CAPELLA 3x5 Administrator Guide

Palram

Palram CANOPIA CAPELLA 3x5 Administrator Guide

Palram Martinique User manual

Palram

Palram Martinique User manual

Palram Palermo 3000 User manual

Palram

Palram Palermo 3000 User manual

Palram Feria 3x4.2 User manual

Palram

Palram Feria 3x4.2 User manual

Palram CANOPIA ARIZONA EXTRA KIT User manual

Palram

Palram CANOPIA ARIZONA EXTRA KIT User manual

Palram Canopia Curtain Set Administrator Guide

Palram

Palram Canopia Curtain Set Administrator Guide

Palram Martinique 5000 User manual

Palram

Palram Martinique 5000 User manual

Palram CANOPIA MARTINIQUE 10x12 Administrator Guide

Palram

Palram CANOPIA MARTINIQUE 10x12 Administrator Guide

Palram Martinique 4300 User manual

Palram

Palram Martinique 4300 User manual

Palram DALLAS 12x14 / 3.6x4.3 Administrator Guide

Palram

Palram DALLAS 12x14 / 3.6x4.3 Administrator Guide

Palram Palermo 3000 User manual

Palram

Palram Palermo 3000 User manual

Palram Verona 5000 User manual

Palram

Palram Verona 5000 User manual

Palram Monaco User manual

Palram

Palram Monaco User manual
Palram CANOPIA ARCADIA Series Administrator Guide

Palram

Palram CANOPIA ARCADIA Series Administrator Guide

Palram GrowDeck User manual

Palram

Palram GrowDeck User manual

Palram Monaco User manual

Palram

Palram Monaco User manual
Palram GrowDeck User manual

Palram

Palram GrowDeck User manual
Popular Outdoor Furnishing manuals by other brands

Woodline Shade Solutions Papillon Assembly instructions

Woodline

Woodline Shade Solutions Papillon Assembly instructions

Costway OP3907BE user manual

Costway

Costway OP3907BE user manual

Argos Habitat 939/7673 manual

Argos

Argos Habitat 939/7673 manual

Wenger Showmobile Mobile Stage Adjustment instructions

Wenger

Wenger Showmobile Mobile Stage Adjustment instructions

Backyard Discovery 2101562 manual

Backyard Discovery

Backyard Discovery 2101562 manual

CAZEBOO MIRA 400L300 Assembly instructions

CAZEBOO

CAZEBOO MIRA 400L300 Assembly instructions

PATIOJOY HW67329 quick start guide

PATIOJOY

PATIOJOY HW67329 quick start guide

Costway Patiojoy OP70732 user manual

Costway

Costway Patiojoy OP70732 user manual

Alice's Garden VELLETRI AFWK007 manual

Alice's Garden

Alice's Garden VELLETRI AFWK007 manual

Safavieh SAMOS FOX6005A manual

Safavieh

Safavieh SAMOS FOX6005A manual

ZDH ZERT Veranda Series Assembly instructions

ZDH ZERT

ZDH ZERT Veranda Series Assembly instructions

Uberhaus 72255159 user manual

Uberhaus

Uberhaus 72255159 user manual

Barton 90139 Owner's manual and safety instructions

Barton

Barton 90139 Owner's manual and safety instructions

Dancover AP1010 manual

Dancover

Dancover AP1010 manual

Alpine MZP278A quick start guide

Alpine

Alpine MZP278A quick start guide

ALDI GARDENLINE DOUBLE GLIDER user guide

ALDI

ALDI GARDENLINE DOUBLE GLIDER user guide

Outdoor GreatRoom Company VNG-2424BRN installation instructions

Outdoor GreatRoom Company

Outdoor GreatRoom Company VNG-2424BRN installation instructions

Outsunny 84B-128 Assembly instructions

Outsunny

Outsunny 84B-128 Assembly instructions

manuals.online logo
manuals.online logoBrands
  • About & Mission
  • Contact us
  • Privacy Policy
  • Terms and Conditions

Copyright 2025 Manuals.Online. All Rights Reserved.