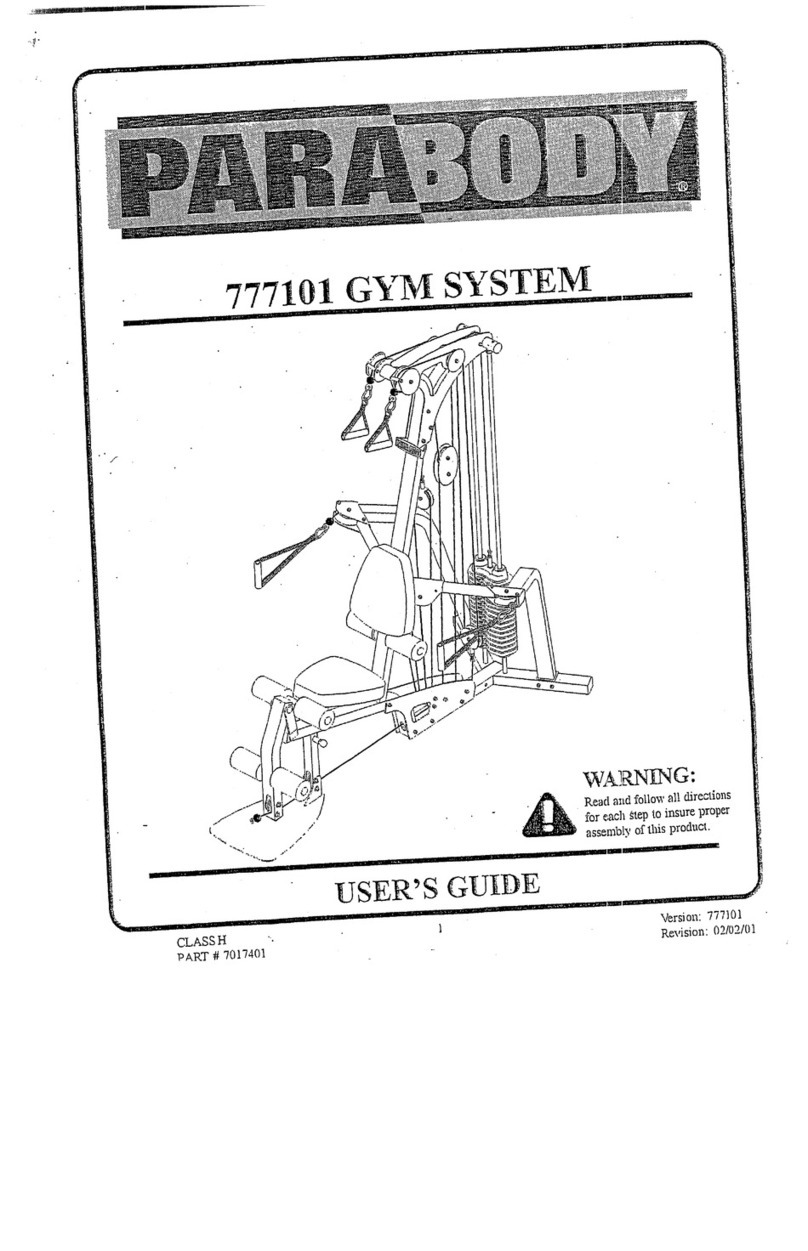
ParaBody PBF501 User manual

PARABODY INC.
EXS00 BASE UNIT
PBFS01 ::
- PRODUCT ASSEMBLY
INSTRUCTION SHEETS
TOOLS REQUIRED" FOR ASSEMBLY:
9/16 INC~ SOCKET
3/4 INCIt SOCKET
ADJUSTABLE WRENCH
B.AMMER or RUBBER MALLET
3/16 ALLEN WRENCH
5]32 ALLEN WRENCH
REVISION: ..W
¯
If you experience any problems with the assembly of this product, please contact
your dealer or your PARABODYCustomer Service reprcsentafive at:
1-800-325-9714.

PBFS01 EXS00 BASE ~IT ASSEMBLY INSTRUCTIONS (STEP #I)
TIIE INSTRUCTIONS FOR STEP #I ARE TO BE USED WITH DRAWING SHEET #I OF 6.
THE PARABODY EXS00 BASE UNIT M’L!ST BE ASSEMBLED ON A FLAT LEVF, L SURFACE
TO ASSURE ITS PROPER FUNCTION.
PARABODY INC. STRONGLY RECOMMENDS THAT TI-IIS PRODUCT BE ASSEMBLED BY
TWO PERSONS TO AVOID POSSIBLE INJURY
*** IMPORTANT***
KEEP ALL LOOSE FRAME,
CONNECTIONS
LO,OSE UNTIL INSTRUCTED IN TI-~
ASSEMBLY STEP SEQUENCES TO
" - SECURELYTIGHTEN-
I .......... J___ I, , , I ..... .-~-.1.... ~I , .=’ ~
Insert four (4) 2 IN. SQ. ENDCAPSinto the ends of the WEIGHTSTACKSUPPORTBASE.Also
fnsert one (I) 1-112 x 2-1/2 ENDCAPinto the SWIVELPULLEYMOLrNTEXTENSIONon the
VVEIGI-IT STACK SUPPORT BASE.
LOOSELYassembleone(I) 318 DIA.x I IN. LG. BUSI-IINGPULLEYintothe SWIVELPULLEY
MOUNTusingone(I)3/8x 2 BOLT,one(])3/8LOCI(WASHER,andone(I) 318NUT(SEE
"A").Inserttwo(2)112 x 3/4 LG.FLANGEBEARINGSintotheSWIVELPULLEYiViOUNTfrom
bottomandtop.
Assemblethe SWIVEL PULLEYMOUNT to the WEIGHTSTACK SUPPORTBASE using one (I)
I/2x 4-I/9_BOLT,one(I).I/°-WASHER,andone(l)I/2LOWHEIGHTLOCKNUT(SEEDETAIL
"A").Tightenconnectionsothatitswivelssmoothlyandfreely.PlacetheWEIGHTS’rACK
SIIPPORTBASEfiaton thefloor.
Insertfour(4)2 IN.SQ.ENDCAPSintotheendsoftheTGPBOOMSECTION.Cm’efullyplacethe
TOPBOOMSECTIONon itssideon thefloor.
:5. Carefully place the NIALNBACKSUPPORTon its side on the floor and loosely assemble the MAIN
BACKSUPPORTto the TOPBOOMSECTION,using two (2) 1/2 x 7. BOLTS,four (4)
WASHERS,two (2) 1/2 LOCI( WASHERS,and two (2) 1/2

PBFS0t EXS00 BASE UNIT ASSEMBLY INSTRUCTIONS (S~fEP #3)
THE INSTRUCTIONSFOR STEP #,’3 ARE TO BE USED WITH DRAWINGSHLET #4 OF 6.
Place each of the two (2) WEIGHTSTACKBUMPERSover the GUIDERODHOLES(RADIUS
EDGESFACINGUP) on the WEIGHTSTACKSUPPORTBASE. Insert each of the two (2) GUIDE
RODSthrough the WEIGHTSTACKBUMPERSand into the WEIGHTSTACKSUPPOP.T BASE.
(NOTE:Apply thin film of LUBRICATION(PROVIDED)to guide rods by using paper towel or clean
hands.)
Press two (2) WEIGHTPLATEBUSHINGSeach, into the top of tv~.enty (20) WEIGH’FPLATES
BUSHINGStotal, SEE DETAILF). :
’3. _USINGEXTREMECARE,slide each of the twenty (20) WEIGHTPLATESdown over the GUIDE
RODS onto the WEIGHTSTACK SUPPORT BASE. (BE SURE THE KEY HOLE OF THE
WEIGHTPLATES ARE FACING THE FRONTOF TIIE MACIL1NE) (SEE DtL4.,WING)
Securely assemble the WEIGHTSTACKSHAFTinto fire IIEADPLATE,using one (I) 3/8 XI-I/2
HEXHEADBOLT,one (1) 3/8 LOCKWASHER,and one ’, 1) 3/8 WASHER.(SEE; DETAJ3L
Slide HEAD PLATE ASSEMBLY down over GUIDE RODS o~i’o WEIGHT STACK.
Place the WEIGHTSELECTPIN into any WEIGHTPLATEby turning and pushing :it to engage the
WEIGHT PLATE.
7. Slide two (2) RUBBERO-RINGSand two (2).13/16 IN. SHAFTCOLLARSonto GUIDERODS.
Dt~TALL E) ......
8. Insert the four’ (4) 3/8 IN. DIA. GUIDERODINSULATORS(two per GUIDEROD)into the GUIDE
ROD. Position GUIDE RODS:~n FRONT ofthe GUIDE ROD BRACKET on the TOP BOOM
SECTION.AttachtheGUIDE:RODSsnu~y,usingtwo(2)318x?.’.’.]-314BOLTS,fcmr(4)3/11WASHEP~S,
two (2)3/8LOCI<WASHERS,’mndtwo (2)3/8NUTS(SEEDETXIL
CAUTION: DO NOT OVER TIGHTEN GUIDE RODS TO THE FRONT SiDE OF THE ’FOP BOOM
SECTION. OVER TIGHTENING MAY C.~.USE TI-IE GUIDE RODS TO "ROLL",
CREATING A BINDING EFFECT ON THE P~AD PLATE, THUS GlarING POOR HEAD
PLATE TP~4~VEL PERFORMANCE.
JJ Slide 13/16 IN. SHAFTCOLLAR.Sand RUBBERO-RINGSup GUIDERODS,until 4 in. from underside
of TOP BOOM SECTION.TightenALLENSCRFWSin the COLLARSto secureto GUIDERODS.
NOTE:
10.,~¢
These COLLARSare provided for the purpose of preventing the WEIGHTSTACKSHAF’r from
brealdng the TOPPULLEY.Makesure the O-RINGSat.- placed directly under t]ae COLLARS.
Attach the WEIGHTSTACKLABELS(designated from #l to #20) to the WEIGHTSTACKPLATES
(SEE DETAIL 19
II

PBFb01 EXb00 BASE UNIT ASSEMBLYINSTRUCTIONS #!)
Insert one (1) 2 IN. SQ. ENDCAPinto the BASESEATSUPPORTand carefully place it on its side
the floor.
o, ~,8X 1-
Loosely assemble the BASESEATSUPPORTto the MAINBACKSUPPORT,using two (2) "~
1/4 BOLTS,four (4) 378 WASHERS,two (2) 3/8 LOCKWASHERS,and two (2) 3/8
Insert a 2 IN. SQ. ENDCAPinto the opert end office EASETEESECTION.
10.
Loosely assemble the BASETEE SECTIONto the MAINBACKSUPPORTASSE~CEBLY(from step
#7),at thefollowingtwocormect~onpoints:ENDCONNECTION~-one(I)I~ x 5 BC~LT,two(2)
WASHERS,one (I) 1/2 LOCKWASHER,and one (1) 1/2 NUT;and the INSIDE CONNECTION:
(I) I/2 x 7 BOLT,two (2) 1/2 WASHERS,one (I) 1/2 LOCKWASIIER,and one C[) IP-
Carefully stand the MAINBACKSUPPORTASSEMBLY(from previous step) in its upright position
and slide it into position to connect with the WEIGHTSTACKSUPPORTBASE.Loosely assemble this
connection using, two (2) 1/2 X 3-1/2 BOLTS,four (4) 1.’2 WASHERS,two (2) 1~ LOCKWASHERS,
and two (2) 112 NUTS.
11. Loosely assemble the REARLEFT UPRIGHT(NOTE: THIS UPRIGHTHASFIVE (5) HOLES
THROUGHIT) and the REARRIGHTUPRIGHTto their respective sides at the TOPand BOTTOM
CONNECTIONPOINTS as follows:
At the TOPCONNECTIONPOINT, loosely assemblingto the TOPBOOIV[SECTION,use
one (1) 1/2 x 7-1~ BOLT,two (2) 1.2 WASHEIIS,one (1) 1/2 LOCKWASHER,and one (1)
NUTon the outside bolt connection. Use one (1) 3/8 X7-I/2 BOLT,two (2) 2/8 WASHERS,
(1) 318 LOCI(WASHERS,and one (1) 3/8 NUTon the inside bolt connection. NOTE:ONE
318 DIA. x 2 LG. BUSHINGPULLEYmust-be assembled between the tu~es on the inside
bolt connection (SEE DETAIL"B").
At the BOTTOMCONNECTIONPOINT, loosely assembling to the CONNECTORFLATS
on the WEIGHTSTACI~SUPPORTBASE,use two (2) I/2 x 3 BOLTS,fo,~r (4)
WASI-IERS,two (2) 1/2 LOCKWASI-IERS,and two (2) 112 NUTS.BECA_I~.EFUL
PLACE REAR RIGHT AND LEFT UPRIGHTS ON THE CORRECT SIDES OF THE ¯
CONNECTORFLATS on the WEIGHTSTACK SUPPORT BASE.
12. Securely mount the BACKPADto the MAINBACKSUPPORTusing, two (2) 3/8 x 1-1/4 BOLTS,two
(2) 318 LOCKWASHERS,and two (2) 3/8 WASHERS.BE SURETO POSITION THEPAD
THAT THE METALHIDEM WELT CLIP IS POSITIONED IN THE DOWNPOSITION.

PBFS01 EXS00 ASSEIVI.BLY PARTS LIST FOR STEP
COUNT ALL PARTS BEFORE BEGINNINGASSEIVIBLY
HARDWARE:.
ITEM NAME/DESCRIPTION
2.
3.
4.
5.
6.
7.
9.
10.
11.
12.
13.
14,
15.
16.
17..
18.
QTY
BAG# v A (PURPLE)
i/2X3-1/2LG.BOLT.............................................................................................................
I/2X3LG.BOLT........................... ;......................................................................................
1
112 WASHER 4
1/2LOCKWASHER............................................................................................................... 2
1/2NUT................................................................................... :,............................................
2
1/9_LOWHEIGHTLOCI<NUT................... " 1
3/8WASHER........................................................................................................................ 10
5/16X1/4SETSCREW......................................................................................................... 2
2IN.SQ.ENDCAP................................................................................................................ 4
7IN.GRIP..............................................................................................................................
ICNOB ’ . ......................................................3
SPPdRqG.........................................................................
"3
PLUNGER................................................................................................................:.............
3
COTTERPIN..........................................................................................................................
3
I/2I.D.X3/4LG.FLANGEBEARING................................................................................
2
STALLLOCI<COLLAR..........................................................................................................
6
SPACEILBUSHING...............................................................................................................
3
BLACKPLASTICWASHER.................................................................................................
2
19.
20.
21.
22.
23.
24.
25.
26.
27.
28.
29,
30.
31.
32.
34.
35.
36.
37.
BAG# 2B .(~ELLO\~ ............
318X1-3/4BOLT............................. ¯.....................................................................................
1
318X6-1/2BOLT...................................... :.............................................................................
5
3/8X3,114BOLT.................................................................................................................... 2
3/gX3BOLT............................................................... :..........................................................
4
3/gWASHER................................................................................................................... , .....10
3/8LOCI<WASHER............................................................................................................... 5
31gLOWI-IEIGHTLOCK:NUT............................. :................................................................
7
3/8NUT......................................................................... : ........................
’...............................
3
1-3/4SQ.ENDCAP.............................................................................................................. 1
1-I/2SQ.ENDCAP.................................. ............................................................................. 3
5IN.GRIP.............................................................................................................................4
PARAGLIDEST1E[PS(STRIPOF8)................................ :.....
~.............................................3
CABLERETAININGCLIP................................................................................................... 1
RUBBERBUMPER................................................................................................................ 1
3/4 I.D. X3/4 LG.FLANG~.BEARLNG......... :........................................................................
2
3/8THUMBSCREW............................................................................................................... 1
PRESSAPdVlADJUSTER....................................................................................................... 1
1/4X3/4BOLT...................................................................................................................... 1
1/4NUT..................................................................................................................................
5
PBFS01 E-X~0 ASSEMBLY PARTS LIST FOR STEP #2
COUNT ALL PARTS BEFOILE BEGINNI~ G ASSEMBI,¥
WELDMENTSfPARTS ~
ITEM NAME/DESCRIPTION QTY
2.
3.
4.
5.
6.
7.
8.
9.
ADJUSTABLEPRESTRETCHSLIDE...................... (PB1818-1)....................................... 1
LEG CURL EXTENSION ’ (PB2296-1)....................................... 1
ADJUSTABLEPRESTRETCHSUPPORT............... (PB2299-1)....................................... 1
ADJUSTABLESEATFRAME................................... (PB1809-I)....................................... 1
SEATHANDLE.......................................................... (PB1830-1)....................................... 2
ROLLER.PADS........................................................... (PB194.6-1)........................................
16IN.ROLLERPADSHAFT..................................... (PB1251-1)........................................ 2
20IN.ROLLERPADSHAFT..................................... (PBI774-1)........................................
PRESSAF,2~BEARINGSHAFT................................ (PB1808-1)........................................
ADJUSTABLEROLLER.PADSLEEVE.................... (PB2167-1)........................................ 1
PRESSARM....................... ~........................................ (PB180I-1).................................. ,..... 1
SEATPAD........................................ :..........................(PB1839-1)........................................ 1
NOTE: PLEASE USE TL:IE PULLEY IDENTIFICATION S}IEET IN THESE ~-NSTRUCTIONSTO AID IN
IDENTIFYING THE CORRECT PULLEYS.
13.
14. 3/8 DIA.x ] IN. LG.BUSHINGPULLEY.................... (Cl161-1)....................................... 1
3/8 DIA.x 2 IN. LG.BUSHINGPULLEY.................... (Cl161-2)........................................ 7

i0.
12.
13.
14.
15.
16.
17.
]9.
20.
EXS00 BASE UNIT ASSEMBLY INSTRUCTIONS (~TEP #2)
Inserttwo (2)2 IN.SQ. ENDCAP intothe TOPand BOTTOMendsof the LEGCUI~EXTENSION.
Securelyassemblethe LEGCURLEXTENSIONontotheBASESEATSUPPORT,usingone (1)I/2
.3 BOLT,andone(I)I/2LOWHEIGHTLOC]:,INUT.
Attachone(1)RUBBERBUMPERto thefrontof thenecktubeof theBASESEAl[’S]/PPORT
approximatelywhereshown,givingsufficientcontact.
Assemblethe two (2) ROLLERPADSto the LEG CURLEXTEN:SION,usingone ([) 15 IN.ROLLER
PAD SHAFT, two (2)BLACKPLASTICWASHERS, and two (2)PUSH-ONCOLLARS. NOTE:
Sl/RE TO INSERT ROLLER PAD SHAFT THROUGH LARGE HOLE ON THE AD,[USTABLE
ROLLER PAD SLEEVE. (SEE DETAIL N)
Securelyassemblefl~eADJUSTABLEPRE STI[ETCIISUPPORTto the BASE’FEESECTION,using
two(2)I/2X3-I/2BOLTS,four(4)I/2WASHERS,two(2)I/2LOCI(WASHERS,;mcltwo(2)
NUTS.
Slide th¢ ADJUSTABLEPRE STRETCHSLIDE. o\,~r the ADJUSTABLEPRE STRETCH
SUPPORTuntilthe SPRINGPIN ASSEMBLYengagesthesecondhole.
Assemble one (1) 1/4 3/4 BOLT through th e to p hole on the ADJUSTABLE PRESTP~ETCI-I SLIDE
and tighten with one (1) I/4 NUT.
.Insert one (1) 1-3/4 inch SQ. ENDCAPinto the top end ofthe ADJUSTAB.LEPRESTRETCH
SUPPORT.
Insertone(I)]-IP-inchSQ.ENDCAPintothetopendel’theSPRINGPIN’FIOUSINGof the
ADJUSTABLEPRE STRETCFISUPPORT.Repeatth~s sequencefor the SPRINGPIN IlOUSINGof
the BASE SEAT SUPPORT,and LEG CI/RL EXTENSION.(SEE DETAILC).
Assemble the two (2) ROLLERPADSto the NSLINBACKSUPPORT,using one (1) :Z0 IN. ROLLER
PADSHAFt, and two (2) PUSH-ONCOLLARS.
Inserttwo(2)2 IN.SQ.ENDCAPSintoeachendof theADJUSTABLESEATF.RANIE.
Attach the two (2) SEATHANDLESonto the ADJUSTABLESEATFRAME,using two (2) 3/8 x 3-1/4
BOLTS,four (4) 3]8 WASHERS,two (2) 3/8 LOCKWASIiERS,and two (2) 3/8
Slip two (2) 5 inch GRIPSonto .fl.~e SEATHANDLES,NOTE:If a lubricant is req~lired, RUBBING
ALCOHOLthoroughly coating the inside of [l~e grip is tb~" best material to use..
Assemblethe two (2)ROLLERPADSto theADJUSTABLESEATFRAME,usingone(I) 16 IN."
ROLLER PAD SHAFT, and two (2) PUSH-ON COLLARS.

PBFS01 EXS00 BASE UNIT ASSEMBLY INSTRUCTIONS(STIgP #2)
THE INSTRUCTIONSFOP, STEP #2 ARE TO BE USED WITH DRAWINGSHEET #2 & #3 OF 6.
Securely assemble ~wo(2) 3/8 DIA. x 2 IN. BUSHINGPULLEYSinto the TOPBOO[V/SECTIONand
tl~ee (3) 318 DIA. x 2 Ii~. BUSHINGPULLEYS~nto the MAINBACKSUPPORT,using five (5) 3/8
6-1/2 BOLTS,ten (10) 3/8 WASHERS,and five (5) 3/8 LOCKNUTS.
Attach eight (8) PARAGLIDESTRIPS to the ADJUSTABLEPRESTRETCHSLIDE, as shown
(DETAILC ONSHEET#2 OF6), using the following steps:
A. Thoroughlyclean all inside andoutside surfaces wherethe ~araglide strips are 1:o be attached.
B. Removethe paper backing fromthe paraglide strips and firmly apply themto all of the shown
surfaces(8 Places).
Loosely assemble one (1) 378 l~IA. x 1 inch BUSHINGPULLEYto the ADJUSTABLEPRE
STRETCHSLIDEusing one (1) 3/8 x 1-.2/4 BOLT,one (I) CABLERETA~ANINGCLIP, one (1)
LOCI( WASHERand one (1) 3/3 NUT.
4. Securelytighten all loose bolt connectionsmadeto this point, except for anyloose pulley connections.
Install two (2) 3/4 DIA. FLANGEBEARINGSinto the TOPBOOMSECTIONand two (2) 1/2
FLANGEBEARINGSinto each side of the neck tube on the BASESEATSUPPORT.
Thread the PRESSARMADJUSTERinto the adjustment nut on the TOPBOOMSECTION.This can be
adjUsted later to give flxe appropriate amountofPILESSAP, Mpre stretch ~ "
Attach eight (8) PARAGLIDESTRIPSto the outside of the ADJUSTABLEROLLER.PADSLEEVE
shownin (DETAILN), using the following steps:
Thoroughlyclean all inside andoutside surfaces wherethe paraglide strips are to be attached.
Removefl~e paper backingfromthe paragtide strips andfirmly apply themto ;tll oft.he shown
surfaces (8 Places)
Assemblethe three (.2) SPRINGPINASSEMBLIESat th~ following places: one (1) re::
ADJUSTABLEPRE STRETCHSLIDE,one (I) for the BASESEATSUPPORT,m~d one (I) for
LEGCURLEXTENSIONSLIDE,usingthree(3)PLUNGERS,three(3)I<]qOBS,three(3)SPR.IN~S,
three(3)SPACEILS,andthree(3)COTTERPINS,usingthefollowingsteps:
B.
C.
D.
AssembletheIGqOBtoflxePLUNGER..
InsertthePLUNGER.throughthefu’stholeofth~housing.
SliptheSPRING,andtheSPACERovertheendof thePLUN~ER.(IN THATORDER)
InsertthePLUNGER.throughthesecondholeofthehousing.
PullbackSPACERonthePLUNGER,andinserttheCOTTERPINthroughfl~ehole.
(SEE DETAIL C ON DRAWING)
Insertthe ADJUSTABLEROLLERPAD SLEEVEintothe bottomof the LEG CUILLEXTENSION
TUBEuntilthespringpinengagesin hole.(SEEDETAILN)

PBFS01 EXS00 BASE U-NIT ASSEMBLY INSTRUCTIONS(~,TEP #2)
24. Attacheight(8) PARAGLIDESTRIPSto the ADJUSTABLESEAT FRAMEand the :BASESEAT
SUPPORTas shownin DETAILA andB onthereversesideof themainassemblydrawingforSTEP
#2, (SHEET#3 of 6), using the following steps:
A. Thoroughlyclean all inside andoutside surfaces wherethe paraglide strips sre ::o be attached.
25.
B. Removethe paper backingfi-om the paraglide strips and finnly apply themto alI of the shown
surfaces(8 Places). .-
Attach the SEATPADto the ADJUSTABLESEATFRAME,using two (2) 3/8 x 3 BOLTS,two (2)
LOCII WASHERS,and two (2) 3/8 WASHERS.BE SURETO POSITIONTHEPA]) SO TI-t~T TI-IE
METAL, HIDEM WELTCLIP IS FACING LNTO TIlE MAIN BACKSUPPORT.
26. Place the ADJUSTABLESEATFRAMEASSEMBLYinto the slide receptacle on the BASESEAT
SUPPORT,disengaging the SPRINGPINASSEMBLYuntil the plunger engages flue first adjustment
hole.
27. Install one (1) thumbscrew into the BASESEATSUPPORT.
28. Attach the PRESSARMto the TOP BOOMSECTION, by sliding the PRESSARMBEARING
SHAFTthrough the PRESSARMand the TOPBOOMSECTIONuntil it is flush with both sides.
Securely tighten two (2) 5/16 SETSCREWS(using a 5/32 inch hex key) through the collars on
PRESS ARMinto the PRESS ARMSUPPORTSHAFT. NOTE: POSITION PRESS ARNI SO TI-I&T
T/:~ EX500 DECAL IS FACING OUT AWAYFItOM THE MACHINE.
29. Install the two (2) 3/8 DIA. X2 IN. BUSHINGPULLEYSbetweenthe fiats on the PIq2ESSAP~M,using
two (2) 3/8 x 3 BOLTS,four (4) 3/8 WASHERS,two (2) 3/8 LOCK
30. Attach two (2) 5 IN. GRIPSand two (2) 7 IN. GRIPSonto the straight and angled P]LE.~S

HANDLES,NOTE:If a lubricant is required, RUBBINGALCOHOLthoroughly coating the inside
" of the grip is the best material to use.

¯ y
PBFS0iEXS00ASSEIViBL’ PARTSLISTFOR STEP
COUNT ALL PARTS BEFORE. BEGIIN-NING ASSEMBL
HA~A~:.
ITE~ N~E~ESC~PTION ~.~G~ ~ (Om~G~)
I. ~IGHTSTACKBUMPE~...................................................................................................
2.. 3/8~.DIA.GUIDE~OD~S~ATO~...............................................................................
3. ~IGHTPLATEBUSH~OS.............................................................................................
~. ~/~X1-I/2~X~ADBOLT..............................................................................................
5. 3l~LOCKWAS~R........................................................................................................
6. 3/8WAS~R..........................................................................................................................
?. 3/8X1-314BOLT...............................................................
8. ~18~T..................................................................................................................................
9. ~IOHTSELECTP~..........................................................................................................
I0. IB/16S~TCOLL~S:,...~...............................
r................................................................
1I. R~BE~O-~O.................................................................................................................
12. LUB~CA~NPACI~T....................................................................................................
WELDMENTS/PARTS:
ITEM NA_ME/DESCR~TION QTY
2.
3.
4.
5.
eum]~~OD................................................................
(eB~S4-])........................................
v_
....~WEIGHT PLATE.... .~.~.~.’.~.~’.1...........................:.......(PB214S-1)...................................... 20
f "I-FEADPLATE....
:::......................................................
(PB2230-1).......................................
1
~~tGHTS~AC::s~rr...................................................................................
1
~WEIGHTSTACK.LABELS(# 1 to #20).............................................. ~.................................1
".IF" C.,,/,~ ~-(~. ~]q C~,o~ ~eo~ ’
10

PBFS01 EXS00 ASSEiVEBLYPARTS LIST FOR STEP #4
COUNTALL PARTSBEFOREBEGINNINGASSEIVEBLY
I-IAR_D~rARE,:.
ITEM NAME/DESCRIPTION QTY
2.
3.
4.
8.
9.
10.
11.
BAG# ~.(BRO~.~)
5/16XIBOLT........................................................................................................................
1
3/8XI-3/4BOLT...................................................................................................................
2
5/16WASI-IEI~.........................................................................................................................
2
5/16LOCKWASHER............................................................................................................
1
3/8LOCKWASHER..............................................................................................................
2
5/16NUT......................................................................................
;.........................................
1
3/8NUT..................................................................................................................................
2
LATBARHOOKCOVER......................................................................................................
2
1EN.DIA.X8IN.GR!P.........................................................................................................
4
5/16IN.SNAPHOOK.............................................................................................................
3
AD~JSTMENTCHAIN, 2~ LINK "1
SVCIV~,L PULLEY I;-!ARDWARE/PARTS
ITEM NAME/DESCRIPTION QTY
2.
3.
4.
5.
3/8x3/4BOLT........................................................................................................................
1
5/16WASHER......................................................................................................................... 2
3/8LOWHEIGHTLOCK.NUT.............................................................................................. 1
3/8WASHER.......................................................................................................................... 1
SWIVELPULLEYBRACKET................................... (PB2184-1)....................................... 2
WELDM’ENTS/PARTS:
ITEM NA.M~/DESCRIPTION QTY
2.
3.
4.
5.
6.
7.
8.
31~DIA.x 1 IN.LG.BUSHINGPULLEY.................... (cn61-1)....................................... 2
PRIMARYCABLEASSEMBLY................................ (PB2524-I)....................................... 1
SECONDAP.YCABLEASSEMBLY.........................
(PB2435-1).......................................I
LATBAR.....................................................................
(PB2753-I).......................................1
LOWROW-BAR...........................................................
(PBF650).......................................
1
ANKLESTRAP..............................................................
(PBF900)........................................
I
TRICEPSTRAP..............................................................
(PBF901).........................................
1
EXERCISEWALLCHART........................................
(PBI981-1)........................................
I
12

PBFS01 EXS00 BASE UNIT ASSEMBLY INSTRUCTIONS iL~i~r ~.)
TIIE INSTRUCTIONSFOP, STEP #4 A_~.E TO BE USED WITH DI%4.W~NGSI-~:ETS#S & #6 OF
6.
Assemble the SWIVELPULLEYBRACKETSusing (1) 3/8 Dia x 3/4 BOLT,(2) :511 5 WASHER,
3/8 WASHERand (1) 3/8 LOCKNUT(TIGHTEN TILL LOCKEDTHENBACK[ NUTOFF 1/4
TURN).
Looselyassembletwo (2)3/8 DIA.x 1 IN. LG.BUSHINGPULLEYSintothe SWIVELPULLEY
BRACKETASSEMBLY,usingtwo (2)3/8 x 1-3/4BOLT,m~o (2)3/8 LOCKWASHERS,m~d two
3/8 NTJTS(SEEDETAILH A/~DE, SHEET#5).
NOTE: BEFORE PROCEEDING WITH CABLE INSTALLATION, UNRAVEL CA3LE, AND REMOVE
AS MUCH SPIRALING AS POSSI-BLE.
To route the PRIMARYCABLEASSEMBLYstart by inserting the end of thecable with the threaded
fittingbetweenthe TOP PULLEYand the LAT BAR HOOK. (REMOVEPULLEYl~OR EASE OF
INSTALLATION)Continue to route cable around the PULLEYSin the confi~ration shown in
CABLE ROUTING DIAGRAM, SHEET #5).
4.
NOTE:
To attach the PRIMARYCABLEto the HEADPLATEASSEMBLY,thread the ~md into the WEIGHT
STACKSHAFTand tighten completely. (SEE DETAILK)
IF TI-IE PEC DEC ATTACHIVIENTIS TO BE ~%SSENIBLEDAT THIS TIME, SE3[P SEQUENCE
#4 AND #5 OF THIS PAGE. SAVE ALL TIIE HARDWARE FROM THESE SEQUENCES. TO BE
USED WITH THE PEC-DEC. GO TO THE PEC-DEC ATTACHhTENT ASSEIM:BLY
INSTRUCTIONS AND COMPLETE STEP #I, AND CONTINUE ON TO STEP W2, ( SK/P
SEQUENCE#5 ON STEP #2.) TI-~N RETURN TO STEP #4 (THIS PAGE) elf "ITIE EX500 BASE
UNIT AND COIVfPLETESEQUENCE #6,#7 AND #8.
To route the SECONDARYCABLEASSEMBLYstart by inserting the end ofth~ cable into the front end
of the SWIVELPULLEYMOUNT,and around the PULLEY.(TI.EMOVEPULLEY:FOP, EASEOF
INSTALLATION)Continu~ to route cable around PULLEYSin the configuration sho~vn in th~ CABLE
ROUTING DIAGRAM, SHEET #5).
Attach the end of the SECONDARYCABLE,*.SSEMBLY(c**d WITHOUTplastic ball) to the LEG
CURLEXTENSION,usingone(I)5/16x 1 BOLT,~wo(2)5/~6WASHERS,one (I)5/16LOCK
WASHER,and one(I) ~/16NUT(SEEDETAILL, SIIEET#6).
Tighten all remaining loose PULLEYconnections.
Slip the two (2) RODENDCOVERSover the ends of tim LATBARHOLDERon the, TOPBOOM
SECTION.
Attach four (4) 1 DIA. x 8 LG. GRIPSonto each end of the LATBAR,and LOWROWBAR.NOTE:
a lubricant is required, RUBBINGALCOHOLthoroughly coating the inside oi"the grip is the best
materialto use.
10. Attach the LATBARto the PidMARYCABLEASSEMBLY,using one (1) 5/I 6 SNAPHOOK.Also
attach the LOWROWBARto the ADJUSTMENTCHAINon the SECONDARY(:ABLE
ASSEMBLY,using two (2) 5/16 SNAPHOOK.S.
13

PBFS0! EXS00 BASE UNIT ASSEIVIBLY INSTRUCTIONS (STEP #4)
![! WARNING
MAKESURE SN.A-P HOOKSARE FASTENEDBEFORE DOING ET~]~&CISES.
!t! WARNING!!!
DO NOT OPERATE TId[IS IVIACHINE WITII LAT BA~. OFF SAFETY HOOKS
EXCEPTDURINGI-IIGI:!PULLEYEXERCISES.ALSO,LAT BAI’,._IS NOT
TO BE USED FOR PULL-UPS.~
!!! ATTENTION USER INSTRUCTION !!!
BEFOREDOING ANYEXERCISES, BE SURE TBAT THE CABI,ES AP,.E
TAUTBY: 1) ADJUSTINGTHE ADJUST,.,.BLE PRE STRETCHSLID~
DOWNT1R~E ADJIJSTABLX PRE STRETCHS~,tPPORT, AND2) ADJ-UST!NG
TIlE pRESS ARM.ADJ-0STER SCREWOUTAGAINSTTI-IE PRESS AP--~.
THESE TWO.ADJUSTMENTS SHOULDBE MADEAS FAR OUT AS NEIP, D~D
IN ORDERTO PROVIDE SU]F]FICIENT CABLETIGHTI’~ESS DU~NG
MACHINEUSE. 3) I]F HEADPLATEIS N OT SITTING ON TOP OF
]FIRST WEIGHT STACK PLATE, PLEASE PUSIt I~AD PLATE DOWN
INSERT WEIGHTPIN TO A DESII~D ltESISTAN’CE ANDDO A ]FEW
REPS ONONEO]F TI-1E STATIONS.TItIS WILL"SEAT" TW’~, C.~BLE
S¥STEM~. 4) REPEATSTEPS 1 AND2"IF NECESSARY.
¯PLEASE NOTE
w-E RECOIVIIVIEiNDCLEA2qfNGYOUR PROD:UCT(PADS AND ]FRAINI-E)ON
REGULAR BASIS, USING x, VAl~f SOAPY WATER. ALSO, TOUCI:I-UP
PAINT CAN BE PURCHASEDFR~.)M YO OR PAI~3ODY DEALER, OR ]FROM
YOURPARABODYCUSTOMEKSERVICE Rv~PRESENTAT .IYE AT:
1-800-328-9714
14

oo

.!
DETAI L ~A"
UNIT STEP ~ 1 SHEET~ OF (~

INSII3E£/]NNECTION
Z.5
.~. E..N~
~JIVEL PULLEY

EXS’OD BASE UNIT ._STEP SHEET?_OFE,

31’.4 REVISIONS
¢_HAF’F
LE.~, CURL
EXTEN¢,I~3N
ROLLER PAD
SLEEVE
bETA/L"N"
%"~ IParaBody~inc.
RAMSEY,MINNESOTA
1~.,,,,,,’-,*"t’
~Ass"r, STEP ~’
_I..,,_,-~_.,~,
IDI PtSF501

UNITSTEP#?_ CONT’D _SHEETS OFG,

~’.
.’.
Table of contents
Other ParaBody Home Gym manuals

ParaBody
ParaBody 458 User manual

ParaBody
ParaBody Home Guide User manual

ParaBody
ParaBody 950 st User manual

ParaBody
ParaBody PBF502 User manual

ParaBody
ParaBody PBF011A User manual

ParaBody
ParaBody 920101 User manual

ParaBody
ParaBody 225 User manual

ParaBody
ParaBody PBF351 User manual

ParaBody
ParaBody PBF508 User manual

ParaBody
ParaBody PBF065 User manual

ParaBody
ParaBody 221 User manual

ParaBody
ParaBody GS2 User manual

ParaBody
ParaBody 94 User manual

ParaBody
ParaBody 911101 User manual

ParaBody
ParaBody 909101 ST User manual

ParaBody
ParaBody PBF203B Quick start guide

ParaBody
ParaBody 425101 User manual

ParaBody
ParaBody 360101 User manual

ParaBody
ParaBody 895101 User manual

ParaBody
ParaBody 250101 User manual