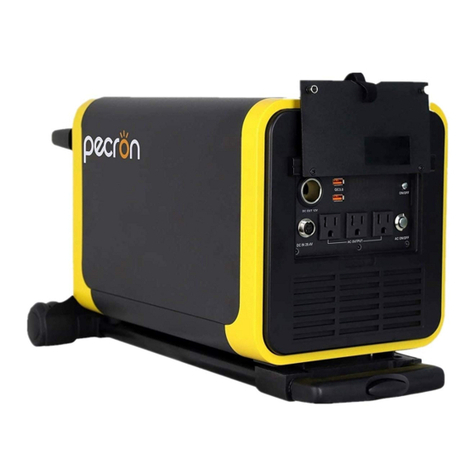
Pecron EB3000-24V User manual

Please read the user manual thoroughly before using
USER MANUAL
EB3000-24V
EB3000-24V 3072Wh

FUNCTION INTRODUCTION
①
②
③
LED Capacity Indicator
Indicator Under Cascade Status
Battery Expansion Port
④
⑤
⑥
Power Display Switch
DC12V XT60 Output
USB-C Ports
⑦
⑧
⑨
USB-A Ports
DC Button
DC 12V~95V Charging Port
⑤
⑧
⑨
⑥
⑦
④
①
②
③

SPECIFICATIONS
LiFePO4 Battery
Retain 80%+
Original Capacity
At 3500 Cycles
Dimension
L17.3*W12.2*H7.8 in
L441*W312*H200
mm
Capacity Battery Type Net Weight
Around 57lb
Around 26kg
3072Wh
(25.6V120Ah)
Protections
Over-Voltage,
Overheat,
Overload,
Short-Circuit,
Self-Recovery
Temperature
0℃~45℃/32°F~113°F
(Charging)
-20℃~45℃/-4°F~113°F
(Discharging)
EB3000-24V3072Wh
OUTPUT SPECS INPUT SPECS
XT60 Output*1 USB-A*1
(5V,9V,12V,20V,
Max 100W)*1
USB-C*1
(5V,9V,12V,
Max 18W)*1
DC 12V-30A
GX16MF-5*1
DC Charging(12V~95V)
Max 400W
CASCADE FUNCTION
It can be connected
with devices that come
with DC 24V cascade port.
Port For Cascade *2

HOW TO USE THE EB3000-24V
Light press to show battery capacity
Long press to turn on/off DC (USB/XT60 12V)
PACKING LIST
Note: Operating temperature range of EB3000-24V is -20~45℃.
If the operating temperature is not within this range, it will fail to work.
MC4 Solar
Charging
Cable
(LSMC4-5GX16) *1
pecron EB3000-24V *1 M25 Cascade cable *1
Cable from XT60 to
Cigar port and 5525 port *1
EB3000-24V 3072Wh
Car charge cable with
GX16MF-5 connector *1 12V Alligator Clips *1
Anderson Solar Charging Cable *1
Solar Cable with
5521 Connector *1

HOW TO CONNECT EB3000-24V WITH E2000 LFP IN CASCADE
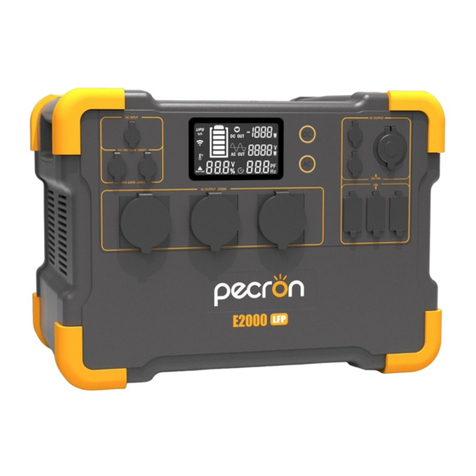
1:First confirm battery volume for both EB3000-24V and E2000 LFP and ensure their volume difference is no more
than 10%. If the difference is too large, it wil take longer time for cascading successfully.
2:Connect the E2000LFP with the port "1" on EB3000-24V with
a 24V cascade connecting cable. (If you want to connect two
external battery pack, you can connect the port "2" on the
first battery pack to the port "1" on the second battery pack)
as shown on the right:
3:After the connection is completed, When the indicator shows
red, it means that the power discrepancy is too large, and the
battery is being balanced at this time (reducing the battery
difference between E2000 LFP and extra battery pack before
cascading can reduce the equalization time).
When the display light is green, it means that the cascade is
successful and can be used normally.
4:Adjust E2000 LFP according to the number of connected EB3000-24V battery packs.(If you don’t adjust accordingly ,
the battery showed on the power station is inaccurate. At this time, the power volume of extra battery pack can be taken
as a sum battery volume of the power station and extra battery pack.)
HOW TO USE THE CASCADE CABLE
Insert the cascading cable: the side with the arrow
is facing up, push it inwards according to the hole,
and insert it in place when you hear a "click".
Pull out the cascading cable: hold the protrusions
on both sides and turn to the left, then pull out at
the same time.
HOW TO CALIBRATE THE POWER LEVEL OF THE E2000 LFP AFTER CASCADING
Solution 1 (some machines do not support Solution 1, please use Solution 2)
1: Press and hold DC for seven seconds in the off state
to enter the setting item.
2: Under a number-001, you will see the number of the
extra battery packs,which is 0 by default. It can be
set according to the number of connected battery
packages - shortly press DC to increase the number
and shortly press AC to decrease the number.
3: Long press AC to enter the process 002, the default
value is L3, this means screen brightness. Shortly
press DC can increase the brightness or shortly press
AC to decrease the brightness.
4: Long press AC to enter the setting of item 003. The
default value is OFF, which means the automatic
shutdown time of the machine without any load.
Shortly press DC can increase the time or shortly
press AC to decrease the time.

2: Setting-001 can be seen at this time, the default
value is 10 (this is for voltage calibration, do not
modify it)
1: Turn on the power station, screen will light. Then
press the DC and AC buttons at the same time, the
battery frame will flash. Then quickly double-click
AC button to enter the setting.
Solution 2
5: Long press AC to enter the setting of item 004, the
default value is 60Hz. This is the AC output frequency,
do not modify it.
6: Long press AC to exit the setting. You will see a word
of SUC if the setting is successful.

3: Long press AC to enter 002 (This is for 0-current
calibration, do not modify it)
4: Long press AC to enter 003, the default value is 10
(this is for current calibration, do not modify it)
5: Long press AC to enter 004, the default value is
1920Wh. You can modify it to the battery volume
after connecting with extra battery packs. Shortly
press DC to change the flashing number and short
press AC to switch the battery volume.
A power pack is 4992Wh;
The two power packs are 8064Wh.
6: Long press AC to enter 005, the default value is L3,
this means screen brightness. Shortly press DC can
increase the brightness or shortly press AC to
decrease the brightness.
Setting the battery volume when you
only connect one extra battery pack
Setting the battery volume when
you connect two battery packs.

7: Long press AC to enter the setting of item 006, the
default value is OFF, which means the automatic
shutdown time of the machine without any load.
Shortly press DC can increase the time or shortly
press AC to decrease the time.
8: Long press AC to enter 007, the default value is 22.0
(the number is for low voltage protection, do not
modify it)
9: Long press AC to exit the setting. You will see a word
of EEP if the setting is successful.
1:Protection may be triggered while you are using high power (higher than 1500W) for a long time under high
temperature. In order to meet your needs, please replace with a high-current fuse.
2:After cascading of the power station and the battery pack is completed and the capacity of the power station is
adjusted, please fully charge it to complete the battery calibration.
CONSIDERATIONS DURING CASCADING PROCESS

HOW TO CHARGE THE EB3000-24V BATTERY PACK BY VEHICL
Car charge cable with GX16MF-5 connector
SOLAR CHARGE TIME
MC4 Solar
Charging Cable
pecron 200W
Note: The above data comes from Pecron's laboratory. Actual charging time depends on
the weather conditions.
200W(×1)
19~20 Hours
Recommended
400W(×2)
10~11 Hours
Recommended
USING SOLAR PANELS TO CHARGE THE EB3000-24V
GX16MF-5 Charging Port: PV(operating voltage) range 12V~95V, 400W maximum; VOC(open circuit voltage) of solar
panel/array must be less than 95V, otherwise, it will damage the unit! Do not wire more than two 36V(AKA 24V) solar
panels in series.(18V~36V stands for Vmp, the operating voltage, of the solar panel)
GX16MF-5 Charging Port:
PV12~95V-400W Maximum Input

USING SOLAR PANELS TO CHARGE THE EB3000-24V
36V 36V
MC4 Solar
Charging Cable*1
※36V is the operating voltage of the solar panels
pecron 200W*1
Using the pecron 200W /36V*1(200W)to charge the EB3000-24V
36V
36V
72V
MC4 Solar
Charging Cable*1
※36V is the operating voltage of the solar panels
pecron 200W*2
Using the pecron 200W /36V*2(400W)to charge the EB3000-24V
pecron 100W
18V
Solar charge cable with 5521 connector*1
※18V is the operating voltage of the solar panels
Using the pecron 100W /18V*1(100W)to charge the EB3000-24V
pecron 100W*1

Q1:What kind of battery is used in EB3000-24V?
A:EB3000-24V utilizes high quality UL certified automotive LiFePO4 battery.
Q2:Which models can the EB3000-24V be cascaded to?
A:Currently EB3000-24V can only be used to E2000 LFP.
Q3:Can the EB3000-24V be charged or discharged separately after cascaded?
A:Yes, but the charging/discharge power will not be shown on the display of E2000 LFP and this will lead to wrong
battery volume showed on the battery display.
Q4:How to calculate the EB3000-24V running time?
A:Running Time=Total Capacity(3072Wh) * 0.85 (Depth of Discharge)/Loading Power(Watts)
Q5:Does EB3000-24V have built-in MPPT controller?
A:Yes, EB3000-24V has a built-in MPPT charge controller, which supports 12V-95V(max 400W).
Q6:After the EB3000-24V battery pack is cascaded, can the E2000 LFP be used normally without setting?
A:Yes, E2000 LFP can be used normally without battery calibration, but the battery volume showed on the display is
inaccurate.
Q7:How many EB3000-24V battery packs can be cascaded to E2000 LFP?
A:Max 2pcs of EB3000-24V can be cascaded to E2000 LFP. With too many battery packs, the internal resistance will
become low and the current will become very high. As a result, the fuse of the E2000 LFP will be blown and the
battery packs will be damaged.
Q8:How to store the EB3000-24V?
A:Please turn off the unit and then store it in a dry, ventilated place at normal room temperature. Do not place this unit
near water sources or a wet/moist environment. For long-term storage, it is recommended to discharge the battery to
30% every three months and recharge it to 60% to prolong the battery life.
FAQS

1、 Do not place the device near heat source, such as a fire or a heating furnace.
2、 Do not immerse in any liquid, or expose the unit to rain or wet conditions.
3、 Do not use the battery in a strong static electricity or electromagnetic environment.
4、 Do not disassemble or puncture the product with sharp objects in any way.
5、 Short circuits can be caused by: vermin or pests chewing through wires; water or other fluids coming into contact with
electrical wiring.
6、 It's prohibited to be used as car jump starter, only can be used to charge the car battery.
7、 Do not use accessories or parts other than those provided by Pecron. Please visit our website www.pecron.com or
reach our support team for a complete list of accessories and parts.
8、 When using this product, please strictly follow the ambient temperature for use in the user manual. If the temperature
is too high, the battery can potentially result in self-combustion and will burst into flames, which can cause
widespread damage. If the temperature is too low, the performance of the battery will be seriously degraded, and it
may even fail to meet the normal use requirements.
Please read the user manual thoroughly before using this product, and keep this manual in a safe place for future
reference. Failure to follow the instructions for proper set up, use, and care for the device can increase the risk of serious
personal injury, death, or property damage. Once you use this device, you are deemed to have understood, recognized
and accepted all terms and contents of this document. The user shall be responsible for his own actions and all
consequences arising from failure to use the device in accordance with the “User Manual”, or as authorized in Pecron's
current product literature.In compliance with laws and regulations, Pecron reserves all rights for final explanation, and to
change these terms and conditions at any time without prior notice. In the event that any revisions are made, the revised
terms and conditions shall be posted on our website immediately, please visit our website to inform yourself of any
changes.
DISCLAIMER
WARNING

9、 Do not stack heavy objects on this product.
10、Do not block the air vents during use, or leave the device in a non-ventilated or dusty space.
11、Please avoid impacts, fall off, and violent vibration. Please turn off the device immediately and stop using it in the
event of major exterior impact. Please fasten the unit firmly during transportation to avoid vibration and impact.
12、In the event of immersing the device into the water accidently, please place the unit in a safe open area and keep
away from the unit until it is completely dry. The dried unit should not be reused and should be disposed of properly
according to the local regulation. If the device catches fire, use the fire extinguishing equipment in the following
recommended order: water or mist, sand, fire blanket, dry chemical, carbon dioxide fire extinguisher.
13、Please wipe it with a dry cloth to clean the surface of the device.
14、Please place this device with care to prevent the product from being damaged due to fall off. If the product is
damaged due to fall off, please turn off the unit immediately and place it in an open area, keep away from
combustibles and crowds, and dispose of in accordance with local laws and regulations.
15、Please store this device in a place out of reach of children and pets.
DISPOSAL
1、When conditions permit, please be sure to completely discharge the battery of this product, and then put the product
in the designated battery recycling box. This product contains batteries. Batteries are dangerous chemicals and are
strictly prohibited from being disposed of in ordinary trash. For details, please follow local laws and regulations on
battery recycling and disposal.
2、If the battery cannot be completely discharged due to the failure of the product itself, please do not dispose of the
battery directly in the battery recycling box, and contact a professional battery recycling company for further disposal.
3、The battery will not be able to start after being over-discharged, please dispose of it according to the principle of
disposal.

EXCLUSIONS
CUSTOMER SUPPORT:[email protected]
WEBSITE:www.pecron.com
PECRON.LLC
Pecron’s warranty does not apply to:
Misused, abused, modified,damaged by accident, or used for anything other than normal consumer
use as authorized in Pecron’s current product literature.
Other manuals for EB3000-24V
1
Table of contents
Other Pecron Portable Generator manuals

Pecron
Pecron E3000 User manual

Pecron
Pecron E1000 User manual

Pecron
Pecron S1500 User manual

Pecron
Pecron S400 User manual

Pecron
Pecron E1000 PRO User manual

Pecron
Pecron S500 User manual

Pecron
Pecron E2000 LFP User manual

Pecron
Pecron S500 User manual

Pecron
Pecron H600 User manual

Pecron
Pecron P600 User manual
Popular Portable Generator manuals by other brands

Teleco
Teleco Telair ENERGY 2510D Use and maintenance manual and instructions for installation

EINHELL
EINHELL STE 2500 operating instructions

Energetiq
Energetiq EQ-99-FC Operation and maintenance manual

Tektronix
Tektronix HDVG1 Service manual

Lifan
Lifan G12500E operating instructions

Dutch originals
Dutch originals DO-CE-SMP01L-W user manual