Peg-Perego Primonido Elite User manual

primonido elite
Instructions for use

1
2
3
click
1 2
3 4
1
PUSH
2

a
b
c
56
78

1
2
9
11
10
12

1
2
1
2
2
13
15
14
16

1
20
17
19
18

21 22
23 24

8
1
48
9
10
7
3
2
5
6
Primonido Elite
Spare parts available in different colours to be specified when ordering.
1) BINPELGB*
2) BCAPELGB*
3) BCOPELGB*
4) SOPA0155L50
5) SPST4578GP
6) SPST4699JGL
7) SPST4600GL
8) ARPI0799*
9) MMMO0025D
10) BSAPELGB*

9
Thank you for choosing a Peg-Pérego
product.
WARNING
IMPORTANT: Read these instructions carefully and
store them in the holder provided throughout the
lifecycle of the product. The child’s safety could be
put at risk if these instructions are not followed.
_ WARNING Never leave your child unattended.
_ Assembly and preparation of the item must be carried out
by adults.
_ Do not use the product if there are missing or broken parts.
_Before use make sure that all of the attachment
mechanisms are connected properly.
_ Do not insert fingers into the mechanisms.
_ Do not use near heat sources, open flames or dangerous
objects that are within reach of the child.
_ It could be dangerous to use accessories which are not
approved by the manufacturer.
_ This product is only suitable for children who are unable to
sit up by themselves.
_ This product is designed for children from birth up to a
weight of 9 kg.
_ Only use the product on surfaces that are hard, horizontal
and dry.
_ Do not leave other children playing unattended near the
carriage.
_ Take care when adjusting the mechanisms (handle, backrest)
with the child present.
_Regularly check the handle (or the handles) and the
bottom of the carriage to make sure that there are no
signs of breakage or damage.
_ When using the pram with a Peg Perego stand, check
the maximum pram length allowed on the stand.
_ The pram is intended for transportation purposes and
should not replace the cot at home.
_ Do not add any mattress are not approved by the
manufacturer.
The images referring to the textile details may differ
from the collection purchased.
INSTRUCTIONS FOR USE
Using the pram
1 HOOD: Lift the hood until it clicks. Fasten the 6 buttons
on the lower profile.
2 To lower the hood, press on the handle and lower it
simultaneously.
3 FOOT MUFF: Slide on the foot muff (fig_a), unfasten the
external buttons of the hood (fig_b), fasten the double
buttons of the foot muff (fig_c) and finally refasten the
hood (fig_d).
4 Fasten the velcro straps as illustrated.
5 The velcro straps can be used to fasten the foot muff to
the hood, so as to protect the child even more against
the elements. Unfasten the sides of the foot muff
(arrow_a), unfold it upwards (arrow_b) and fasten it to
the hood with the velcro straps (arrow_c).
6 turn the pram into a cradle, remove the foot muff, open
the zip on the hood (fig_a), unbutton the hood at the
back (fig_b) and finally remove the flap of fabric (fig_c).
7 Remove the insect screen from the foot muff (fig_a) and
stretch it over the hood, fastening it to the side button
(fig_b).
8 BACKREST ADJUSTMENT: pull the handle outwards and
rotate it clockwise to raise the backrest or anticlockwise
to lower it.
9 FOUR SEASONS SYSTEM: as shown in the figure, it is
possible to adjust the product’s air circulation from the
base in order to prevent condensation.
Move the lever to blue for a cool, well-ventilated
environment (summer), or to red to limit the intake of
air (winter).
10 CARRY HANDLE: this is built into the hood. To carry the
bassinet, lift the hood (if lowered) until it clicks and hold
the handle placed above it.
_Before lifting the bassinet, ensure the built-in hood is
correctly fastened.
_Before lifting the bassinet, make sure the hood is in the
correct position for transport.
_ Before unfastening and lifting the bassinet from the
frame, adjust the backrest to its lowest position (figure 8).

10
must only be carried out by adults. Keep all moving parts
clean and if necessary lubricate them with light oil. Clean
the plastic parts periodically with a damp cloth. Do not
use solvents or similar substances. Brush the fabric parts
to remove dust. Do not clean the polystyrene shock
absorbing device with solvents or other similar products.
Protect the product from atmospheric agents: humidity,
rain or snow. Extended exposure to sunshine can cause
colour changes in many materials. Store the product in
a dry environment. Remember to regularly ventilate the
interior of the carrycot.
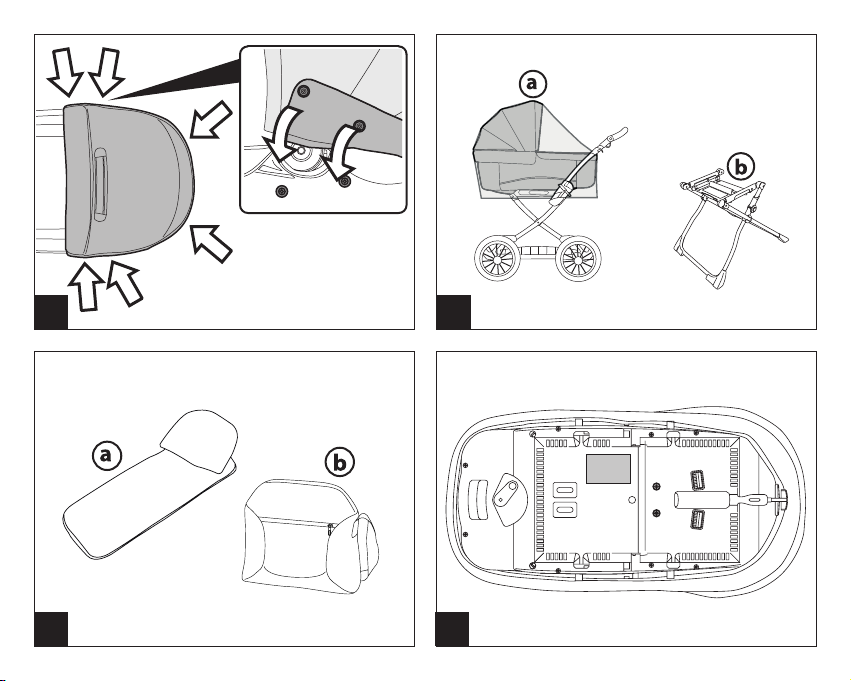
ACCESSORIES
22 RAIN COVER: rain canopy made of clear (fig_a).
BASSINET STAND: Practical, compact support base
(fig_b).
23
COMPLETO TRASPIRANTE:
mattress plus cushion (fig_a).
BORSA: diaper-changing bag with pad for changing
baby’s diaper (fig_b.
SERIAL NUMBERS
24 Information about the production date of pram can be
found under the base.
_ Product name, production date and serial number.
PEG-PÉREGO S.p.A.
P
eg-Pérego S.p.A. is an ISO 9001 certified
company. This certification is a guarantee
for customers and consumers of the
transparency and trustworthiness of the
company's procedures and working
methods. Peg-Pérego can make changes
at any time to the models described in this publication
for technical or commercial reasons. Peg-Pérego is at
the disposal of its customers and consumers to ensure
that all their demands and queries are fully satisfied. It
is a key part of our policy to ensure we are always
aware of our customers' views and requirements. We
would therefore be very grateful if, after using a Peg-
Pérego product, you take the time to fill in our
CUSTOMER SATISFACTION QUESTIONNAIRE, making a
note of any comments or suggestions you might have.
GANCIOMATIC SYSTEM
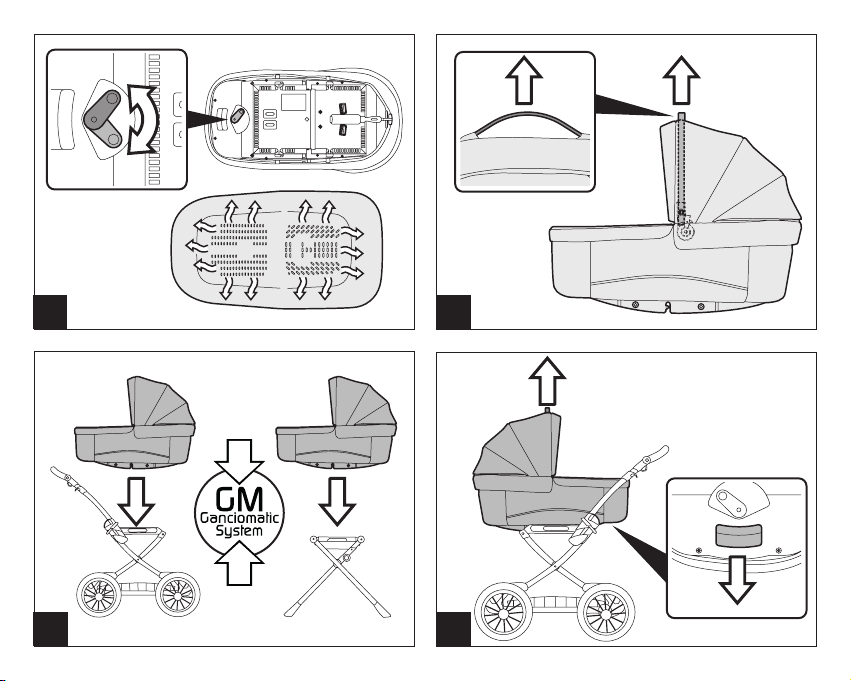
11 The Ganciomatic System enables you to fasten the
bassinet quickly and easily, with one simple operation,
to the Ganciomatic base of the Bassinet Stand and the
Classic Chassis (purchased separately).
To attach the pram, put it on the chassis and press with
both hands until it clicks into place.
Always apply the brakes on the chassis before attaching
and removing the pram.
IMPORTANT: Check that the pram is properly attached.
12 To release it, press the lever under the bassinet and lift it.
13 REMOVING THE LINING: To remove the lining of the
hood, unfasten the 6 buttons on the lower profile.
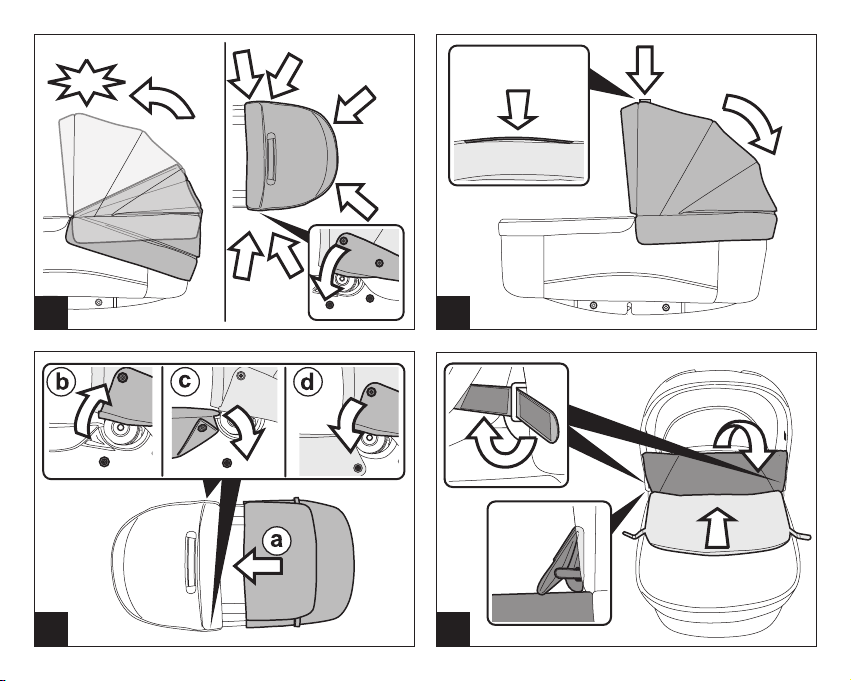
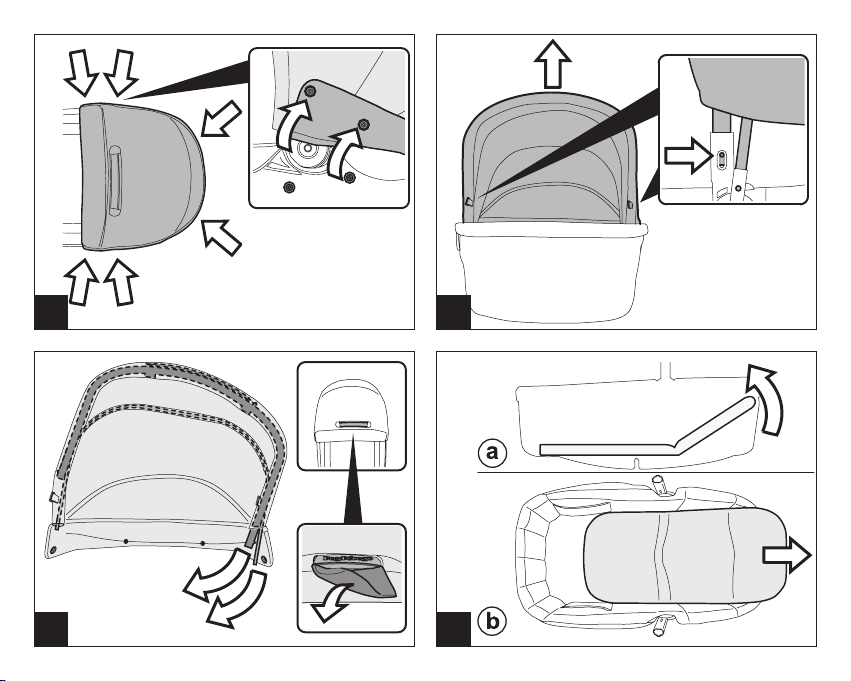
14 Press the buttons on the two fasteners and remove the hood.
15 Pull out the flap of fabric under the handle of the hood
and pull out the two rigid supports.
16 Raise the backrest (fig_a) to make it easier to remove the
mattress (fig_b).
17 Unfasten the 6 buttons on the outside of the bassinet
and remove the inner lining.
18 Finally, unfasten the 10 elastic bands on the bottom
of the bassinet and the other 4 positioned close to the
hood fasteners, and remove the outer lining.
To replace the lining of the bassinet, do the opposite.
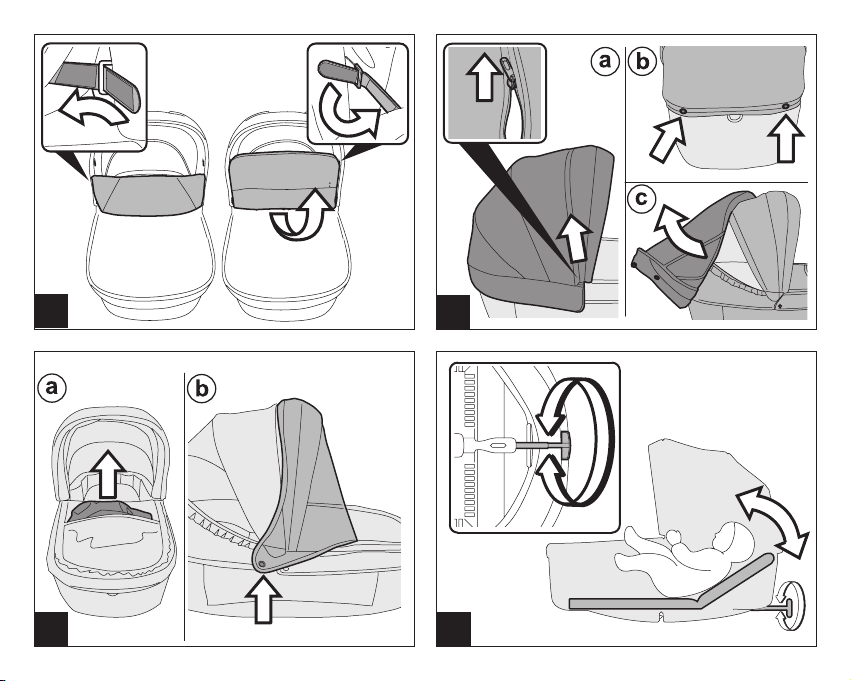
19 When placing the lining on the hood, ensure you insert
the rigid supports correctly. Insert the tube bearing the
carry handle into the hood’s front slot, ensuring the
handle is centered correctly (fig_a). Pull the flap of fabric
out from the opening on the hood (fig_b) and slide it
under the handle (fig_c).
20 Finally, slip the second metal support into the hood’s
inner slot.
21 Fasten the hood to the appropriate supports and fasten
the 6 buttons.
PADDING CLEANING INSTRUCTIONS: Brush the fabric
parts to remove dust. When washing, closely follow the
instructions stated on the label sewn into the cover. Do
not use chlorine bleach, do not iron, do not dry clean, do
not remove stains with solvents and do not tumble dry.
PRODUCT CLEANING: This product requires a small
amount of maintenance. Cleaning and maintenance

11
You can find the questionnaire on the Peg-Pérego
website:
www.pegperego.com
PEGPÉREGO AFTERSALES SERVICE
If any parts of the item get lost or damaged, only
use genuine Peg-Pérego spare parts. For any repairs,
replacements, information on the products and sales of
genuine spare parts and accessories, contact the Peg-
Pérego Assistance Service and state the serial number
of the product, if present.
tel. 0039/039/60.88.213
e-mail [email protected]
website www.pegperego.com
All intellectual property rights on the contents of this
manual are property of PEG-PEREGO S.p.A. and are
protected by the laws in force.
Declaration of conformity
Product name
PRIMONIDO ELITE
Product reference number
IN01**
Reference Standards (origin)
EN 1466:2014 / AC:2015
EN 71-2:2011+ A1:2014
EN 71-3
EN 1888:2012
Declaration of conformity
PegPerego S.p.A. declares under its sole responsibility that the article
to which this declaration relates has undergone internal testing and
has been approved, in accordance with regulations in force, by
external, independent testing laboratories.
Date and place of issue
Arcore, September 2016
PegPerego S.p.A.
via De Gasperi, 50
20043 Arcore (Mi), ITALY

primonido elite
PEG-PEREGO S.p.A. VIA DE GASPERI 50 20862 ARCORE MB ITALIA
tel. 0039•039•60881
After Sale: tel. 0039•039•6088213
PEG-PEREGO U.S.A. Inc.
3625 INDEPENDENCE DRIVE FORT WAYNE INDIANA 46808
phone 260 482 8191
Call us toll free: 1 800 671 1701
PEG-PEREGO CANADA Inc.
585 GRANITE COURT PICKERING ONTARIO CANADA L1W3K1
phone 905 839 3371
Call us toll free: 1 800 661 5050
www.pegperego.com
All of the intellectual property rights for the contents of this instruction manual belong to PEG-PEREGO S.p.A. and are
protected by the laws in force.
Primonido Elite
FIGB1601I244
18/10/2016
Table of contents
Other Peg-Perego Baby Carrier manuals

Peg-Perego
Peg-Perego pliko p3 compact User manual

Peg-Perego
Peg-Perego Culla Futura User manual

Peg-Perego
Peg-Perego Kit Auto User manual

Peg-Perego
Peg-Perego Baby carriage User manual

Peg-Perego
Peg-Perego Navetta XL User manual

Peg-Perego
Peg-Perego Navetta XL User manual

Peg-Perego
Peg-Perego Navetta XL User manual

Peg-Perego
Peg-Perego Navetta S User manual

Peg-Perego
Peg-Perego Pliko Switch User manual

Peg-Perego
Peg-Perego Culla Elite User manual