manuals.online logo
Brands
  1. Home
  2. •
  3. Brands
  4. •
  5. Philips
  6. •
  7. Lantern
  8. •
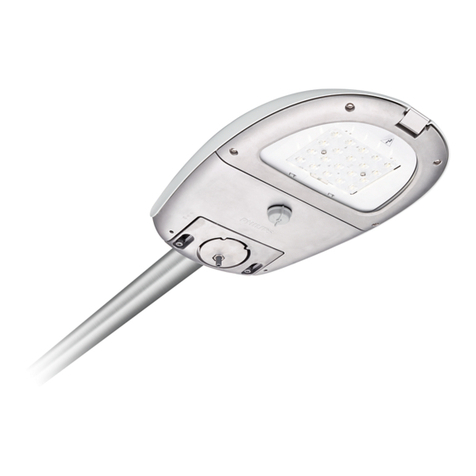
  9. Philips Luma gen 2 Series User manual

Philips Luma gen 2 Series User manual

4427 103 78320
© 01/ 2020, Signify Holding All rights reserved
Printed in POLAND
Data subject to change without notice
Keep for future reference: www.philips.com/lighting
1/14
Luma gen 2
BGP702/703/704/705
outdoor
R&TTE
RED 220V
240V
50Hz
60Hz
IP
66
24
LEDs
kg
4P1
IK
10
(+/-10%)
Luminaire Driver MCB
B16A
Inrush
current
I
peak
(A)
Inrush
current
T
width
(µs)
6-1 22W FP 23 15 36 4-12 5,5-14,8
2 4 W FP 21 21 3 11-39 14-42,5
1 22W FP 23 15 36 4-12 5,5-14,8
2 4 W FP 21 21 3 11-37 14-4 ,5
3 75W FP 1 43 26 36-6 4 -64
4 11 W FP 1 45 25 47-73 51-78
2 4 W FP 21 7 3 11-37 14-41,5
4 11 W FP 1 47 25 25-1 7 28,5-114
6 -8 165W FP 7 58 34 81-16 9 -17
6 -18 11 W FP 1 47 25 45-314 5 -33
8 -18 165W FP 7 58 34 81-353 89-37
6-1 22W SR 21 18 32 4-12 5,9-15,4
2 4 W SR 21 21 3 11-39 14,6-43,5
1 22W SR 21 18 32 4-12 5,9-15,4
2 4 W SR 21 21 3 11-37 14,6-41
3 75W SR 33 4 27 36-6 4 -64
4 11 W SR 23 4 27 47-73 52-79
2 4 W SR 21 21 3 11-37 14,6-42,5
4 11 W SR 23 4 27 25-1 7 29-114
6 -8 165W SR 13 11,5 1 81-16 89-17
8 75W SR 33 4 27 11 -141 118-15
6 -18 11 W SR 23 4 27 45-314 5 -33
8 -18 165W SR 13 11,5 1 81-353 89-37
Luma gen 2 Medi um BGP7 4
Luma gen 2 Large BGP7 5
8
Luma gen 2 Mini BGP7 3
9,5
Luma gen 2 Micro BGP7 2
11,5
19,5
11,5
SR -
System Ready driver; FP - Full Prog driver
Luma gen 2 Medium BGP7 4
19,5
Luma gen 2 La rge BGP7 5
Luma gen 2 Micro BGP7 2
Luma gen 2 Mini BGP7 3
8
9,5
-2 ° -1 ° ° +1 ° +2 ° -2 ° -1 ° ° +1 ° +2 °
Micro , 47 , 28 , 16 , 17 NA Micro NA NA , 21 , 25 , 36
Mini , 53 , 31 , 17 , 2 NA Mini NA NA , 21 , 27 , 45
Medium , 62 , 34 , 18 , 21 NA Medium NA NA , 24 , 29 , 5
Large , 65 , 46 , 27 , 39 NA Large NA NA , 31 , 47 , 65
Side Entry Post Top
2
Cxs(m )
BGP701/702/703//703/704/705 BGP701/702/703//703/704/705
+CABLES
2/14
Luminaire A B C E F D
Micro BGP7 2
556
642
293
146
241
32-6
Mini BGP7 3
652
734
295
146
241
32-6
Medium BGP7 4
657
743
36
146
241
32-6
Large BGP7 5 855 937 485 158 242 32-6
Dimensions
1b
1e
Standarized SR Socket
B
C
A
77
E
F
1a
G
H
K
Standarized SR Socket
Luminaire G H K
Micro BGP7 2
153
158
154
Mini BGP7 3
153
158
154
Medium BGP7 4
153
158
154
Large BGP7 5 16 16 15
Dimensions
Luminaire G H
Micro BGP7 2
198
2 2
Mini BGP7 3 198 2 2
Medium BGP7 4
198
2 2
Large BGP7 5 215 215
Dimensions
G
H
1c
G
Luminaire G
Micro BGP7 2
2 6
Mini BGP7 3
2 6
Medium BGP7 4
2 6
Large BGP7 5 211
Dimensions
RF Antenna
CityTouch OLC COM SR
Standarized SR Socket
Luminaire I J K L
Micro BGP7 2
188
193
225
2 1
Mini BGP7 3
188
193
22
196
Medium BGP7 4
188
193
223
199
Large BGP7 5 176 186 214 19
Dimensions
Wattstopper OLC SR
1d
KI
J
L
Standarized SR Socket
3/14
1f
2
3a 3c
3b 3d
3i
G
H
Luminaire G H
Micro BGP7 2
198
2 2
Mini BGP7 3
198
2 2
Medium BGP7 4
198
2 2
Large BGP7 5 182 182
Dimensions
EasyAir OLC SR
GB
SR compatibility
: For SR based luminaires only SR Certified components/sensors are to be used (see also:
http://www.lighting.philips.co.uk/oem-emea/products/driving-connected-lighting).
Functional compatibility of 2 (SR certified) components/sensors to be used in comb
ination as well as override possibility
of any line-
switch function used in a SR based luminaire, is to be released by the master component/sensor supplier. For
the use of NEMA 7pin socket on a SR based luminaire a full system verification is required. Not
following these advises
can/will cause risk of damage and non-compliance for which Signify cannot take any responsibility.
IP66
IP66
!
IP66 IP66
!
CityTouch OLC COM SR
~20°
12
WIDE
3g 3h
green LED
check power
2
1
~20°
A
A
BB
Wattstopper OLC SR
3j
~20°
12
3e 3f
4/14
4c
Pole:
Wattstopper OLC SR
3k
WIDE
2
1
~20°
A
B
B
A
O
76
O
76-60-48-42-32
Post-top
only
O
76
O
32/
O
42/
O
48
SE - Side Entry: 10°; 7,5°; 5°; 2,5°;
0°; -2,5°; -5°; -7,5; -10°; -12,5°;
-15° ; -17,5°; -20°
PT - Post Top: 0
v
; 2,5°; 5°; 7,5;
10°; 12,5°; 15°; 17,5°; 20°
4a 4b
0
v
0
v
SPIGOT SETUP:
!
Luminaire size MDEV FIX ANGLE
BGP7 2, BGP7 3, BGP7 4 32/48S -2 , -15, -1 , -5, , 5, 1
BGP7 2, BGP7 3, BGP7 4, BGP7 5 42/6 S -2 , -15, -1 , -5, , 5, 1
BGP7 2, BGP7 3, BGP7 4 32/48P , 5, 1 , 15, 2
BGP7 2, BGP7 3, BGP7 4, BGP7 5 42/6 P , 5, 1 , 15, 2
BGP7 2, BGP7 3, BGP7 4, BGP7 5 6 /76P , 5, 1 , 15, 2
BGP7 3, BGP7 4, BGP7 5 32/76S -2 , -15, -1 ,-5, , 5, 1
BGP7 3, BGP7 4, BGP7 5 32/76P , 5, 1 , 15, 2
Only in BGP702/3/4
ONLY BGP705
5e
5/14
5a 5b
5c 5d
The dimentions of the GearFlex box may varry per size,
please see page 7 and 8 for an overview
!
<45
v
<7 Kg
Max. <45
v
and <7 Kg
6b
6/14
6a
7/14
7a
NFC POINT
GEARFLEX MEDIUM components
6c
Luminaire SIZE
Micro BGP7 2
GearFlex MEDIUM
Mini BGP7 3
GearFlex MEDIUM
Medium BGP7 4
GearFlex MEDIUM
Large BGP7 5
GearFlex LARGE
Gearflex Size
A
BC
D
E
F
A
MAINS CONNECTOR
1 - NEUTRAL IN 5 -
2
- MAINS IN 6 - MAINSRETURN (LO)
3
- NEUTRAL OUT 7 - GROUNDING/EQUI
4 -
MAINS IN
8 - LINE SWITCH IN
OUTPUT CONNECTOR 1/2/3
1 - DALI +SR 5 - AUX 24V SR
2
- NTC SIGNAL 6 - LED-
3
- DALI -SR 7 -
4 - NTC COM 8 - LED+
B
8/14
7b
Xi FP 75W 0.2-0.7A SNLDAE 230V C133 sXt
Xi FP 110W 0.2-0.7A SNLDAE 230V C133 sXt
Xi FP 165W 0.2-0.7A SNLDAE 230V C170 sXt
Xi SR 165W 0.2-0.7A SNEMP 230V C170 sXt
Xi FP 330W 2:0.2-0.75A SNDAE C240 sXt
Version with 2 drivers
Xi SR 75W 0.2-0.7A SNEMP 230V C150
XI SR 110W 0.2-0.7A SNEMP 230V C150 SXT
GEARFLEX LARGE components
Version with 2 drivers Version with 2 drivers
A
A
A
AB
B
C
C
C
C
DD
D
D
E
E
E
H
F
HB
B
A
COMPONENTS:
A- MAINS CONNECTOR
B- OUTPUT CONNECTOR 1
C- OUTPUT CONNECTOR 2
D- OUTPUT CONNECTOR 3
E- LED DRIVER
F- LUNATONE DIMMING DEVICE
G- FUSE
H- SURGE PROTECTION DEVICES
F
E E E
F
EEEE
F
MAINS CONNECTOR
1 - NEUTRAL IN 5 -
2
- MAINS IN 6 - MAINSRETURN (LO)
3
- NEUTRAL OUT 7 - GROUNDING/EQUI
4 -
MAINS IN
8 - LINE SWITCH IN
OUTPUT CONNECTOR 1/2/3
1 - DALI +SR 5 - AUX 24V SR
2
- NTC SIGNAL 6 - LED-
3
- DALI -SR 7 -
4 - NTC COM 8 - LED+
B,C,D
HH
GG
GG
9/14
6
10
!
RF/ CTC
8
9
Luminaire
Spigot/pole (M1 )
BGP7 2
25Nm
BGP7 3
25Nm
BGP7 4
25Nm
BGP7 5
3 Nm
CTC
RF
5mm
5mm
10/14
11
DDF1
DDFx - Dynadimmer
Ls-x - Lumistep
DDF2 DDF3 DDF27
DDF69 DDF93 LS-6 LS-8
11/14
Digi Stre et Micro
BGP 615 12NC:
Servic eTag:
P0 00 01 16 30 536300 02
12
©2019 Signify Holding
All rights reserved. Reproduction in whole or in part is prohibited without the prior written consent of the copyright owner.
The information presented in this document does not form part of any quotation or contract, is believed to be accurate and
reliable and may be changed without notice. No liability will be accepted by the publisher for any consequence of its use.
Publication thereof does not convey nor imply any license under patent- or other industrial or intellectual property rights.
Signify
Holding
The Netherlands
12/14
!
13
Storage, installation, use, operation and maintenance of the products needs to be performed exactly according the instructions
in this manual and/or other instructions as may be provided by us to guarantee safe use of the product over its entire lifetime.
Failure to adhere to these instructions will invalidate your entitlement to warranty. Bolts with indication of torque strength on the
drawing need to be tightened using a calibrated torque wrench. Pre-assembled bolts need to be retightened again to the
required torque specification to assure maximum strength over lifetime
El almacenamiento, instalación, uso, funcionamiento y mantenimiento de este producto debe realizarse exactamente según
las instrucciones de este manual, así como otras instrucciones que le proporcionemos con el fin de garantizar un uso seguro
del producto durante toda su vida útil. Si no se cumplen estas instrucciones, la garantía quedará anulada. Los tornillos con
indicación de par de apriete en el dibujo, deben apretarse con una llave dinamométrica calibrada. Los tornillos del
acoplamiento premontados deben reapretarse de nuevo con la especificación de par de apriete necesaria para garantizar una
solidez máxima durante toda la vida útil de la luminaria
Para garantir uma utilização segura do produto durante a respetiva vida útil, o armazenamento, a instalação, a utilização,
a operação e a manutenção dos produtos têm de ser efetuados exatamente de acordo com as instruções neste manual e/ou
com outras instruções que possam ser fornecidas por nós. O incumprimento destas instruções irá invalidar o direito à garantia.
Os parafusos com indicação do torque no esquema têm de ser apertados utilizando uma chave dinamométrica calibrada. Os
parafusos pré-montados têm de ser novamente apertados de acordo com a especificação de torque necessário para garantir
uma resistência máxima durante a vida útil
Lagerung, Installation, Verwendung, Betrieb und Wartung der Produkte müssen genau nach den Anweisungen in dieser
Anleitung und/oder anderen von uns zur Verfügung gestellten Anweisungen erfolgen, um eine sichere Verwendung des
Produkts über seine gesamte Lebensdauer zu gewährleisten. Bei Nichtbeachtung dieser Hinweise erlischt Ihr Anspruch auf
Gewährleistung. Schrauben mit Angabe der Drehmomente auf der Zeichnung müssen mit einem kalibrierten
Drehmomentschlüssel angezogen werden. Vormontierte Schrauben müssen mit dem angegebenen Drehmoment
nachgezogen werden, um eine maximale Festigkeit über die gesamte Lebensdauer zu gewährleisten
Le stockage, l'installation, l'utilisation et la maintenance des produits doivent être effectués conformément aux instructions de
ce manuel et / ou d'autres instructions que nous fournissons afin de garantir une utilisation sûre du produit pendant toute sa
durée de vie. Le non-respect de ces instructions invalidera votre droit à la garantie.
Les vis, dont les couples de serrage sont indiqués sur les schémas, doivent être serrés à l'aide d'une clé dynamométrique
étalonnée. Les vis, préassemblés, doivent être resserrés à nouveau selon la spécification de couple de serrage requise afin
d’assurer leur résistance maximale pendant toute leur durée de vie
La conservazione, l'installazione, l'uso, il funzionamento e la manutenzione dei prodotti devono essere eseguiti esattamente in
base alle istruzioni contenute nel presente manuale e / o in altra documentazione fornita da noi per garantire la sicurezza del
prodotto per l'intera durata del suo utilizzo. La mancata osservanza di queste istruzioni invaliderà la garanzia. I bulloni con
indicazione sull'intensità della coppia serraggio sul disegno devono essere serrati utilizzando una chiave dinamometrica
calibrata. I bulloni pre-assemblati devono essere riserrati nuovamente secondo le specifiche di coppia richieste per assicurare
la massima resistenza per tutta la durata
Om een veilig gebruik van dit product gedurende zijn hele levensduur te garanderen, dient het opslaan, installeren, gebruiken,
bedienen en onderhouden ervan exact te worden uitgevoerd in overeenstemming met de instructies in deze handleiding en/of
andere door ons geleverde instructies. Niet opvolgen van deze instructies maakt uw garantieaanspraken ongeldig. Bouten
waarvan in de tekening het aanhaalkoppel is vermeld, dienen te worden vastgezet met behulp van een momentsleutel. Voor-
geassembleerde bouten dienen opnieuw te worden aangehaald tot het vereiste koppel om maximale strekte gedurende de
hele levensduur te waarborgen
Förvaring, installation, användning, drift och underhåll av produkterna måste utföras enligt instruktionerna i denna handbok
och/eller andra instruktioner som kan tillhandahållas av oss för att garantera säker användning. Om instruktioner inte följs
frångår man produktgarantin. Skruvar där vridmoment anges på ritningen måste dras åt med en kalibrerad skiftnyckel.
Förmonterade skruvar måste dras åt igen med angivet vridmoment för att säkerställa högsta styrka under livslängden.
Oppbevaring, montering, bruk, drift og vedlikehold av produktene må utføres nøyaktig i samsvar med instruksjonene i denne
håndboken og/eller andre instruksjoner vi måtte gi for å garantere sikker bruk av produktet i hele dets levetid. Hvis
instruksjonene ikke følges, bortfaller garantien. Bolter med angivelse av dreiemoment på tegningen må strammes med en
kalibrert momentnøkkel. Ferdigmonterte bolter må strammes på nytt til påkrevd dreiemoment for å sikre maksimal styrke i hele
produktets levetid
Tuotteiden asennuksessa, käytössä ja huollossa on noudatettava tarkoin tässä käyttöoppaassa tai muissa toimittamissamme
ohjemateriaaleissa annettuja ohjeita. Tämä varmistaa tuotteen turvallisen toiminnan koko sen käyttöiän ajan. Näiden ohjeiden
noudattamatta jättäminen mitätöi kaikki oikeutesi takuukorvauksiin. Pultit, joille on asennusohjeessa ilmoitettu tietty
kiristystiukkuus, on kiristettävä kalibroidulla momenttiavaimella. Esiasennetut pultit on kiristettävä ilmoitettuun
kiristystiukkuuteen koko käyttöiän mittaisen kestävyyden varmistamiseksi
Při uchovávání, montáži, používání a údržběproduktůje třeba postupovat přesněpodle pokynův této příručce a dalších našich
případných pokynů, které zajišťují bezpečné používání produktůpo celou dobu jejich životnosti. Když tyto pokyny dodržovat
nebudete, přijdete o záruku. Šrouby, které mají na výkresu uveden utahovací moment, je třeba utahovat zkalibrovaným
momentovým klíčem. Předem namontované šrouby je třeba dotáhnout požadovaným momentem, aby po dobu životnosti
produktu držely na místě
Przechowywanie, instalacja, użytkowanie, obsługa i konserwacja produktów musi odbywaćsięściśle według wytycznych
zawartych w niniejszej instrukcji i / lub w innych instrukcjach, które dołączamy, aby zagwarantowaćbezpieczne użytkowanie
produktu przez cały okres eksploatacji. Nieprzestrzeganie tych instrukcji może spowodowaćutratęprawa do gwarancji. Śruby,
przedstawione na rysunku wskazującym siłęmomentu dokręcania, musząbyćdokręcone za pomocąkalibrowanego klucza
dynamometrycznego. Aby zapewnićmaksymalnąwytrzymałość w całym okresie użytkowania, wstępnie zamontowane śruby
należy dokręcićzgodnie z wymaganąspecyfikacjąmomentu dokręcenia
Depozitarea, instalarea, utilizarea, operarea și întreținerea produselor trebuie săfie efectuate exact în conformitate cu
instrucțiunile din acest manual și/sau cu alte instrucțiuni care pot fi furnizate de noi pentru a garanta utilizarea în siguranță a
produsului, pe întreaga duratăde viață a acestuia. Nerespectarea acestor instrucțiuni văva anula dreptul la garanție. Șuruburile
care au cuplul de strângere indicat pe desen, trebuie săfie strânse cu ajutorul unei chei dinamometrice calibrate. Șuruburile
preasamblate trebuie săfie strânse din nou la specificația de cuplu cerută, pentru a asigura rezistența maximăpe întreaga
duratăde viață
Opbevaring, installation, brug, betjening og vedligeholdelse af produkterne må kun udføres ifølgenistruktionerne i denne
vejledning og / eller eventuelle øvrige instruktioner fra Philips Lighting for at garantere sikker brug af produktet i hele dets levetid.
Hvis disse instruktioner ikke følges bortfalder produktgarantien. Bolte/skruer med angivet spændingsmoment på tegningen
skal spændes med en indstillet momentnøgle. Færdigsamlede bolte/skruer skal efrerspændes i henhold til det specificerede
moment for at sikre maksimal fastgørelse i hele produktets levetid
GB
SP
PT
DE
FR
IT
NL
DK
SE
NO
FI
HU
PL
RO
13/14
!
!
15
14
PT A luminária tem um isolamento básico entre a alimentação de baixa tensão e os cabos de sinal decontrolo
GB Luminaire has basic insulation between Low Voltage supply and control conductors
FR Le luminaire comporte une isolation de base entre l'alimentation basse tension et les câbles decontrôle.
IT Il grado di isolamento tra il conduttore di alimentazione ed il conduttore di segnale è básico.
DE Die Leuchte verfügt über eine einfachen Isolation zwischen der Niederspannungsversorgung und den Steuerleitungen.
NL Armatuur heeft een basisisolatie tussen laagspannings-voeding en controle conductoren
DK Armaturet har enkelisolering mellem lavvoltsforsyningen og styreledningerne.
SP La luminaria tiene un aislamiento básico entre la alimentación de baja tensión y los cables de la señal de control
SE Armaturen har enkelisolering mellan lågvoltsförsörjningen och styrledningarna.
PL Oprawa posiada podstawowąizolacjępomiędzy modułem zasilania niskonapięciowego i przewodami sterującymi.
BG Осветителното тяло има основна изолация межд захранването ниско напрежение иконтролните проводници.
NO Armaturet har enkelisolering mellom lavvoltsforsyningen og styreledningene
проводниками
RS Светильник обладает базовой электроизоляцией межд низковольтным блоком питания иправляющими
CS V esvítidle je mezi vodiči napájení a řízení základní izolace
HU A lámpatest kisfeszültségűés szabályozó bemenetei galvanikusan el vannak választva.
FI Valaisimessa on peruseristys syöttöjännitteen ja ohjausjohtimien välillä.
RO Corpul de iluminat dispune de izolație de bazăîntre sistemul de alimentare de joasăși conductorii de control.
HR Svjetiljka ima osnovnu izolaciju između napajanja i upravljačkih konektora
GR Το φωτιστικό διαθέτει βασική μόνωση μεταξύ της χαμηλής τάσης τροφοδοσίας και των αγωγών ελέγχου.
15
!
Při uchovávání, montáži, používání a údržběproduktůje třeba postupovat přesněpodle pokynův této příručce a dalších
našich případných pokynů, které zajišťují bezpečné používání produktůpo celou dobu jejich životnosti. Když tyto pokyny
dodržovat nebudete, přijdete o záruku. Šrouby, které mají na výkresu uveden utahovací moment, je třeba utahovat
zkalibrovaným momentovým klíčem. Předem namontované šrouby je třeba dotáhnout požadovaným momentem, aby po
dobu životnosti produktu držely na místě
Ürünlerin saklanması, kurulumu, kullanımı, çalıştırılması ve bakımı, ürünün kullanım ömrü boyunca güvenli kullanımının
sağlanması amacıyla tam olarak bu kılavuzdaki ve/veya tarafımızdan sağlanan diğer talimatlara uygun biçimde
gerçekleştirilmelidir. Söz konusu talimatlara uyulmaması, ürünle ilgili garanti hakkınızı geçersiz kılar. Teknik çizimde
yanında sıkma torku değeri belirtilen cıvatalar kalibre edilmişbir tork anahtarı kullanılarak sıkılmalıdır. Önceden takılmış
olarak gelen cıvataların da belirtilen tork değerine uygun biçimde yeniden sıkılması, kullanım ömrü boyunca maksimum
dayanıklılığın sağlanması açısından önemlidir
Ηαποθήκευση, ηεγκατάσταση, ηχρήση, ηλειτουργία και ησυντήρηση των προϊόντων πρέπει να γίνεται ακριβώς
σύμφωνα με τις οδηγίες του παρόντος εγχειριδίου ή/και τις άλλες οδηγίες που ενδεχομένως να παρασχεθούν,
προκειμένου να είναι εγγυημένη ηασφαλής χρήση του προϊόντος για ολόκληρη τη διάρκεια ζωής του. Ημη εφαρμογή
αυτών των οδηγιών θα ακυρώσει τα δικαιώματά σας στο πλαίσιο της εγγύησης. Οι βίδες με ένδειξη τιμής ροπής
σύσφιξης στο σχέδιο θα πρέπει να σφιχτούν με τη χρήση ενός βαθμονομημένου ροπόκλειδου. Οι
προσυναρμολογημένες βίδες πρέπει να σφιχθούν και πάλι με την απαιτούμενη τιμή ροπής σύσφιξης, προκειμένου να
διασφαλιστεί ημέγιστη ισχύς σε όλη τη διάρκεια ζωής
Съхранението, инсталирането, потребата, експлоатацията иподдръжката на прод ктите трябва да се
извършват точно всъответствие сказанията втова ръководство и/или др ги инстр кции, които могат да бъдат
предоставени от нас, за да се гарантира безопасна потреба на прод кта през целия м експлоатационен живот.
Неспазването на тези казания ще обезсили Вашето право на гаранция. Болтовете синдикация за силата
на въртящия момент на чертежа трябва да бъдат затегнати спомощта на калибриран гаечен ключ. Предварително
сглобените болтове трябва да бъдат отново затегнати до изискваната спецификация на въртящия момент, за да
осиг рят максимална якост по време на експлоатационния живот
Чтобы гарантировать безопасное использование этого изделия на протяжении всего соответств ющего срока
сл жбы, его хранение, становк , использование, экспл атацию иобсл живание необходимо ос ществлять в
точном соответствии сприведенными внастоящем р ководстве инстр кциями и(или) иным инстр кциями,
которые мог т быть предоставлены нами. Несоблюдение этих инстр кций приведет кпотере прав на гарантию.
Болты, для которых на чертеже казан кр тящий момент, необходимо затягивать калиброванным
динамометрическим ключом. Для обеспечения максимальной прочности изделия втечение всего срока сл жбы
болты, завинченные входе предварительной сборки, необходимо подтян ть до казанного момента
CZ
TR
GR
BG
RS
The light source contained in this luminaire shall only be replaced by the manufacturer or his service agent or a similar qualified person.
La fuente de luz contenida en esta luminaria sólo podrá ser sustituido por el fabricante o su agente de servicio o una persona calificada similar.
A fonte de luz contida neste luminária só será substituído pelo fabricante ou o seu agente de serviços ou uma pessoa qualificada similar.
Die in dieser Leuchte enthaltenen Lichtquelle darf nur durch den Hersteller oder seinen Kundendienst oder eine ähnlich qualifizierte
Person ersetzt werden.
La source de lumière contenue dans ce luminaire ne doit être remplacé par le fabricant ou son agent de service ou une personne qualifiée.
La sorgente di luce contenuta in questo apparecchio potrà essere sostituita solo dal costruttore, da suo personale addetto all'assistenza
tecnica od ugualmente qualificato
De lichtbron in dit armatuur mag alleen worden vervangen door de fabrikant of zijn service agent of een soortgelijk gekwalificeerd persoon.
Lyskilden er indeholdt i dette armatur må kun udskiftes af fabrikanten eller hans serviceværksted eller en tilsvarende kvalificeret person.
Ljuskällan i detta Armaturen får endast bytas av tillverkaren eller dennes serviceombud eller liknande behörig person.
Извор светлости садржана овом светиљке биће замењен само од стране произвођача или његовог сервисера или слично
квалификоване особе.
Източникът на светлина се съдържа втози осветително тяло се заменя само от производителя или негов сервизен агент или
подобно квалифицирано лице.
Ηπηγή φωτός που περιέχονται σε αυτό το φωτιστικό θα πρέπει να αντικατασταθεί μόνο από τον κατασκευαστή ήτοναντιπρόσωπο
συντήρησης αυτού ήέναν παρόμοιο ειδικευμένο άτομο.
Izvor svjetla sadržan u ovom svjetiljke će se zamijeniti samo proizvođačili njegov servisera ili sličnog stručne osobe.
Světelný zdroj obsažené v tomto svítidle se nahrazují pouze výrobcem nebo jeho servisním zástupcem nebo podobněkvalifikovanou osobou.
Sursa de luminăîn acest corp de iluminat conținute se înlocuiește numai de către producător sau de agentul său de service sau o
persoanăsimilarăcalificată.
Źródło światła zawarte w oprawie powinno byćwymieniane wyłącznie przez producenta, przedstawiciela serwisu lub wykwalifikowanąosobę.
A lámpatestben található fényforrást csak a gyártó, a gyártóval szerződött cég vagy megfelelőképesítéssel rendelkezőszakember cserélheti ki.
Valonlähde sisältämät valaisimen saa vaihtaa vain valmistaja tai valtuutettu huoltoliike tai muu ammattitaitoinen.
Lyskilden i denne armaturen skal bare skiftes ut av produsenten eller serviceverksted eller en tilsvarende kvalifisert person.
SP
PT
DE
FR
IT
NL
DK
GB
SE
NO
FI
HU
PL
RO
CZ
HR
GR
BG
RS
©2019 Signify Holding
All rights reserved. Reproduction in whole or in part is prohibited without the prior written consent of the copyright owner.
The information presented in this document does not form part of any quotation or contract, is believed to be accurate and
reliable and may be changed without notice. No liability will be accepted by the publisher for any consequence of its use.
Publication thereof does not convey nor imply any license under patent- or other industrial or intellectual property rights.
Signify
Holding
The Netherlands

This manual suits for next models

9

Other Philips Lantern manuals

Philips LED Luminaires User manual

Philips

Philips LED Luminaires User manual

Philips SmartBirght BN013C Series User guide

Philips

Philips SmartBirght BN013C Series User guide

Philips SolarSpot User manual

Philips

Philips SolarSpot User manual

Philips Vari-lite VL3500 Wash FX Luminaries User manual

Philips

Philips Vari-lite VL3500 Wash FX Luminaries User manual

Philips BGP300 User manual

Philips

Philips BGP300 User manual

Philips Coreline XL User manual

Philips

Philips Coreline XL User manual

Philips SFRA LUMINAIRE TO RND/SQ POLE User manual

Philips

Philips SFRA LUMINAIRE TO RND/SQ POLE User manual

Philips Ledinaire Waterproof WT050C User guide

Philips

Philips Ledinaire Waterproof WT050C User guide

Philips GSA ST321T User manual

Philips

Philips GSA ST321T User manual

Philips LifeLight User manual

Philips

Philips LifeLight User manual

Philips ClearScape LED Series User manual

Philips

Philips ClearScape LED Series User manual

Philips HB311 User manual

Philips

Philips HB311 User manual

Philips PrimeSet LDM524 User manual

Philips

Philips PrimeSet LDM524 User manual

Philips CoreLine Waterproof WT120C G2 EL MDU User manual

Philips

Philips CoreLine Waterproof WT120C G2 EL MDU User manual

Philips TMFIC Series User manual

Philips

Philips TMFIC Series User manual

Philips HP 3147 User manual

Philips

Philips HP 3147 User manual

Philips StyleState Accent GD916B User guide

Philips

Philips StyleState Accent GD916B User guide

Philips BY480P User manual

Philips

Philips BY480P User manual

Philips Selecon PLSTUPNL-03 Instruction Manual

Philips

Philips Selecon PLSTUPNL-03 Instruction Manual

Philips LifeLight Series User manual

Philips

Philips LifeLight Series User manual

Philips GentleSpace Gen3 User manual

Philips

Philips GentleSpace Gen3 User manual

Philips Stylid Evo Compact ST770B User manual

Philips

Philips Stylid Evo Compact ST770B User manual

Philips eColor Graze Powercore User manual

Philips

Philips eColor Graze Powercore User manual

Philips VARI-Lite VL4000 User manual

Philips

Philips VARI-Lite VL4000 User manual
Popular Lantern manuals by other brands

Westfalia Wetelux 96 76 74 instruction manual

Westfalia

Westfalia Wetelux 96 76 74 instruction manual

IKEA STRALA J1923 manual

IKEA

IKEA STRALA J1923 manual

BENITO AVANT Assembly instructions

BENITO

BENITO AVANT Assembly instructions

BEGA 84 327 Instructions for use

BEGA

BEGA 84 327 Instructions for use

Stahl ECOLUX 6608 operating instructions

Stahl

Stahl ECOLUX 6608 operating instructions

Neuwerk Auriga quick start guide

Neuwerk

Neuwerk Auriga quick start guide

Coleman 2000000940 user manual

Coleman

Coleman 2000000940 user manual

BRIGHT SunBell 2.0 Y Training manual

BRIGHT

BRIGHT SunBell 2.0 Y Training manual

North Light TN-5112 manual

North Light

North Light TN-5112 manual

Vari Lite VL3000 Series Service manual

Vari Lite

Vari Lite VL3000 Series Service manual

HAMPTON BAY 413-953 instruction manual

HAMPTON BAY

HAMPTON BAY 413-953 instruction manual

HOMEDEPOT G19332 Use and care guide

HOMEDEPOT

HOMEDEPOT G19332 Use and care guide

HAMPTON BAY HB7002-05 Use and care guide

HAMPTON BAY

HAMPTON BAY HB7002-05 Use and care guide

CREE LIGHTING Urban Series quick start guide

CREE LIGHTING

CREE LIGHTING Urban Series quick start guide

Energetic Lighting E3SB Series manual

Energetic Lighting

Energetic Lighting E3SB Series manual

BEGA 8933 Instructions for use

BEGA

BEGA 8933 Instructions for use

Gama Sonic GS-114F instruction manual

Gama Sonic

Gama Sonic GS-114F instruction manual

Clas Ohlson ZK7029 quick start guide

Clas Ohlson

Clas Ohlson ZK7029 quick start guide

manuals.online logo
manuals.online logoBrands
  • About & Mission
  • Contact us
  • Privacy Policy
  • Terms and Conditions

Copyright 2025 Manuals.Online. All Rights Reserved.