Features
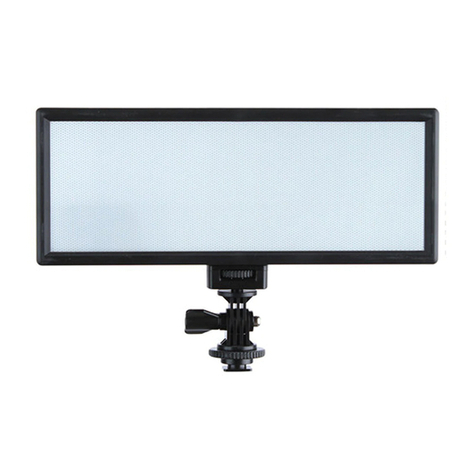
The Phottix Kali600 VLED Video LED is a compact and powerful light source for
still and video photography. It uses the latest in icker-free LED technology,
making it more ecient and durable.
The Kali600 features:
• 4320 Lumens of power
• Long-life, Low-Heat LEDs
• Durable one-piece aviation-spec Aluminum shell
• Battery / AC Power Modes
• Adjustable brightness and color temperature
• Wireless remote control
Please note:
• Do not shine the VLED directly at people’s eyes at short distances. This can cause
short-term vision issues. Use at distances of at least 1m from subject – or use a
reector/diffuser to soften the light.
• Do not place the VLED close to alcohol or ammable objects.
• Do not place liquids on or near the VLED. The product is not water, splash or
dust resistant.
• Use a soft cloth and neutral cleaner to clean the VLED light.
• Do not use strong cleaning agents or solvents such as thinner gasoline or
alcohol to clean the VLED light.
• Do not store the VLED at temperatures of +40C as high temperatures may
damage the product components.
• Do not use the VLED in outdoors in direct sunlight for an extended period of
time to prevent the product from overheating and possible damage.
Parts
Back Side:
1. LED Display
2. Battery Ports
3. Battery Port / Accessory
Locking Switches
4. AC Power Port
5. Channel Adjustment Button
6. Battery Status Button
7. Power Button
8. Adjustment Dial / Mode Button
9. Mounting Bracket
10. Locking Nuts
Front Side:
11. Accessory Mounting Buttons
12. Mounting Rails
13. LEDs
Wireless Remote
1. Brightness Adjustment Mode Indicator (Red)
2. Color Temperature Adjustment Mode Indicator (Yellow)
3. LED Display
4. Power Button
5. + / - Adjustment Buttons
6. Mode Button
Mounting and Adjusting the Kali
1. Use the Mounting Bracket to mount the Kali600 to a Light Stand or other mount.
Ensure the Mounting Bracket Locking Nut is securely fastened.
2. Loosen and tighten the Locking Nuts on the Mounting Bracket to adjust the
Kali600 angle.
Mounting Batteries
1. Align the battery with the Battery Port
2. Push the battery down until locked into position.
3. Press the Battery Status Button to check the approximate power remaining in
battery cells.
Please Note:
The Kali600 will only operate with 2 batteries being used.
Removing Batteries
1. Push the battery cell upwards and remove it from the Kali600’s battery chamber.
Using AC Power
1. Connect the AC Adapter to the AC Power Port on the Kali600
2. Plug the other end of the AC Adapter into mains power.
Turning Power On / Off
1. Press and hold the Power Button to turn the Kali600 on
2. Press and hold the Power Button to turn the Kali600 off.
The LED Display
On the Kali600 LED Display
- Power is displayed by the left two digits – from 10-99.
- Color Temperature is displayed by the right two digits – from 32-56. These are
abbreviations for 3200-5600K.
- The blue indicator light on the bottom of the display shows the Kali600’s
adjustment mode – for Brightness Adjustments, Color for Color Adjust-
ments.
Adjusting Brightness and Temperature
1.Press the Adjustment Dial / Mode Button to toggle between Brightness
Adjustment and Color Temperature Adjustment Modes.
2.The blue indicator light on the bottom of the display shows the Kali600’s
adjustment mode – Dimmer for Brightness Adjustments, Color for Color
Adjustments.
3.Use the Adjustment Dial to set the desired brightness level or color tempera-
ture.
Using the Diffuser Panel
The Kali600 comes with a white diffuser panel.
To Add :
1. Push and hold the one of the Battery Port / Accessory Locking Switches to the
Left or Right while depressing the Accessory Mounting Button.
2. Align the Diffuser Panel to the bottom mounting rails and slide into position.
3. Push and hold the one of the Battery Port / Accessory Locking Switches to the
Left or Right white depressing the Accessory Mounting Button (from the back of
the Kali600) to lock into position.
To remove:
1. Push and hold the one of the Battery Port / Accessory Locking Switches to the
Left or Right white depressing the Accessory Mounting Button
2. Slide the Diffuser Panel off the front of the Kali600. Make sure the Locking Nuts
and Mounting Bracket are aligned to allow the Panel to be removed.
3. Push and hold the one of the Battery Port / Accessory Locking Switches to the
Left or Right white depressing the Accessory Mounting Button (from the back of
the Kali600) to lock into position.
Using the Barndoors
The Barndoors included with the Kali600 are very useful in control and shaping
light.
To Add / Remove:
To Add :
1. Push and hold the one of the Battery Port / Accessory Locking Switches to the
Left or Right while depressing the Accessory Mounting Button.
2. Align the Diffuser Panel to the top mounting rails and slide into position.
3. Push and hold the one of the Battery Port / Accessory Locking Switches to the
Left or Right white depressing the Accessory Mounting Button (from the back of
the Kali600) to lock into position.
To remove:
1. Push and hold the one of the Battery Port / Accessory Locking Switches to the
Left or Right white depressing the Accessory Mounting Button
2. Slide the Barndoors off the front of the Kali600. Make sure the Locking Nuts and
Mounting Bracket are aligned to allow the Panel to be removed.
3. Push and hold the one of the Battery Port / Accessory Locking Switches to the
Left or Right white depressing the Accessory Mounting Button (from the back of
the Kali600) to lock into position.
To Use:
Using gentle force, position the barndoors into the desired position(s).
Using the Remote Control
The Phottix Kali600 comes with wireless remote control. Using this remote, the
brightness of the Kali600 can be controlled from up to 50m away.
Phottix Kali600 VLED
Instruction Manual
En
Made in China
www.phottix.com
Setting the Wireless Channel on the Kali600
1. Press the Channel Button under the Kali600 LED Display.
2. Use the Adjustment Dial / Mode Button to set the Channel from 1-99
Using the Remote
Setting the Wireless Channel on the Remote
1. Press the Power Button to Activate the Remote Control
2. By Default it will open in Channel Mode
3. Set the Channel from 1-99 using the + / - buttons
Please note:
The Channel on the Remote and Kali600 needs to be the same for the remote to
control the Kali600.
Using the Power Button
The Kali600 Remote Control will power off automatically after not being used.
If powered off:
- One press of the Power Button will “wake up” the remote and display the last
used mode.
- A second press of the Power Button will Power On or Power Off the Kali600 unit.
Changing Remote Modes
The Remote has three modes:
- Channel Adjustment Mode (Default)
- Brightness Adjustment Mode – Indicated by the Red Light above the LED
- Color Temperature Adjustment Mode - Indicated by the Yellow Light above the
LED
1. Press the Mode button to toggle between the three modes.
2. The Remote LED will display a two digit number – for Channel, Brightness
Level or Color Temperature.
3. Use the + / - buttons to make desired adjustment.
Tech Specs
Model: Kali600
Output Power: 36W
Luminous Flux: 4320LM
LED Quantity: 600
Color Temperature: 3200K-5600K Continuous adjustment
Light Source: 45° LED
Color Rendering Index (CRI): ≥95
Brightness Adjustment: 10%-100%
Estimated Life: 50000 hours
Remote Control: 99 channels 2.4G wireless remote control
Remote Control Range: 50m
Lithium Battery Type: NP-F750/NP-F960 (2 batteries required for operation)
AC Power Input DC13-19V
Adapter DC15V 2.4A
Size (Excluding Mount): 242x191x42mm
Weight: 1340g (without batteries / barndoors)
12
5 78
3
10
46
9
12
11
13
1
3
4
5
6
2
