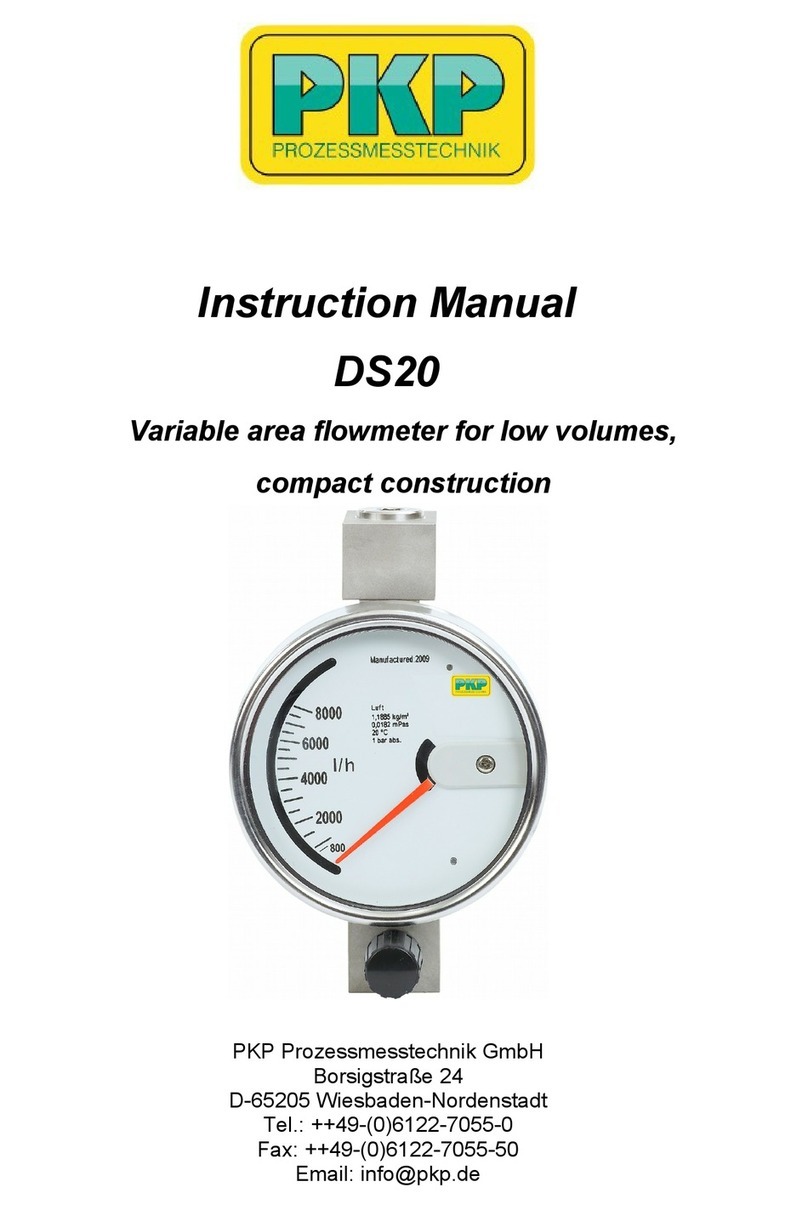
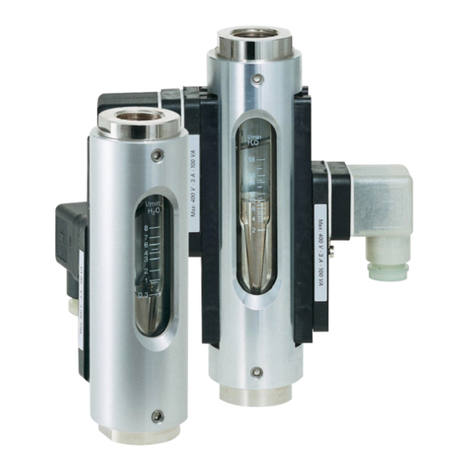
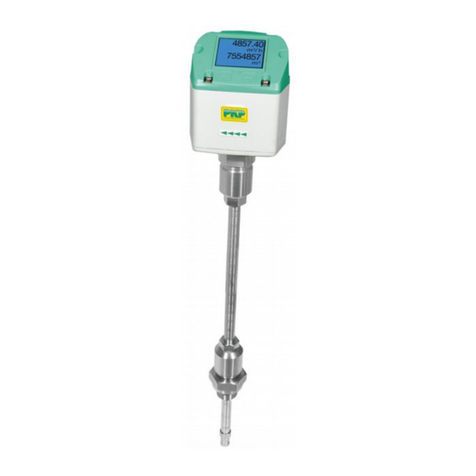
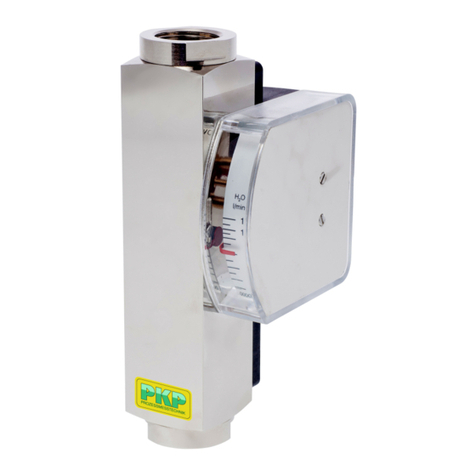
PKP DS08 User manual

Instruction Manual
DS08
Viscosity Compensated Variable Area Flowmeter and
Switch
- mounting independent all metal for high pressures -
PKP Prozessmesstechnik GmbH
Borsigstraße 24
D-65205 Wiesbaden- ordenstadt
Tel.: ++49-(0)6122-7055-0
Fax: ++49-(0)6122-7055-50
Email: info@pkp.de

Table of Contents
Safety Information..................................................................................................................2
Overview................................................................................................................................4
Installation..............................................................................................................................5
Connecting devices equipped with Reed switches................................................................7
Electrical connection..............................................................................................................9
Contacts for DS08.M:...........................................................................................................10
Contacts for DS08.S............................................................................................................12
Setting the switch point........................................................................................................14
Troubleshooting guide.........................................................................................................15
Maintenance / Maintenance plan.........................................................................................16
Degree of protection (IP-Code)............................................................................................16
Returns.................................................................................................................................16
Safety Information
General Instructions
To ensure safe operation, the device should only be operated according to the specifica -
tions in the instruction manual. The requisite Health & Safety regulations for a given
application must also be observed. This statement also applies to the use of accessories.
Every person who is commissioned with the initiation or operation of this device must have
read and understood the operating instructions and in particular the safety instructions!
The liability of the manufacturer expires in the event of damage due to improper use, non-
observance of this operating manual, use of insufficiently qualified personnel and unau-
thorized modification of the device.
Proper Usage
The variable area flowmeters of the DS08 series are used exclusively for monitoring and
indicating continuous flows of liquid media that do not attack the materials used. All other
usage is regarded as being improper and outside the scope of the device.
Process conditions:
Max. pressure: brass version: 300 bar (DS08.M)
250 bar (DS08.S)
st. st. version: 350 bar (DS08.M)
300 bar (DS08.S)
Max. medium-temperature: 100 °C (optional 160 °C)
Ex-devices: acc. to ATEX-declaration
DS08 Instruction manual 03/2020 page 2

In particular, applications in which shock loads occur (for example, pulsed operation)
should be discussed and checked in advance with our technical staff.
In particular applications in which shock loads occur (e.g. intermittent operation) should be
discussed and checked in advance with our technical staff.
Do not use flow monitors with fast-switching valves.
The series DS08 flow meter devices should not be deployed as the sole agents to prevent
dangerous conditions occurring in plant or machinery. Machinery and plant need to be
designed in such a manner that faulty conditions and malfunctions do not arise that could
pose a safety risk for operators.
Dangerous substances
For dangerous media such as e.g. Oxygen, Acetylene, flammable or toxic substances as
well as refrigeration systems, compressors, etc. must comply with the relevant regulations
beyond the general rules.
Qualified Personnel
The DS08 devices may only be installed by trained, qualified personnel who are able to
mount the devices correctly. Qualified personnel are persons, who are familiar with
assembling, installation, placing in service and operating these devices and who are suit-
ably trained and qualified.
Inward Monitoring
Please check directly after delivery the device for any transport damages and deficiencies.
Additional with reference to the accompanying delivery note the number of parts must be
checked.
Claims for replacement or goods which relate to transport damage can only be considered
valid if the delivery company is notified without delay.
DS08 Instruction manual 03/2020 page 3

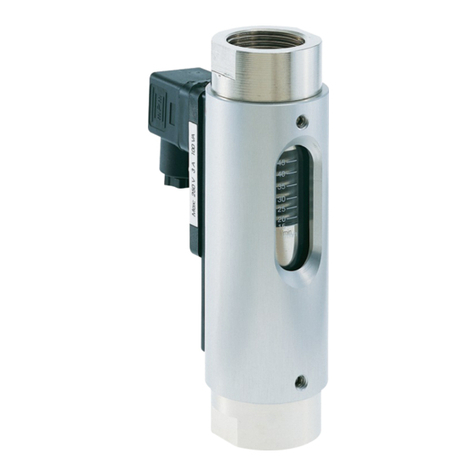
Overview
1: Process connection (outlet)
2: Device body
3: Switch contact and female socket or switch contact
with cable
4: Switch point adjustment scale
5: Display housing with display scale and pointer
mechanism
6: Process connection (inlet)
Switch point adjustment scale:
A scale is applied to the device body, to which the
desired switch point can be adjusted.
Display scale:
On the device, a display housing is mounted with integrated
indicator scale and pointer movement. The pointer on the
scale indicates the current flow value.
DS08 Instruction manual 03/2020 page 4

Installation
Process connection:
The following requirements must be observed to avoid damage to the flow monitor or the
system:
a process connection suitable for the device must be provided by the customer
check connection size and screw-in depth
use suitable sealants (liquid sealants damage the flow monitor if they run in)
seal properly
Ambient conditions:
do not install the flow monitor as a supporting part in a pipe system
the medium must not carry solid bodies. Magnetic particles accumulate on the
magnetic float and impair its function.
Check corrosion and antifreeze agents from the application for compatibility.
Notice:
The following requirements must be observed, otherwise the function of the flow monitor is
impaired or measurement results are falsified:
external magnetic fields will influence the switch contact. Keep sufficient distance to
magnetic fields (e.g. electric motors).
piping, process connections or supports made of ferromagnetic material influence
the magnetic field of the device. Keep a space of minimum 100 mm to those
materials (e.g. steel).
changes in cross-section, branch-offs or arcs in the pipe system impair measuring
accuracy. Ensure that the unimpeded flow sections are maintained (in front of
instrument 10 x nominal diameter, behind the instrument 5 x nominal diameter).
ever reduce the pipe diameter immediately before the device.
in the case of liquid media, take appropriate steps to ensure that the device is ven-
ted.
to ensure measuring accuracy, the device must always be completely filled with
medium.
vent the pipeline. If there are air pockets in the line during the measurement, this
could result in damage to the device caused by hydraulic shock. This may cause
malfunctions.
ensure that the plant is operating without cavitation. Cavitation may result in mal-
functions and damage to the device.
ensure that the medium is flowing continuously. Pulse-like staggered loads could
destroy the device. This may result in serious injury to the user.
if the mediums is contaminated by solids, a strainer must be installed before the
device (e.g. SF00 or SF01 from PKP)
DS08 Instruction manual 03/2020 page 5

Direction of flow:
Only install the flow monitor in one of the positions displayed in the drawing. The medium
must flow in the direction of the arrow (from a low to a high scale value).
DS08 Instruction manual 03/2020 page 6

Connecting devices equipped with Reed switches
Reed switches are basically designed for small contact ratings. To connect a load with
higher power consumption it is indispensable to use a contact protection relay (e.g. our
series MSR01)
If you connect directly a load to a Reed contact the following recommendations should be
considered.
one of the contact rating values printed on the switching unit must not to be exceeded,
even momentarily. This is valid for each of the given values individually: voltage, current,
power. The Reed contact integrated in the switching unit is very sensible to electrical over-
load
Danger of overload is given by the following applications:
•inductive load
•capacitive load
•lamp load
Inductive Load
Inductive loads consist e.g. of relay, contactors, solenoid valves, motors, electric engines,
etc.
WAR I G: Voltage spikes at shut down (up to 10 times of nominal voltage)
Protective measures: (examples)
(Flyback diode, e.g. type 1 4007)
Capacitive Load
Capacitive loads consist e.g. of long connection cables or capacitive consumers.
WAR I G: High current spikes at switching on (this will exceed the nominal current)
Protective measures: (examples)
Limitation of current by a resistor
DS08 Instruction manual 03/2020 page 7

Lamp Load
Lamp loads consist e.g. by light bulbs, starting motors .
WAR I G: High current spikes at switching on, because the glowing spiral has low
resistance at low temperature.
Protective measures: (examples)
Limitation of current by a resistor
or preheating of the glowing
spiral.
Connecting to a PLC
There is no need for protective measures by connecting the Reed switch to a PLC. The
Reed contacts are plated by Tunsten, Gold, and Rhodium located in a protective atmo-
sphere. They can be directly connected to the input terminals of a PLC without problems.
RC-Circuits as protective measures (Boucherot cell Snubber)
In practice the following values of resistor/capacitor cells give good results. evertheless,
the values given in the following tables are only recommendations for general purposes.
But it cannot be guaranteed that for specific applications more adequate Boucherot cells
may exist.
For Reed switches o 10 – 40 VA
Voltage [V] Resistance [Ohm] Capacitance [nF]
230 1500 330
115 470 330
48 220 330
24 100 330
For Reed switches o 40 – 100 VA
Voltage [V] Resistance [Ohm] Capacitance [nF]
230 1000 330
115 470 330
48 100 330
24 47 330
DS08 Instruction manual 03/2020 page 8

Electrical connection
The switch contacts employed in these devices are potential free and do not require a
power source.
Note:
Switch contacts and flow monitor have been optimally harmonized. After replacement of a
switch contact, the switch point must be readjusted.
The contacts open/change when the flow rate falls below the set value.
Grounding o the device:
When installing the device in a pipeline, make sure that the device is grounded via the
pipeline. This prevents dangerous potential differences from occurring
Switching capacity of contacts:
Contact rating
Type Size Contact unction Angle plug IP65 M12x1 plug IP67** Cable connection (1 m) IP67
DS08.M 1/2“ 1 = /O 230 V / 3 A / 60 VA 125 V / 3 A / 60 VA 230 V / 3 A / 60 VA
2 = SPDT 250 V / 1,5 A / 50 VA,
min load: 3 VA
125 V / 1,5 A / 50 VA,
min load: 3 VA
-/-
2X = SPDT for SPS 250 V / 1 A / 60 VA -/- -/-
3SM = Ex- /O* gas: < 30 V / 0,101 A / 0,76 W
dust: < 30 V / 0,25 A / 0,75 W
gas: < 30 V / 0,101 A / 0,76 W
dust: < 30 V / 0,25 A / 0,75 W
3UM = Ex-SPDT* -/-
DS08.S 1/4“
1/2“
3/4“
1“
1 = /O 250 V / 3 A / 100 VA
2 = SPDT 250 V / 1,5 A / 50 VA, min load: 3 VA
2X = SPDT for SPS 250 V / 1 A / 60 VA -/- -/-
3ST5 = Ex- /O, T5*
3ST6 = Ex- /O, T6*
-/- -/- 250 V / 2 A / 60 VA (2 m
cable)
3UT5 = Ex-SPDT, T5*
3UT6 = Ex-SPDT, T6*
-/- -/- 250 V / 1 A / 30 VA,
min load: 3 VA (2 m cable)
* Exact max. switching capacity: see ATEX documents
** Safety class M12x1 plug fo DS08.M: IP65
DS08 Instruction manual 03/2020 page 9

Contacts for DS08.M
Switching contact with connector acc. to EN 175301-803:
Normally Open (NOC) Change Over (COC)
Switch position under no-flow condition Switch position under no-flow condition
The ground-pin is not used The ground-pin is not used
DS08 Instruction manual 03/2020 page 10

Switching contacts with plug connector M12x1 (mating connector not included in deliv-
ery)
Normally Open (NOC) Change Over (COC)
Switch position under no-flow condition Switch position under no-flow condition
Switching contact with cable:
The individual cores of the cable are numbered according to the following connection dia -
gram:
Normally Open (NOC)
Switch position under no-flow condition
DS08 Instruction manual 03/2020 page 11

Contacts for DS08.S
Switching contact with connector acc. to EN 175301-803:
Normally Open (NOC) Change Over (COC)
Switch position under no-flow condition Switch position under no-flow condition
The ground-pin is not used The ground-pin is not used
DS08 Instruction manual 03/2020 page 12

Switching contacts with plug connector M12x1 (mating connector not included in
delivery)
Normally Open (NOC) Change Over (COC)
Switch position under no-flow condition Switch position under no-flow condition
Switching contact with cable:
The individual cores of the cable are numbered according to the following connection dia -
gram:
Normally Open (NOC) Change Over (COC)
Switch position under no-flow condition Switch position under no-flow condition
DS08 Instruction manual 03/2020 page 13

Setting the switch point
The following instructions describe the procedure for a ormally Open Contact ( OC).
The actual state (open or closed), can be determined using a continuity meter.
1. Loosen the switch contact set screws (1) using a
screwdriver
2. Slide the switch contact to the flow value to be
monitored. Make sure that the arrow on the switch
contact label is in exact alignment with the desired
flow value on the body scale.
3. Re-tighten the switch contact housing set screws (1)
using a screwdriver. Observe the correct tightening
torque of 0,4 m.
The set switch point corresponds to the switch-off point of the switch contact by decreas-
ing flow.
DS08 Instruction manual 03/2020 page 14

Troubleshooting guide
Fault description Cause Remedy
The switch contact does not
switch
o medium flowing through
flow monitor
Check that medium is
flowing through the pipeline
Flow is too low or the switch
contact is set too high
Adjust the switch contact to
a lower flow rate
Use the device at another
measuring range
Increase the flow rate
Incorrect reduction fitting or
pipe diameter is too small
Correct pipe diameter
Float is stuck Disassemble and clean the
device
Switch contact is defective Remedy the cause of the
defect (short-circuit,
overload)
Replace the switch contact
Switch contact is
permanently switched
Flow is too high or the switch
contact is set too low
Reduce the flow
Adjust the switch contact to
a higher flow rate
Use the device at another
measuring range
Switch contact is
permanently switched
Float is stuck Disassemble and clean the
device
Switch contact is defective Remedy the cause of the
defect (short-circuit,
overload)
Replace the switch contact
The switch point is not the
same as the actual flow rate
Improper scale installed for
media used
Request proper conversion
table or scale for media
used
Incorrect reduction fitting or
pipe diameter is too small
Correct pipe diameter
Device is dirty Disassemble and clean the
device
Device is defective Remove device from system
and contact PKP
DS08 Instruction manual 03/2020 page 15

Maintenance / Maintenance plan
Intervals or replacing wear parts
DS08 type flow monitors require very little maintenance due to the small number of mov-
ing parts. The intervals for the replacement of wear parts depend significantly on the oper -
ating conditions as well as on the composition of the medium flowing through the device.
For this reason, no intervals have been set by the manufacturer. The operator must
determine suitable intervals based on the local conditions and circumstances.
Maintenance work:
Visual inspection for dirt/soiling
Visual inspection for free movement of float
Visual inspection for leaks from the device
Check function of switch contact
For detailed in ormation on maintenance and cleaning o the device, please re er to
a separate manual. Please ask or them i required.
Degree of protection (IP-Code)
Process connection Speci ication o
connection material
Degree o protection
E 175301-803 with gland Ø of connection cable:
6-8 mm
IP65
M12x1 (DS08.M) Plug connector M12x1 IP65
M12x1 (DS08.S) Plug connector M12x1 IP67
Cable -- IP67
Returns
For returns please contact us:
PKP Prozessmesstechnik GmbH
Info@pkp.de
+49 (0) 6122-7055-0
DS08 Instruction manual 03/2020 page 16

Flow Measurement and Monitoring
DS08
Viscosity Compensated Variable
Area Flow Meter and Switch
Mounting Independent
for igh Pressure Applications
•for viscous media up to 600 cSt
•mounts in any position without recalibration
•compact design, high switching accuracy
•version in brass or stainless steel
•very small switching hysteresis
•robust design without glass measuring tube
•suitable for high operating pressures
• Ex- version acc. to ATEX optional
•analogue transmitter 4...20 mA available
Description:
The flow meter and switch model DS08 works according to a
modified variable area principle. The float is guided in a cylin-
drical measuring tube by means of a spring. The flowing
medium moves the float in the flow direction.
An e ternally mounted pointer indicator is magnetically cou-
pled to the float and thus, following the float position, indi-
cates the flow rate on a scale. A Reed contact is mounted
outside the meter in a sealed housing. When the float reaches
the position of the Reed contact the switch will close. With
higher flows the float moves further upward until it reaches a
built-in float stop, still keeping the switch closed. This ensures
a bistable switch function at any time.
Viscosity compensation, mounting position and
reliability:
The built-in spring and the magnetic float guarantee an abso-
lute reliability of the meter. This spring, which pushes the float
back towards its zero position against the flow makes it
possible to use the meter in any mounting position. The
spring is artificially aged, thus eliminating the need for
recalibration to the different mounting positions. The strong
spring and an orifice in the float work together to
limit the effects of viscosity changes to an absolute minimum
compared to regular variable area flow meters.
Typical applications:
The variable area flow meter and switch model DS08 is used
for measuring and monitoring the flow of viscous liquids, i. e.
in central lubricating systems, any other lubricating circuitry,
hydraulics, transformer oils etc.
PKP Prozessmesstechnik GmbH
Borsigstr. 24 • D-65205 Wiesbaden
S +49 (0) 6122-7055-0 • T +49 (0) 6122 7055-50
[email protected] • www.pkp.de
20200302

Models:
Measuring range: 0,1–0,8 l/min ... 35–110 l/min
liquids with viscosity up to
600 cSt,
measuring range 01/03/06 up to 200 cSt
Materials: brass or stainless steel
Technical Data:
Ma . pressure: brass version:
300 bar (DS08.M.)
250 bar (DS08.S.)
stainless steel version:
350 bar (DS08.M.)
300 bar (DS08.S.)
Pressure drop: 0,02 bar–0,2 bar (DS08.M)
0,02 bar – 0,4 bar (DS08.S.)
Viscosity range: 30 cSt to 600 cSt
Ma . media-
temperature: 100 °C (optional 160 °C)
E -devices under. ATEX- identification
Operating temp.: 70 °C with analogue transmitter AZ06
Electr. connection: angle plug acc. to DIN 43650,
E -contact with 2 m cable
optional: 1 m cast cable
round plug M12 1 acc. to EN 50044,
angle plug with LED or glow lamp
Accuracy: ± 10 % of full scale
Materials:
Brass version:
Wetted parts:
measuring tube: brass (nickel plated outside)
spring: stainless steel 1.4571
seals*: FKM (optional NBR, EPDM)
magnet: hard ferrite
all other wetted parts: brass
Stainless steel version (1.4571):
Wetted parts:
seals*: FKM (optional NBR, EPDM)
magnet: hard ferrite
all other wetted parts: stainless steel 1.4571
*only with reduced connection
Order Code:
Order number: DS08.
Variable area flow meter
and switch
S. 4. 1. 1. 06. 1. 1. 1. 0
Models:
M = miniature
S = standard
Connection:
1R = reduction to G ¼
only for measuring range 01-03
and 06-08
2R = reduction to G ½,
only for measuring range 06-12A
2 = female thread G 1/2
(Standard for DS08.M)
3R = reduction G ¾
only for measuring range 06-15A
4 = female thread G 1
(standard for DS08.S)
Materials:
1 = brass
2 = stainless steel 1.4571
Scale:
1 = for viscous medium
Measuring ranges: E tended
measuring ranges.:
only DS08.M:
01 = 0,1–0,8 l/min (ma . 200 cSt)
03 = 0,5–1,6 l/min (ma . 200 cSt)
04 = 0,8–3 l/min
05 = 2–7 l/min
only DS08.S:
06 = 0,1–0,8 l/min (ma . 200 cSt)
07 = 0,5–1,5 l/min
08 = 1–4 l/min
09 = 2–8 l/min
10 = 3–10 l/min
11 = 5–15 l/min
12 = 8–24 l/min 12A = 1–20 l/min
13 = 10–30 l/min 13A = 4–40 l/min
14 = 15–45 l/min 14A = 5–50 l/min
15 = 20–60 l/min 15A = 8–60 l/min
16 = 30–90 l/min 16A = 12–70 l/min
17 = 35–110 l/min 17A = 15–80 l/min
Flow indicator:
0 = switch only, without flow indicator
1 = flow meter and -switch, with flow indicator
Number of contacts:
0 = without contact (only for devices with display and/or AZ06)
1 = 1 contact
2 = 2 contacts
Contact function / analogue output:
(contact or analogue transmitter available)
0 = without
1 = N/O
2 = SPDT
2X = SPDT for SPS application
3ST5 = E -N/O, T5 (100 °C), with 2 m cable, for DS08.S
3ST6 = E -N/O, T6 (80 °C), with 2 m cable, for DS08.S
3UT5 = E -SPDT, T5 (100 °C), with 2 m cable, for DS08.S
3UT6 = E -SPDT, T6 (80 °C), with 2 m cable, for DS08.S
3SM = E -N/O for DS08.M
3UM = E -SPDT for DS08.M
AZ06.1.I = analogue transmitter 4...20 mA
AZ06.1.V = analogue transmitter 0...10 V
Options:
0 = without
1 = please specify in plain te t
HT = high temperature version 160 °C
M12 = round plug M12 1 acc. to EN 50044 (Tma . 85 °C)
K = cable version 1 m, 2 m , 5 m, or 10 m
PKP Prozessmesstechnik GmbH
Borsigstr. 24 • D-65205 Wiesbaden
S +49 (0) 6122-7055-0 • T +49 (0) 6122 7055-50
[email protected] • www.pkp.de
Flow

Dimensions:
Contacts:
The contact opens/changes, if the flow level has fallen under the
adjusted value.
*
*E act ma . switching capacity: see ATEX documents
** Safety class M12 1 plug for DS08.M: IP65
Dimensions:
Type Installation dimensions [mm] Weight [g]
with/with-
out
display
SW D A1 A4 G T L
DS08.M
DS08.S
27
40
31
40
48
57
48
68
G 1/2
G 1
14
17
90
130
350/---
1000/1050
with reduction
DS08.M G 1/4
G 3/8
14
14
98
108
400/---
450/---
DS08.S G 1/4
G 1/2
G 3/4
21
21
21
152
152
152
1100/1150
1100/1150
1100/1150
ATEX-designations:
Contacts 3SM and 3UM for DS08.M:
ATEX II 2 G E ib IIC and ATEX II 2 D E ib IIIC
for connection to certified intrinsically safe circuit,
temperature range -5 °C < Tservice < 45 °C, Li=0, Ci=0
Contacts 3ST5, 3ST6, 3UT5, 3UT6 for DS08.S.:
ATEX II 2 G E mb II T6, ATEX II 2 D E tD A21 IP67 T80 °C
ATEX II 2 G E mb II T5, ATEX II 2 D E tD A21 IP67 T100 °C
(only with cable connection, standard 2 m
PKP Prozessmesstechnik GmbH
Borsigstr. 24 • D-65205 Wiesbaden
S +49 (0) 6122-7055-0 • T +49 (0) 6122 7055-50
[email protected] • www.pkp.de
Contact rating
Type Size Contact function Angle plug IP65 M12 1 plug IP67** Cable connection (1 m) IP67
DS08.M 1/2“ 1 = N/O 230 V / 3 A / 60 VA 125 V / 3 A / 60 VA 230 V / 3 A / 60 VA
2 = SPDT 250 V / 1,5 A / 50 VA,
min load: 3 VA
125 V / 1,5 A / 50 VA,
min load: 3 VA
-/-
2X = SPDT for SPS 250 V / 1 A / 60 VA -/- -/-
3SM = E -N/O* gas: < 30 V / 0,101 A / 0,76 W
dust: < 30 V / 0,25 A / 0,75 W
gas: < 30 V / 0,101 A / 0,76 W
dust: < 30 V / 0,25 A / 0,75 W
3UM = E -SPDT* -/-
DS08.S 1/4“
1/2“
3/4“
1“
1 = N/O 250 V / 3 A / 100 VA
2 = SPDT 250 V / 1,5 A / 50 VA, min load: 3 VA
2X = SPDT for SPS 250 V / 1 A / 60 VA -/- -/-
3ST5 = E -N/O, T5*
3ST6 = E -N/O, T6*
-/- -/- 250 V / 2 A / 60 VA (2 m cable)
3UT5 = E -SPDT, T5*
3UT6 = E -SPDT, T6*
-/- -/- 250 V / 1 A / 30 VA,
min load: 3 VA (2 m cable)

Accessories (see separate data sheets):
• Needle valves SNV01, SNV02
• Ball valves SKG01, SKG02
• Dirt traps SF00, SF01
• Protection relay MSR01
• M12 Plug connector PVC-cable SM12
Notes:
The specified measuring/switching ranges apply when the
instrument is installed vertically and the flow rate is from bottom
to top.
Other installation positions or operating densities deviating from
the specified specifications increase the specified measuring
error.
Special scales for different media and operating conditions are
available on request.
The specified switching points are shut-off points at falling flow
rates. Please note that the switch-on points are higher due to
the hysteresis.
For applications where pressure surges are to be e pected,
please contact PKP!
PKP Prozessmesstechnik GmbH
Borsigstr. 24 • D-65205 Wiesbaden
S +49 (0) 6122-7055-0 • T +49 (0) 6122 7055-50
[email protected] • www.pkp.de
This manual suits for next models
2
Table of contents
Other PKP Measuring Instrument manuals
Popular Measuring Instrument manuals by other brands

Nidec
Nidec DT-501X instruction manual

Agilent Technologies
Agilent Technologies WireScope 350 user manual

GREISINGER
GREISINGER GTF 103-Ex Series operating manual

Hanna Instruments
Hanna Instruments HI749 instruction manual

Protimeter
Protimeter BLD7705 quick guide

DeltaTRAK
DeltaTRAK FlashLink 22370 quick start guide