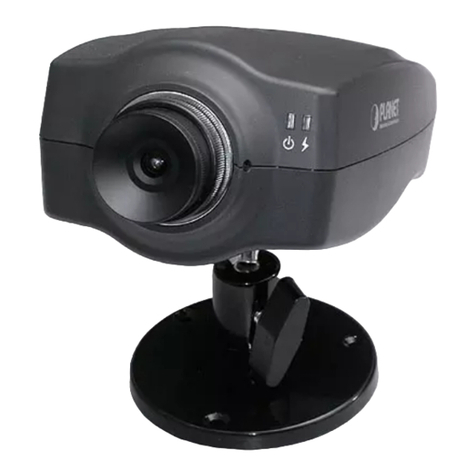
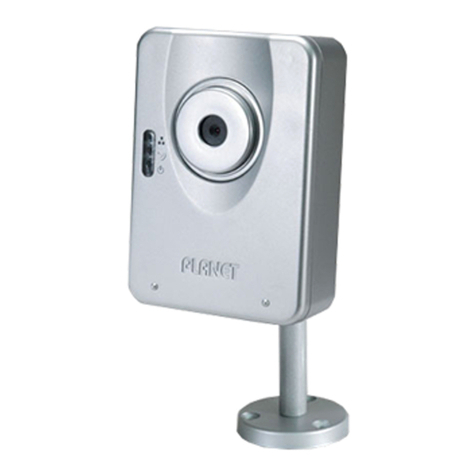
Planet ICA-100C User manual

Internet Camera
ICA-100C
User’s Manual
Version 1.1

1
Copyright
Copyright (C) 2005 PLANET Technology Corp. All rights reserved.
The products and programs described in this User’s Manual are
licensed products of PLANET Technology, This User’s Manual
contains proprietary information protected by copyright, and this
User’s Manual and all accompanying hardware, software, and
documentation are copyrighted.
No part of this User’s Manual may be copied, photocopied,
reproduced, translated, or reduced to any electronic medium or
machine-readable form by any means by electronic or mechanical.
Including photocopying, recording, or information storage and
retrieval systems, for any purpose other than the purchaser's
personal use, and without the prior express written permission of
PLANET Technology.
Declaration of Conformity
This device complies with part 15 of the FCC Rules. Operation is
subject to the following two conditions:
(1) this device may not cause harmful interference, and
(2) this device must accept any interference received, including
interference that may cause undesired operation.
Disclaimer
PLANET Technology does not warrant that the hardware will work
properly in all environments and applications, and makes no
warranty and representation, either implied or expressed, with
respect to the quality, performance, merchantability, or fitness for
a particular purpose.
PLANET has made every effort to ensure that this User’s Manual
is accurate; PLANET disclaims liability for any inaccuracies or
omissions that may have occurred.
Information in this User’s Manual is subject to change without
notice and does not represent a commitment on the part of
2
PLANET. PLANET assumes no responsibility for any inaccuracies
that may be contained in this User’s Manual. PLANET makes no
commitment to update or keep current the information in this
User’s Manual, and reserves the right to make improvements to
this User’s Manual and/or to the products described in this User’s
Manual, at any time without notice.
If you find information in this manual that is incorrect, misleading,
or incomplete, we would appreciate your comments and
suggestions.
Trademarks
The PLANET logo is a trademark of PLANET Technology. This
documentation may refer to numerous hardware and software
products by their trade names. In most, if not all cases, these
designations are claimed as trademarks or registered trademarks
by their respective companies.
Revision
User’s Manual for PLANET Internet Camera
Model: ICA-100C
Rev: 1.1 (August,2005)
Part No.EM-ICA100CV1

3
TABLE OF CONTENTS
ABOUT THIS GUIDE............................................................5
CHAPTER 1 INTRODUCTION................................................6
FEATURES AND BENEFITS .........................................................7
UNPACKING THE PACKAGE .......................................................9
SYSTEM REQUIREMENT...........................................................10
PHYSICAL DESCRIPTION..........................................................11
CHAPTER2HARDWARE INSTALLATION ..............15
A
TTACHING THE
C
AMERA TO THE
S
TAND
...............................15
CONNECTING THE ETHERNET CABLE ......................................16
ATTACHING THE POWER SUPPLY............................................16
CHAPTER3SECURITY......................................................17
CHAPTER4APPLICATION OF THECAMERA.......18
APPLICATIONS.........................................................................19
APPLICATION DIAGRAMS OF THE CAMERA.............................20
CHAPTER5USING THE CAMERA...............................22
WEB CONFIGURATION.............................................................22
SYSTEM ADMINISTRATION......................................................24
VIEW VIDEO –ACTIVEXMODE ..............................................41
VIEW IMAGE –JAVA MODE.....................................................43
CHAPTER 6 IPVIEW PRO..................................................45
GETTING STARTED ..................................................................45
USING IPVIEW PRO .................................................................49

4
CONFIGURING THE SYSTEM.....................................................54
CHAPTER 7 APPENDIX ......................................................68
AFREQUENTLY ASKED QUESTIONS........................................68
BPING YOUR IP ADDRESS.....................................................71
CTROUBLE SHOOTING............................................................72
DTIME ZONE TABLE...............................................................76
EXPLUG CONTROL INSTALLATION.........................................78
FADJUST INTERNET CAMERA FOCUS .....................................82
GSPECIFICATION.....................................................................83
HGLOSSARY OF TERMS ..........................................................85

5
ABOUT THIS GUIDE
This manual provides instructions and illustrations on how to use
your ICA-100C Internet Camera, includes:
zChapter 1, Introduction, provides the general information
on the camera.
zChapter 2, Hardware Installation, describes the hardware
installation procedure for the camera.
zChapter 3, Security, explains the security feature of the
camera.
zChapter 4, Application of the Camera, provides the
illustrations of the camera’s applications.
zChapter 5, Using the Camera, guides you through the
configuration using the web browser.
zChapter 6, IPView Pro, helps you to install and use the
software.
zChapter 7, Appendix.
Please note that the illustrations or setting values in this manual
are FOR YOUR REFERENCE ONLY. The actual settings and
values depend on your system and network. If you are not sure
about the respective information, please ask your network
administrator or MIS staff for help.

6
1
Chapter 1 INTRODUCTION
Thank you for purchasing the ICA-100C Internet Camera, a
camera device that can be connected directly to an Ethernet or
Fast Ethernet network. Compared to the conventional PC Camera,
the Internet Camera features a built-in CPU and web-based
solutions that can provide a cost-effective solution to transmit
real-time high-quality video images and sounds for monitoring.
The Internet Camera can be managed remotely, accessed and
controlled from any PC/Notebook over the Intranet or Internet via
a web browser.
The simple installation procedures and web-based interface allow
you to integrate it into your network easily. With comprehensive
applications supported, the Internet Camera is your best solution
for remote monitor, high quality, and high performance video
images.

7
Features and Benefits
Simple To Use
The Internet Camera is a standalone system with built-in CPU
requiring no special hardware or software such as PC frame
grabber cards. The Internet Camera supports both ActiveX mode
(for Internet Explorer users) and Java mode (for Internet Explorer
and Netscape Navigator users). Therefore, all that is required is a
web browser software such as Internet Explorer 5.0 or above or
Netscape 6.0 or above. Just plug and view the picture from your
Internet Camera with a valid IP Address.
Support Variety of Platforms
The ICA-100C supports TCP/IP networking, SMTP e-mail,
HTTP and other Internet related protocols, and can be utilized in
a mixed operating system environment such as Windows, UNIX,
and Mac. It can be integrated easily into other www/Intranet
applications.
Web Configuration
Applying a standard web browser, the administrator can configure
and manage the Internet Camera directly from its own web page
via the Intranet or Internet. Up to 64 users name and password
are permitted with privilege setting controlled by the
administrator.

8
Remote Utility
The powerful IPView Pro application assigns the administrator
with a pre-defined user ID and password, allowing the
administrator to modify the Internet Camera settings from the
remote site via Intranet or Internet. When new firmware is
available, you can also upgrade remotely over the network for
added convenience. Users are also allowed to monitor the image,
and take snapshots.
Broad Range of Applications
With today’s high-speed Internet services, the Internet Camera
can provide the ideal solution for live video images over the
Intranet and Internet for remote monitoring. The Internet Camera
allows remote access from a web browser for live image viewing
and allows administrator to manage and control the Internet
Camera anywhere and any time in the world. Apply the Internet
Camera to monitor various objects and places such as homes,
offices, banks, hospitals, child-care centers, amusement parks and
other varieties of industrial and public monitoring. The Internet
Camera can also be used for intruder detection; in addition, it can
capture still images for archiving and many more applications.

9
Unpacking the Package
Unpack the package and check all the items carefully. In addition
to this User’s Guide, be certain that you have:
PLANET Internet Camera x 1
Installation CD-ROM x 1
Quick Installation Guide x 1
Power Adapter x 1
Camera Stand x 1
RJ-45 Ethernet Cable x 1
If any item contained is damaged or missing, please contact your
local dealer immediately. Also, keep the box and packing
materials in case you need to ship the unit in the future.

10
System Requirement
Networking
10Base-T Ethernet or 100Base-TX Fast Ethernet.
Accessing the Camera
For Web Browser Users
Operating System: Microsoft® Windows® 98SE/ME/
2000/XP
CPU: Intel Pentium II, 266 MHz or above
Memory Size: 32MB (64MB recommended)
Resolution: 800x600 or above
Internet Explorer 5.0 or above (ActiveX & JAVA Mode –
Image View for Windows OS and JAVA Mode – Image
View for other OS)
Netscape 6.0 or above (JAVA Mode – Image View)
For IPView Pro Application Users
Operating System: Microsoft® Windows® 98SE/ME/
2000/XP.
CPU: Intel Pentium III, 450 MHz or above
Memory Size: 128 MB (256 MB recommended)
Resolution: 1024x768 or above

Physical Description
This section describes the externally visible features of the
Internet Camera.
Front Panel
1. Power LED
2. Link LED
1. Power LED
The Power LED is positioned on the right side of the Internet
Camera’s lens while facing the Internet Camera.
A steady BLUE light confirms that the Internet Camera is
powered on.
2. Link LED
11
The Link LED is positioned on the right side of the Internet
Camera’s lens while facing the Internet Camera. It is located
right of the Power LED

A steady ORANGE light confirms that the camera has good
connection to LAN connectivity.
Dependent on the data traffic the LED will begin to flash to
indicate that the Internet Camera is receiving/sending data
from/to the network.
Rear Panel
2. Reset Button
12
1. Network Cable Connector 3. DC Power Connector
1. Network Cable Connector
The Internet Camera’s rear panel features an RJ-45 connector for
connections to 10Base-T Ethernet cabling or 100Base-TX Fast
Ethernet cabling (which should be Category 5 twisted-pair cable).
The port supports the N-Way protocol, allowing the Internet
Camera to automatically detect or negotiate the transmission
speed of the network.

13
2. Reset Button
Reset will be initiated when the reset button is pressed once, and
Power LED begins to flash.
Factory Reset will be initiated when the reset button is pressed
continuously for three seconds or when Power LED begins to
light up. Release the reset button and the Power LED will begin
to flash, indicating the Internet Camera is changing to factory
reset. The IP address will return to the default setting as
192.168.0.20.
3. DC Power Connector
The DC power input connector is located on the Internet
Camera’s rear panel, and is labeled DC5V with a single jack
socket to supply power to the Internet Camera. Power will be
generated when the power supply is connected to a wall outlet.

Top Panel
Top Panel
14
Screw Hole
Screw Hole
Located on the top/bottom panel of the camera, the screw hole is
used to connect the camera stand onto the camera by attaching the
screw head on the camera stand into the screw hole of the camera.

15
2
Chapter 2 HARDWARE
INSTALLATION
Attaching the Camera to the Stand
The Internet Camera comes with
a camera stand (optional) with a
swivel ball screw head that can
be attached to the Internet
Camera's bottom screw hole.
Attach the camera stand to the
Internet Camera and station it
for your application. There are
three holes located in the base of
the camera stand allowing the
Internet Camera to be mounted
on the ceiling or any wall
securely.

Connecting the Ethernet cable
Connect an Ethernet cable to
the network cable connector
located on the Internet
Camera’s rear panel, and then
attach it to the network.
Attaching the Power Supply
Attach the external power
supply to the DC power input
connector located on Internet
Camera’s rear panel, and then
connect it to your local power
supply.
TIP: You can confirm power source is supplied from the LED
indicators label Power on the Internet Camera is illuminated.
16

17
3
Chapter 3 SECURITY
To ensure the highest security and prevent unauthorized usage of
the Internet Camera the Administrator has the exclusive privilege
to access the System Administration for settings and control
requirements to allow users the level of entry and authorize the
privileges for all users. The Internet Camera supports multi-level
password protection and access to the Internet Camera is strictly
restricted to defined user who has a “User Name” and “User
Password” that is assigned by the Administrator.
The administrator can release a public user name and password so
when remote users access the Internet Camera they will have the
right to view the images transmitted by the Internet Camera.
NOTE: Since the default settings are Null String, it is highly
recommended to set the "Admin ID" and "Admin Password"
when you are the first time to use the Internet Camera. Once
the ID and Password are defined, only the administrator has
the access to manage the Internet Camera. This procedure
should be done as soon as possible since the security features
with the Internet Camera will not be enabled until the "Admin
ID" and "Admin Password" is defined.

18
4
Chapter 4 APPLICATION OF THE
CAMERA
The Internet Camera can be applied in wide variety of
applications. With the built-in CPU, it can work as a standalone
system that provides a web-based solution transmitting high
quality video images and sounds for monitoring purposes. It can
be managed remotely, accessed and controlled from any PC
desktop over the Intranet or Internet via a web browser. With the
easy installation procedure, real-time live images will be available.
In addition, once the Internet Camera is installed coupled with the
IPView Pro application, you can further expand the scope of the
Internet Camera.
The following section will provide the typical applications for the
Internet Camera along with the IPView Pro application, and also
includes some basic knowledge to assist in the installation and
configuration of the Internet Camera.

19
Applications
zMonitoring of local and remote places and objects such as
construction sites, hospitals, amusement parks, schools and
day-care centers through the use of a web browser.
zCapture multiple frame images from the IPView pro
application.
zConfigure the camera to upload image or send-email
messages with a single frame image.
Other manuals for ICA-100C
1
Table of contents
Other Planet IP Camera manuals

Planet
Planet ICA-HM220W User manual

Planet
Planet ICA-HM100 User manual

Planet
Planet ICA-3260 User manual

Planet
Planet ICA-HM240 User manual

Planet
Planet ICA-HM125 User manual

Planet
Planet ICA-HM136 User manual

Planet
Planet ICA-HM317 User manual

Planet
Planet ICA-501 User manual

Planet
Planet ICA-HM830W User manual

Planet
Planet ICA-108 User manual

Planet
Planet ICA-312 User manual

Planet
Planet ICA-E SERIES User manual

Planet
Planet ICA-500 User manual

Planet
Planet ICA-600 User manual

Planet
Planet ICA-HM351 User manual

Planet
Planet ICA-650 User manual

Planet
Planet ICA-M230 User manual

Planet
Planet ICA-500 User manual

Planet
Planet ICA-3110 User manual

Planet
Planet ICA-2200 User manual