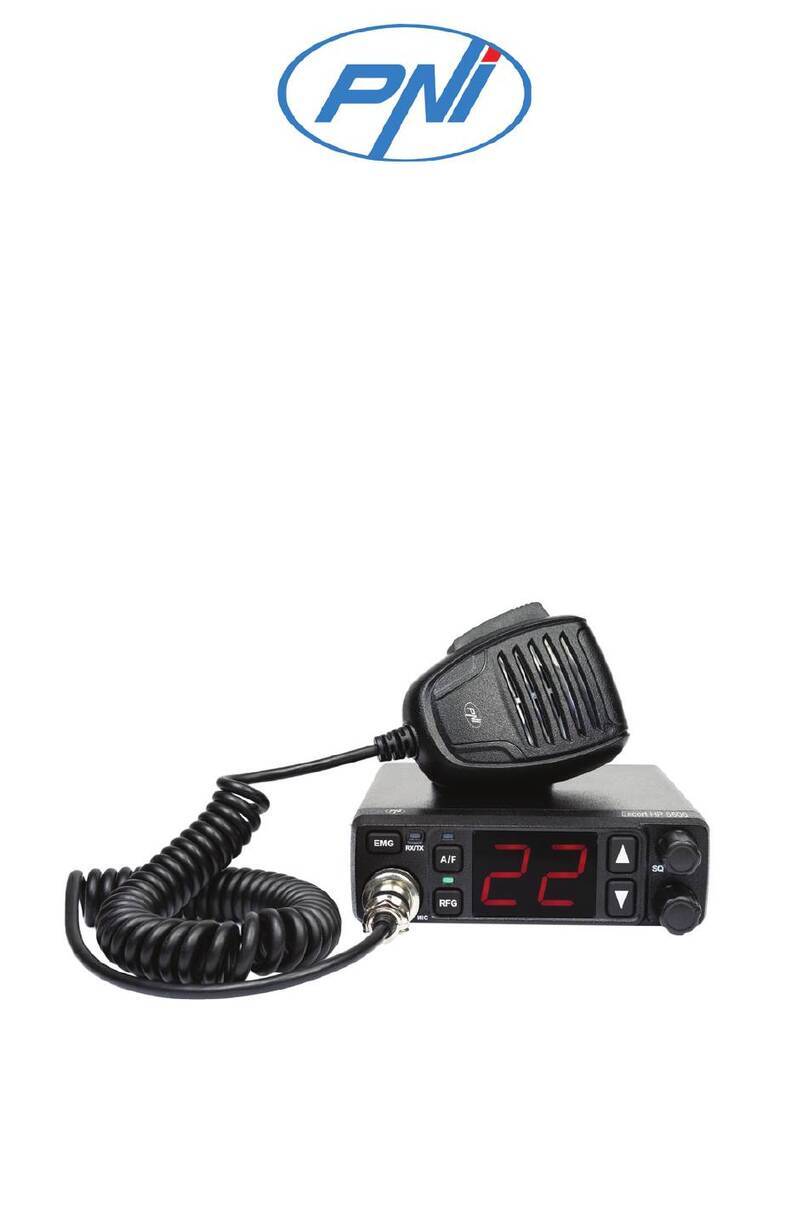
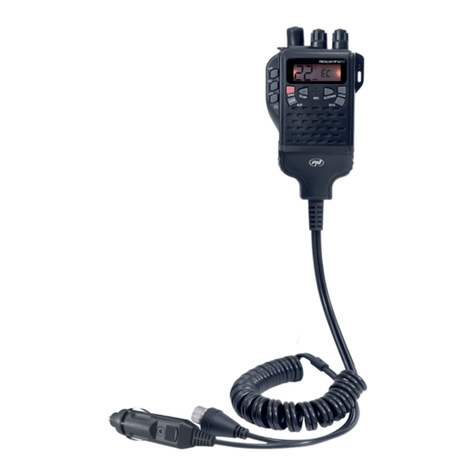
PNI Escort HP 82 User manual

PNI Escort HP 82
EN
BG
DE
ES
FR
HU
IT
NL
PL
RO
Portable CB radio
Преносимо CB радио
Tragbares CB-Funkgerät
Radio CB portátil
Radio CB portable
Hordozható CB rádió
Radio CB portabile
Draagbare CB-radio
Przenośne radio CB
Statie radio CB
EN User manual ......................................................... 3
BG Ръководство за употреба ............................. 13
DE Benutzerhandbuch .............................................. 24
ES Manual de usuario ............................................... 35
FR Manuel utilisateur ............................................... 45
HU Használati utasítás .............................................. 55
IT Manuale utente .................................................. 65
NL Handleiding ........................................................ 75
PL Instrukcja obsługi ............................................... 86
RO Manual de utilizare ............................................. 96


3
English
Safety warnings
Read the following warnings to prevent fire, personal injury, or damage
to the CB radio or antenna.
Do not try to adjust the CB radio while driving, it is dangerous.
Do not position the CB radio on an excessively dusty, wet or
unstable surface.
Do not connect the antenna during transmission, risk of burns or
electric shock.
Keep your distance from devices that create interference (such as:
TV, generator, etc.)
Those who use pacemakers are advised to keep their distance from
the antenna during transmission and especially not to touch it.
Do not bring metal objects close to the internal electrical part of
the CB radio; danger of electric shock.
Avoid exposing the CB radio to temperatures lower than -26°C and
higher than +80°C. The temperature inside a vehicle can sometimes
exceed 80°C, which can cause irreparable damage in case of prolonged
exposure. Do not expose the CB radio to sunlight for a long time.
Do not put anything on the CB radio, it will prevent it from cooling
down.
Check if you have a suciently charged car battery to avoid a rapid
discharge.
It is important to stop the CB radio before starting the engine, to
avoid damage caused by the high voltage at start-up.
When replacing the fuse, you must use a fuse of the same type as
the original one.
If an abnormal smell or smoke comes out of the CB radio, turn o
the power immediately.
Do not transmit for a long time, the CB radio may heat up and
malfunction.

4
English
Important note!
In some countries it may be necessary to present the license that will
certify the right to use the CB band. Please check the local legislation
and the table at the end of the manual.
Keys and functions
Description Short press Long press
1Antenna
2On/O
Volume
3Status LED
4LCD screen
5PTT Transmission

5
English
6HI/LO High/low power
selection
7Backlight On/O
8Monitor
9FUNC Menu
10 ▲Increase channel
number
Continuous increase
in channel number
11 DW Enable/Disable Dual
Watch Dual Watch setting
12 LCR/VOX Last channel recall VOX control
13 ▼Decrease channel
number
Continuous
decrease in channel
number
14 SQ/ASQ SQ/ASQ level
selection
Switch between SQ/
ASQ
15 NRC/LOCK
Enable/Disable
NRC (Noise
Reduction Circuit)
Key lock
16 AM/FM/
BAND
Switch between
AM/FM Band selection
17 EMG/SC Emergency channel Enable/Disable
channel scanning
18 MIC
19 Speaker
20
2 pins PNI-K
headset
connector

6
English
21
USB-C port
for battery
charging
22 Belt clip
Usage instructions
Turn the radio on/o
Turn the knob on the top of the CB radio [2] clockwise to turn it on.
The CB radio starts from the previous mode of use.
Turn the knob on the top of the CB radio [2] counterclockwise to turn
it o.
Volume control
After turning the CB radio on, continue to turn the knob [2] to adjust
the volume to the desired level.
Channel selection
Briefly press the ▲or ▼key to increase or decrease the channel
number, until you reach the desired channel.
Long press the ▲or ▼key to quickly increase or decrease the channel
number.

7
English
Squelch (SQ) level selection
Briefly press the SQ/ASQ [14] key. On the screen, the SQ icon and
the digits corresponding to the level flash. 25 levels of manual squelch
are available, from 00 (squelch o) to 25 (highest level).
When the digits corresponding to the level are flashing, press the ▲or
▼keys to select the desired level.
To confirm the selection, press the SQ/ASQ key or wait 5 seconds.
Automatic squelch (ASQ) level selection
Long press the SQ/ASQ [14] key to switch to ASQ mode. On the
screen, the SQ icon becomes ASQ.
On the screen, the ASQ icon and the digits corresponding to the
level flash. There are 5 levels of manual squelch available, from 01 (the
lowest level) to 05 (the highest level).
When the digits corresponding to the level are flashing, press the ▲or
▼keys to select the desired level.
To confirm the selection, press the SQ/ASQ key or wait 5 seconds.
AM/FM selection
Press the AM/FM/BAND [16] key to switch between AM and FM.
The corresponding icon will appear on the screen.
Note: Not all standards support both types of modulation. If the band
you are in does not support AM or FM, pressing the AM/FM/BAND
key will not produce any change.

8
English
Emergency channels (9/19)
Press the EMG/SC [17] key to switch to channel 09. The EMG icon
appears on the screen.
Press the EMG/SC key again to switch to channel 19.
Press the EMG/SC key again to exit Emergency mode. The EMG icon
disappears from the screen.
Key lock
Long press the NRC/ key to activate the key lock function. The
icon appears on the screen. When pressing any key you will hear
a warning beep and the icon will blink. All radio’s keys are locked,
except the PTT key.
Long press again the NRC/ key to disable the key lock function. The
icon will disappear from the screen.
Channel scan
Long press the EMG/SC [17] key. The SC icon blinks on the screen.
The channel scanning starts immediately.
During scanning, you can press the ▲or ▼key to change the scanning
direction.
Long press the EMG/SC key or the PTT key to stop scanning. The SC
icon disappears from the screen.
High/Low power selection
Briefly press the HI/LO [6] key on the side of the CB radio to change
between high (4W) and low (1.5W) transmission power. The HI or LO

9
English
icon will appear on the screen.
Dual Watch
Long press the DW [11] key. The DW icon and the digits corresponding
to the channel blink on the screen. Press the ▲or ▼key to choose
the second channel you want to monitor. Press the DW key again to
save and exit.
To activate the Dual Watch mode, briefly press the DW key. The two
channels set for simultaneous monitoring will be displayed successively
on the screen. The DW icon is blinking. Short press the DW key to exit.
NCR (Noise Reduction Circuit)
Briefly press the NRC/ [15] key to activate the background noise
reduction function. The NRC icon appears on the screen.
Briefly press the NRC/ key again to disable the NRC function. The
NRC icon disappears from the screen.
LCR (Last Channel Recall)
Briefly press the LCR/VOX [12] key to return to the last channel you
stayed on for more than 5 seconds. Press LCR/VOX again to return to
the original channel.
VOX
Long press the LCR/VOX [12] key to activate the VOX function. The
VOX icon appears on the screen.
By activating the VOX function, you can transmit without pressing the

10
English
PTT key. The VOX sensitivity level can be set from the menu.
Long press the LCR/VOX [12] key to disable the VOX function. The
VOX icon disappears from the screen.
Menu
Key beep
Briefly press the FUNC key [9] to access the menu.
The icon and the current setting (On or O) blink.
Press ▲or ▼to change the setting:
On - key beep enabled (the icon appears on the screen)
O - key beep disabled (the icon disappears from the screen)
VOX level
Press the FUNC [9] key twice to access the VOX menu.
On the screen, the VOX icon and the digits corresponding to the level
blink.
Press the ▲or ▼key to change the VOX level. There are 5 levels
available:
01 - low VOX sensitivity
05 - high VOX sensitivity
Roger Beep
Press the FUNC [9] key three times to access the Roger Beep menu.
The icon and the current setting (On or O) blink.

11
English
Press ▲or ▼to change the setting:
On - roger beep enabled (the icon appears on the screen)
O - roger beep disabled (the icon disappears from the screen)
TOT (Timeout timer)
Turn o the CB radio.
Hold down the AM/FM/BAND key [16] while restarting the CB radio.
“150 TIME OUT TIMER” appears on the screen. Use the ▲or ▼keys
to set the maximum continuous transmission time.
Reset
With the CB radio turned o, hold down the SQ/ASQ [14] key while
turning back on the radio. The message Rest Default and the firmware
version will be displayed on the screen.
After the reset, the CB radio returns to the factory settings.
Standard selection
Long press the AM/FM/BAND [16] key. The icon corresponding to
the current standard blinks on the screen.
Press the ▲or ▼key to change the standard.
Short press AM/FM/BAND to save and exit or wait 5 seconds.
Check the Bands and frequency table at the end of this manual.

12
English
Technical specifications
Frequency range 26.965MHZ - 27.405MHZ
Frequency tolerance ±300Hz
Power supply 12V (by the car adapter)
7.4V±0.4V (by battery)
Emission power 4W AM/FM
Consumption < 1.3A
Frequency response 300-3000HZ
Distortion < 8%
Impedance 50 Ohm
Reception sensitivity 0.25uv@12dB
Interference rejection 60dB
Audio power 1W
Operating temperature -26°C ~ +80°C

13
български
Предупреждения за безопасност
Прочетете следните предупреждения, за да предотвратите
пожар, лично нараняване или повреда на CB радиото или
антената.
Не се опитвайте да настройвате CB радиото, докато
шофирате, опасно е.
Не поставяйте CB радиото върху прекалено прашна, мокра
или нестабилна повърхност.
Не свързвайте антената по време на предаване, риск от
изгаряне или токов удар.
Спазвайте дистанция от устройства, които създават
смущения (като: телевизор, генератор и др.)
Тези, които използват пейсмейкъри, се съветват да спазват
разстояние от антената по време на предаване и особено да
не я докосват.
Не доближавайте метални предмети до вътрешната
електрическа част на CB радиото; опасност от токов удар.
Избягв ай те и злаг ане т о на CB р а д ио т о на т емп ер а т ури п о - н ис ки
от -26°C и по-високи от +80°C. Температурата в превозното
средство понякога може да надвиши 80°C, което може да
причини непоправими щети в случай на продължително
излагане. Не излагайте CB радиото на слънчева светлина за
дълго време.
Не поставяйте нищо върху CB радиото, това ще му попречи
да изстине.
Проверете дали имате достатъчно зареден автомобилен
акумулатор, за да избегнете бързо разреждане.
Важно е да спрете CB радиото преди стартиране на
двигателя, за да избегнете повреда, причинена от високото

14
български
напрежение при стартиране.
Когато сменяте предпазителя, трябва да използвате
предпазител от същия тип като оригиналния.
Ако от CB радиото излиза необичайна миризма или дим,
незабавно изключете захранването.
Не предавайте дълго време, CB радиото може да се нагрее
и да се повреди.
Важна забележка!
В някои страни може да е необходимо да представите
лиценза, който ще удостовери правото за използване
на CB честотния диапазон. Моля, проверете местното
законодателство и таблицата в края на ръководството.
Клавиши и функции

15
български
Описание Кратко натискане Продължително
натискане
1Антена
2On/O
Сила на звука
3Светодиод за
състояние
4LCD екран
5PTT Предаване
6HI/LO Избор на висока/
ниска мощност
7On/O фоновото
осветление
8 Функция монитор
9FUNC Меню
10 ▲Увеличете номера
на канала
Непрекъснато
увеличаване на
броя на каналите
11 DW
Активиране/
деактивиране
на двойно
наблюдение
Настройка за
двойно гледане
12 LCR/VOX
Последно
извикване на
канал
VOX контрол

16
български
13 ▼Намалете номера
на канала
Непрекъснато
намаляване на
броя на каналите
14 SQ/ASQ Избор на ниво SQ/
ASQ
Превключване
между SQ/ASQ
15 NRC/LOCK
Активиране/
деактивиране на
NRC (верига за
намаляване на
шума)
Ключалка
16 AM/FM/BAND Превключване
между AM/FM Избор на лента
17 EMG/SC Авариен канал
Активиране/
деактивиране на
сканирането на
канали
18 Микрофон
19 Говорител
20 2 пина PNI-K
21 конектор за
слушалки
22
USB-C порт за
зареждане
на батерията
Щипка за
колан

17
български
Инструкции за употреба
Включете/изключете радиото
Завъртете копчето в горната част на CB радиото [2] по посока
на часовниковата стрелка, за да го включите. CB радиото
стартира от предишния режим на използване.
Завъртете копчето в горната част на CB радиото [2] обратно на
часовниковата стрелка, за да го изключите.
Контрол на звука
След като включите CB радиото, продължете да въртите
копчето [2], за да регулирате силата на звука до желаното ниво.
Избор на канал
Натиснете за кратко клавиша ▲ или ▼, за да увеличите или
намалите номера на канала, докато стигнете до желания
канал.
Натиснете продължително клавиша ▲ или ▼, за да увеличите
или намалите бързо номера на канала.
Squelch (SQ) избор на ниво
Натиснете за кратко бутона SQ/ASQ [14]. На екрана мигат
иконата SQ и цифрите, съответстващи на нивото. Налични са
25 нива на ръчно шумоподтискане, от 00 (шумоподтискането е
изключено) до 25 (най-високо ниво).
Когато цифрите, съответстващи на нивото, мигат, натиснете

18
български
бутоните ▲ или ▼, за да изберете желаното ниво.
To conrm the selecon, press the SQ/ASQ key or wait 5 seconds.
Automac squelch (ASQ) избор на ниво
Натиснете дълго бутона SQ/ASQ [14], за да превключите в
режим ASQ. На екрана иконата SQ става ASQ.
На екрана мигат иконата ASQ и цифрите, съответстващи на
нивото. Налични са 5 нива на ръчно шумоподтискане, от 01
(най-ниското ниво) до 05 (най-високото ниво).
Когато цифрите, съответстващи на нивото, мигат, натиснете
бутоните ▲ или ▼, за да изберете желаното ниво.
За да потвърдите избора, натиснете бутона SQ/ASQ или
изчакайте 5 секунди.
AM/FM избор
Натиснете бутона AM/FM/BAND [16], за да превключите между
AM и FM. На екрана ще се появи съответната икона.
Забележка: Не всички стандарти поддържат и двата вида
модулация. Ако обхватът, в който се намирате, не поддържа
AM или FM, натискането на бутона AM/FM/BAND няма да
доведе до промяна.
Аварийни канали (9/19)
Натиснете бутона EMG/SC [17], за да превключите към канал
09. Иконата EMG се появява на екрана.

19
български
Натиснете бутона EMG/SC отново, за да превключите на канал
19.
Натиснете бутона EMG/SC отново, за да излезете от авариен
режим. Иконата за ЕМГ изчезва от екрана.
Функция за заключване на клавишите
Натиснете продължително бутона NRC/ , за да активирате
функцията за заключване на клавишите. Иконата се появява
на екрана. При натискане на произволен клавиш ще чуете
предупредителен звуков сигнал и иконата ще мига. Всички
клавиши на радиото са заключени, с изключение на клавиша
РТ Т.
Натиснете отново дълго бутона NRC/ , за да деактивирате
функцията за заключване на клавишите. Иконата ще изчезне
от екрана.
Сканиране на канали
Натиснете продължително бутона EMG/SC [17]. Иконата SC
мига на екрана. Сканирането на канали започва веднага.
По време на сканиране можете да натиснете клавиша ▲ или
▼, за да промените посоката на сканиране.
За да спрете сканирането, натиснете продължително бутона
EMG/SC или бутона РТТ. Иконата SC изчезва от екрана.
Избор на висока/ниска мощност
Натиснете за кратко бутона HI/LO [6] отстрани на CB радиото,
за да промените между висока (4W) и ниска (1,5W) мощност на

20
български
предаване. Иконата HI или LO ще се появи на екрана.
Dual Watch
Натиснете продължително клавиша DW [11]. На екрана иконата
DW и цифрите, съответстващи на канала, мигат. Натиснете
клавиша ▲ или ▼, за да изберете втория канал, който искате
да наблюдавате. Натиснете бутона DW отново, за да запазите
и да излезете.
За да активирате режима на двойно наблюдение, натиснете за
кратко клавиша DW. Двата канала, зададени за едновременно
наблюдение, ще се показват последователно на екрана.
Иконата DW мига. Натиснете кратко бутона DW за изход.
NCR (Noise Reducon Circuit)
Натиснете за кратко бутона NRC/ [15], за да активирате
функцията за намаляване на фоновия шум. Иконата NRC се
появява на екрана.
Натиснете отново за кратко бутона NRC/ , за да деактивирате
функцията NRC. Иконата NRC изчезва от екрана.
LCR (Last Channel Recall)
Натиснете за кратко бутона LCR/VOX [12], за да се върнете към
последния канал, на който сте останали повече от 5 секунди.
Натиснете отново LCR/VOX, за да се върнете към оригиналния
канал.
Table of contents
Languages:
Other PNI Radio manuals

PNI
PNI ESCORT HP 62 User manual

PNI
PNI ESCORT HP 7110 User manual

PNI
PNI Escort HP 8000L User manual

PNI
PNI R40 Pro User manual

PNI
PNI ESCORT HP 9500 User manual

PNI
PNI ESCORT HP 6500 User manual

PNI
PNI R40 Pro User manual

PNI
PNI Clementine 8480BT User manual

PNI
PNI ESCORT HP 72 User manual

PNI
PNI PMR R40 Pro User manual

PNI
PNI PMR R60 User manual

PNI
PNI Escort HP 8500 User manual

PNI
PNI Escort HP 8000L User manual

PNI
PNI ESCORT HP 55 User manual

PNI
PNI Escort HP 62DE User manual

PNI
PNI Escort HP 9001 ASQ User manual

PNI
PNI escort HP 8001 ASQ User manual

PNI
PNI ESCORT HP 9700 User manual
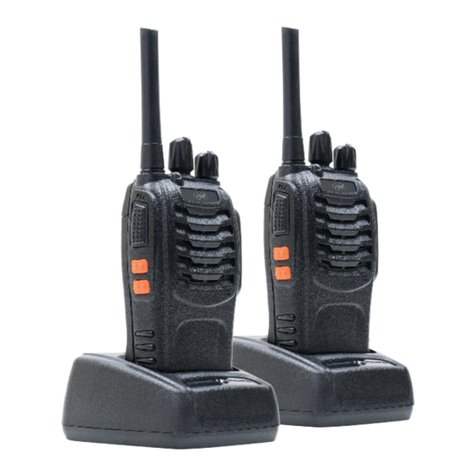
PNI
PNI ESCORT HP 7120 User manual

PNI
PNI PMR R45 PRO User manual