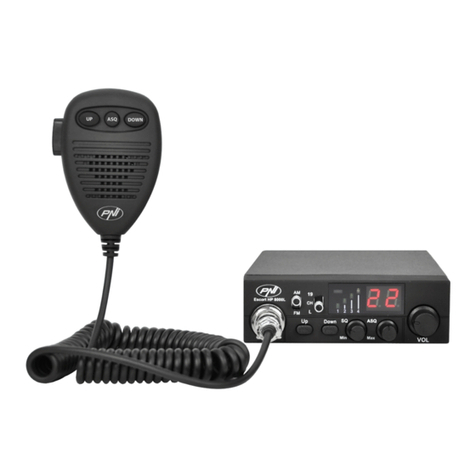
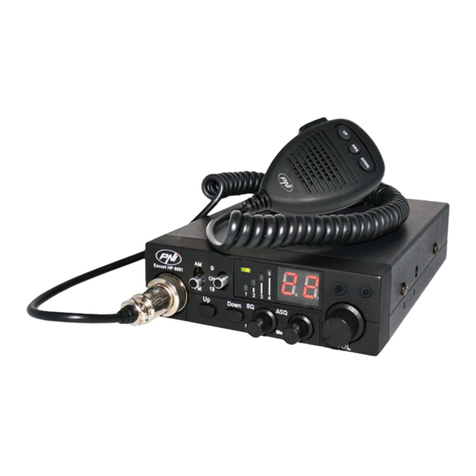
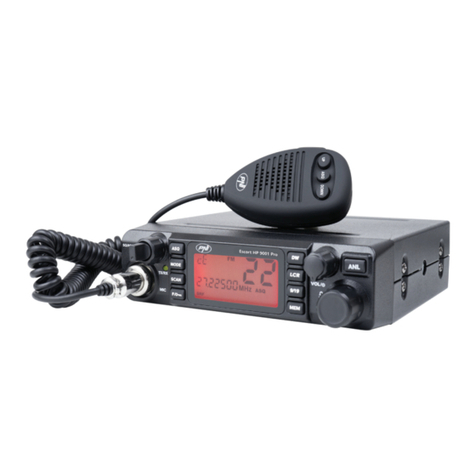
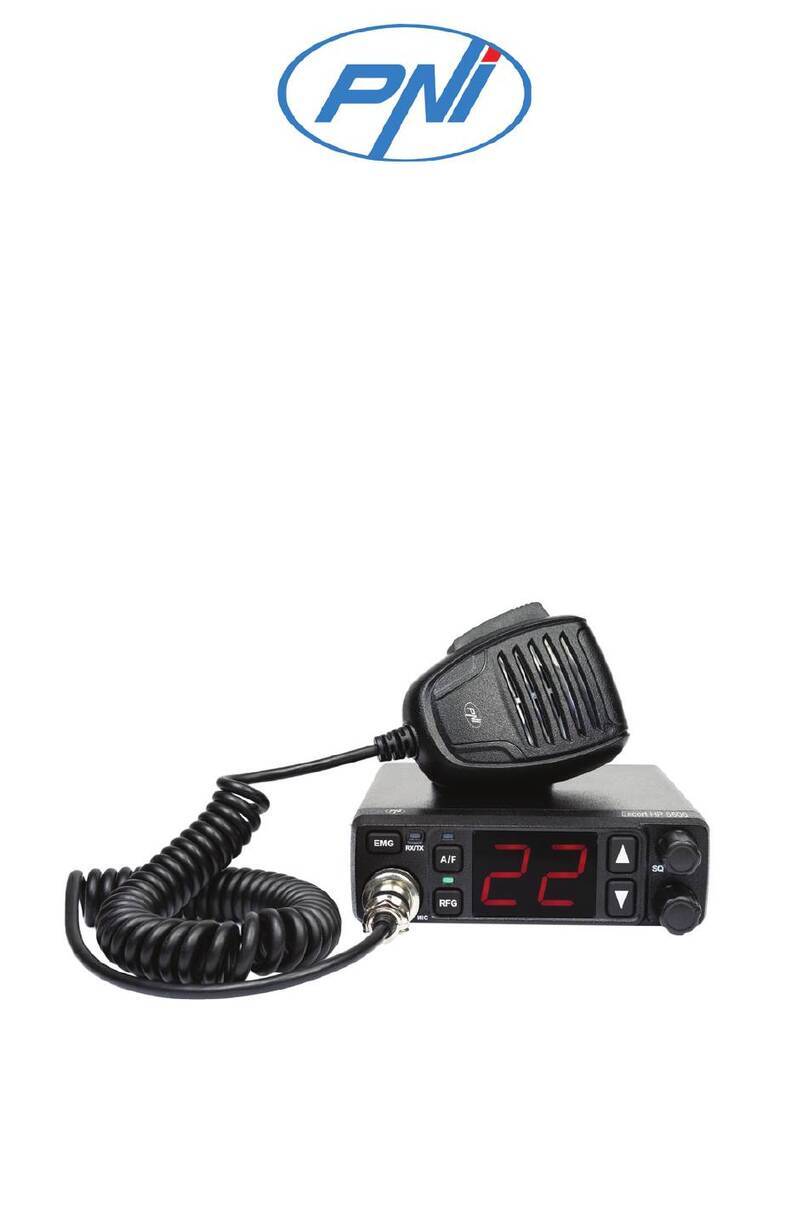
PNI Escort HP 8001L ASQ User manual

Statie radio CB
PNI Escort HP 8001L ASQ
include casti cu microfon HS81
- MANUAL DE UTILIZARE -

INAINTE SA CONECTATI SAU SA UTILIZATI ACEST PRODUS, VA RUGAM SA
CITITI CU ATENTIE ACESTE INSTRUCTIUNI DE UTILIZARE SI PASTRATI
ACEST MANUAL PENTRU O UTILIZARE ULTERIOARA.
NU EXISTA COMPONENTE CARE POT FI REPARATE DE UTILIZATOR. PENTRU
REPARATII ADRESATI-VA UNUI SERVICE AUTORIZAT.
PENTRU A PREVENI RISCUL DE INCENDIU NU UTILIZATI DECAT O SURSA DE
ALIMENTARE CORESPUNZATOARE.
ATENTIE:
1. Caracteristici principale ... 1
CURPINS
2. Specificatii tehnice ... 1
3. Descriere produs ... 2
4. Instalare ... 3
5. Sfaturi utile ... 4
6. Schimbare norma ... 4
7. Frecventele si puterile legale in Europa ... 5

1. CARACTERISTICI PRINCIPALE:
2. SPECIFICATII TEHNICE:
Ÿ40 de canale AM/FM
ŸComutator selectare mod AM/FM (AM functioneaza doar prin schimbarea
normei)
ŸComutator blocare taste (Lock)
ŸComutator selectare canal de urgenta (19)
ŸButoane selectare canal UP/DOWN
ŸLED-uri indicatoare nivel semnal
ŸIndicator numar canal din 2 cifre
ŸPotentiometru volum si pornire/oprire statie
ŸIndicatoare LED pentru RX/TX/ASQ
ŸMicrofon cu butoane de selectare canal (sus/jos) si activare ASQ
ŸMufa microfon cu 6 pini pe panoul frontal
ŸMufa pentru difuzor extern
ŸSquelch manual si squelch automat ajustabil
ŸConector antena
Canale
40 AM/FM
Banda de frecventa
26.965 – 27.405 MHz
Control frecventa
P.L.L.
Temperatura de functionare
-10~ +55°C
Alimentare
13.8Vdc ±15%
Dimensiuni
115 x 36 x 152 mm
Greutate
0.8 kg
Receptor
Frecventa intermediara
1° 10.7 MHz / 2° 450 KHz
Sensibilitate
-120dBm / 12dB SINAD (FM)
-107dBm / 12dB SINAD (AM)
Iesire audio
@10% THD 2.5W la 8 Ohm
Distorsiune audio
<8% at 1 KHz
Rejectie imagine
65 dB
Canal adiacent
85 dB
Consum curent
200 mA in stand-by
Emitator
Putere maxima RF
4W FM la 13.8Vdc
Modulatie
85% la 90% (AM)
3KHz ±0.2 KHz (FM)
Impredanta antena
50 Ohm
Consum curent
2 A
1

3. DESCRIERE PRODUS:
1. Conector 6 pini pentru microfon
2. Buton crestere numar canal
3. Buton scadere numar canal
4. Potentiometru ajustare squelch – squelch-ul face statia mai silentioasa prin
eliminarea zgomotelor de pe fundal. Rotiti potentiometrul in sensul acelor de
ceasornic pentru a reduce zgomotele sau in sens invers acelor de ceasornic daca
doriti sa auziti si cele mai slabe semnale
5. Potentiometru ASQ – pentru a creste nivelul de ASQ rotiti potentiometrul in sensul
acelor de ceasornic; in acest caz se reduce zgomotul de fundal, dar si nivelul
semnalului receptionat. RECOMANDARE: porniti statia cu ASQ rotit la stanga.
6. Potentiometru pornire/oprire statie si ajustare volum – rotiti in sensul acelor de
ceasornic pentru a porni statia si a mari volumul. Daca nu se receptioneaza nici un
semnal va sugeram sa ajustati squelch-ul (prin rotirea potentiometrului SQ in sens
invers acelor de ceasornic) si apoi volumul la un nivel confortabil. Cand este pornita
din potentiometrul de volum, statia va memora ultimul canal utilizat.
7. Buton selectare mod AM/FM. (În AM functioneaza doar prin schimbarea normei).
8. Comutator selectare functii:
a. Pe prima pozitie comutam automat pe canalul de urgenta 19
b. Pozitia a doua, CH, este modul normal de functionare si putem modifica canalele
(1 - 40) din butoanele UP si DOWN de pe microfon. In Romania canalul utilizat este
22.
c. Pozitia a treia, L, blocheaza tastele de pe statie si microfon (exceptie butonul
PTT). Este cunoscuta sub numele "functie Lock".
9. LED indicator TX/ASQ - Pentru activare ASQ se apasa butonul central de pe
microfon, ASQ. Astfel, LED-ul va avea culoare verde. In timpul emisiei TX el va
deveni rosu.
10. Indicator nivel semnal – indicator cu 4 bare pentru a monitoriza puterea
semnalelor receptionate/emise
11. Ecran LED – afiseaza numarul canalului
A. Mufe pentru casca si microfon
2

12. Conector antena
13. Cablu de alimentare 13.8VDC
14. Mufa pentru difuzor extern
15. Buton PTT – apasati pentru a emite
16. Buton marire numar canal
17. Buton activare/dezactivare functie ASQ
18. Buton micsorare numar canal
19.Mufa 6 pini pentru conectarea
microfonului in statie
Inainte de a instala unitatea centrala in
masina, verificati si alegeti cea mai
convenabila pozitie, pentru a avea acces
usor la statie si pentru a o putea folosi fara a
va deranja de la condus. Utilizati suportul si
accesoriile din pachet pentru a instala statia.
Suruburile suportului trebuie stranse bine
pentru a evita vibratia statiei in timpul
mersului.
Suportul de montaj poate fi pozitionat deasupra sau sub statie, iar aceasta poate fi
inclinata in functie de modul de instalare (sub bord sau sub plafonul cabinei).
ATENTIE: Asigurati-va ca tensiunea la care alimentati statia este cea indicata de
fabricant.
Instalarea unitatii centrale: inainte de a alimenta statia, asigurati-va ca butonul de
pornire este maxim la stanga. Conectati cablul de alimentare al statiei la bricheta
autovehiculului.
ATENTIE: In cazul arderii sigurantei nu o inlocuiti cu una de valoare mai mare. Cea
din fabrica are 2A.
Instalarea antenei:
Pentru utilizarea statiei aveti nevoie de o antena specifica ce functioneaza in
frecventa 27.225MHz. Instalarea antenei trebuie efectuata de un tehnician
specializat. Pozitionati antena corespunzator pe autovehicul. Inainte de a conecta
antena la statie este necesara verificarea antenei cu un aparat specializat, altfel se
poate defecta circuitul de emisie al statiei.
4. INSTALARE:
3

De obicei antena trebuie pozitionata pe partea cea mai inalta a autovehiculului, fara
a fi obstructionata de obstacole si cat mai departe de orice sursa electrica sau
zgomot electromagnetic. Cablul coaxial al antenei nu trebuie sa fie intrerupt sau
presat. Conectati mufa din capatul cablului coaxial al antenei la mufa de antena din
spatele statiei.
Verificarea functionarii statiei:
Odata instalata statia si alimentata de la sistemul electric al autovehiculului,
procedati in felul urmator pentru a verifica functionarea acesteia:
- Verificati daca alimentarea este conectata corect
- Verificati conexiunea antenei la statie
- Conectati microfonul la mufa de pe panoul frontal al statiei
- Porniti statia prin rotirea potentiometrului de volum in sensul acelor de ceasornic si
ajustati volumul la nivelul dorit
- Selectati canalul dorit prin intermediul tastelor UP/DOWN de pe panoul frontal al
statiei sau de pe microfon; in Romania se utilizeaza canalul 22
- Actionati butonul SQ in zona limita in care dispare zgomotul de fundal. Daca modul
ASQ este activat (de pe microfon) butonul SQ nu mai functioneaza
- Apasati butonul PTT de pe microfon pentru a emite si eliberati-l pentru a receptiona
- Verificati nivelul semnalului receptionat prin intermediul barelor de semnal de pe
panoul frontal al statiei
- Porniti functia ASQ de pe microfon si reglati nivelul acestuia din butonul ASQ de pe
panoul frontal al statiei
- Nu inversati polaritatea de alimentare a statiei
- Nu inlocuiti siguranta arsa cu una de valoare mai mare; cea din fabrica are 2A.
- Nu emiteti fara antena sau cu o antena defecta sau necalibrata, pentru a evita
arderea finalului de emisie
- Reglati SQ si ASQ la limita disparitiei zgomotului de fundal. Prin rotirea butonul SQ
in sensul acelor de ceasornic prea mult, nu veti receptiona decat semnalele
puternice (cele emise din apropiere)
- Nu taiati mufa de bricheta, deoarece aceasta contine la interior siguranta de
protectie
Pentru a schimba norma in care utilizati statia radio CB procedati in felul urmator:
ŸCand statia este oprita, apasati simultan butoanele Down si PTT de pe microfon
si apoi porniti statia, mentinand butoanele apasate.
ŸUtilizati tastele up si down de pe statie pentru a selecta norma dorita
ŸOpriti si reporniti statia
Pentru a verifica norma curenta utilizati aceeasi procedura.
5. SFATURI UTILE:
6. SCHIMBARE NORMA:
4

Norme disponibile: CE > -9 > -A > -b > -C > -d > -E > -F > -p > -n
ŸCE: 26.965 - 27.405 MHz doar FM
Ÿ9: 26.965 - 26.955 80 canale AM FM (Germania)
ŸA: 25.615 - 26.055MHz
Ÿb: 26.065 - 26.505MHz
ŸC: 26.515 - 26.955MHz
Ÿd: 26.965 - 27.405MHz
ŸE: 27.415 - 27.855MHz
ŸF: 27.865 - 28.305MHz
Ÿp: 26.960 - 27.400MHz
Ÿn: 26.330 - 26.770MHz AM FM
7. FRECVENTELE SI PUTERILE LEGALE IN EUROPA SUNT:
ŸItalia 40CH AM/FM 4 watt
ŸItalia 34CH AM/FM 4 watt
ŸGermania 80 CH FM 4watt/ 12 CH AM 1watt
ŸGermania 40 CH FM 4watt/ 12 CH AM 1watt
ŸEuropa 40 CH FM 4 watt/ 40 CH AM 1watt
ŸRomania CEPT 40 CH FM 4watt
ŸSpania 40 CH AM/FM 4watt
ŸFranta 40 CH FM 4watt/ 40 CH AM 1watt
ŸAnglia 40 CH FM 4watt frecvente engleze + EC 40 CH FM 4 watt frecventeCEPT
ATENŢIE! Acest produs este destinat sa fie utilizat in Romania si functioneaza pe
norma EC Europa 40 CH FM 4 watt. Pentru a functiona in AM va trebui sa schimbati
norma din EC in d.
ATENŢIE! In Romania este permis doar 1 watt pentru modulatie AM!
Specificatiile se pot modifica fara preaviz!
5

CB radio
PNI Escort HP 8001L ASQ
Earphones with microphone HS81 included
- USER MANUAL -

BEFORE CONNECTING AND USING THIS PRODUCT, PLEASE READ
CARREFULLY THESE INSTRUCTION MANUAL AND KEEP IT FOR LATER USE.
THERE ARE NO COMPONENTS THAT CAN BE REPAIRED BY THE USER.
FOR REPAIRS PLEASE REFER TO A N AUTHORIZED SERVICE.
TO PREVENT FIRE HAZZARDS USE PROPER POWER SOURCE.
NOTES:
1. Main features ... 1
INDEX
2. Technical indicators ... 1
3. Product description ... 2
4. Installation ... 3
5. Useful tips ... 4
6. Standard change ... 4
7. Legal frequencies and transmitting powers in Europe ... 5

1. MAIN FEATURES:
2. TECHNICAL INDICATORS:
Ÿ40 AM/FM channels
ŸMode AM/FM switch
ŸEmergency channel selector (19)
ŸKeypad lock function
ŸUP/DOWN buttons for channel selection
ŸSignal LED indicators
Ÿ2 digit channel indicator
ŸVolume knob with power ON/OFF control
ŸTX/RX /ASQ LED indicator
ŸMicrophone with Up /Down and ASQ buttons
ŸFront microphone plug
ŸJack for external speaker
ŸManual and automatic squelch
Channels
40 AM/FM
Frequency range
26.965 – 27.405 MHz
Frequency control
P.L.L.
Operating temperature
-10~ +55°C
DC input voltage
13.8Vdc ±15%
Dimensions
115 x 36 x 152 mm
Weight
0.8 kg
Receiver
IF
1° 10.7 MHz / 2° 450 KHz
Sensitivity
-120dBm / 12dB SINAD (FM)
-107dBm / 12dB SINAD (AM)
Audio output
@10% THD 2.5W la 8 Ohm
Audio distortion
<8% at 1 KHz
Image rejection
65 dB
Adjacent channel
85 dB
Current drain
200 mA in stand-by
Transmitter
Maximum RF power
4W FM la 13.8Vdc
Modulation
85% la 90% (AM)
3KHz ±0.2 KHz (FM)
ANT impedance
50 Ohm
Current drain
2 A
1

3. PRODUCT DESCRIPTION:
1. MICROPHONE connector : Connect the supplied electric condenser microphone
to this connector, and then lock it via the ring nut.
2. UP KEY : Press this key and channel NO. runs up.
3. DOWN KEY : Press this key channel NO. runs down.
4. SQ knob : The SQUELCH control allows to silent the receiver by cutting the
background noise. Turn the SQUELCH knob anticlockwise until the background
noise is cut. Rotate the SQUELCH knob clockwise (SQUELCH ON) to listen to the
weakest signals.
5. ASQ knob : to increase the ASQ level rotate the knob clockwise, in this case the
backround noise is reduced but also the received signal. Reccomanded: turn on the
radio CB with the ASQ knob on the left.
6. OFF/VOL : This knob controls the radio ON and OFF as well as adjusts the
volume. If no signals are being received on the operating channel, it is suggested to
turn on the SQUELCH and adjust the volume to the desired level while listening to
the background noise. When it is turned on by operating the Volume knob,the radio
will remember the channel, frequency, AM or FM used last time.
7. AM/FM mode selector: This switch allows selecting the modulation mode AM/ FM.
8. Emergency channel or function mode selector: with this button you can select the
emergency channel 19, the normal CH funtioning mode or activate keypad locking
function. In the CH mode you cand select the number of the channel you want to use.
In Romania they use channel no.22.
9. TX/ASQ LED : The indicator is bicolour light as red and green colour. When TX is
red colour, when ASQ on is green light.
10. RX Signal Meter: 4-bar RX signal Meter to monitor the strength of the received
signals.
11. DISPLAY: The digital LED display
A. Earphone and Microphone Jack
2

12. Antennaconnector
13. 13.8 VDC power cord
14. EXT (External Speaker) Jack
Before installing the main unit in the vehicle,
please check and select the most convenient
position, in order that the radio will be easy to
reach and comfortable to operate without
disturbing or interfering driving. Use the
supplied bracket and hardware to install the
radio. The bracket screws must be well
tightened to avoid looseness as the vehicle
vibrates. The car mounting bracket can be
installed over or below the radio and the radio
may be inclined as desired according to the
specific type of installation (under dashboard
or track cabin roof installation).
Installation of the Main Unit
Before connecting the radio to the vehicle electric system, please make sure the
radio is powered off with the OFF/VOL (6) knob completely turned anticlockwise at
OFF position. The DC power cable of the radio includes a fuse holder with fuse
located on the red positive (+) wire. Please connect the DC power cable to the
vehicle electric system with special attention to correct polarity, even if the radio is
protected against polarity inversion. Connect the red wire to the positive (+) pole and
the black wire to the negative (-) pole of the vehicle electric system. Please make
sure that the wires and terminals are firmly connected, to prevent cables from
disconnecting or causing short circuits .
4. INSTALLATION:
3
15. PTT (Push-to-talk) key: Push the button
to talk then release to receiving mode.
16. UP key of the microphone: This switch
allows increasing a channel number.
17. ASQ: Press this button, TX and ASQ on
the LED would be green light, shows ASQ
turn on.
18. DN key of the microphone: This switch
allows decreasing a channel number.
19.MICROPHONE plug: 6-pole microphone
plug with locking ring nut, to be connected
to socket (1) located on the front side of the
radio.

Installation of the antenna
A specific mobile antenna adjusted for 27 MHz frequency range must be used. The
antenna installation must be done by a qualified technician or service center. Please
install the antenna carefully on the vehicle with proper
connection to ground. Before connecting the antenna to the radio, it is necessary to
check the correct operation of the antenna with low standing wave ratio (S.W.R.) via
adequate instruments. If not, the transmitter circuit of the radio could be damaged.
The antenna usually must be installed on the highest part of the vehicle, free from
obstacles and as far away as possible from any source of electric or electromagnetic
noise. The RF antenna coaxial cable must not be damaged or pressed on its way
between antenna and the radio. The correct operation of the antenna and the low
standing wave ratio (S.W.R.) must be checked periodically. Connect the RF antenna
coaxial cable to the antenna connector (15), located on the rear side of the radio.
Checking Operation of the Radio
Once radio has been connected to the vehicle electric system and to the antenna, the
correct operation of the system should be checked. Please proceed as following:
1)Check that the power cable is correctly connected.
2)Check that the RF antenna coaxial cable is properly connected.
3)Connect the microphone to the connector (1) that is on the front side of theradio.
4)Rotate the SQUELCH (4) knob anticlockwise.
5)Turn radio on by the OFF/VOL (6) knob and adjust volume to the desiredlevel.
6)Select the desired channel with the up/down key on the front side of the radio.
7)Rotate the SQUELCH (4) knob clockwise to cut the background noise.
8)Press the PTT key to transmit and release it to receive.
9)Check the level of the received and transmitted signals on the 4 bar RXsignal
Meter and TX LED. The transceiver will work correctly.
• Do not invert power polarity
• Do not replace the fuse with a bigger one. The default is 2A.
• Do not transmit without an antenna connected, you risc damagingthe device.
• Set the SQ and ASQ at the limit of the background noise.
• Do not cut cigarette lighter socket, because it contains inside safetyprotection
5. USEFUL TIPS:
4
6. STANDARD CHANGE:
To change the working standard of the radio follow the next instructions:
• When the radio is off, press the Down button simultaneously andPTT on the
microphone and then turn on the station, keeping thebuttons pressed.
• Use up and down buttons on the front panel of the radio to selectthe desired
standard
• Turn the radio off and on again
To check the current standard use the same procedure.

Available standards: CE > -9 > -A > -b > -C > -d > -E > -F > -p > -n
• CE: 26.965 - 27.405 MHz FM only
• 9: 26.965 - 26.955 80 channels AM FM (Germany)
• A: 25.615 - 26.055 MHz
• b: 26.065 - 26.505 MHz
• C: 26.515 - 26.955 MHz
• d: 26.965 - 27.405 MHz
• E: 27.415 - 27.855 MHz
• F: 27.865 - 28.305 MHz
• p: 26.960 - 27.400 MHz
• n: 26.330 - 26.770 MHz AM FM
7. LEGAL FREQUENCIES AND TRANSMITTING POWERS IN EUROPE:
ŸItaly 40CH AM/FM 4 watt
ŸItaly 34CH AM/FM 4 watt
ŸGermany 80 CH FM 4watt/ 12 CH AM 1watt
ŸGermany 40 CH FM 4watt/ 12 CH AM 1watt
ŸEurope 40 CH FM 4 watt/ 40 CH AM 1watt
ŸRomania CEPT 40 CH FM 4watt
ŸSpain 40 CH AM/FM 4watt
ŸFrance 40 CH FM 4watt/ 40 CH AM 1watt
ŸGB 40 CH FM 4watt English frequencies + EC 40 CH FM 4 watt CEPTfrequencies
Specifications subject to change without notice!
5

CB Статие Радио
PNI Escort HP 8001L ASQ
Слушалки с микрофон Hs81 включени
- РЪКОВОДСТВО ЗА УПОТРЕБА -

Преди да свързвате или използвате този продукт, моля, прочетете внимателно
тези инструкции и запази това ръководство за бъдеща употреба.
Не са открити части, които могат да бъдат поправени от потребителя.
Попитайте за ремонт в оторизиран сервиз.
за Да се предотврати рискът от възникване на пожар, използвайте само
източник на енергия съответно
ВНИМАНИЕ:
1. Характеристики: ... 1
CЪДЪРЖАНИЕ
2. технически специализации ... 1
3. Описание на продукта ... 2
4. Mонтаж: ... 3
5. Полезна информация ... 4
6. правило Промяна ... 4
7. Честоти и юридически правомощия в Европа са ... 5

1. ХАРАКТЕРИСТИКИ:
2. ТЕХНИЧЕСКИ СПЕЦИАЛИЗАЦИИ:
Ÿ40 канала FM/AM
ŸИзбор на режим на превключване FM / AM (AM работи само чрезпромяна
на нормата) / Авариен канал превключвател (19)
ŸKeylock превключвател (Lock)
ŸБутони за избор на канал нагоре / надолу
ŸLED индикатори сигнализиращи ниво
ŸИндикатор 2-цифрен номер на канала
Ÿпотенциометър обем и старт / стоп станция
Ÿзелена крушка (LED) индикатор за ASQ
ŸБутони за избор на канал за микрофон (нагоре / надолу) иактивиране на
ASQ
Ÿ6-пинов жак за микрофон на предния панел
Ÿкрик за външен високоговорител
ŸCЪДЪРЖАНИЕ шумоподтискане
Ÿ•Регулируемо автоматично шумоподтискане
Ÿ•Антена съединител
Kанали
40 AM/FM
Честотна лента
26.965 – 27.405 MHz
Kонтрол чест
P.L.L.
Работна температура
-10~ +55°C
Xранене
13.8Vdc ±15%
Pазмери
115 x 36 x 152 mm
Tегло
0.8 kg
Приемник
Междинно чест
1° 10.7 MHz / 2° 450 KHz
Чувствителност
-120dBm / 12dB SINAD (FM)
-107dBm / 12dB SINAD (AM)
Продукция звуков
@10% THD 2.5W la 8 Ohm
Изопачаване звуков
<8% at 1 KHz
Отхвърляне изображение
65 dB
Съседен канал
85 dB
Консумация на енергия
200 mA in stand-by
редавател
Максимална мощност RF
4W FM la 13.8Vdc
Модулация
85% la 90% (AM)
3KHz ±0.2 KHz (FM)
Антена импеданс
50 Ohm
Консумация на енергия
2 A
1

3. ОПИСАНИЕ НА ПРОДУКТА :
1. 6-пинов конектор за микрофон
2. Бутон нараства номера на канала
3. Бутон номер намаление канал
4. Шумоподтискане потенциометър корекция - шумоподтискане станция
направи по-тихи, като елиминира фоновия шум. Завъртете потенциометъра в
посока на часовниковата стрелка, за да се намали шумът, или обратно на
часовниковата стрелка смисъл, ако искате да чуете дори най-слабите сигнали
5. Потенциометър ASQ - да се повиши нивото на ASQ Завъртете
потенциометъра в посока на часовниковата стрелка, в този случай намалява
фоновия шум и получи нивото на сигнала. ПРЕПОРЪКА: започнете с ASQ
станция завърта наляво.
6. Потенциометър за включване / изключване и регулиране на звукагара -
завърта по часовниковата стрелка, за да увеличите силата на звука и гарата.
Ако не се приема сигнал, ние Ви предлагаме да регулирате шумоподтискането
(SQ потенциометъра се върти обратно на часовниковата стрелка посока) и
след това обемът до комфортно ниво. Когато силата на звука е включена,
радиото ще се съхранява последния канал, използван.
7.Бутон за избор на AM / FM. (В AM работи само чрез промяна нанормата).
8.Аварийно избора на канал превключвател 19, нормалнофункционираща CH
или Lock (Заключване на клавишите). В режимCH да изберете всички други
канали 1- 40. В Румъния канал,използван е 22.Светодиоден индикатор TX /
ASQ. По време наемисиите LED ще бъде червено и когато ASQ е
активиранафункцията LED ще свети в зелено.
9.Ниво на сигнала показател - 4 индикатор бар за контрол силата насигнала,
получен / издадено
10.LED екран - показва номера на канала
A. наушников и микрофона
2

12.Aнтена конектор
13.Kабелхранене 13.8Vdc
14.Kрик за външен високоговорител
15.PTT бутон - натиснете за да въпрос
16.Бутон брой Канал Увеличи
17.Бутон за включване / изключване
в зависимост
18.Hомер намаление Button канал
19.6-пинов конектор за свързванена
микрофон станция.
4. MОНТАЖ:
3
Преди да инсталирате на процесора в колата си,
провери и да изберете най-удобния позиция за
лесен достъп до гарата и можете да го
използвате, без да се налага да се занимавам
шофиране. Използвайте подкрепа и аксесоари в
пакета, за да инсталирате станция. Болтовете
трябва да бъдат затегнати по-добра поддръжка за
да се избегнат вибрации по време на шофиране
станция. Монтажна скоба може да се позиционира
над или под станцията, и това може да бъде
наклонена, в зависимост от това как да
инсталирате (под таблото или под кабина таван
камиона). ВНИМАНИЕ: Уверете се, че
напрежението, на което мощността на станцията
е посочен от производителя.
ВНИМАНИЕ: Уверете се, че напрежението, което се подава на станцията е 12V.
Инсталиране радиостанция CB. Преди да заредите станция, се уверете, че
бутонът за захранването е максимално в ляво. Захранващят кабел на
станцията включва защитна безопасността на червената жица.
Включете захранващия кабел на станцията към електрическата система с
внимание. Свържете червения кабел (+) към положителния (+) и черния
проводник (-) към отрицателния полюс (-) на автомобила. Проверете верността
на връзките, направени за да се предотврати тяхното изключване или късо
съединение. ВНИМАНИЕ:Когато не изгаряне на бушон заменя с по-висока
стойност. Използвайте една от 2А .
Инсталирайте антена
За използване станция имате нужда от специфична антена, работеща в
честота 27.225MHz на. Монтажът на Антената трябва да се извърши от
квалифициран техник. Поставете антената на колата си правилно. Преди да
свържете антената към антената на радиото е необходимо да се провери със
специалист устройство, SWR метър , в противен случай тя може да повреди
веригата на емисията радио.

Обикновено на антената трябва да бъде поставен върху най-високата част на
вашето превозно средство, без да бъдат възпрепятствани от различни пречки и
по-далеч от всеки източник на електрически или електромагнитен шум. Антена
коаксиален кабел не трябва да се прекъсва или пресован. Включете края на
коаксиален кабел от антената към жака на антена на гърба на гарата.
Проверете работата на радиостанцията:
Радиостанцията веднъж инсталиранна се захранва от електрическата система
на автомобила, направете следното, за да проверят функционирането:
•Проверете дали захранването е свързан правилно
•Проверете връзката на антената на радиостанцията
•Свържете жака за микрофон с предната част на радиостанцията.
•Вк лючете радио чр ез завъртане н а потенциометъра в посока
начасовниковата стрелка обем и регулирате силата на звука до желаното ниво
•Изберете желания канал, като използвате бутона UP / DOWN напредния панел
на радиото или до микрофона, в България с помощта на канал 22.
• Натиснете бутона в границата на SQ изчезва фоновия шум.
Ако режимът на ASQ е активиран (на микрофона) Бутон SQ не работи
•Натиснете бутона РТТ на микрофона, за да изпълнява обещанията си, и го
пуснете, за да получите
•Проверете сигнала, получен от сигналните барове в предната част на
радиостанцията
• ASQ Започнете функция на микрофона и да регулирате нивото на бутон
Asq на предната част на радиостанцията.
Не обратна полярност мощнострадиостанция .?
•Не сменяйте изгорял бушона с един от по-висока стойност,Заводът има
2А.
•Да не се излъчва не антена или неизправност антена илиоразмерена да се
избегнат емисиите изгаряне
•Регулиране на SQ и ASQ лимит изчезване фоновия шум.Чрез завъртане на
копчето по часовниковата стрелка SQ прекалено много, вие ще получите не
само силни сигнали (тези, отделяни в близост).
За да промените часа използвате радиостанцията CB направете следното:
•Когато радиото е изключен, натиснете бутона, установени едновременно и
РТТ на микрофона, а след това включете гарата, водене на бутоните
натиснати.
•Използвайте нагоре и надолу клавишите на гарата, за да изберете желаната
норма
• Спрете и рестартирайте станция
За да проверите текущото време по същата процедура,.
5. ПОЛЕЗНА ИНФОРМАЦИЯ :
6. ПРАВИЛО ПРОМЯНА:
4
This manual suits for next models
1
Table of contents
Languages:
Other PNI Radio manuals

PNI
PNI Escort HP 5500 User manual

PNI
PNI Escort HP 62DE User manual

PNI
PNI escort HP 8001 ASQ User manual

PNI
PNI ESCORT HP 6500 User manual

PNI
PNI PMR R30 User manual

PNI
PNI PMR R45 PRO User manual

PNI
PNI ESCORT HP 6500 User manual

PNI
PNI ESCORT HP 9500 User manual

PNI
PNI Escort HP 8000L User manual

PNI
PNI Escort HP 9001 ASQ User manual

PNI
PNI ESCORT HP 6550 User manual

PNI
PNI ESCORT HP 8900 User manual

PNI
PNI Escort HP 8024 ASQ 12V-24V User manual

PNI
PNI R40 Pro User manual

PNI
PNI ESCORT HP 72 User manual

PNI
PNI Escort HP 8001L User manual

PNI
PNI Escort HP 8000L User manual

PNI
PNI Escort HP 2020 User manual

PNI
PNI ESCORT HP 7120 User manual

PNI
PNI ESCORT HP 62 User manual