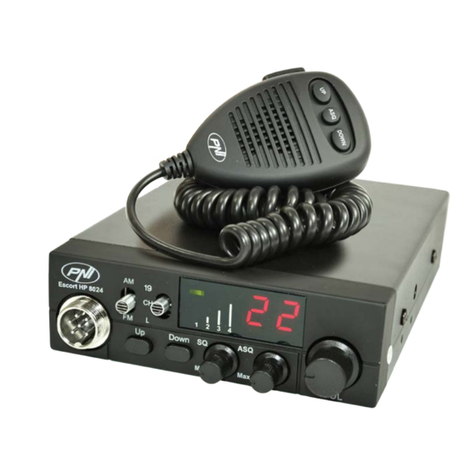
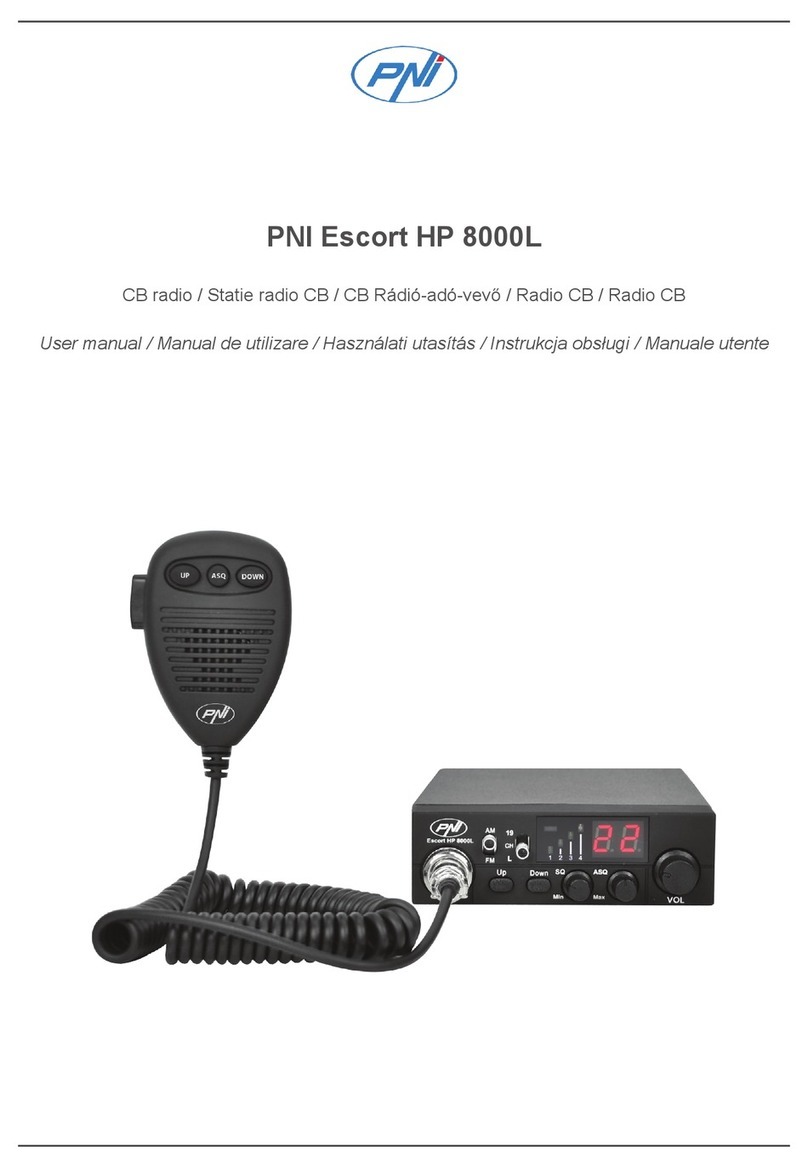
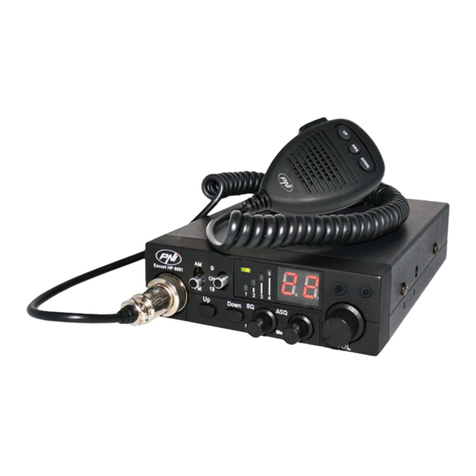
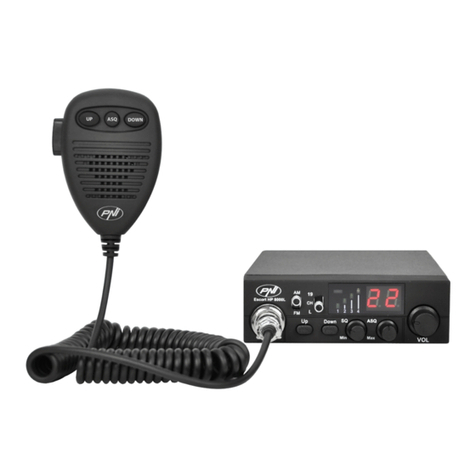
PNI Escort HP 8024 ASQ 12V-24V User manual

PNI Escort HP 8024 ASQ 12V-24V
CB radio / Statie radio CB / CB Rádió-adó-vevő / Radio CB / Radio CB
User manual / Manual de usuario / Manuel utilisateur
Használati utasítás / Manuale utente Instrukcja obsługi / Manual de utilizare

8
BESONDERE WARNUNGEN
Bitte lesen Sie die folgenden Vorsichtsmaßnahmen, um Feuer, Verletzungen oder Zerstörung der
Station zu vermeiden.
Versuchen Sie nicht, die Station einzustellen, während das Fahren gefährlich ist.
Diese Station ist für die Stromversorgung bei 13,8 V DC ausgelegt. Verwenden Sie keine 24-V-Batterie,
um die Station mit Strom zu versorgen.
Stellen Sie die Station nicht auf eine übermäßig feuchte, feuchte oder instabile Oberfläche.
Schließen Sie die Antenne nicht während der Übertragung an, es besteht Verbrennungsgefahr oder
Stromschlaggefahr.
Personen, die Herzschrittmacher verwenden, sollten während der Übertragung Abstand zur Antenne
halten und insbesondere nicht berühren.
Schließen Sie keine metallischen Gegenstände an die interne elektrische Seite an - Stromschlaggefahr.
Vermeiden Sie, die Station Temperaturen unter -30 ° C und über + 60 ° C auszusetzen, die Temperatur
an einem Fahrzeug kann manchmal 80 ° C übersteigen, was irreparable Schäden bei langen
Belichtungszeiten verursachen kann. Setzen Sie die Station nicht dem Sonnenlicht aus.
Stellen Sie nichts auf das Gerät, damit es nicht auskühlt.
Überprüfen Sie, ob Sie genügend geladene Batterie haben, um eine schnelle Entladung zu vermeiden.
Es ist wichtig, die Station vor dem Starten des Motors anzuhalten, um Schäden durch hohe
Startspannung zu vermeiden.
Beim Austausch der Sicherung müssen Sie eine 2A 250V-Sicherung Typ F verwenden. Verwenden Sie
auf keinen Fall einen höheren Wert.
Wenn ein abnormaler Geruch oder Rauch festgestellt wird, der von der Station kommt,
schalten Sie das Gerät sofort aus. Übertrage lange Zeit keine Energie, die Station kann heiß
werden.
Halten Sie die Station von Kindern fern.
WEITERE WARNHINWEISE:
Bevor Sie dieses Produkt anschließen oder benutzen, lesen Sie bitte diese Bedienungsanleitung sorgfältig
durch. Bewahren Sie dieses Handbuch zum späteren Nachschlagen auf.
Bevor Sie die Station benutzen, schließen Sie bitte die Antenne an. Überprüfen Sie das SWR vor der
Ausstellung. Ein zu hoher SWR kann dazu führen, dass das Ende der Station zerstört wird, was nicht durch
die gewährleistung gedeckt ist.
Es gibt keine vom Benutzer reparierbaren Komponenten. Wenden Sie sich für reparaturen an ein
autorisiertes Servicecenter. Um Brandgefahr zu vermeiden, verwenden Sie nur ein geeignetes netzteil.

RO
9
HAUPTMERKMALE:
•40 von Kanälen FM/AM
•Moduswahlschalter FM/AM (AM es funktioniert nur, indem man die Norm ändert)
•Notkanalwahlschalter 9/19
•Schalter - tastensperre
•Kanalwahltasten UP/DOWN
•Signalpegel-LEDs
•2-stellige Kanalnummernanzeige
•Lautstärkepotentiometer und Start / Stopp der Station
•LED-Anzeigen für RX / TX / ASQ
•Mikrofon mit Kanalwahltasten (auf / ab) und ASQ-Aktivierung
•6-polige Mikrofonbuchse an der Vorderseite
•Externe Lautsprecherbuchse
•Squelch manuell und Squelch automatisch einstellbar
TECHNISCHE DATEN:
Kanäle 40 40 AM/FM
Frequenzband 26.965 – 27.405 MHz
Frequenzsteuerung P.L.L.
Betriebstemperatur -26° - +65°C
Ernährung 13.8Vdc ±15%
Abmessungen / Gewicht 115 x 36 x 152 mm / 0.8 kg
Empfänger
Zwischenfrequenz 1° 10.7 MHz / 2° 450 KHz
Empfindlichkeit -120dBm / 12dB SINAD (FM)
-107dBm / 12dB SINAD (AM)
Audioausgabe @10% THD 2.5W bis 8 ohm
Audioverzerrung <8% beim 1 KHz
Bild Ablehnung 65 dB
Kanal nebenan 85 dB
Aktueller Verbrauch 200 mA im stand-by
Absender
Maximale HF-Leistung 4W FM bis 13.8Vdc
Modulation 85% bis 90% (AM)
3KHz ±0.2 KHz (FM)
Antennenimpedanz 50 Ohm
Aktueller Verbrauch 2 A

10
FRONTPLATTE BESCHREIBUNG:
1. 6-poliger Mikrofonanschluss
2. Schaltfläche Kanalnummer erhöhen
3. Kanalnummer nach unten Taste
4. Squelch-Squelch-Einstellungspotentiometer macht leiser, indem Rauschen eliminiert wird
im Hintergrund. Drehen Sie das Potentiometer im Uhrzeigersinn, um das Rauschen zu reduzieren, oder
gegen den Uhrzeigersinn, wenn Sie selbst die schwächsten Signale hören möchten.
5. ASQ-Potentiometer - Um den ASQ-Pegel zu erhöhen, drehen Sie das Potentiometer im uhrzeigersinn,
in diesem Fall wird das Hintergrundrauschen, aber auch der Pegel des empfangenen Signals reduziert.
EMPFEHLUNG: Schalten Sie die Station mit ASQ nach links ein.
6. Potentiometer Ein / Aus-Station und Lautstärkeeinstellung - Im Uhrzeigersinn drehen, um den Sender zu
starten und die Lautstärke zu erhöhen. Wenn kein Signal empfangen wird, wird empfohlen, die
Rauschsperre (durch Drehen des Potentiometers SQ gegen den Uhrzeigersinn) und dann die
Lautstärke auf ein angenehmes Niveau einzustellen. Beim Einschalten des Lautstärkepotentiometers
speichert die Station den zuletzt verwendeten Kanal.
7. AM / FM-Modus-Wahltaste
Hinweis: Der AM-Modus funktioniert nur durch Ändern der Norm (siehe Seite 12)
8. Multifunktionsschalter:
•"19": Notkanalwahl 19
•"CH": Kanäle 1 ~ 40 können ausgewählt werden (Abhängig von der gewählten Regel, in Rumänien ist
der Kanal 22)
•"L": Tastensperre
9. LED-Anzeige TX / ASQ - Während der Übertragung leuchtet die LED rot und wenn die ASQ-Funktion
aktiviert ist, leuchtet die LED grün
10. Signalpegelanzeige - 4-Balkenanzeige zur Überwachung der Leistung der empfangenen/ausgesandten
Signale
11. LED-Bildschirm - Zeigt die Kanalnummer an
POSTERIOR PANEL BESCHREIBUNG:
1. Antennenanschluss
2. 13.8VDC Stromkabel
3. Externe Lautsprecherbuchse
ANT EXT
13.8VDC
1 2 3

RO
11
Mikrofon Beschreibung:
1. PTT-Taste - Drücken, um zu senden
2. Kanalnummer-Schaltfläche
3. Schaltfläche zum Aktivieren / Deaktivieren der ASQ-Funktion
4. Kanalnummer nach unten Taste
INSTALLATION:
Bevor Sie die Station in Ihrem Auto installieren, wählen Sie den am besten geeigneten Ort, damit Sie ihn
benutzen können, ohne Sie während der Fahrt zu stören.
Verwenden Sie zum Installieren der Station den Support und das Zubehör in der Verpackung. Die
Stützschrauben müssen festgeklemmt sein, um Vibrationen der Station während der Fahrt zu vermeiden.
Die Halterung kann oberhalb oder unterhalb der Station positioniert werden und kann je nach Installationsart
(unter oder unter der LKW-Kabinendecke) gekippt werden.
VORSICHT: Stellen Sie sicher, dass die Spannung, mit der die Station betrieben wird, vom Hersteller
angegeben wird.
Installation der Zentraleinheit:
Stellen Sie vor dem Einschalten der Station sicher, dass der Netzschalter vollständig nach links gedreht ist.
Das Netzkabel der Station enthält eine Schutzsicherung am roten Kabel. Verbinden Sie das
Stromversorgungskabel der Station mit erhöhter Polarität mit dem Bordnetz (auch wenn die Station
verpolungssicher ist).
Verbinden Sie das rote Kabel mit dem Pluspol (+) und das schwarze Kabel mit dem Minuspol (-) des
Bordnetzes. Überprüfen Sie die korrekten Verbindungen, um zu verhindern, dass sie unterbrochen oder
möglicherweise kurzgeschlossen werden.
WARNUNG: Im Falle einer Verbrennung, ersetzen Sie es nicht durch einen höheren Wert. Die Fabrik hat
2A.
Installieren Sie die Antenne:
Um die Station zu benutzen, benötigen Sie eine Antenne mit 27,225 MHz.
Um die Antenne zu installieren, wenden Sie sich an einen Fachmann.
Bevor die Antenne an die Station angeschlossen wird, muss sie mit einem speziellen Gerät überprüft
werden, um den Ausfall des Übertragungsschaltkreises zu verhindern.
Typischerweise sollte die Antenne auf der höchsten Seite des Fahrzeugs positioniert sein, ohne
ASQ DOWNUP
1
2 3 4

12
Hindernissen abgeschirmt zu sein und so weit wie möglich von irgendeiner elektrischen Quelle oder
elektromagnetischen Störungen entfernt zu sein. Das Koaxialkabel der Antenne sollte nicht unterbrochen
von oder gedrückt werden. Verbinden Sie den Stecker am Ende des Antennenkoaxialkabels mit der
Antennenbuchse auf der Rückseite der Station.
Überprüfen des Betriebs der Station:
Nach der Installation und der Stromversorgung durch das elektrische System des Fahrzeugs gehen Sie
folgendermaßen vor, um den Betrieb zu überprüfen:
•Überprüfen Sie, ob das Kraftwerk korrekt eingeschaltet ist
•Überprüfen Sie die Antennenverbindung zur Station
•Schließen Sie das Mikrofon an die Buchse an der Vorderseite der Station an
•Schalten Sie den Sender ein, indem Sie das Lautstärkepotentiometer im Uhrzeigersinn drehen und die
Lautstärke auf das gewünschte Niveau einstellen
•Wählen Sie den gewünschten Kanal mit den Tasten UP / DOWN an der Vorderseite oder am Mikrofon.
•Drücken Sie die SQ-Taste im Grenzbereich, in dem das Hintergrundgeräusch verschwindet.
Hinweis: Wenn der ASQ-Modus aktiviert ist (durch Drücken des ASQ am Mikrofon), kann die SQ-Taste nicht
aktiviert werden
•Drücken Sie zum Senden die PTT-Taste am Mikrofon und lassen Sie sie zum Empfang los.
•Überprüfen Sie den Signalpegel, der über die Signalbalken auf dem Frontpanel empfangen wird.
•Drehen Sie die ASQ-Funktion am Mikrofon und stellen Sie den Pegel über die ASQ-Taste an der
Vorderseite der Station ein.
NÜTZLICHE LINKS:
Vertauschen Sie nicht die Polarität des Kraftwerks.
Ersetzen Sie die Sicherung nicht durch einen höheren Wert. Die Fabrik hat 2A.
Senden Sie nicht ohne Antenne oder eine defekte oder unkalibrierte Antenne, um ein Verbrennen des
Emissionsendes zu vermeiden. Passen Sie SQ und ASQ an die Grenze des Verschwindens von
Hintergrundgeräuschen an. Wenn Sie den SQ-Knopf zu stark im Uhrzeigersinn drehen, erhalten Sie nur
starke Signale (die in der Nähe emittiert werden).
Standardänderung:
Gehen Sie folgendermaßen vor, um die Norm zu ändern, in der Sie das CB-Radio verwenden:
•Halten Sie die Tasten "Down" und "PTT" am Mikrofon gedrückt und schalten Sie den Sender ein
•Verwenden Sie die Aufwärts- und Abwärtstasten an der Station, um die gewünschte Einstellung auszuwählen
•Stoppen und starten Sie die Station neu
Um die aktuelle Norm zu überprüfen, verwenden Sie dasselbe Verfahren.
Verfügbare Regeln:
• CE: 26.965 - 27.405 MHz doar FM (Rumänien)
• 9: 26.965 - 26.955 80 canale AM FM (Deutschland)
•
A: 25.615 - 26.055MHz (Russland)
•b: 26.065 - 26.505MHz (Russland)
•C: 26.515 - 26.955MHz (Russland)
•d: 26.965 - 27.405MHz (Italien)
•E: 27.415 - 27.855MHz (Spanien)
•F: 27.865 - 28.305MHz (Frankreich)
•p: 26.960 - 27.400MHz (Polen)
•n: 26.330 - 26.770MHz AM FM (Niederlande)

RO
13
FREQUENZ UND RECHTSKRAFT IN EUROPA:
Banda Land Anzahl der Kanäle AM oder FM Sendeleistung
CE (CEPT) Europa 40 FM 4 Watts (in ganz Europa)
EU Europa 40 AM und FM 4 Watts FM, 4 Watt AM
UK UK 40 FM 4 Watts
SP Spanien 40 AM und FM 4 Watts
I0 Italien 40 AM und FM 4 Watts
I2 Italien 36 AM und FM 4 Watts
FR Frankreich 40 AM und FM 4 Watts FM, 1 Watt AM
D2 Deutschland 40 FM, 12 AM AM und FM 4 Watts FM, 1 Watt AM
DE Deutschland 80 FM, 12 AM AM und FM 4 Watts FM, 1 Watt AM
PL Polen 40 AM und FM 4 Watts
RU Russland 400 AM und FM 4 Watts (in Europa nicht erlaubt)
PO Russland 400 AM und FM 4 Watts (in Europa nicht erlaubt)

2
WARNINGS
Please read the following precautions to prevent re, personal injury or the radio destruction.
Do not attempt to adjust the radio while driving; is dangerous.
This radio is designed for power supply at 13.8V DC. Do not use a 24V battery to power the radio.
Do not place the station on an excessively dusty, damp or unstable surface.
Do not connect the antenna during transmission, risk of burning or electric shock.
Please keep distance from devices that cause interference (such as TV, generator, etc.)
People who use pacemakers are advised to keep distance from the antenna during transmission and
especially not to touch it.
Do not connect metal objects to the internal electrical side; danger of electric shock.
Avoid exposing the radio to temperatures below -30°C and above + 60°C, the temperature on a vehicle
may sometimes exceed 80°C, which can cause irreparable damage to electric devices. Do not expose the
radio to sunlight.
Do not place anything on the radio, it will prevent it from cooling down.
Check to see if you have enough charged battery to avoid rapid discharge.
It is important to stop the radio before starting the engine, to avoid damage caused by high starting voltage.
You must use a 2A 250V fuse type F. Under no circumstances use a higher value.
If an abnormal odor or smoke is detected as coming from the radio, switch o the appliance immediately.
Do not transmit for a long time, the radio may warm up.
Keep the station away from children.
OTHER WARNING:
Before connecting or using this product, please read these operating instructions carefully. Keep this manual
for future reference.
Before using the radio, please connect the antenna, then check the SWR before transmitting. A too high SWR
can cause demage to the CB nal output transistors, which is not covered by the warranty.
The radio does not includes components that can be repaired by the user. Please contact an authorized
service center.
To prevent the risk of re, use only a suitable power supply.

EN
3
MAIN CARACTERISTICS:
• 40 FM/AM channels
• 12 V / 24 V power supply
• FM / AM mode selection switch (AM only works by changing the norm)
• Emergency channel selection switch 9/19
• Key lock switch
• Channel selection UP / DOWN buttons
• Signal level LED
• 2-digit channel number indicator
• Volume and radio start / stop potentiometer
• LED indicators for RX / TX / ASQ
• Microphone with channel selection buttons (up / down) and ASQ activation
• 6-pin microphone jack on the front panel
• External speaker jack
• Manual squelch and adjustable ASQ
TECHNICAL SPECIFICATIONS:
Channels 40 40 AM/FM
Frequency band 26.965 – 27.405 MHz
Frequency control P.L.L.
Operating temperature -26° - +65°C
Power supply 12V / 24V
Dimensions / weight 115 x 36 x 152 mm / 0.8 kg
Receiver
Intermediate frequency 1° 10.7 MHz / 2° 450 KHz
Sensitivity -120dBm / 12dB SINAD (FM)
-107dBm / 12dB SINAD (AM)
Audio output @10% THD 2.5W la 8 ohm
Audio distortion <8% at 1 KHz
Image rejection 65 dB
Canal adjacent 85 dB
Current consumption 200 mA in stand-by
Transmitter
Maximum RF power 4W FM at 13.8Vdc
Modulation 85% ~ 90% (AM)
3KHz ±0.2 KHz (FM)
Antenna Impedance 50 Ohm
Current consumption 2 A

4
FRONT PANEL DESCRIPTION:
1. 6-pin microphone connector
2. Increase channel number
3. Decrease channel number
4. Potentiometer for squelch adjustment – the squelch makes your radio quieter by removing the
background noise. Rotate the potentiometer clockwise to reduce the noise or counterclockwise if you
want to hear even the weakest signals.
5. ASQ Potentiometer – to increase the ASQ level rotate the potentiometer clockwise, in this case it
reduces the background noise but also the signal level received.
Tip: turn on the station with ASQ turned left.
6. Potentiometer for turing on / o teh radio and for volume adjustment – Turn clockwise to start station
and increase volume. If no signal is received, we suggest you to adjust the squelch (by rotating the SQ
potentiometer counterclockwise) and then the volume to a comfortable level. When switched on from the
volume potentiometer, the radio will store the last channel used.
7. AM / FM mode select button
Note: The radio works in AM mode only by changing the standard (details on page 6)
8. Multifunctional switch:
• “19“: emergency channel selection
• “CH“: se pot selecta canalele 1~40 (according to the selected standard)
• “L“: key lock
9. TX / ASQ LED indicator - During the transmission the LED will be red, and when the ASQ function is
activated, the LED will be green.
10. Signal level indicator – 4-bar indicator to monitor the power of the received / emitted signals
11. LED display – displays the channel number
REAR PANEL DESCRIPTION:
1. Antenna jack
2. 13.8VDC power cable
3. External speaker jack
ANT EXT
13.8VDC
1 2 3

EN
5
MICROPHONE DESCRIPTION:
1. PTT button – Push to Talk
2. Increase channel number
3. Enable / disable ASQ function
4. Decrease channel number
INSTALLATION INSTRUCTIONS:
Before installing the radio in your vehicle, choose the most suitable location so you can use it without being
disturbed while driving.
To install the radio, use the mounting bracket and accessories in the package. The screws must be securely
clamped to avoid vibration of the station while driving. The mounting bracket can be positioned above or below
the device and can be tilted depending on the installation mode (under the dashboard or under the truck cabin
ceiling).
WARNING: Ensure that the voltage at which the station is powered is the voltage indicated by the manufacturer.
Installation of the central unit:
Before powering the radio, make sure that the power button is fully turned to the left.
The power cord of the station includes a protective fuse on the red wire. Connect the radio's power cable to
the car's electrical system paying attention to the polarity (even if the radio has protection against polarity
reversal).
Connect the red wire to the positive terminal (+) and the black wire at the negative terminal (-) of the vehicle's
electrical system.Check the connections made correctly to prevent them from being disconnected or possibly
short-circuiting.
WARNING: Do not replace the fuse with a higher value. The fone from the actory has 2A.
Antenna installation:
To use this radio, you need an antenna that operates at 27.225MHz.
To install the antenna, call a specialist.
Before connecting the antenna to the radio, it is necessary to check it with a specialized device to prevent the
transmission circuit failure.
ASQ DOWNUP
1
2 3 4

6
Typically, the antenna should be positioned on the highest side of the vehicle without being obstructed by
obstacles and as far from any electrical source or electromagnetic noise. The coaxial cable of the antenna
should not be interrupted or pressed. Connect the plug at the end of the coaxial antenna cable to the antenna
jack on the rear panel of the radio.
Check the radio:
Once installed and powered from the vehicle's electrical system, do the following to verify its operation:
• Check that the radio is powered correctly
• Check the antenna connection to the radio
• Connect the microphone to the jack on the front panel of the radio
• Turn on the radio by rotating the volume knob clockwise and adjust the volume to the desired level
• Select the desired channel with the UP / DOWN keys on the front panel or on the microphone.
• Press the SQ button in the limit area where the background noise disappears.
Note: If the ASQ mode is enabled (by pressing the ASQ on the microphone) the SQ button can not be activated
• Press the PTT button on the microphone to emit, and release it to receive
• Check the signal level received via the signal bars on the front panel
• Turn the ASQ function on the microphone and adjust its level from the ASQ button on the front panel of
the station
USEFUL TIPS:
Do not reverse the polarity when powering the radio.
Do not replace the fuse with a higher value. The fone from the factory has 2A.
Do not emit without an antenna or a broken or not tuned antenna to avoid burning the CB nal output transistors.
Adjust the SQ and ASQ until the background noise disappears. By turning the SQ knob clockwise too much,
you will receive only the strong signals (those emitted nearby).
CHANGING THE STANDARD:
To change the standard in which you are using the CB radio, do the following:
• While holding down the Down and PTT buttons on the microphone, turn on the station
• Use the up and down keys on the station to select the desired setting
• Turn o and then restart the station
To check the current norm do the same procedure.
Available standards:
• CE: 26.965 - 27.405 MHz doar FM (Romania)
• 9: 26.965 - 26.955 80 canale AM FM (Germany)
• A: 25.615 - 26.055MHz (Russia)
• b: 26.065 - 26.505MHz (Russia)
• C: 26.515 - 26.955MHz (Russia)
• d: 26.965 - 27.405MHz (Italy)
• E: 27.415 - 27.855MHz (Spain)
• F: 27.865 - 28.305MHz (France)
• p: 26.960 - 27.400MHz (Poland)
• n: 26.330 - 26.770MHz AM FM (Netherlands)

EN
7
FREQUENCIES AND LEGAL POWERS IN EUROPE:
Band Country Channels number AM or FM Output power
CE (CEPT) Europe 40 FM 4 Watts (used all over Europe)
EU Europe 40 AM and FM 4 Watts FM, 4 Watt AM
UK UK 40 FM 4 Watts
SP Spain 40 AM and FM 4 Watts
I0 Italy 40 AM and FM 4 Watts
I2 Italy 36 AM and FM 4 Watts
FR France 40 AM and FM 4 Watts FM, 1 Watt AM
D2 Germany 40 FM, 12 AM AM and FM 4 Watts FM, 1 Watt AM
DE Germany 80 FM, 12 AM AM and FM 4 Watts FM, 1 Watt AM
PL Poland 40 AM and FM 4 Watts
RU Russia 400 AM and FM 4 Watts (not allowed in Europe)
PO Russia 400 AM and FM 4 Watts (not allowed in Europe)

8
ADVERTENCIAS ESPECIALES
Os pedimos por favor a que leáis las siguientes precauciones para prevenir los incendios, las lesiones
personales o la destrucción del dispositivo.
No intente ajustar el dispositivo mientras conduce el coche, es peligroso.
Este dispositivo está diseñado para utilizarlo con una fuente de alimentación de 13.8V DC. No utilice una
batería de 24V como fuente de alimentación para el dispositivo.
No coloque el aparato sobre una supercie con mucho polvo, humedad o inestable.
No conecte la antena durante la transmisión, hay riesgo de quemaduras o descarga eléctrica. .
Os pedimos por favor a que mantengáis una distancia de los dispositivos que causan interferencias
(como TV, generadores).
Se recomienda a los usuarios de marcapasos que mantengan una distancia de la antena durante la
transmisión y, especialmente, que no la toquen.
No acerque objetos metálicos de la parte eléctrica interna; peligro de descarga eléctrica.
Evite exponer la estación a temperaturas por debajo de -30 ° C y por encima de + 60 ° C, la temperatura
en un vehículo a veces puede exceder los 80 ° C, lo que puede causar un daño irreparable a la exposición
prolongada. No exponga la estación a la luz solar.
No coloque nada sobre el aparato, ya que evitará a que se enfríe. Verique si la batería está sucientemente
cargada para evitar una descarga rápida.
Es importante detener la estación antes de arrancar el motor para evitar daños causados por el alto voltaje
de arranque.
Al reemplazar el fusible, debe usar un fusible de 2A 250V tipo F. Bajo ninguna circunstancia use un valor
más alto.
Si se detecta un olor anormal o humo proveniente del dispositivo, apague el aparato inmediatamente
No transmita durante mucho tiempo, el dispositivo puede calentarse.
Mantener la estación fuera del alcance de los niños.
OTRAS ADVERTENCIAS:
Antes de conectar o utilizar este producto, os rogamos a que leáis con atención estas instrucciones de
utilización. Guarda este manual para poder utilizarlo más adelante.
Antes de que utilice el dispositivo, le rogamos a que conecte la antena. Verique el SWR antes de empezar
la transmisión. Un SWR demasiado grande puede causar la destrucción del nal, lo que no está cubierto por
la garantía.
No hay componentes que pueden ser reparados por el usuario. Para reparaciones póngase en contacto con
un centro de reparaciones autorizado. Para evitar el riesgo de incendio no utilice nada más que una fuente
de alimentación adecuada.
CARACTERÍSTICAS PRINCIPALES:
• 40 canales FM/AM
• Interruptor de selección modo FM/AM (AM funciona solamente cambiando la norma)
• Interruptor de selección de canal de emergencia 9/19
• Interruptor de bloqueo de teclas
• Botones de selection de canal UP/DOWN
• LED-s que indican el nivel de la señal
• Indicador de numero de canal de 2 dígitos
• Potenciómetro de volumen y para encender/apagar el dispositivo
• Indicadores LED para RX/TX/ASQ
• Micrófono con botones para la selección del canal (arriba/abajo) y activación de ASQ
• Conector micrófono con 6 pines en el panel frontal
• Conector para altavoces externos
• Squelch manual y squelch automático ajustable

ES
9
ESPECIFICACIONES TÉCNICAS:
Canales 40 40 AM/FM
Banda de frecuencia 26.965 – 27.405 MHz
Control frecuencia P.L.L.
Temperatura de funcionamiento -26° - +65°C
Fuente alimentación 12V / 24V
Dimensiones/peso 115 x 36 x 152 mm / 0.8 kg
Receptor
Frecuencia intermediaria 1° 10.7 MHz / 2° 450 KHz
Sensibilidad -120dBm / 12dB SINAD (FM)
-107dBm / 12dB SINAD (AM)
Salida audio @10% THD 2.5W la 8 ohm
Distorsión audio <8% at 1 KHz
Rechazo de imagen 65 dB
Canal adyacente 85 dB
Consumo electricidad 200 mA in stand-by
Transmisor
Potencia máxima RF 4W FM la 13.8Vdc
Modulación 85% la 90% (AM)
3KHz ±0.2 KHz (FM)
Impedancia de la antena 50 Ohm
Consumo electricidad 2 A
DESCRIPCIÓN PANEL FRONTAL:
1. Conector 6 pines para el micrófono
2. Botón aumento número de canal
3. Botón para bajar el número de canal
4. Potenciómetro para ajustar el squelch – el squelch consigue a que el dispositivo sea más silencioso
eliminando los ruidos de fondo. Gire el potenciómetro en el sentido de las agujas del reloj para reducir el
ruido o en el sentido contrario a las agujas del reloj si deseáis escuchar las señales más débiles.
5. Potenciómetro ASQ – para aumentar el nivel ASQ gire el potenciómetro en el sentido de las agujas del

10
reloj, en este caso se reduce el ruido de fondo, pero también el nivel de la señal que se recibe
RECOMENDACIÓN: encender el dispositivo con el ASQ girado hacia la izquierda
6. Potenciómetro encender/apagar el dispositivo y ajuste volumen – gire en el sentido de las agujas del reloj
para encender el dispositivo y aumentar el volumen. Si no recibe ninguna señal, le aconsejamos a que ajuste
el squelch (girando el potenciómetro SQ en el sentido contrario de las agujas del reloj) y luego el volumen a
un nivel cómodo. Cuando se enciende mediante el potenciómetro de volumen, el dispositivo memorizara el
último canal utilizado.
7. Botón selección modo AM/FM
Nota: el dispositivo funciona en el modo AM, funciona solamente cambiando la norma (detalles en la página
39)
8. Interruptor multifuncional:
• “19“: selección canal de emergencia 19
• “CH“: se pueden seleccionar los canales 1~40 (Según la norma elegida. En Rumania el canal
utilizado es el 22)
• “L“: bloqueo tecla
9. LED indicador TX/ASQ – Durante la transmisión el LED será de color rojo, y cuando la función ASQ esta
activada el LED tendrá el color verde.
10. Indicador nivel señal – indicador con 4 barras para monitorizar la potencia de las señales recibidas/
transmitidas
11. Pantalla LED – muestra el número de canal
DESCRIPCIÓN PANEL POSTERIOR:
1. Conector de antena
2. Cable de alimentación 13.8VDC
3. Conector para altavoz externo
DESCRIPTION MICRÓFONO:
1. Botón PTT – pulse para transmitir
2. Botón aumentar el número de canal
3. Botón activar/desactivar función ASQ
4. Botón reducir el número de canal
INSTALACIÓN:
ANT EXT
13.8VDC
1 2 3
ASQ DOWNUP
1
2 3 4

ES
11
Antes de instalar el dispositivo en el coche, elige la ubicación más adecuada, de tal manera para que pueda
utilizarlo sin molestar mientras conduce.
Para instalar el dispositivo, utilice el soporte y los accesorios incluidos en el paquete. Los tornillos del soporte
deben ser bien sujetos para evitar a que el dispositivo se mueva durante el viaje. El soporte de montaje puede
ser posicionado encima o debajo del dispositivo y se puede inclinar según el modo de instalación (debajo del
salpicadero o del techo de la cabina del camión).
ATENCIÓN: Asegúrese de que la tensión a la que alimenta el dispositivo es la indicada por el fabricante.
Instalación de la unidad central:
Antes de conectar el dispositivo a la fuente de alimentación, asegúrese de que el botón para encender esta
girado al máximo hacia la izquierda
El cable de alimentación del dispositivo incluye un fusible de protección en el cable rojo. Conecte el cable de
alimentación del dispositivo al sistema eléctrico del vehículo con mucha atención a la polaridad (incluso si el
dispositivo tiene protección contra inversión de polaridad).
Conecte el cable rojo al borne positivo (+) y el cable negro al borne negativo (-) del sistema eléctrico del
vehículo. Verique a que la conexión efectuada sea correcta para evitar que se desconecten o a que se
produzca un cortocircuito.
ATENCIÓN: Si el fusible se quema, no lo reemplace con otro con un valor más alto. El original tiene un valor
de 2A.
Instalación de la antena:
Para utilizar el dispositivo se necesita una antena que funciona en banda de frecuencia de 27.225MHz. Para
instalar la antena póngase en contacto con un especialista.
Antes de conectar la antena al dispositivo es necesario vericarla mediante un aparato especial para evitar
defecciones en el circuito de transmisión del dispositivo.
Por lo general, la antena debe colocarse en la parte más alta de vehículo sin estar obstruida por obstáculos y
lo más lejos de cualquier fuente eléctrica o ruido electromagnético. El cable coaxial de la antena no debe ser
interrumpido o presionado. Conecte el conector que está al nal del cable coaxial de la antena con la toma
que está detrás del dispositivo.
Comprobar el funcionamiento del dispositivo:
• Una vez instalado el dispositivo y conectado al sistema eléctrico del vehículo, haga lo siguiente para
vericar el funcionamiento de esta:
• Comprueba si el dispositivo esta correctamente conectado a la fuente eléctrica;
• Verique la conexión de la antena con el dispositivo;
• Conecte el micrófono a la toma del panel frontal del dispositivo
• Encienda el dispositivo girando el potenciómetro de volumen en el sentido de las agujas de reloj y ajuste
el volumen al nivel deseado.
• Seleccione el canal deseado mediante las teclas ARRIBA/ABAJO (UP/DOWN) del panel frontal del
dispositivo o del micrófono. NOTA: en Rumania se utiliza el canal 22
• Presione el botón SQ en el área donde desaparece el ruido de fondo.
Nota: Si el modo ASQ está activado (pulsando la tecla ASQ del micrófono) el botón SQ ya no puede ser
utilizado
• Pulse el botón PTT del micrófono para transmitir, y suéltelo para recibir;
• Verique el nivel de la señal recibida mediante las barras de señal del panel frontal del dispositivo;
• Activar la función ASQ del micrófono y ajuste su nivel mediante el botón ASQ situado en el panel frontal
del dispositivo
CONSEJOS:
No invierta la polaridad de la fuente de alimentación del dispositivo.
No reemplace el fusible quemado con otro que tiene un valor más alto El de fábrica tiene 2A.
No transmita sin antena o con la antena rota o sin ser calibrada, para evitar que se queme el nal de la
transmisión. Ajuste SQ y ASQ al límite de desaparición del ruido de fondo. Girando demasiado el botón SQ en

12
el sentido de las agujas de reloj solo conseguirá recibir señales fuertes (las que se emiten cerca).
CAMBIO DE LA NORMA:
Para cambiar la norma en la que utiliza la radio CB haga lo siguiente:
• Mientras mantiene presionados los botones Abajo (Down) y PTT del micrófono encienda el dispositivo;
• Utilice las teclas arriba y abajo (up y down) que están situados en el dispositivo para elegir la norma
deseada;
• Apague y reinicie el dispositivo
Para vericar la norma actual utilice el mismo procedimiento.
Normas disponibles:
• CE: 26.965 - 27.405 MHz solo FM (Rumania)
• 9: 26.965 - 26.955 80 canales AM FM (Alemania)
• A: 25.615 - 26.055MHz (Rusia)
• b: 26.065 - 26.505MHz (Rusia)
• C: 26.515 - 26.955MHz (Rusia)
• d: 26.965 - 27.405MHz (Italia)
• E: 27.415 - 27.855MHz (España)
• F: 27.865 - 28.305MHz (Francia)
• p: 26.960 - 27.400MHz (Polonia)
• n: 26.330 - 26.770MHz AM FM (Holanda)
BANDAS DE FRECUENCIAS Y POTENCIA DE TRANSMISIÓN LEGALES EN EUROPA:
Banda País Número de
canales
AM o FM Potencia de transmisión
CE (CEPT) Europa 40 FM 4 Watts (utilizada en toda Europa)
EU Europa 40 AM e FM 4 Watts FM, 4 Watt AM
UK UK 40 FM 4 Watts
SP España 40 AM e FM 4 Watts
I0 Italia 40 AM e FM 4 Watts
I2 Italia 36 AM e FM 4 Watts
FR Francia 40 AM e FM 4 Watts FM, 1 Watt AM
D2 Alemania 40 FM, 12 AM AM e FM 4 Watts FM, 1 Watt AM
DE Alemania 80 FM, 12 AM AM e FM 4 Watts FM, 1 Watt AM
PL Polonia 40 AM e FM 4 Watts
RU Rusia 400 AM e FM 4 Watts (no permitida en Europa)
PO Rusia 400 AM e FM 4 Watts (no permitida en Europa)

FR
13
AVERTISSEMENTS SPÉCIAUX
Veuillez lire les précautions suivantes pour prévenir les incendies, les blessures corporelles ou la
destruction de la radio CB.
N'essayez pas de régler la radio CB pendant que vous conduisez, est dangereuse.
Cette radio CB est conçue pour une alimentation électrique à 13,8 V CC. Ne pas utiliser de batterie 24V
pour alimenter la station.
Ne placez pas la radio CB sur une surface excessivement humide ou instable.
Ne pas connecter l’antenne pendant la transmission, risque de brûlure ou de choc électrique.
Veuillez vous tenir à distance des appareils générant des interférences (tels que la télévision, un
générateur, etc.)
Il est conseillé aux utilisateurs de stimulateurs cardiaques de rester à distance de l’antenne pendant la
transmission et surtout de ne pas la toucher.
Ne connectez pas d'objets métalliques au côté électrique interne; risque d'électrocution.
Évitez d'exposer la radio CB à des températures inférieures à -30°C et supérieures à + 60°C. La
température sur un véhicule peut parfois dépasser 80°C, ce qui peut causer des dommages irréparables aux
longues expositions. Ne pas exposer la radio au soleil.
Ne posez rien sur l'appareil, cela l'empêcherait de refroidir.
Vériez si votre batterie est susamment chargée pour éviter une décharge rapide.
Il est important d'arrêter la radio avant de démarrer le moteur pour éviter les dommages causés par une
tension de démarrage élevée.
Lors du remplacement d'un fusible, vous devez utiliser un fusible 2A 250V de type F. Ne jamais utiliser
une valeur supérieure.
Si une odeur anormale ou de la fumée est détectée comme venant de la radio, éteignez immédiatement
l'appareil.
Ne pas transmettre avec une puissance élevée pendant longtemps, la radio peut chauer.
Gardez la radio loin des enfants.
AUTRES AVERTISSEMENTS:
Avant de connecter ou d’utiliser ce produit, veuillez lire attentivement ce mode d’emploi.
Conservez ce manuel pour référence future.
Avant d’utiliser la radio CB, veuillez connecter l’antenne. Vériez le SWR avant de le publier. Un SWR trop
élevé peut entraîner la destruction de l'extrémité de la radio, ce qui n'est pas couvert par la garantie.
Il n'y a pas de composants réparables par l'utilisateur. Pour les réparations, contactez un centre de service
autorisé.
Pour éviter les risques d’incendie, utilisez uniquement une source d’alimentation appropriée.

14
CARACTÉRISTIQUES PRINCIPALES:
• 40 chaines FM/AM
• Sélecteur de mode FM / AM (AM ne fonctionne qu'en modiant la norme)
• Sélecteur de canal d'urgence 9/19
• Interrupteur verrouillage des boutons/touches
• Sélection des chaines UP / DOWN
• LED de niveau de signal
• Indicateur de numéro de canal à 2 chires
• Potentiomètre de volume et start/stop de la radio
• Indicateurs LED pour RX / TX / ASQ
• Microphone avec touches de sélection de chaines (UP / DOWN) et activation de l'ASQ
• Prise pour microphone a 6 broches sur le panneau devant
• Prise pour haut-parleur externe
• Squelch manuel et squelch automatique réglable
SPÉCIFICATIONS TECHNIQUES:
Chaines 40 40 AM/FM
Bande de fréquence 26.965 – 27.405 MHz
Contrôle de fréquence P.L.L.
Température de fonctionnement -26° - +65°C
Alimentation 12V / 24V
Dimensions / poids 115 x 36 x 152 mm / 0.8 kg
Réception
Fréquence intermédiaire 1° 10.7 MHz / 2° 450 KHz
Sensibilité -120dBm / 12dB SINAD (FM)
-107dBm / 12dB SINAD (AM)
Sortie audio @10% THD 2.5W a 8 ohm
Distorsion audio <8% at 1 KHz
Rejet de l'image 65 dB
Canal adjacent 85 dB
Consommation d'énergie 200 mA in stand-by
Émission
Puissance maximale RF 4W FM la 13.8Vdc
Modulation 85% a 90% (AM)
3KHz ±0.2 KHz (FM)
Impédance d'antenne 50 Ohm
Consommation d'énergie 2 A
Table of contents
Languages:
Other PNI Radio manuals

PNI
PNI ESCORT HP 7120 User manual

PNI
PNI ESCORT HP 9700 User manual

PNI
PNI Escort HP 9700 USB User manual

PNI
PNI Escort HP 8001L User manual

PNI
PNI R40 Pro User manual

PNI
PNI PMR R60 User manual

PNI
PNI Escort HP 8000L User manual

PNI
PNI R40 Pro User manual

PNI
PNI Escort HP 62DE User manual

PNI
PNI ESCORT HP 7110 User manual

PNI
PNI RD290 User manual

PNI
PNI ESCORT HP 72 User manual

PNI
PNI PMR R40 Pro User manual

PNI
PNI ESCORT HP 6550 User manual

PNI
PNI Escort HP 5500 User manual

PNI
PNI Escort HP 82 User manual

PNI
PNI Escort HP 8000 ASQ User manual

PNI
PNI Escort HP 446 User manual

PNI
PNI ESCORT HP 6500 User manual

PNI
PNI escort HP 8001 ASQ User manual