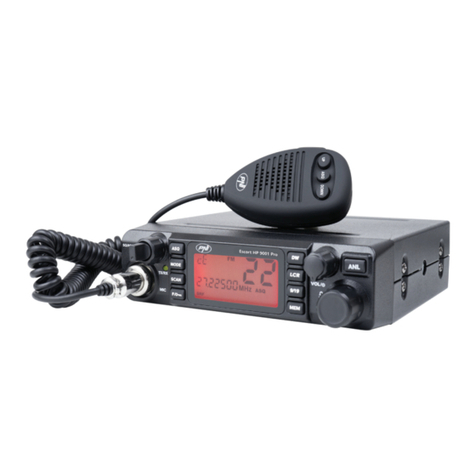
PNI ESCORT HP 55 User manual

PNI ESCORT HP 55
CB Radio/ CB-Radio / Radio CB / Statie radio CB
EN User manual ............................................. 3
DE Benutzerhandbuch ................................... 18
ES Manual de usuario .................................... 35
FR Manuel utilisateur ..................................... 51
HU Használati utasítás ................................... 67
IT Manuale utente ........................................ 83
PL Instrukcja obsługi ..................................... 99
RO Manual de utilizare ................................... 115


3User manual
English
Special warnings
Read the warnings below to prevent fire, personal injury, or damages to
the CB radio or to the CB antenna.
Do not try to operate the radio while driving. Doing so expose yourself to
the risk of road accidents.
This radio is designed for 12V DC power supply. Do not use a voltage
higher than the recommended one.
Do not place the radio on an excessively dusty, damp or unstable surface.
Do not connect the antenna during transmission; risk of electric shock.
Please keep away from interfering devices (such as: tv, generator, etc.)
Those who use pacemakers are advised to keep their distance from the
antenna during transmission and especially not to touch it.
Do not bring metal objects close to the internal electrical part of the
radio; danger of electric shock.
Avoid exposing the radio to temperatures lower than -26°C and higher
than + 60°C, the temperature on board a vehicle can sometimes exceed
80°C, which can cause irreparable damage to the radio in case of prolonged
exposure. Do not expose the radio to sunlight for a long time.
Do not cover the radio, it will prevent it from cooling.
Check that the vehicle battery is suciently charged to avoid rapid
discharge.
It is important to turn o the radio before starting the engine to avoid
damage caused by high starting voltage.
When replacing the fuse, you must use a 2A 250V type F fuse. Do not
use a higher value fuse.
If an abnormal odor or smoke is detected coming out of the radio, turn o
the radio immediately.
Do not transmit for a long time, the radio may heat up and malfunction.
Keep the radio away from children.
Other warnings:
Before connecting or using this product, please read the instructions for use
carefully. Keep this manual for future reference.
Before using the radio, connect the antenna. Check the SWR before
transmitting. A too high SWR can lead to the destruction of the radio

User manual 4
English
terminals, internal components that are not covered by the warranty.
There are no components of the radio that can be repaired by the user. For
repairs, contact an authorized service center.
To prevent the risk of fire, use a suitable power supply.
Key features
• All control keys are on placed the microphone
• Multicolor screen (7 colors)
• Manual squelch (28 levels)
• Automatic Digital Squelch (5 levels)
• RF Gain
• Channel scan function
• S-meter RX-TX on the screen
• Lighter plug included
• 2-pin Kenwood connector for audio accessories
Installation instructions
Before installing the radio in your car, choose the most suitable location so
that when using it, it does not disturb you while driving.
To install the radio, use the bracket and accessories in the package. The
screws must be tightened well to avoid vibration of the radio while driving.
The mounting bracket can be positioned above or below the radio, and it can
be tilted depending on the installation method.
WARNING: Make sure that the voltage at which you supply the radio is the one
indicated by the manufacturer (12V).
Power the radio
The power cord of the radio includes a protective fuse (on the red wire). The
radio is equipped with a cigarette lighter plug. To power the radio, insert the
cigarette lighter plug into the dedicated slot in your car.
WARNING: If the fuse burns, do not replace it with a higher value one. The one

5User manual
English
in the factory has 2A.
The installation of the antenna
To use the radio you need an antenna that operates in the frequency 26-
28MHz.
To install and calibrate the antenna, consult a specialized technician.
Usually, the antenna must be positioned on the highest part of the vehicle,
without being shielded by obstacles and as far as possible from any electrical
source or electromagnetic noise. The coaxial cable of the antenna must not be
interrupted or pressed. Connect the plug on the end of the antenna coaxial
cable to the antenna plug on the back of the radio.
Testing the radio
Once the radio is installed and powered, test its correct operation:
• Check that the radio is powered correctly
• Check the antenna connection to the radio
• Connect the microphone to the jack on the front panel of the radio
• Turn on the radio by long pressing MUTE/PWR key.
• Select the desired channel using the ◄and ►keys on the microphone.
Note: in Romania channel 22 is used
• Adjustthesquelchleveltotheareawherethebackgroundnoisedisappears.
(Instructions on activating and adjusting the ASQ/SQ function can be
found on the page 9)
• Press the PTT button on the microphone to output and release it to
receive
• Check the level of the signal transmitted/received via the signal bars on
the screen of the microphone.

User manual 6
English
Keys and functions
No Key name Short press function Long press function
1Earphone
connector - -
2SCAN Channels scan -
3EMG Enable emergency
channels -

7User manual
English
4DOWN key Decrease the channel
number Decreases the channel
number continuously
5A/F Switch between AM
and FM mode/return to
the last channel -
6 F Press twice briefly to
activate the key lock
function (Lock) Go to settings menu
7Speaker - -
8 LCD screen - -
9RFG Enable RF Gain -
10 DW Enable Dual Watch -
11 UP key Increase the channel
number Increases the channel
number continuously
12 SQ/ASQ Set SQ/ASQ level Switch between SQ
and ASQ
13 LED (RX/TX
indicator) - -
14 PTT Shortly press to emit -
15 SQ/VOL- Decreases SQ level
number/Decrease
volume -
16 MUTE/PWR Briefly press twice to
cancel the speaker Press and hold to turn
on/o the radio
17 SQ/ VOL+ Increase SQ level
number/Increase
volume -
18 MIC Microphone -
19 RJ45 connector
for microphone - -

User manual 8
English
Basic operations
Turn the radio on/o and Adjust the volume
1. Long press the MUTE/PWR key to turn on the station.
2. The screen will light up and display all the radios’s icons, then the active
standard, then the current channel number and active functions.
3. Briefly press the SQ/VOL- and SQ/VOL + keys to adjust the volume.
10 levels are available, 00-09. The set level will flash the screen for 3
seconds, after which the screen will return to the standard display mode
(channel number and active functions).
4. Briefly press the MUTE/PWR key twice to cancel the speaker (Mute).
The Micon will appear on the screen.
Note: by turning o and back on the radio, the Mute function remains active.
Briefly press twice the MUTE/PWR key again to reactivate the speaker.
5. Long press the MUTE/PWR key to turn the radio o.
Channel selection
Shortly press ◄and ► on the microphone, to change the channel. Press and
hold to scroll the channels faster.

9User manual
English
Note: In 400 channel mode, long press the UP and DOWN keys to switch over 10
channels at once continuously.
Functions
SQ/ASQ
Enable manual squelch (SQ) and level setting
1. Briefly press the SQ key.
2. The SQ icon will appear on the screen, while the current squelch level will
flash.
3. Press the arrows (▼and ▲) on the top of the microphone to set the
desired squelch level. 28 levels are available.
4. The set level will flash on the screen for 3 seconds, then the screen will
return to standard display mode.
Note: After setting the level, the SQ icon will not remain displayed on the screen.
Enable automatic squelch (ASQ) and level setting
1. Long press the SQ key.
2. The ASQ icon will appear on the right side of the screen.
3. Briefly press the SQ key. The AQ icon will appear on the screen, while
the current squelch level will flash.
4. Press the arrows (▼and ▲) on the top of the microphone to set the
desired squelch level. 5 levels are available.
5. The set level will flash on the screen for 3 seconds , then the screen will
return to the standard display mode.
6. To disable the ASQ function, press and hold the SQ key again.

User manual 10
English
Note: After setting the level, the ASQ icon will remain displayed on the screen.
Note: We recommend level 02 of ASQ sensibility.
AM/FM Modulation
Briefly press the AF/SC key [2] to switch between AM and FM.
Notes:
• If you have the radio set on a standard that does not support AM, pressing the
A/F key will have no eect. The FM icon will also be displayed on the screen.
• If the radio is set on a standard that supports only AM or only FM modulation,
pressing the A/F key briefly returns to the last channel used.
RF Gain
1. Briefly press the RFG key on the microphone.
2. The Ricon will appear on the screen, while the current RF Gain level will
flash.
3. Press the arrows (◄and ►) on the front of the microphone to set the
desired squelch level. 9 levels are available, 00-06-12-18-24-30-36-42-
48-54.
4. The set level will flash on the screen for 3 seconds, then the screen will
return to standard display mode.
Note: The Ricon will remain displayed on the screen.
Note: We recommend level 06 of RF Gain.
5. To disable the RF Gain function, change the level to 00.

11 User manual
English
EMG (Emergency channels)
1. Briefly press the EMG key.
2. The EMG icon will flash at the top of the screen and channel 09 will
appear.
3. Briefly press the EMG key again and the radio will switch to channel 19.
4. Press again to exit emergency mode. The screen will return to standard
display mode.
Note: The following keys remain active in EMG mode: PTT, VOL -/+, RFG, MUTE/
PWR.
Lock (Key lock)
1. Briefly press the Fkey twice.
2. The LOCK icon will appear on the screen.
3. All keys except the PTT key and the volume keys are locked.
4. To reactivate the keys, briefly press the Fkey again twice.

User manual 12
English
Scan (Channel scan)
1. Briefly press the SC key.
2. The SC icon will appear on the screen.
3. The radio will immediately start scanning the channels.
4. Change the scanning direction by pressing the arrows (◄and ►) on the
front panel of the microphone.
5. Exit scan mode by briefly pressing the SC key again.
Note: The following keys remain active in SCAN mode: PTT, RFG, MUTE/PWR,
A/F.
Dual watch
1. First, select the main channel you want to monitor by pressing the ◄and
►keys. For example, select channel 22.
2. To select the secondary channel, briefly press the DW key.
3. The DW icon will appear on the screen and the current secondary channel
number will flash.
4. Use the ◄and ►keys to change the sub channel. For example, select
channel 20.
5. After choosing the secondary channel, briefly press the DW key again.
6. The two monitored channels, for example, 22 and 20, will be displayed
alternately on the screen.
7. Press the DW key again to exit the Dual watch mode.

13 User manual
English
Additional settings menu
FL (Key backlight)
1. Long press the Fkey to enter the additional settings menu.
2. FL will appear on the screen.
3. Press the ◄and ►keys to switch between ON and OFF.
Fb (Key beep)
1. Long press the Fkey to enter the additional settings menu.
2. FL will appear on the screen.
3. Briefly press the Fkey until you reach the Fb (Key tone) menu.
4. Press the ◄and ►keys to switch between ON and OFF.
FC (Screen backlight color)
1. Long press the Fkey to enter the additional settings menu.
2. FL will appear on the screen.
3. Briefly press the F key until you reach the FC (LCD light color) menu.

User manual 14
English
4. Press the ◄and ►keys to choose one of the 7 available colors.
Disable microphone speaker
1. Press the F and ◄keys
2. SP ON (speaker activated) will appear on the screen for a short time.
3. Execute the F + ◄key combination again
4. SP OFF (speaker o) will appear briefly on the screen.
Change frequency table and standard
To change the radio’s operation standard (according to your country), you
must first select the frequency table and then the standard.
3 frequency tables are available: 1 Tb, 2 Tb, 3 Tb.
1Tb
Standard Channels Frequency range Output power
EU 40FM/40AM 26.965-27.405MHZ 1W AM/4W FM
CE 40FM 26.965-27.405MHZ 4W
UK+CE 40FM 27.60125-27.99125MHZ 4W
PL 40FM/40AM 26.960-27.400MHZ 4W
I0 40FM/40AM 26.965-27.405MHZ 4W AM/FM

15 User manual
English
I2 34FM/34AM 26.965-27.265MHZ 4W
dE 40FM/40AM 26.965-27.405MHZ 4W
80FM 26.565-27.405MHZ
IN 27FM/27AM 26.965-27.275MHZ 4W
2Tb
Standard Channels Frequency range Output power
EU 40FM/40AM 26.965-27.405MHZ
CE 40FM 26.965-27.405MHZ 4W
UK+CE 40FM 27.60125-27.99125MHZ 4W
PL 40FM/40AM 26.960-27.400MHZ 4W
I0 40FM/40AM 26.965-27.405MHZ 4W
I2 34FM/34AM 26.965-27.265MHZ 4W
dE 40FM/40AM 26.965-27.405MHZ 4W
80FM 26.565-27.405MHZ
IN 27FM/27AM 26.965-27.275MHZ 4W
RU 400CH AM/
FM 25.615-30.105MHZ 4W
PC 50CH AM/FM 25.645-29.895MHZ 4W
Px 400CH AM/
FM 25.610-30.100MHZ 4W
3Tb
Standard Channels Frequency range Output power
AU 40AM 26.965-27.405MHZ 4W
nL 40AM 26.330-27.770MHZ 4W
AM* 10AM 27.680-27.980MHZ 4W
* When you have set the radio to this standard (AM), briefly press the EMG
key. The radio will automatically switch to channel 88, which is an emergency
channel, similar to channels 9/19. The EMG icon will flash on the screen.

User manual 16
English
Briefly press the EMG key again to exit emergency mode.
To change the frequency table and the standard, follow the steps below:
1. Briefly press the keys below in the following order:
F- UP (key ►from the front panel of the microphone) - A/F - RFG - SC
2. Press the ◄or ►keys to select one of the 1 Tb, 2 Tb, or 3 Tb tables.
3. Briefly press the Fkey to confirm the selection.
4. Now you have entered the norm selection mode. The current standard
(e.g. CE) appears on the screen.
5. Briefly press the ◄and ► keys to navigate through the standards.
6. Stop at the standard specific to the country you are in.
7. Briefly press the PTT key to confirm the selection.
8. The radio will exit the frequent table selection mode and return to the
standard display mode.
Note: If you do not want to change the frequency table but only the norm inside
the table you are already in, execute the key sequence below:
F- A/F
Now you have entered the norm selection mode. The red LED will flash 3
times. Use the ◄or ►keys to select the desired norm. Press PTT to confirm.
Note: When the radio is in the UK standard, long press the A/F key to quickly
switch to the CE standard.
Reset
To return to the factory settings, press the following keys in the order below:
F - ►- EMG
The red LED will flash 3 times and the radio will restart.

17 User manual
English
Default values:
ASQ - level 3
SQ - level 10
Channel - 22
Frequency table - 1 Tb
Standard -CE
Modulation - FM
Power - L-P (Low Power)
Screen light color (menu FC) - 7 (cyan)
Technical specifications
Channels 40 AM/FM
Frequency band 26.965 – 27.405 MHz
Power supply 13.2V
Dimensions/weight 110 x 105 x 25 mm/0.550 kg
Operating temperature -26° - +65°C
Reception
Sensitivity > 1µV
Frequency deviation ≤500Hz
Current consumption 200 mA in stand-by
Emission
Maximum output power 4W FM @ 13.2V
Modulation 80% - 90% (AM)
1.8-2.0 KHz (FM)
Antenna impedance 50 Ohm
Current max. 2 A

Benutzerhandbuch
Deutsche
18
Besondere Warnungen
Lesen Sie die folgenden Warnungen, um Feuer, Verletzungen oder
Schäden am CB-Radio oder an der CB-Antenne zu vermeiden.
Versuchen Sie nicht, das Radio während der Fahrt zu bedienen. Setzen
Sie sich dabei dem Risiko von Verkehrsunfällen aus.
Dieses Radio ist für eine 12-V-Gleichstromversorgung ausgelegt.
Verwenden Sie keine höhere Spannung als die empfohlene.
Stellen Sie das Radio nicht auf eine übermäßig staubige, feuchte oder
instabile Oberfläche.
Schließen Sie die Antenne während der Übertragung nicht an. Risiko
eines elektrischen Schlages.
Bitte halten Sie sich von störenden Geräten fern (z. B. Fernseher,
Generator usw.).
Personen, die Herzschrittmacher verwenden, wird empfohlen, während
der Übertragung Abstand zur Antenne zu halten und diese insbesondere
nicht zu berühren.
BringenSiekeineMetallgegenständeindieNähedesinternenelektrischen
Teils des Radios. Stromschlaggefahr.
Vermeiden Sie es, das Radio Temperaturen unter -26°C und über + 60°C
auszusetzen. Die Temperatur an Bord eines Fahrzeugs kann manchmal 80°C
überschreiten, was bei längerer Exposition zu irreparablen Schäden am Radio
führen kann. Setzen Sie das Radio nicht längere Zeit dem Sonnenlicht aus.
Decken Sie das radio nicht ab, da es sonst nicht abkühlt.
Überprüfen Sie, ob die Fahrzeugbatterie ausreichend aufgeladen ist, um ein
schnelles Entladen zu vermeiden.
Es ist wichtig, das Radio vor dem Starten des Motors auszuschalten, um
Schäden durch hohe Startspannung zu vermeiden.
Beim Ersetzen der Sicherung müssen Sie eine 2A 250V Typ F Sicherung
verwenden. Verwenden Sie keine Sicherung mit höherem Wert.
Wenn ein ungewöhnlicher Geruch oder Rauch aus dem Radio austritt,
schalten Sie das Radio sofort aus.
Senden Sie nicht lange, da sich das Radio erwärmen und Fehlfunktionen
verursachen kann.
Halten Sie das Radio von Kindern fern.

Benutzerhandbuch
Deutsche
19
Andere Warnungen:
Lesen Sie die Gebrauchsanweisung sorgfältig durch, bevor Sie dieses Produkt
anschließen oder verwenden. Bewahren Sie dieses Handbuch zum späteren
Nachschlagen auf.
Schließen Sie die Antenne an, bevor Sie das Radio verwenden. Überprüfen
Sie das SWR vor dem Senden. Ein zu hohes SWR kann zur Zerstörung der
Funkendgeräte führen, interner Komponenten, die nicht unter die Garantie
fallen.
Es gibt keine Komponenten des Radios, die vom Benutzer repariert werden
können. Wenden Sie sich für Reparaturen an ein autorisiertes Servicecenter.
Verwenden Sie ein geeignetes Netzteil, um Brandgefahr zu vermeiden.
Hauptmerkmale
• Alle Steuertasten befinden sich am Mikrofon
• Mehrfarbiger Bildschirm (7 Farben)
• Manuelle Rauschsperre (28 Stufen)
• Automatische digitale Rauschsperre (5 Stufen)
• RF Gain
• Kanalsuchfunktion
• S-Meter RX-TX auf dem Bildschirm
• Feuerzeugstecker enthalten
• 2-poliger Kenwood-Anschluss für Audiozubehör
Installationsanleitung
Wählen Sie vor dem Einbau des Radios in Ihr Auto den am besten geeigneten
Ort, damit Sie beim Fahren nicht gestört werden.
Verwenden Sie zum Installieren des Radios die Halterung und das Zubehör in
der Verpackung. Die Schrauben müssen gut angezogen sein, um Vibrationen
des Radios während der Fahrt zu vermeiden. Die Montagehalterung kann
über oder unter dem Radio positioniert und je nach Installationsmethode
gekippt werden.
WARNUNG: Stellen Sie sicher, dass die Spannung, mit der Sie das Radio

Benutzerhandbuch
Deutsche
20
versorgen, der vom Hersteller angegebenen entspricht (12 V).
Schalten Sie das Radio ein
Stellen Sie vor dem Einschalten des Radios sicher, dass der Netzschalter
vollständig nach links gedreht ist.
Das Netzkabel des Radios enthält eine Schutzsicherung (am roten Kabel).
Das Radio ist mit einem Zigarettenanzünderstecker ausgestattet. Stecken
Sie den Zigarettenanzünderstecker in den dafür vorgesehenen Steckplatz
Ihres Autos, um das Radio mit Strom zu versorgen.
WARNUNG: Wenn die Sicherung durchbrennt, ersetzen Sie sie nicht durch eine
höhere. Der in der Fabrik hat 2A.
Die Installation der Antenne
Um das Radio nutzen zu können, benötigen Sie eine Antenne, die mit einer
Frequenz von 26-28 MHz arbeitet.
Wenden Sie sich zur Installation und Kalibrierung der Antenne an einen
spezialisierten Techniker.
Normalerweise muss die Antenne auf dem höchsten Teil des Fahrzeugs
positioniert werden, ohne durch Hindernisse abgeschirmt zu sein und
so weit wie möglich von elektrischen Quellen oder elektromagnetischen
Störungen entfernt zu sein. Das Koaxialkabel der Antenne darf nicht
unterbrochen oder gedrückt werden. Verbinden Sie den Stecker am Ende
des Antennenkoaxialkabels mit dem Antennenstecker auf der Rückseite des
Radios.
Radio testen
Sobald das Radio installiert und mit Strom versorgt ist, testen Sie den
korrekten Betrieb:
• Überprüfen Sie, ob das Radio richtig mit Strom versorgt wird
• Überprüfen Sie die Antennenverbindung zum Radio
• Schließen Sie das Mikrofon an die Buchse an der Vorderseite des Radios
an
• Schalten Sie das Radio ein, indem Sie lange die Taste MUTE/PWR
drücken.
Table of contents
Languages:
Other PNI Radio manuals

PNI
PNI ESCORT HP 72 User manual

PNI
PNI Escort HP 82 User manual

PNI
PNI ESCORT HP 8024 ASQ User manual

PNI
PNI PMR R40 Pro User manual

PNI
PNI Escort HP9001 User manual

PNI
PNI RD290 User manual

PNI
PNI ESCORT HP 62 User manual

PNI
PNI ESCORT HP 6500 User manual

PNI
PNI ESCORT HP 6500 User manual

PNI
PNI PMR R60 User manual

PNI
PNI Escort HP 5500 User manual

PNI
PNI PMR R45 PRO User manual

PNI
PNI Escort HP 8000 ASQ User manual

PNI
PNI Clementine 8480BT User manual

PNI
PNI Escort HP 8001L ASQ User manual

PNI
PNI Escort HP 446 User manual

PNI
PNI Escort HP 62DE User manual

PNI
PNI Escort HP 8500 User manual

PNI
PNI Escort HP 2020 User manual

PNI
PNI ESCORT HP 9500 User manual