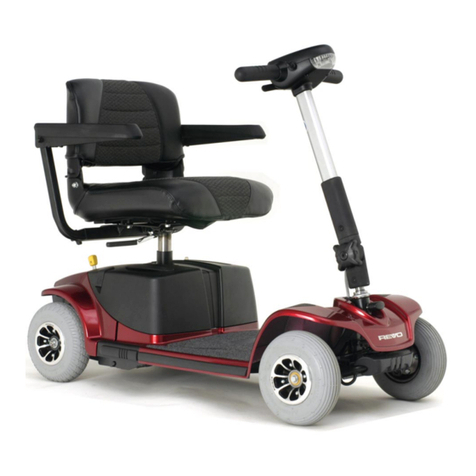
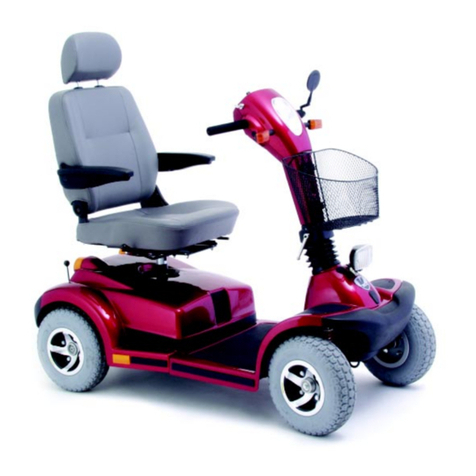
Pride DESTINY User manual

DESTINY

WARNING! An authorised Pride Provider or qualified technician must perform the initial
setup of this scooter and must perform all of the procedures in this manual.
The symbols below are used throughout this owner's manual and on the scooter to identify warnings and
important information. It is very important for you to read them and understand them completely.
WARNING! Indicates a potentially hazardous condition/situation. Failure to follow
designated procedures can cause either personal injury, component damage or
malfunction. On the product, this icon is represented as a black symbol on yellow triangle
with black border.
MANDATORY! These actions should be performed as specified. Failure to perform
mandatory actions can cause personal injury and/or equipment damage. On the product,
this icon is represented as a white symbol on blue dot.
PROHIBITED! These actions are prohibited. These actions should not be performed at
any time or in any circumstances. Performing a prohibited action can cause personal
injury and/or equipment damage. On the product, this icon is represented as a black
symbol with red circle and red slash.
SAFETY GUIDELINES
088 609 661
NOTE: This owner’s manual is compiled from the latest specifications and product information avail-
able at the time of publication. We reserve the right to make changes as they become necessary. Any
changes to our products may cause slight variations between the illustrations and explanations in this
manual and the product you have purchased. The latest/current version of this manual is available on
our website.
Please fill out the following information for quick reference:
This product is manufactured by:
Pride Mobility Products Corporation
182 Susquehanna Avenue
Exeter, PA 18643-2694
USA
Copyright © 2007
Pride Mobility ProductsAustralia Pty. Ltd.
INFMANU3496/Rev B/May 2007
Pride Provider:______________________________________________________________________
Address:___________________________________________________________________________
Phone Number:_________________________
Purchase Date:__________________________ Serial Number:_______________________________

3
Destiny www.pridemobility.com
CONTENTS
I. INTRODUCTION......................................................................................................................... 4
II. SAFETY ......................................................................................................................................... 5
III. SPECIFICATIONS ................................................................................................................... 17
IV. YOUR SCOOTER...................................................................................................................... 19
V. BATTERIES AND CHARGING ............................................................................................ 23
VI. OPERATION............................................................................................................................... 28
VII. COMFORT ADJUSTMENTS................................................................................................ 30
VIII.DISASSEMBLY AND ASSEMBLY ..................................................................................... 32
IX. BASIC TROUBLESHOOTING ............................................................................................. 34
X. CARE AND MAINTENANCE ................................................................................................ 36
XI. WARRANTY................................................................................................................................38

5
Destiny www.pridemobility.com
4www.pridemobility.com Destiny
I. INTRODUCTION II. SAFETY
PRODUCT SAFETY SYMBOLS
The symbols below are used on the scooterto identify warnings, mandatory actions, and prohibited actions. It
isvery important for you to read and understand them completely.
Corrosive chemicals contained in battery. Use only AGM or Gel-Cell batteries to
reduce the risk of leakage or explosive conditions.
Maximum weight capacity.
Read and follow the information in the owner’s manual.
Pinch/Crush points created during assembly.
EMI-RFI- This product has been tested and passed at an immunity level of 20 V/m.
Use only AGM or Gel-Cell batteries.
DRIVE
NEUTRAL
Place unit on level ground and stand to one side when changing from drive mode
to freewheel mode or freewheel mode to drive mode.
Locked and in drive mode.
Unlocked and in freewheel mode.
SAFETY
Welcometo
PrideMobilityProductsAustralia Pty. Ltd.
(Pride).
The product you havepurchasedcombinesstate-
of-the-artcomponents withsafety,comfort, and stylinginmind. Weareconfident the designfeatureswill provide
youwith the conveniences you expectduringyourdaily activities. Understanding howtosafely operate andcare
forthisproduct should bring you years of trouble freeoperationsandservice.
Readand followallinstructions,warnings, and notesinthismanual and allotheraccompanyingliterature before
attemptingtooperate this product for the first time. In addition, your safety depends upon you, aswellas your
provider, carer,or healthcare professionalinusinggood judgement.
Ifthereis any information in this manualwhichyoudo not understand, or if yourequireadditionalassistance for
setuporoperation, please contact your authorisedPrideProvider. Failureto followtheinstructions,warnings,
andnotesin this manualandthoselocatedonyour Pride product canresultinpersonalinjury or product
damageandwill void Pride’sproductwarranty.
PURCHASER’S AGREEMENT
Byaccepting deliveryofthis product, youpromisethat youwillnot change,alter, ormodifythis productorremove
orrender inoperable orunsafeany guards, shields,orother safety features ofthisproduct; fail, refuse,orneglect to
installanyretrofit kits from time to time provided by Pride toenhanceorpreservethesafe use of this product.
SHIPPING AND DELIVERY
Beforeusingyourscooter,make sure your delivery is complete as some components maybeindividuallypack-
aged.If you donotreceive acompletedelivery,pleasecontactyour authorisedPrideProvider immediately.Where
damagehasoccurredduringtransport, either to the packaging or content, please contact the delivery company
responsible.
INFORMATION EXCHANGE
Wewantto hear your questions, comments, andsuggestionsaboutthismanual.Wewouldalsolike to hear about
the safety and reliability of your new scooter, and about the service you received from your authorised Pride
Provider. Please notifyusofanychange of address, so we cankeepyouapprised of important information about
safety,newproducts, and new optionsthatcanincrease your ability touseand enjoy your scooter. Please feel free
tocontact us at the address below:
PrideMobility ProductsAustralia Pty. Ltd.
21HealeyRoad
Dandenong,3175
Victoria,Australia
NOTE: If you ever lose or misplace your product registration card or your copy of this manual, contact
us and we will be glad to send you a new one immediately.

7
Destiny www.pridemobility.com
6www.pridemobility.com Destiny
II. SAFETY
Do not remove anti-tip wheels.
Do not connect an extension lead to the AC/DC converter or the battery charger.
Contact with tools can cause electrical shock.
Avoid exposure to rain, snow, ice, salt, or standing water whenever possible.
Maintain and store in a clean and dry condition.
Removal of grounding prong can create electrical hazard. If necessary, properly
install an approved 3-pronged adapter to an electrical outlet having 2-pronged
plug access.
Do not use a cell phone, walkie/talkie, laptop, or other radio transmitter while
operating.
Keep your hands away from the tyres when driving. Be aware that loose fitting
clothing can become caught in the drive tyres.
Disposal and recycling-Contact your authorised Pride Provider for information on
proper disposal of your Pride product and its packaging.
Disposal and recycling - Contact your authorised Pride Provider for information on
proper disposal and recycling of your Pride product and its packaging.
Do not lift the mobility product while seated in it.
Do not use batteries with different amp-hour (Ah) capacities. Do not mix old and new
batteries. Always replace both batteries at the same time.
Wear safety goggles.
Contains lead.
Battery charger for indoor use only.
Explosive conditions exist!
II. SAFETY

9
Destiny www.pridemobility.com
8www.pridemobility.com Destiny
WEIGHT LIMITATIONS
Your scooter is ratedforamaximum weight capacity.Refertothe specifications table forinformation.
MANDATORY! Stay within the specified weight capacity of your scooter. Exceeding the
weight capacity voids the warranty. Pride will not be held responsible for injuries and/or
property damage resulting from failure to observe weight limitations.
WARNING! Do not carry passengers on your scooter. Carrying passengers on your scooter
may affect the centre of gravity, resulting in a tip or a fall.
TYRE INFLATION
If your scooter is equipped with pneumatic tyres, you should check or have the air pressure checked at least
onceaweek.Properinflationpressureswillprolongthelifeofyour tyres and help ensure the smooth operation
of your scooter.
WARNING! It is critically important that 2-2.4 bar (30-35 psi) tyre pressure be maintained
in pneumatic tyres at all times. Do not underinflate or overinflate your tyres. Low pressure
may result in loss of control and overinflated tyres may burst. Failure to maintain 2-2.4 bar
(30-35 psi) tyre pressure in pneumatic tyres at all times may result in tyre and/or wheel
failure.
WARNING! Inflate your scooter tyres from a regulated air source with an available pressure
gauge. Inflating your tyres from an unregulated air source could overinflate them, resulting
in a burst tyre.
INCLINE INFORMATION
Moreand more buildings have ramps with specified degrees of inclination, designed foreasyand safe access.
Somerampsmay have turning switchbacks (180-degree turns) that require youtohavegoodcornering skills on
yourscooter.
!Proceedwithextremecautionasyou approach the downgrade of a ramp or other incline.
!Take wide swings with your scooter around anytightcorners. If you do that, the scooter’s rear wheels will
followawidearc,not cut the corner short, and not bump into or get hung up on anyrailingcorners.
!Whendrivingdownaramp,keepthe scooter’sspeed adjustment set to the slowest speedsettingtoensurea
safelycontrolled descent.
!Avoidsuddenstops and starts.
When climbing an incline, try to keep your scooter moving. If you must stop, start up again slowly, and then
acceleratecautiously.Whendrivingdown an incline, do so by setting the speed adjustmentdial to the slowest
settinganddrivingintheforwarddirectiononly. If your scooter starts to move down the incline faster than you
anticipatedordesired, allow it to come to a complete stop by releasing the throttle control lever.Thenpush the
throttlecontrol lever forward slightlytoensurea safely controlled descent.
WARNING! When climbing an incline, do not zigzag or drive at an angle up the face of the
incline. Drive your scooter straight up the incline. This greatly reduces the possibility of a
tip or a fall. Always exercise extreme caution when negotiating an incline.
WARNING! Do not drive your scooter across the side of an incline or diagonally up or down
an incline; do not stop, if possible, while driving up or down an incline.
WARNING! You should not travel up or down a potentially hazardous incline (i.e., areas
covered with snow, ice, cut grass, or wet leaves).
II. SAFETY
II. SAFETY
GENERAL
MANDATORY! Do not operate your new scooter for the first time without completely reading
and understanding this owner’s manual.
Your scooterisa state-of-the-artlife-enhancement devicedesignedto increasemobility.Pride providesanextensive
varietyofproducts to best fit the individual needs of thescooteruser. Please be awarethatthefinalselection and
purchasingdecision regardingthe typeofscooter tobe usedisthe responsibilityof thescooteruser whois capableof
makingsuch adecisionand his/herhealthcare professional(i.e.,medical doctor,physicaltherapist, etc.).
The contents of this manual are based on the expectation that a mobility device expert has properly fitted the
scooterto the user andhasassistedthe prescribing healthcare professionaland/orthe authorised Pride Providerin
theinstructionprocessforthe use of the product.
There are certain situations, including some medical conditions, where the scooter user will need to practice
operatingthe scooter in thepresenceof a trained attendant.Atrained attendant canbedefinedas a familymember
orcare professional speciallytrainedin assisting ascooteruser in variousdailyliving activities.
Asyoubegin using your scooter duringdailyactivities,you will probably encounter situations inwhichyouwill
needsomepractice. Simply take your time and you will soon be in full and confidentcontrolasyou maneuvre
throughdoorways,onandoff lifts, up and down ramps, and over moderate terrain.
Below are some precautions, tips, and other safety considerations that will help you become accustomed to
operatingthescooter safely.
MODIFICATIONS
Pridehas designed and engineered your scooter to provide maximum mobility andutility. However,under no
circumstancesshouldyou modify,add,remove,ordisable any feature, part, or function of yourscooter.
WARNING! Do not modify your scooter in any way not authorised by Pride. Do not use
accessories if they have not been tested or approved for Pride products.
REMOVABLE PARTS
WARNING! Do not attempt to lift or move your scooter by any of its removable parts,
including the armrests, seat, or shroud.
PRE-RIDE SAFETY CHECK
Getto know thefeelof your scooteranditscapabilities. Pride recommendsthatyou perform asafetycheck before
eachusetomakesureyourscooteroperatessmoothlyandsafely.
Performthe following inspectionspriorto using yourscooter:
!Checkfor proper tyre inflation(ifequippedwith pneumatic tyres).
!Check the brakes.
!Checkbatterycharge.
Ifyoudiscovera problem, contact your authorised Pride Provider for assistance.

11
Destiny www.pridemobility.com
10 www.pridemobility.com Destiny
II. SAFETY
CORNERING INFORMATION
Excessivelyhigh cornering speeds can create the possibility of tipping. Factorswhich affect the possibility of
tippinginclude, but are notlimitedto,cornering speed, steeringangle(howsharply you are turning),unevenroad
surfaces,inclined roadsurfaces,riding from anareaof lowtractionto anareaof high traction(suchas passingfrom
a grassy area to a paved area – especially at high speed while turning), and abrupt directional changes. High
cornering speeds are not recommended. If you feel that you may tip over in a corner, reduce your speed and
steeringangle(i.e., lessen the sharpness of theturn)topreventyour scooter from tipping.
WARNING!
When cornering sharply, reduce your speed and maintain a stable centre of
gravity. When using your scooter at higher speeds, do not corner sharply. This greatly
reduces the possibility of a tip or fall. Always exercise common sense when cornering.
BRAKING INFORMATION
Your scooter is equipped with these powerfulbrakesystems:
!Regenerative:Uses electricity to rapidly slowthevehiclewhen the throttle controlleverreturnsto the centre/
stopposition.
!DiscParkBrake:Activatesmechanicallyafterregenerativebrakingslowsthevehicle to near stop, or when
powerisremovedfrom the system for any reason.
OUTDOOR DRIVING SURFACES
Your scooter is designedtoprovideoptimum stability undernormaldrivingconditions—dry,level surfacescom-
posedof concrete, blacktop, ortarmac.However,Priderecognisesthatthere will be timeswhenyou will encoun-
terothersurfacetypes. For this reason, your scooter is designed to perform admirablyonpackedsoil,grass,and
gravel.Feelfreetouseyourscootersafelyonlawnsandinparkareas.
!Reduceyourscooter’sspeed when drivingonuneventerrainand/orsoft surfaces.
!Avoidtallgrassthatcan become tangled in the running gear orwrappedaroundtheaxle.
!Avoidlooselypackedgravelandsand.
!Ifyoufeel unsure about adrivingsurface,avoid that surface.
PUBLIC STREETS AND ROADWAYS
WARNING! You should not operate your scooter on public streets and roadways. Be aware
that it may be difficult for traffic to see you when you are seated on your scooter. Obey all
local pedestrian traffic rules. Wait until your path is clear of traffic, and then proceed with
extreme caution.
STATIONARY OBSTACLES (STEPS, KERBS, ETC.)
WARNING! Do not drive near raised surfaces, unprotected ledges and/or drop-offs (kerbs,
porches, stairs, etc.).
WARNING! Do not attempt to have your scooter climb or descend an obstacle that is
inordinately high.
WARNING! Do not attempt to have your scooter proceed rearward down any step,
kerb, or other obstacle. This may cause the scooter to tip.
II. SAFETY
WARNING! When on any sort of an incline or decline, never place the scooter in freewheel
mode while seated on it or standing next to it.
WARNING! Even though your scooter is capable of climbing slopes greater than that
illustrated in figure 1, do not, under any circumstances, exceed the incline guidelines or
any other specifications presented in this manual. Doing so could cause instability in your
scooter.
Handicap public access ramps are not subject to government regulation in all countries, and therefore do not
necessarilyshare the same standardpercentofslope. Other inclines maybenatural or,ifman-made,notdesigned
specificallyforscooters. Figure1illustrates yourscooter’sstability and its abilitytoclimbgradesunder various
weightloads and undercontrolledtestingconditions.
Thesetestswereconducted with the scooter’s seat in the highestpositionandadjustedrearwardon the seat base
toitsfarthest rearward position. Use this information asaguideline.Your scooter’s ability to travel up inclinesis
affectedby your weight, your scooter’s speed, your angle of approach to the incline, and your scooter setup.
WARNING! Any attempt to climb or descend a slope steeper than what is shown in figure
1 may put your scooter in an unstable position and cause it to tip.
Figure 1. Maximum Recommended Incline Angle
Whenyou approach an incline,itisbest to lean forward. Seefigures2 and 2A. This shiftsthecentre of gravity of
youandyourscooter toward the front of the scooter for improved stability.
NOTE: When negotiating ramps, if the throttle control lever is released while moving forward, the
powered scooter may roll back approximately 30.5 cm before the brake engages. If the throttle control
lever is released while moving in reverse, the powered scooter may roll back approximately 1 metre
before the brake engages.
136kg
10.5%(6°)
Figure 2. Normal Driving Position Figure 2A. Increased Stability Driving Position

13
Destiny www.pridemobility.com
12 www.pridemobility.com Destiny
II. SAFETY
Anadded feature builtintothescooter is “push-too-fast”protectionwhich safeguards thescooteragainstgaining
excessivespeed while in freewheelmode.
“Push-too-fast”operates differently dependingonwhichof two conditionsexists:
!Ifthe keyisturned to the“off”positionwhile in freewheelmode,the scooter’s controlleractivatesregenerative
brakingwhen the scooter is pushedfasterthan a maximum threshold whichhasbeen preprogrammed. In this
case,thecontrollerisactingasaspeedgovernor.
!Ifthekeyis in the “on” position while in freewheel mode, you will encounter considerable resistanceatany
speedbecause the brakes are fully engaged. This prevents the scooterfromgaining unwanted momentum
shouldthe manual freewheelleverinadvertently be releasedwhiledrivingthe scooter.
STAIRS AND ESCALATORS
Scootersarenotdesignedtotravel up or down stairs or escalators.Always use a lift.
WARNING! Do not use your scooter to negotiate steps or escalators.
DOORS
!Determineifthedooropens toward or away from you.
!Useyourhand to turn the knob or push the handle or push-bar.
!Driveyourscooter gently and slowlyforwardtopush the door open. Ordriveyourscooter gently and slowly
rearwardsto pull the door open.
LIFTS
Modernliftshaveadoor edge safety mechanism that, when pushed, reopens the door(s).
!Ifyouareinthedoorwayof a lift when the door(s) begin to close, push on the rubber door edge or allow the
rubberdoor edge to contact the scooter and the doorwill reopen.
!Usecarethat handbags, packages, or scooter accessories do not become caught in lift doors.
LIFT/ELEVATION PRODUCTS
Ifyou willbetraveling with yourscooter, you mayfindit necessarytouse alift/elevationproduct toaidin transpor-
tation.Pride recommendsthatyou closelyreviewthe instructions,specificationsand safetyinformation setforthby
themanufacturer of the lift/elevationproductbefore using thatproduct.
WARNING! Never sit on your scooter when it is being used in connection with
any type of lift/elevation product. Your scooter was not designed with such use
in mind and any damage or injury incurred from such use is not the responsibility
of Pride.
II. SAFETY
Figure 3. Correct Kerb Approach Figure 3A. Incorrect Kerb Approach
KERB
KERB
WARNING! Be sure your scooter is traveling perpendicular to any kerb you may be required
to ascend or descend. See figures 3 and 3A.
WARNING! Do not attempt to negotiate a kerb that has a height greater than 5 cm.
INCLEMENT WEATHER PRECAUTIONS
Exposure of your scooter to inclement weather conditions should be avoided whenever possible. If suddenly
caughtupin rain, snow, severe cold or heat while operatingyourscooter, proceed to shelter at the earliestoppor-
tunity.Thoroughly dry yourscooterbefore storing, charging oroperatingyour scooter.
WARNING! Operating in rain, snow, salt, mist/spray conditions and on icy/slippery surfaces
can cause damage to the scooter and electrical system. Maintain and store your scooter
in a dry and clean condition.
WARNING! Prolonged exposure to hot or cold conditions may affect the temperature of
upholstered and non-upholstered items on the scooter, possibly resulting in skin irritation.
Exercise caution when using your scooter in extremely hot or cold conditions or when
exposing your scooter to direct sunlight for prolonged periods of time.
FREEWHEEL MODE
Your scooter is equipped with a manual freewheel lever that, when pushed forward, allows the scooter to be
pushed. For more information about how to place your scooter into and out of freewheel mode, see IV.
“Your Scooter.”
WARNING! When your scooter is in freewheel mode, the braking system is disengaged.
!Disengage the drive motors only on a level surface.
!Ensure the key is removed from the key switch.
!Stand beside the scooter to engage or disengage freewheel mode. Never sit on
a scooter to do this.
!After you have finished pushing your scooter, always return it to the drive mode
to lock the brakes.

15
Destiny www.pridemobility.com
14 www.pridemobility.com Destiny
GETTING ONTO AND OFF OFYOUR SCOOTER
Gettingonto and off of your scooter requires a good sense of balance.Please observe the following safety tips
whengettingonto and off ofyourscooter:
!Removethekey from the key switch.
!Ensurethatyourscooterisnotin freewheel mode. See IV.“Your Scooter.”
!Makecertainthatthe seat is positioned securely into place.
!Pivotthearmrestsuptomakegettingontoandoffof the scooter easier.
WARNING! When driving on level ground, position yourself as far back as possible in the
scooter seat to prevent the scooter from tipping.
WARNING! Avoid putting all of your weight on the scooter armrests and do not use the
armrests for weight bearing purposes, such as transfers. Such use may cause the scooter
to tip, resulting in a fall from the scooter.
WARNING! Avoid putting all of your weight on the floorboard. Such use may cause the
scooter to tip.
REACHING AND BENDING
Avoid reaching or bending while driving your scooter. Bending forward creates the risk of accidental throttle
controllever contact. Bendingtothe sidewhileseated creates theriskof tipping.Itis important tomaintaina stable
centreof gravity and keep the scooter from tipping. Pride recommendsthat the scooter user determine his/her
personallimitations and practice bendingandreachingin the presenceofaqualified attendant.
WARNING! Do not bend, lean or reach for objects if you have to pick them up from
the scooter deck or from either side of the scooter. Movements such as these may
change your centre of gravity and the weight distribution of the scooter and cause
your scooter to tip.
PROHIBITED! Keep your hands away from the tyres when driving. Be aware that loose
fitting clothing can become caught in drive tyres.
PRESCRIPTION DRUGS/PHYSICAL LIMITATIONS
Thescooter usermustexercise care andcommonsense whenoperatinghis/her scooter.Thisincludes awarenessof
safetyissues whentakingprescribed orover-the-counterdrugs orwhen theuserhas specificphysicallimitations.
WARNING! Consult your physician if you are taking prescribed or over-the-counter
medication or if you have certain physical limitations. Some medications and limitations
may impair your ability to operate your scooter in a safe manner.
II. SAFETY
II. SAFETY
BATTERIES
Inaddition to followingthewarnings below,besure to complywithall other batteryhandlinginformation.
MANDATORY! Battery posts, terminals, and related accessories contain lead and lead
compounds. Wear goggles and gloves when handling and wash hands after handling.
WARNING! Scooter batteries are heavy. See specifications table. If you are unable to lift
that much weight, be sure to get help. Use proper lifting techniques and avoid lifting
beyond your capacity.
WARNING! Always protect the batteries from freezing and never charge a frozen battery.
WARNING! Connect the battery harnesses in the proper manner. RED (+) cables must be
connected to positive (+) battery terminals/posts. BLACK (-) cables must be connected to
negative (-) battery terminals/posts. REPLACE cables immediately if damaged. Protective
caps must be installed over all battery terminals.
NOTE: If you encounter a damaged or cracked battery, immediately enclose it in a plastic bag and call
your authorised Pride Provider for instructions on disposal. Your authorised Pride Provider will also
have the necessary information on battery recycling, which is our recommended course of action.
BATTERY DISPOSAL AND RECYCLING
Ifyouencounteradamaged or cracked battery, immediately enclose it in a plastic bag and call your authorised
PrideProvider forinstructionson disposal.Your authorisedPrideProvider willalsohave thenecessaryinformation
onbatteryrecycling, which is our recommendedcourseofaction.
MOTOR VEHICLE TRANSPORT
Pride recommends that you do not remain seated in your scooter while traveling in a motor vehicle. The
scooter should be stowed in the boot of a car or in the back of a truck or van with the batteries removed and
properly secured.
WARNING! Although your scooter may be equipped with a positioning belt, this belt is not
designed to provide restraint during motor vehicle transport. Anyone travelling in a motor
vehicle should be properly secured in the motor vehicle seat with safety belts fastened
securely.
WARNING! Do not sit on your scooter while it is in a moving vehicle.
WARNING! Always be sure your scooter and its batteries are properly secured when it is
being transported. Batteries should be secured in an upright position and protective caps
should be installed on the battery terminals. Batteries should not be transported with any
flammable or combustible items.
PREVENTING UNINTENDED MOVEMENT
WARNING! If you anticipate being seated in a stationary position for an extended period
of time, turn off the power. This will prevent unexpected motion from inadvertent throttle
control lever contact.

17
Destiny www.pridemobility.com
16 www.pridemobility.com Destiny
Figure 4. Scooter Dimensions
III. SPECIFICATIONS
49.2 cm - 54.20cm
-
II. SAFETY
ELECTROMAGNETIC AND RADIO FREQUENCY INTERFERENCE (EMI/RFI)
WARNING! Laboratory tests have shown that electromagnetic and radio frequency waves
can have an adverse affect on the performance of electrically-powered mobility vehicles.
ElectromagneticandRadio Frequency Interference can comefromsourcessuch as cellular phones, mobile two-
way radios (such as walkie-talkies), radio stations, TV stations, amateur radio (HAM) transmitters, wireless
computerlinks, microwavesignals,paging transmittersand medium-rangemobiletransceivers usedbyemergency
vehicles.In some cases, these waves can cause unintended movement or damage tothe control system. Every
electrically-poweredmobility vehicle has animmunity(or resistance) to EMI.Thehigher the immunity level,the
greatertheprotection against EMI. This product has beentestedandhaspassed at an immunity level of 20 V/M.
WARNING! Be aware that cell phones, two-way radios, laptops, and other types of radio
transmitters may cause unintended movement of your electrically-powered mobility vehicle
due to EMI. Exercise caution when using any of these items while operating your mobility
vehicle and avoid coming into close proximity of radio and TV stations.
WARNING! The addition of accessories or components to the electrically-powered mobility
vehicle can increase the susceptibility of the vehicle to EMI. Do not modify your scooter in
any way not authorised by Pride.
WARNING! The electrically-powered mobility vehicle itself can disturb the performance
of other electrical devices located nearby, such as alarm systems.
NOTE: For more information on EMI/RFI, visit the Resource Center on www.pridemobility.com. If
unintended motion or brake release occurs, turn your scooter off as soon as it is safe to do so. Contact
your authorised Pride Provider to report the incident.

19
Destiny www.pridemobility.com
18 www.pridemobility.com Destiny
TILLER CONSOLE COMPONENTS
The tiller console houses all controls needed to drive your scooter, including the key switch, throttle control
lever, horn button, speed adjustment dial, the battery condition meter, and the off-board batterycharger port.
See figures 5, 5A and 5B.
WARNING! Do not expose the tiller console to moisture. In the event that the tiller console
does become exposed to moisture, do not attempt to operate your scooter until the tiller
console has dried thoroughly.
IV. YOUR SCOOTER
Figure 5. UpperTiller Console Components
SPEED ADJUSTMENT DIAL
HORN BUTTON
BATTERY CONDITION METER
STATUS LED
THROTTLE
CONTROL LEVER
KEY SWITCH
Figure 5A. LowerTiller Console Components
Key Switch
!Insertthe key into thekeyswitchand turn itclockwiseto
powerup(turnon) your scooter.
!Turnthekey anticlockwise topower down (turnoff)your
scooter.
Althoughthekeycanbeleft inthe keyswitch whenthe scooter
is powered down, we recommend removing it to prevent
unauthoriseduseof your scooter.
WARNING! If the key is moved to the “off”
position while your scooter is in motion,
the electronic brakes will engage and your
scooter will come to an abrupt stop!
III. SPECIFICATIONS
ModelNumber SC1710AUS
ClassofUse B
MaximumSafe Slope See figure1.
MaximumClimbingAbility Seefigure 1.
MaximumObstacle ClimbingAbility 5 cm
Colour Red
OverallLength2120.65 cm
OverallWidth260.33 cm
HeaviestPiece When Disassembled Front Section: 21.77 kg
TurningRadius2147cm
Speed(Maximum) Variable up to 8.04 km/h
RangePerCharge1Up to 25.75 km
GroundClearance25cm
WeightCapacity 136 kg
StandardSeating Type:High-backwith headrest; manualrecline
Material:Blackvinyl
Dimensions: 44.45cmwidth
40.64cm depth
43cm height (notincludingheadrest)
DriveSystem Rear-wheel drive, sealed minitransaxle,24voltDC motor
DualBraking System Electronic,regenerativeand electromechanical
Tyres Front: 25.40cm,pneumatic
Rear:25.40cm, pneumatic
BatteryRequirements3Type: Two (2) 12-volt, deep-cycle
Size:36Ah
BatteryWeight 10.43 kg each
BatteryCharger 5-amp, off-board
1Varies with user weight, terrain type, battery charge, battery condition, tyre type, and tyre condition.
2Due to manufacturing tolerances and continual product improvement, this specification can be subject to variance of
(+ or – ) 3 %.
3AGM or Gel-Cell type required. See V. “Batteries and Charging.”
NOTE: All specifications subject to change without notice.

21
Destiny www.pridemobility.com
20 www.pridemobility.com Destiny
Manual Freewheel Lever
Wheneveryouneedorwanttopushyourscooterfor short distances, you can put it in freewheel mode.
1. Push down on themanualfreewheelleverto disable the drive system and the brakesystem.Youwill now be
abletopushyour scooter.
2 Pullup on the manualfreewheelleverto reengage the driveandthe brake systems; thistakesyourscooter out
offreewheel mode.
WARNING! When your scooter is in freewheel mode, the braking system is disengaged.
!Disengage the drive motors only on a level surface.
!Ensure the key is removed from the key switch.
!Stand beside the scooter to engage or disengage freewheel mode. Never sit on a
scooter to do this.
!After you have finished pushing your scooter, always return it to the drive mode to lock
the brakes.
Anti-TipWheels
The anti-tip wheels are bolted to the frame of the scooter and are an integral and important safety feature of
your scooter.
PROHIBITED! Do not remove the anti-tip wheels or modify your scooter in any way that is
not authorised by Pride.
IV. YOUR SCOOTER
REAR SECTION COMPONENTS
Themanualfreewheellever,anti-tip wheels, batteries (not shown),motor/transaxleassembly, and main circuit
breaker reset button are located on the rear section of your scooter. See figure 6.
Figure 6. Rear Section
MANUAL
FREEWHEELLEVER
MOTOR/TRANSAXLE ASSEMBLY
(LOCATEDBENEATHSHROUD)
MAINCIRCUITBREAKER
(RESET BUTTON)
ANTI-TIP WHEELS
IV. YOUR SCOOTER
Figure 5B. Off-board Battery Charger Port
Throttle Control Lever
Thislever allows youtocontrol the forwardspeedand the reversespeedofyour scooter uptothe maximum speed
youpresetwith the speed adjustment dial.
!Placeyour right hand on therighthandgrip and your left handonthe left handgrip.
!Useyour right thumb topushtheright side of thelevertodisengage your scooter’sbrakes and moveforward.
!Releasethe lever and allow yourscootertocome to a completestopbeforepushing the other side ofthelever
tomovein reverse.
!Whenthe throttleiscompletely released,itautomatically returnstothe centre“stop”position andengagesyour
scooter’s brakes.
Horn Button
Thisbuttonactivatesa warning horn. The scooter must be “on” for the horn to beoperational.Donothesitateto
usethe warning horn when doingsomayprevent accident or injury.
Speed Adjustment Dial
This dial allows you to preselect and limit your scooter’s top speed.
!Theimageof the tortoise represents the slowest speed setting.
!The image of the hare represents the fastest speed setting.
Battery Condition Meter
Whenthe key isfullyinserted and turnedclockwiseto power
upyour scooter,this meter indicates theapproximatebattery
voltagestrength. For furtherinformationon batterycharging,
seeV. “Batteries andCharging.”
Status LED
Whenthe keyisinserted intothekey switchand turned clock-
wiseto the “on”position,the status LEDlightsup, indicating
thatscooter is powered up.
Off-board Battery Charger Port
Theoff-board battery charger leadplugsinto this port during
batterycharging.Seefigure5B.
OFF-BOARD BATTERY
CHARGERPORT

23
Destiny www.pridemobility.com
22 www.pridemobility.com Destiny
PROHIBITED! Never use an extension lead to plug in your battery charger. Plug the charger
directly into a properly wired standard electrical outlet.
MANDATORY! Read the battery charging instructions in this manual and in the manual
supplied with the battery charger before charging the batteries.
WARNING! Explosive gases may be generated while charging the batteries. Keep the scooter
and battery charger away from sources of ignition such as flames or sparks and provide
adequate ventilation when charging the batteries.
WARNING! You must recharge your scooter’s batteries with the supplied off-board charger.
Do not use an automotive-type battery charger.
WARNING! Inspect the battery charger, wiring and connectors for damage before each
use. Contact your authorised Pride Provider if damage is found.
WARNING! Do not attempt to open the battery charger case. If the battery charger does
not appear to be working correctly, contact your authorised Pride Provider.
WARNING! If the battery charger is equipped with cooling slots, then do not attempt to
insert objects through these slots.
PROHIBITED! Do not allow unsupervised children to play near the scooter while the
batteries are charging. Pride recommends that you do not charge the batteries while the
scooter is occupied.
WARNING! If your battery charger has not been tested and approved for outdoor use, then
do not expose it to adverse or extreme weather conditions. If the battery charger is exposed
to adverse or extreme weather conditions, then it must be allowed to adjust to the difference
in environmental conditions before use indoors. Refer to the manual supplied with the
battery charger for more information.
V. BATTERIES AND CHARGING
Your scooter isequipped with two sealed, maintenancefree, 12AH batteries. Fully charge the batteries prior to
usingyour scooter for thefirsttime. Keeping the batteriesfullychargedwill keepyourscooterrunning smoothly.
Figure 7. Battery Condition Meter
IV. YOUR SCOOTER
Batteries
Thebatteries store theelectricalenergythat powers yourscooter. SeeV.“Batteries andCharging” for information
onhowtocharge your scooter batteries.
Motor/Transaxle Assembly
Themotor/transaxleassemblyis an electromechanical unit that converts electrical energyfromyourscooter’s
batteriesintothe controlled mechanical energythat drives the scooter’swheels.
Main Circuit Breaker (Reset Button)
Whenthevoltage in your scooter’sbatteriesbecomeslowor the scooter is heavily strained becauseofexcessive
loadsorsteep inclines, the main circuit breaker may trip to protectthemotorandelectronics from damage.
!Themaincircuitbreakerresetbuttonpopsoutwhen the breaker trips.
!Whenthebreakertrips, the entire electrical system of your scooter shuts down.
!Allowaminute or two for your scooter’s electronics to “rest.”
!Pushinthereset button to reset the main circuit breaker.
!Ifthemaincircuitbreakertrips frequently,you may need to chargeyourbatteriesmoreoften.You may also
needtohaveyourauthorisedPrideProviderperforma load test on your scooter’sbatteries.
!Ifthemain circuit breaker trips repeatedly, see your authorised Pride Providerforservice.
OFF-BOARD BATTERY CHARGER
The off-board battery charger, when plugged into the off-board battery charger port and a standard electrical
outlet,chargesthe scooter’s batteries.
TheLED lights on thechargerindicate differentcharger conditionsatvarious times. Refer tothechargerowner’s
manualenclosed with the charger foracomplete explanation of these indicators.
READING YOUR BATTERY VOLTAGE
Thebattery conditionmeteron the tillerconsoleuses acolour
codetoindicate the approximate strength of your batteries.
Fromright to left,greenindicates fullychargedbatteries, yel-
lowa draining charge, and red indicates that an immediate
recharge is necessary. See figure 7. To ensure the highest
accuracy,thebattery conditionmeter shouldbechecked while
operatingyourscooterat full speed on a dry,level surface.
To check the battery strength during charging, you must
first unplug the charger power lead and turn on your
scooter.
PROHIBITED! Removal of grounding prong
can create electrical hazard. If necessary,
properly install an approved 3-pronged
adapter to an electrical outlet having 2-
pronged plug access.

25
Destiny www.pridemobility.com
24 www.pridemobility.com Destiny
V. BATTERIES AND CHARGING
Battery Removal
1. Remove the key fromthekeyswitch.
2. Make sure the manualfreewheelleveris in the drive po-
sition.
3. Remove the securement knob from the seat post, fold
downthe seatback, then lifttheseat straight upandoffof
thescooter.
4. Remove the ball detent pin from the seat post, then re-
movethe upper seat post.
5. Gently liftupandremove the rear shroud.
6. Disconnect the red (+) positive and black (-) negative
batterycablesbypressingthelockingtaboneachcable
connectorandpullingthemapart.Seefigure8.
7. Disconnect the battery cablesfromthebattery terminals
byslidingback each terminal boot andremovingthenut
fromthe bolt.
8. Unfasten the batterystrapfrom each battery andremove
the batteries.
Battery Replacement
1. Place new batteries into the scooterand secure the bat-
terystraps.
2. Attach the red battery cable to the positive (+) battery
terminal.
3. Attach the black battery cable to the negative(-)battery
terminal.
4. Reposition the terminalbootsover the battery terminals.
5. Reconnect the batterycableconnectorsuntil the locking
tabengages,indicated by a “click.”
6. Place the rear shroud back onto the scooter frame.
7. Reinstall the upper seat post and secure it with the ball
detentpin.
8. Reinstall theseat.
9. Reinstall and tightenthesecurement knob.
NOTE: If you encounter a damaged or cracked bat-
tery, immediately enclose it in a plastic bag and call
your authorised Pride Provider for instructions on dis-
posal. Your authorised Pride Provider will also have
the necessary information on battery recycling, which
is our recommended course of action.
Figure 8. Battery Connections
BATTERY CABLE CONNECTORS
TERMINAL BOOTS
30A
CIRCUIT
BREAKER
80A
FUSE
Figure 8A. BatteryWiring Diagram
V. BATTERIES AND CHARGING
NOTE: For more information on battery charging, refer to the operation manual supplied with your
battery charger.
Follow these easy steps to charge your batteries safely:
1. Position the front of your scooterclosetoastandardelectricaloutlet.
2. Remove the key fromthekeyswitch.
3. Make certain thatthemanualfreewheel lever is indrivemode.
4. Slide the off-boardbatterycharger port cover awayfromthe off-board battery chargerportand plug the 3-pin
off-boardchargerpowerleadintotheport.
5. Extend the charger power lead from the off-boardbattery charger and plug it into the electrical outlet. Itis
recommendedthatyouchargeyourbatteriesfor8to14hours.
6. When the batteries are fully charged, unplugtheoff-boardchargerpowerleadfromthe electrical outlet and
thenfromtheoff-boardbattery charger port.
7. Replace the off-boardbatterychargerport cover.
NOTE: There is a charger inhibit function on your scooter. The scooter will not run and the battery condition
meter will not operate if the charger power lead is not disconnected from the scooter.
REPLACING YOUR SCOOTER’S BATTERIES
Iffor any reasonyoudo not feel capableorconfident in performingthesteps below, donotattempt to replaceyour
batteries.Contactyourauthorised Pride Provider for service instead.
Toassure complete compatibilityandoptimalperformance, Pride recommendsusingoriginal equipment replace-
mentbatteries obtainable from your authorisedPrideProvider.
WARNING!Contact your authorised PrideProvider if youhave anyquestionsregarding
the batteries in your scooter.
WARNING! Do not replace the batteries while the scooter is occupied.
WARNING! The batteries on your scooter should only be serviced or replaced
by an authorised Pride Provider or a qualified technician.
MANDATORY! Battery posts, terminals and related accessories contain lead
and lead compounds. Wear goggles and gloves when handling batteries and
wash hands after handling.
WARNING! Always use two batteries of the exact same type, chemistry and
amp-hour (Ah) capacity. Refer to the specifications table in this manual and in
the manual supplied with the battery charger for recommended type and
capacities.

27
Destiny www.pridemobility.com
26 www.pridemobility.com Destiny
V. BATTERIES AND CHARGING
Whattype and size batteryshould I use?
Your scooter comes equippedwithtwodeep-cycle batteries that aresealedand maintenance free. BothAGMand
Gel-Cellaredeep-cyclebatteries that are similar in performance. Do not use wet-cell batteries, which have re-
movablecaps.
WARNING! Corrosive chemicals are contained in batteries. Use only AGM or Gel-Cell
batteries to reduce the risk of leakage or explosive conditions.
Why do my new batteries seem weak?
Deep-cyclebatteries employ a different chemicaltechnologythan that used incarbatteries,nickel-cadmium bat-
teries(nicads) or in othercommonbatterytypes. Deep-cycle batteries arespecificallydesigned to provide power,
draindowntheir charge and then accept a relativelyquickrecharge.
Weworkclosely with our batterymanufacturertoprovide batteries that bestsuityour scooter’s specific electrical
demands.Fresh batteries arrivedailyand are shippedfullycharged withthescooter.During shipping, thebatteries
mayencounter temperatureextremes thatmayinfluencetheirinitial performance.Heatdiminishesthecharge onthe
battery;coldslowstheavailablepowerandextendsthetime needed to recharge the battery.
WARNING! If your scooter’s batteries become frozen, do not attempt to charge them. Cold
or frozen batteries should be allowed to warm up for several days prior to recharging.
Itmaytakea few days for the temperature of your scooter’s batteries to stabilise and adjust to their new room or
ambienttemperature.It takes a few chargingcycles(partialdraining followed by full recharging)toestablishthe
criticalchemicalbalancethat is essential to a deep-cycle battery’speakperformanceandlonglife.Follow these
stepstoproperly break-in your scooter’s newbatteriesformaximum efficiency andservicelife.
1. Fully rechargeanynewbattery priortoits initial use.Thischarging cycle bringsthebattery uptoabout 88% of
itspeak performance level.
2. Operate your new scooterinfamiliarandsafe areas. Drive slowly at first, and donottraveltoofar from your
homeor familiar surroundings until youhavebecome accustomed to your scooter’scontrols.
3. Fully recharge the batteries. Theyshouldbeatover90% of their peak performance level.
4. Operate your scooter again.
5. Fully recharge thebatteriesagain.
6. After four orfivecharging cycles, thebatteriesare able to receiveacharge of 100%oftheirpeak performance
levelandareabletolastforanextendedperiodoftime.
HowcanIensuremaximum battery life?
Fullychargeddeep-cycle batteries provide reliable performance and extended battery life. Keep your scooter’s
batteriesfully charged whenever possible. Protectyourscooterand batteries from extremeheatorcold. Batteries
thatare regularly and deeplydischarged,infrequently charged,storedinextreme temperatures or storedwithouta
fullcharge maybepermanently damaged, causingunreliableperformance andlimitedservice life.
Whatabout public transport?
Ifyou intend to use publictransportwith your scooter,you mustcontactthetransportation Provider in advanceto
determinetheir specificrequirements.
V. BATTERIES AND CHARGING
FREQUENTLY ASKED QUESTIONS
Howdoesthe charger work?
When your scooter’s battery voltage is low, the charger works harder, sending more electrical current to the
batteriestobring up their charge.Asthe voltage approaches full charge,the charger sendslessandlesselectrical
current to the batteries. When the batteries are fully charged, the current sent by the charger is at nearly zero
amperage. Therefore, when the charger is plugged in, it maintains the charge on your scooter’s batteries, but
does not overcharge them. We do not recommend that you charge your scooter’s batteries for more than 24
consecutivehours.
Whatifmy scooter’sbatteries won’t charge?
Ensurethatbothendsof the off-boardchargerpower lead are inserted fully.
Howoften must I chargethe batteries?
Two majorfactorsmustbeconsideredwhendecidinghow often to chargeyourscooter’s batteries:
!Alldayscooteruseonadailybasis.
!Infrequentorsporadicscooteruse.
With theseconsiderationsin mind,youcan determinehow oftenandfor howlongyou shouldchargeyourscooter’s
batteries.The off-board chargerwasdesignedsothat it will not overchargeyourscooter’sbatteries. However,
youmay encounter someproblemsif you do notchargeyour batteries oftenenoughand if youdonot charge them
ona regular basis. Followingtheguidelines below will providesafeandreliable battery operationandcharging.
!Ifyou use your scooterdaily,chargeits batteries as soonasyou finish using itfortheday.Your scooterwillbe
readyeachmorning to give you afulldayof service. Werecommendthat you chargeyourscooter’sbatteries
for8to14 hours after daily use.
!If you use your scooter once a week or less, charge its batteries at least once a week for 12 to 14 hours at
atime.
!Keepyourscooter’sbatteries fully charged.
!Avoiddeeply dischargingyourscooter’s batteries.
!Do not charge your scooter’s batteries for more than 24consecutive hours.
HowcanI get maximum range or distancepercharge?
Rarelywill youhave idealdriving conditions—smooth,flat,harddrivingsurfaces withno windorcurves.Oftenyou
willfacehills, pavement cracks, uneven and loosely packed surfaces, curves, and wind, all of whichaffectthe
distanceorrunningtimeperbatterycharge.Belowareafewsuggestionsforobtainingthemaximum range per
batterycharge.
!Fullychargeyour scooter’s batteries prior to use.
!Planyourroutetoavoidasmanyhills,cracked,brokenorsoftsurfaces as possible.
!Limityour baggageweightto essential items.
!Trytomaintainan even speed while yourscooteris in motion.
!Avoidstop-and-go driving.

29
Destiny www.pridemobility.com
28 www.pridemobility.com Destiny
!Releasethethrottlecontrollevertodecelerateandcometoa complete stop.
!Theelectromechanicaldiscpark brake automatically engages when your scooter comes to astop.
NOTE: Your scooter’s reverse speed is slower than that of the forward speed you preset with the speed
adjustment dial.
GETTING OFF OFYOUR SCOOTER
1. Bring your scooter to a complete stop.
2. Remove the key fromthekeyswitch.
3. Rotate the seat to either side of the scooter and carefully and safely get out of the seat.
POWER DOWN TIMER FEATURE
Your scooter is equippedwithanenergysavingautomaticpower down timer featuredesignedto preserve battery
life.If you mistakenlyleavethe keyinthe “on” position,butdo notuseyour scooter forapproximately30 minutes,
thescooter’scontrollershutsdown automatically.
Ifthepower down timer feature takes effect,performthefollowingsteps to resume normal operation.
1. Remove the key fromthekeyswitch.
2. Insert the key back into the key switch.
VI. OPERATION
VI. OPERATION
BEFORE GETTING ONYOUR SCOOTER
!Haveyoufully charged thebatteries?SeeV. “Batteries and Charging.”
!Isthe manual freewheel lever in the drive position? Never leavethe manual freewheel lever pushed down
unlessyou aremanuallypushing your scooter.
GETTING ONTOYOUR SCOOTER
WARNING! Never attempt to get onto or off of your scooter without first removing the key
from the key switch. This will prevent the scooter from moving if accidental throttle control
lever contact is made.
1. Make certain that the key is removedfromthekeyswitch.
2. Disengage the seat rotation lever and rotate the seat so it faces you.
3. Position yourself comfortably andsecurelyinthe seat, then rotate the seat forward.
4. Make certain that the seat is secured intoposition.
5. Make certain that your feet are safely on the floorboard.
PRE-RIDE ADJUSTMENTS AND CHECKS
!Areyou positioned comfortably in theseat?
!Istheseatat the proper height?
!Istheseatsecurely in place?
!Isthe tiller at a comfortabledrivingpositionand locked securely in place?
!Isthekeyinthe“on”position?See IV. “Your Scooter.”
!Doesthescooter’s horn work properly?
!Isyour proposed path clear of people, pets, and obstacles?
!Haveyouplanned your route to avoid adverse terrain and asmanyinclinesaspossible?
OPERATING YOUR SCOOTER
WARNING! The following can adversely affect steering and stability while operating your
scooter:
!Holding onto or attaching a leash to walk your pet.
! Carrying passengers (including pets).
! Hanging any article from the tiller.
!Towing or being pushed by another motorised vehicle.
Such practices could cause loss of control and/or tipping.
Keepboth hands onthetiller and yourfeeton the floorboardatall times whileoperatingyourscooter.Thisdriving
positiongives you the mostcontrolover your vehicle.
!Setthespeedadjustment dial to your desired speed.
!Pressyourthumb against the appropriate side of the throttlecontrollever.
!Theelectromechanicaldisc park brake automatically disengages andthescooteraccelerates smoothly to the
speedyoupreselectedwith the speed adjustment dial.
!Pullontheleft handgrip to steer your scooter to the left.
!Pullonthe right handgrip to steer your scooter totheright.
!Movethetiller to the centre position to drive straightahead.

31
Destiny www.pridemobility.com
30 www.pridemobility.com Destiny
MANUAL RECLINE SEATBACK ADJUSTMENT
To adjust the seatback angle:
1. Pull uponthe manualreclinelevertounlock theseatback.
See figure 11.
2. Lean forward or rearward to adjust the seatback to a
comfortableposition.
3. Release the manual reclinelevertolock the seatback se-
curelyinto place.
WARNING! Always keep your back pressed
firmly against the seatback when
adjusting the seatback recline angle.
HEADREST HEIGHT ADJUSTMENT
Toadjusttheheadrestheight:
1. Press the headrest release button located at the base of
the headrest. Seefigure11.
2. Adjust theheadrestup or downtoa comfortableposition.
3. Release the headrest release button to secure the head-
restinthe selected position.
ARMREST ANGLE ADJUSTMENT
Toadjustthearmrestangle:
1. Flip up thearmrestsothat it is perpendicular tothefloor.
2. Loosen the locking nut. See figure 11.
3. Turn the armrest angle adjustment screw clockwise to
lower the front of the armrest or anticlockwise to raise
thefrontof the armrest.
4. Tightenthe locking nuttosecurethe armrest inposition.
ARMREST WIDTH ADJUSTMENT
Thearmrestwidthcanbeadjustedinwardoroutward.
1. Loosen the armrest adjustment knobs. Seefigure12.
2. Slide the armrests in or out to the desired width.
3. Tightenthe armrest adjustment knobstosecurethe arm-
restsinplace.
WARNING! Do not attempt to lift or move
your scooter by any of its removable
parts, including the armrests, seat, and
shroud.
NOTE: Pivot the armrests upward to aid in getting onto
and off of your scooter.
Figure 12. ArmrestWidth Adjustment
ARMREST ADJUSTMENT KNOBS
HEADRESTRELEASE BUTTON
LOCKINGNUT
ARMRESTANGLE
ADJUSTMENTSCREW
MANUAL
RECLINELEVER
Figure 11. Seat and Armrest Adjustments
VII. COMFORT ADJUSTMENTS
TILLER ANGLE ADJUSTMENT
WARNING! Remove the key from the key
switch before adjusting the tiller or the
seat. Never attempt to adjust the tiller or
the seat while the scooter is in motion.
Your scooter isequippedwith an adjustable pivotingtiller.
1. Loosen the tiller adjustment knob. See figure 9.
2. Adjust the tillertoacomfortable position.
3. Tightenthe tilleradjustmentknob.
SEAT ROTATION ADJUSTMENT
Theseatrotation leverwillsecuretheseatintoseveralpositions.
1. Disengage the seat rotation lever to releasetheseat.See
figure10.
2. Rotate the seat to the desired position.
3. Release the lever to secure the seat into place.
SEAT HEIGHT ADJUSTMENT
The seat can be repositioned to different heights. See
figure 10.
1. Remove the key fromthekeyswitch.
2. Make sure the manual freewheel lever is in the drive
position.
3. Loosen the securement knob on the seat post.
4. Remove the ball detent pin fromtheseatpost.
5. Raise orlowertheseattothedesiredheight.
6. Hold the seat in position, insert the ball detent pin, and
tightenthe securement knob.
FRONT-TO-BACK SEAT ADJUSTMENT
You can repositiontheseatforward or rearward to adjust the
distancebetweenthe seat and the tiller. Seefigure10.
1. Pull up ontheseat sliding lever.
2. While holding theleverup, slide theseatforward or rear-
ward.
3. Release the seat sliding lever once the seat is in the de-
siredposition.
Figure 9.Tiller Angle Adjustment
Figure 10. Seat Adjustments
TILLER ADJUSTMENT KNOB
SEAT ROTATION LEVER
BALL DETENT PIN SECUREMENT
KNOB
SEAT SLIDING
LEVER

33
Destiny www.pridemobility.com
32 www.pridemobility.com Destiny
VIII. DISASSEMBLY AND ASSEMBLY
WARNING! Failure to unplug both battery cables and the front-to-rear harness prior to
separating the front and rear sections could result in permanent damage to the scooter.
12. Pivotthe rearsectionrearwardsuntil it is standingverticallyon its bumper.
13. Lift the front section up until the pegs on the front section are no longer in the locking brackets of the rear
section. Seefigure 14.
14. Carefullymovethefront sectionawayfromtherearsection.
ASSEMBLY
To assemble the scooter:
1. Position the front and rear sections of your scooter as shown in figure 15.
2. Align the locking bracketsontherearsection with the corresponding pegs on thefrontsection.
3. Using the seat post,slowlypivotthe rear section forward untilthelockingbracketsare fully connected to the
pegs.
4. Reinstall theframelock pin.
5. Raise thetiller.
6. Reinstall the batteriesandtightenthe battery straps.
7. Reconnect the battery cableconnectorsuntilthe locking tab engages, indicatedbya“click.”
8. Reconnect the front-to-rear harness.
9. Reinstall the rearshroud.
10. Reinstall the upper seat post and secure itwiththeballdetentpin.
11. Reinstallthe seatandrotateit into place, then reinstall andtightenthesecurement knob.
Figure 15. Frame Positioning
VIII. DISASSEMBLY AND ASSEMBLY
DISASSEMBLY
Notools are required to disassembleorassemble your scooter,but keep inmindthat the disassembled sections of
thescootertake up more floor space than the assembledunit.Alwaysdisassemble or assemble your scooter on a
level, dry surface with sufficient room for you to work and move around your scooter-about 1.5 meters in all
directions.Rememberthat some scooter componentsareheavyand you may need assistancewhenliftingthem.
WARNING! Do not lift weight beyond your physical capability. Ask for assistance when
necessary while disassembling or assembling your scooter.
You can disassemble the scooter into fivepieces: the seat, the front section, the rear section, and the batteries.
See figure 13.
SEAT
REAR SECTION
Figure 13. Scooter Components
BATTERIES
FRONT SECTION
Figure 14. Frame Separation
PEG
LOCKINGBRACKET
FRAMELOCKPIN
To disassemble the scooter:
1. Remove the key fromthekeyswitch.
2. Make sure themanualfreewheellever is in drive mode.
3. Remove the securement knob from the seat post, fold
down the seatback, then lift the seat up and off of the
scooter.
4. Remove the ball detent pin from the seat post, then re-
movethe upper seat post.
5. Gently lift upandremovethe rear shroud.
6. Disconnect the red (+) positive and black (-) negative
batterycablesbypressingthelockingtaboneachcable
connectorand pulling them apart.
7. Unfasten thebatterystrapfromeachbattery.
8. Remove the batteries by lifting them up and away from
thescooter.
9. Loosen thetilleradjustmentknobandlowerthetillerto
thescooterfloorboard.
10. Remove the frame lock pin. See figure 14.
11. Unplugthefront-to-rearharness

35
Destiny www.pridemobility.com
34 www.pridemobility.com Destiny
Yourscooter requires a minimal amount of care and maintenance. If you do not feel confident in your ability to
performthe maintenance listed below,youmayschedule inspection and maintenancewithyourauthorised Pride
Provider.The followingareasrequireperiodic inspection and/or careandmaintenance.
TYRE CONDITION AND TREAD WEAR
!Regularlyinspectyour scooter’s tyres for signsofwear.
!Usearubberconditioneronyourscooter’styre sidewalls to help to preserve them.
WARNING! Do not apply rubber conditioner on tyre tread; this may cause the tyres to
become dangerously slippery.
WHEEL REPLACEMENT
Ifyourscooter is equipped with pneumatic tyres and you haveaflattyre,you can have the tube replaced. If your
scooteris equipped withasolid tyreinsert,either the solidinsertor the entirewheelmust bereplaceddepending on
model.Contact your authorised Pride Providerforinformationregarding replacement wheels for yourscooter.
WARNING! Wheels on your scooter should only be serviced/replaced by an authorised
Pride Provider or qualified technician.
WARNING! Completely deflate pneumatic tyres before dismantling the rim or attempting repair.
WARNING! When changing a tyre, remove only the centre lug nut and washer, then remove
the wheel. If any further disassembly is required, deflate the tyre completely or it may explode.
EXTERIOR SURFACES
!Bumpersand trim benefitfromanoccasional application ofrubberor vinyl conditioner.
WARNING! Do not apply a rubber or vinyl conditioner on a scooter’s vinyl seat or floorboard
mats; they will become dangerously slippery.
!ThescootershroudismadefromdurableABSplasticandcoatedwithanadvancedformulaurethanepaint.Alight
applicationofcar waxwillhelptheshroud retainitshighgloss.Avoidusingrubbingcompoundsontheshroud.
BATTERY TERMINAL CONNECTIONS
!Makecertainthat the terminal connections remain tightandarenotcorroded.
!Thebatteries must sit flatinthebattery wells.
!Thebatteryterminals should face towards the inside of thescooter.
WIRING HARNESSES
!Regularlycheck allwiring connections.
!Regularlycheck all wiringinsulation,including the charger powerlead,for wear ordamage.
!Haveyourauthorised Pride Provider repair or replace any damagedconnector,connectionorinsulationthat
youfind before using yourscooteragain.
X. CARE AND MAINTENANCE
Anyelectromechanical devicerequiresoccasional troubleshooting.However, mostproblemsthat arisecanusually
besolvedwitha bit of thought and common sense. Many of these problems occur because the batteries are not
fullychargedorbecausethebatteriesareworndownandcanno longer hold a charge.
Whatif the motor runs butmy scooter does not move?
!Your scooter was probablyleftinfreewheelmode.
!Whenthemanualfreewheelleverispushed down,thebrakesaredisengagedandallpowerto themotor/transaxle
iscut.
!Pullthemanual freewheel lever upward to restorenormaloperationtoyour scooter.
Whatifthemaincircuit breaker trips repeatedly?
!Chargethe scooter’s batteries more frequently.SeeV.“Batteries and Charging.”
!SeeV.“Batteries andCharging”orIII.“Specifications” forinformationaboutyour scooter’sbatterytype.
!Ifthemain circuit breaker continues to trip repeatedly, contact yourauthorisedPrideProviderfor service.
Whatif the battery condition meterdips way down and themotor surges or hesitates whenI press the
throttlecontrollever?
!Fullychargeyour scooter’s batteries. See V. “Batteries and Charging.”
!HaveyourauthorisedPrideProviderloadtesteachbattery.
What if all the systems on my scooter seem to be “dead?”
!Makecertainthat the key is in the “on” position.
!Checkthatthebatteries are fully charged. SeeV.“Batteries and Charging.”
!Pushinthemaincircuit breaker reset button. See IV. “Your Scooter.”
!Ifhavingchanged a battery recently, ensure allthebatteryconnections secure.
!Checkthatthepowerdowntimerfeaturehasnotbeenactivated. See VI. “Operation.”
Ifyou experience any problems with your scooter that you arenotable to solve, contact your authorised Pride
Providerfor information onmaintenanceand service.
IX. BASIC TROUBLESHOOTING

37
Destiny www.pridemobility.com
36 www.pridemobility.com Destiny
X. CARE AND MAINTENANCE
AXLE BEARINGS AND THE MOTOR/TRANSAXLE ASSEMBLY
PROHIBITED! Even though the scooter has passed the necessary testing requirements for
ingress of liquids, you should keep electrical connections away from sources of dampness,
including direct exposure to water or bodily fluids and incontinence. Check electrical
components frequently for signs of corrosion and replace as necessary.
Theseitemsare all prelubricated, sealed andrequirenosubsequent lubrication.
CONSOLE, CHARGER AND ELECTRONICS
!Keeptheseareasfreeofmoisture.
!If any of these items do become exposed to moisture, let them dry thoroughly before operating your
scooter again.
NYLON LOCK NUT REPLACEMENT
Anynylon insert locknutremovedduring the periodicmaintenance,assembly or disassembly ofthescooter must
bereplaced with anewnut. Nylon insertlocknutsshould not bereusedas it maycausedamage to thenyloninsert,
resultingin a lesssecurefit. Replacementnyloninsert lock nutsareavailable atlocalhardware stores orthroughan
authorisedPrideProvider.
CLEANING AND DISINFECTION
!Useadampclothand mild, non-abrasive cleanser to clean the plastic and metal parts of your scooter.Avoid
usingproductsthatmay scratch the surface of your scooter.
!Ifnecessary,cleanyourproductwithanapproveddisinfectant.Makesure the disinfectant is safe for use on
yourproductbefore application.
WARNING! Follow all safety instructions for the proper use of the disinfectant and/or cleaning
agent before applying it to your product. Failure to comply may result in skin irritation or
premature deterioration of upholstery and/or scooter finishes.
DISPOSAL OFYOUR SCOOTER
Your scooter must be disposed of according to applicable local and national statutory regulations. Contact your
localwastedisposalagencyforinformationonproper disposal of packaging, metal frame components, plastic
components,electronics,and batteries.
STORAGE
Ifyouplanonnot using your scooter for an extended period of time, it is best to:
!Fullychargeits batteries prior to storage.
!Storeyourscooter in a warm, dry environment.
!Avoidstoring your scooter where it will be exposed totemperatureextremes.
WARNING! Always protect batteries from freezing temperatures and never charge a frozen
battery.
Batteriesthat are regularlyanddeeply discharged, infrequently charged,storedin extreme temperatures,orstored
withouta full chargemaybe permanentlydamaged,causing unreliable performanceandlimited service life.Pride
recommendsthat you charge the scooterbatteriesperiodicallythroughout periods of prolongedstoragetoensure
properperformance.
Youmay also wish to place several boards under the frame of your scooter to raise the scooter offoftheground
duringperiodsofprolongedstorage. This takes the weight off the tyres and reduces the possibility of flat spots
developingonthe areas of the tyres contactingtheground.
X. CARE AND MAINTENANCE
Table of contents
Other Pride Scooter manuals

Pride
Pride Sonic User manual

Pride
Pride Hurricane PMV User manual

Pride
Pride Dynamo User manual

Pride
Pride CELEBRITY XL User manual

Pride
Pride Hurricane User manual

Pride
Pride COLT ES10 User manual

Pride
Pride Victory Viper User manual

Pride
Pride PATHRIDER ES10 User manual

Pride
Pride Sundancer User manual

Pride
Pride Icon User manual

Pride
Pride Sundancer User manual

Pride
Pride COLT EXECUTIVE User manual

Pride
Pride Celebrity X-6 User manual

Pride
Pride Jet 2 User manual

Pride
Pride Sundancer User manual

Pride
Pride MAXIMA User manual

Pride
Pride Jazzy 1105 User manual

Pride
Pride Jazzy 1113 User manual

Pride
Pride Elite Trsveller User manual

Pride
Pride BAJA BANDIT User manual