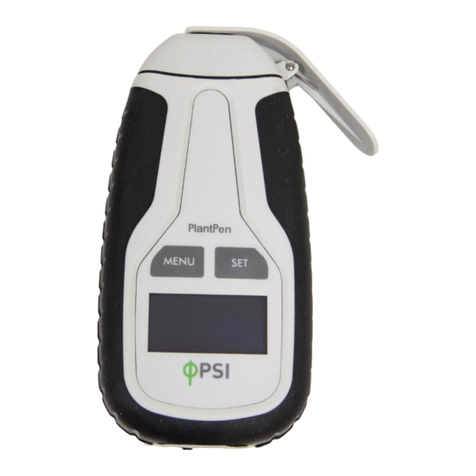
PSI PlantPen PRI 200 User manual

P
PlantPen
PRI 200 & NDVI 300
Instruction Manual
Please read this manual before operating this product
PSI, spol. s r. o., Drásov 470, 664 24 Drásov, Czech Republic
FAX: +420 511 440 901, TEL: +420 511 440 011, www.psi.cz

2
CONTENTS
Contents........................................................................................................................................................... 2
Instruction Manual ........................................................................................................................................... 3
Technical specifications..................................................................................................................................... 3
General Description .......................................................................................................................................... 6
Components of the Plant pen series.................................................................................................................. 7
Description of the Plant pen device-.................................................................................................................. 8
Operation instructions .................................................................................................................................... 10
Control Menu Tree.......................................................................................................................................... 11
Connection of the device via USB pairing ........................................................................................................ 16
Bluetooth Pairing....................................................................................................................................... 17
Bluetooth Connection................................................................................................................................ 21
PlantPen Software .......................................................................................................................................... 23
Start up ..................................................................................................................................................... 23
Menu and Icon Explanation ....................................................................................................................... 24
Example of Data Transfer and Visualization................................................................................................ 26
PRI - Photochemical Reflectance Index ...................................................................................................... 27
NDVI - Normalized Difference Vegetation Index......................................................................................... 27
Software Update............................................................................................................................................. 28
GPS Module.................................................................................................................................................... 30
GPS Module Description............................................................................................................................ 30
First Time Installation of the GPS Module .................................................................................................. 31
GPS / PlantPen Operation.......................................................................................................................... 32
Data Download.......................................................................................................................................... 32
WARRANTY TERMS AND CONDITIONS............................................................................................................. 35
Troubleshooting and Customer support .......................................................................................................... 36

3
INSTRUCTION MANUAL
TECHNICAL SPECIFICAT IONS
Measured Parameters:
PRI (Photochemical Reflectance Index)
PRI = (R525 - R592) / (R525 + R592)
NDVI (Normalized Difference Vegetative Index)
NDVI = (NIR760 –VIS635) / (NIR760 + VIS635)
Measuring Light:
PRI: Internal dual wavelength light source R531 = 531 nm (bandwidth 520 nm - 540 nm), R570 = 570 nm
(bandwidth 570 nm - 590 nm)
NDVI: Internal dual wavelength light source VIS = 635 nm (bandwidth 625 nm - 645 nm), NIR = 760 nm
(bandwidth 750 nm - 760 nm)
Detector Wavelength Range:
PRI: PIN photodiode with 500 to 600 nm bandpass filters
NDVI: PIN photodiode with 620 to 750 nm bandpass filters
Wavelenght Tolerance
± 5 nm
Communication:
Bluetooth, USB, or serial
PlantPen / PlantPen 1.0 Software:
Windows 2000, XP, or higher compatible*
Memory Capacity:
Up to 4 Mb
Internal Data Logging:
Up to 100,000 data points
Display:
2 x 8 characters LC display
Keypad:
Sealed, 2-key tactile response

4
Keypad Escape Time:
Turns off after 3 minutes of no use
Power Supply:
4 AAA alkaline batteries (single use or rechargeable)
Battery Life:
48 hours typical with full operation
Low Battery Detection:
Low battery indication displayed
Size:
120 mm x 57 mm x 30 mm
4.7" x 2.2" x 1.2"
Weight:
180 g, 6.5 oz
Sample Holder:
Mechanical leaf clip (non-destructive for plants, effective for sample pre-darkening)
Operating Conditions:
Temperature: 0 to 55 ºC; 32 to 130 ºF Relative humidity: 0 to 95 % (non-condensing)
Storage Conditions:
Temperature: -10 to +60 ºC; 14 to 140 ºF Relative humidity: 0 to 95 % (non-condensing)
Warranty:
1 year parts and labor (see the last page of this Operation Manual for precise conditions)
* Windows is a registered trademark of Microsoft Corporation.

5
The Bluetoothmodule BlueNiceCom III is endowed with a declaration of conformity with the following norms:
EN 300 328 V1.6.1 (2004-11)
EN 301 489-1, -3 V1.5.1 (2003-12)
EN 50371 December 2002
EN60650
FCC Part 15.247
FCC Grantee Code: R7T
Bluotooth Qualified Product Notice:
GRA_013_04
Bluetooth Listing Identifier: B01572
PlantPen models (PRI 200-B, PRI 200-U, NDVI 300-B, NDVI 300-U) incorporate one of the two offered
communication modules: Bluetooth or USB cable. PlantPen 1.0 software provides visualization and data
transfer routines to a computer.

6
GENERAL DESCRIPTION
The PlantPen model PRI 200 measures Photochemical Reflectance Index (PRI) in two narrow wavelength
bands centered close to 531 nm and 570 nm. The photochemical reflectance index (PRI = (R531–
R570)/(R531+R570)) correlates with the epoxidation state of xanthophyll cycle pigments and
photosystem efficiency in many studies under diverse conditions, such as different 1. PRI is sensitive to
changes in carotenoid pigments that are indicative of photosynthetic light use efficiency, the rate of carbon
dioxide uptake, or as a reliable water-stress index. As such, it is used in studies of vegetation productivity and
stress.
The PlantPen model NDVI 300 measures Normalized Difference Vegetation Index, which is an important
indicator of chlorophyll content in plants. The pigment in plant leaves, chlorophyll, strongly absorbs visible light
(from 0.4 to 0.7 µm) for use in photosynthesis. The cell structure of the leaves, on the other hand, strongly
reflects near-infrared light (from 0.7 to 1.1 µm). The differences in plant reflectance in the visible and near-
infrared wavelengths is used to calculate NDVI index as follows: NDVI=((NIR-VIS)/((NIR+VIS)), where VIS and
NIR stand for the spectral reflectance measurements acquired in the visible (red) and near-infrared regions,
respectively. NDVI is directly related to the photosynthetic capacity and hence energy absorption of plant
canopies 2. The NDVI 300 device compares reflected light at two distinct wavelengths, 660 and 740 nm.
PlantPen models (PRI 200-B, PRI 200-U, NDVI 300-B, NDVI 300-U) incorporate one of the two offered
communication modules: Bluetooth or USB cable. FluoPen 1.0 software provides visualization and data transfer
routines to a computer.
1John Gamon, Josep Penuelas, and Christopher Field (1992). A narrow-waveband spectral index that tracks diurnal changes
in photosynthetic efficiency. Remote Sensing of environment, 41, 35-44.
2Sellers, P. J. (1985) 'Canopy reflectance, photosynthesis, and transpiration', International Journal of Remote Sensing, 6,
1335-1372.

7
COMPONENTS OF THE PLANT PEN SERIES
Carefully unpack the carton. You should have received the following items, as described in table 1 and
shown in fig. 1.
Table 1. Components of the PlantPen Series package.
1. PlantPen
2. 4 AAA Alkaline Batteries
3. Carrying Case
4. Textile Strap for Comfortable Wearing
5. Self-Adhesive Rubber Pads for Optics Protection
6. Install USB flash disc with FluorPen software
7. USB cable
8. Other Accessories or Optional Features (according to your specific order)
9. This Owner’s Manual (on a USB flash disc)
Fig.1 Components of the PlantPen series package. Numbers correspond to component number in table 1.
Note: If any item is missing, please, contact the manufacturer: [email protected].
Please check the carton for any visible external damage. If you find any damage, notify the carrier and PSI
immediately. The carton and all packing materials should be retained for inspection by the carrier or

8
DESCRIPTION OF THE PLANT PEN DEVICE-
PlantPen models (PRI 200-B, PRI 200-U, NDVI 300-B, NDVI 300-U) incorporate one of the two offered
communication modules: Bluetooth or USB cable. Depending on the version purchased design of the device
might slightly differ.PRI 200-U version of device is shown in figure 2.
Fig.2 PlantPen series device with USB connector.
Leaf clip
Menu key
Set key
Optical window
Textile strap holder
LC display
Connector for
communication cable

9
LEAF CLIP AND THE PROTECTIVE RUBBER PAD
The optical part of the PlantPen is covered with a self-adhesive rubber pad that protects the optics from dirt or
moisture. The damaged or dirty pad can be easily removed by tearing it off from the surface. To affix a new
one, just remove the sheeting and stick the pad on cleaned and dried surface. Be sure that you placed the pad
properly and that you did not cover the optical window.
BATTERIES
The PlantPen operates from four AAA single-use or rechargeable batteries. They may be easily replaced by
unscrewing the cover of the battery holder on the rear of the instrument. Battery life is approximately 48 hours
when the PlantPen is operated continuously.

10
OPERATION INSTRUCTIONS
The next chapter explains the operation software and the structure of the Main Menu and three Sub-Menus
with all their options. The explanations of the operation software are same for both versions of the PlantPen
devices (NDVI and PRI).
The blue color represents the Main Menu and its Options.
The yellow color represents the first-level Sub-Menus and their Options.
The green color represents the second-level Sub-Menus and their Options.
Full-line arrows are used for the SET key.
Dashed-line arrows are used for the MENU key.
To START the device please press the SET key for 1 second.
To CONTROL the operation of the device use the MENU key to scroll through sequential menu options on the
digital display.
Use the SET key to select a menu option based on cursor (>) position.
Follow the description of the CONTROL MENU TREE in next section for graphical explanation of the device
operation.

11
CONTROL MENU TREE

12

13

14

15

16
DATA TRANSFER AND VISUALISATION
Please follow the next steps for data transfer from the PlantPen device and data visualisation with the FluorPen
1.0 software.
CONNECTION OF THE DEVICE VIA USB PAIRING
Please follow next steps if you have PRI 200-U /NDVI 300-U type of device.
Before you set up the USB connection between the PlantPen and PC, make sure you have these components:
USB enabled PlantPen
USB cable (fig. 3)
Installed FluorPen 1.0 software to your PC
Fig.3 NDVI-200-U with USB connector and highlighted connector for USB cable.
Connect the USB cable to a computer and PlantPen as shown in fig.4. Then Switch ON the PlantPen
(press and hold the SET key). On computer run the program Fluorpen 1.0. Please refer to page 23 for
detail description of the software.
Fig.4 NDVI-200-U with USB connector (left panel) and the connection in USB port of the PC.

17
CONNECTION OF THE DEVICE VIA BLUETOOTH
Please follow next steps if you have PRI 200-B /NDVI 300-B type of device.
Before you set up the USB connection between the PlantPen and PC, make sure you have these components:
Bluetooth enabled PlantPen with built-in Bluetooth capabilities.
Bluetooth enabled PC
The PC used must have Bluetooth wireless technology, either built-in or through a Bluetooth card.
Make sure that the PC's Bluetooth setting is "discoverable" (meaning that it shows up when other
devices search for nearby Bluetooth connections). Consult the user guide for your PC or Bluetooth
card for more information.
Bluetooth configuration software properly set up on PC
Before you can exchange files with your PC, you will need to set up the Bluetooth software that was
provided together with your PC, or your PC's Bluetooth card. This software varies by manufacturer.
Please consult your PC's Bluetooth documentation for more information.
Switched ON Bluetooth in visible mode on both devices
To pair the PlantPen with another Bluetooth device, such as a computer, you will need to ensure that
Bluetooth is switched on visible on both devices.
BLUETOOTH PAIRING
Please follow next steps to establish Bluetooth connection for your PlantPen device.
1. Enable Bluetooth in the PlantPen
Switch on the PlantPen (press and hold the SET key).
Scroll to the “Setting” menu (press the MENU key twice, then press the SET key once).
Select “BT_On” to enable Bluetooth (press the SET key).
NOTE: Please note that the PlantPen turns off automatically after about 3 minutes of no action. Turning
off the PlantPen will always turn off Bluetooth.
2. Starting the Bluetooth Application on Your PC
NOTE: Be aware that this description is a general example; some of the steps may be different on your
PC.
Select: Start>All Programs>My Bluetooth Places (fig. 5)

18
Fig.5 Selection of my Bluetooth places function.
You may also start your Bluetooth application via the Control Panel:
Select: Start>Settings>Control Panel>Bluetooth Devices.
3. Opening the Add Bluetooth Device Wizard
Select: “Add” to start the wizard (fig.6)
NOTE: Before starting to use the wizard, be sure that the PlantPen is in discoverable mode (see Step 1).
Fig.6 Add function of Bluetooth device.
4. Searching for a New Bluetooth Device
Mark the following box: “My device is set up and ready to be found” as shown in fig. 7
Go to Next step.

19
Fig.7 Searching of Bluetooth device.
5. Selecting the PlantPen
Select: Bluetooth PlantPen icon (PlantPen FluoroMeter PSI) (fig. 7)
Select: Next.
Note: Please note that your display may show more Bluetooth Device icons.
Fig.8 Selection and adding of Bluetooth device.
6. Starting the Pairing Process
Select: “Let me choose my own passkey.” (Fig. 9)
Enter: 0000 (four digits).
Select: Next.

20
IMPORTANT NOTE: Your Bluetooth Pairing Passkey is 0000.
Fig.9 Adding of the own passkey.
7. Completing the PlantPen Pairing
Select: Finish. (fig.10)
Fig.10
This manual suits for next models
1
Table of contents
Other PSI Measuring Instrument manuals
