www.PyleUSA.com www.PyleUSA.com
SAFETY INSTRUCTIONS
• Please read the instructions carefully before installation and use.
Keep the manual safe for future reference.
• Prior to installing the speakers into any wall, check the structure for weight
bearing ability and avoid contact with any wiring or plumbing that might
be behind the surface area. Installing on soft materials or in areas incapable
of supporting the speakers' weight may cause personal injury or damage
to the speaker.
• Make sure the speaker is properly secured to the wall. Please use the proper
screws, bolts, or anchors. Failure to do so may cause the speaker to became
unsecured and cause potential damages/injuries.
• When installing the speakers outside, choose areas such as the underside of
eaves to avoid strong direct sunlight that may affect the color and life of
the speaker enclosure.
• Use only approved and certied wiring in your installation.
Do not stretch or place the wire in contact with sharp objects.
• Prior to removing cables, ensure all power to your amplier and other
components is turned off.
• Damage to the woofer and tweeter may occur if the speaker is dropped or
hit-resulting in no sound or distorted sound.
• Never overdrive your speakers to the point of distortion and always reduce
volume prior to switching input sources.
PREPARATION
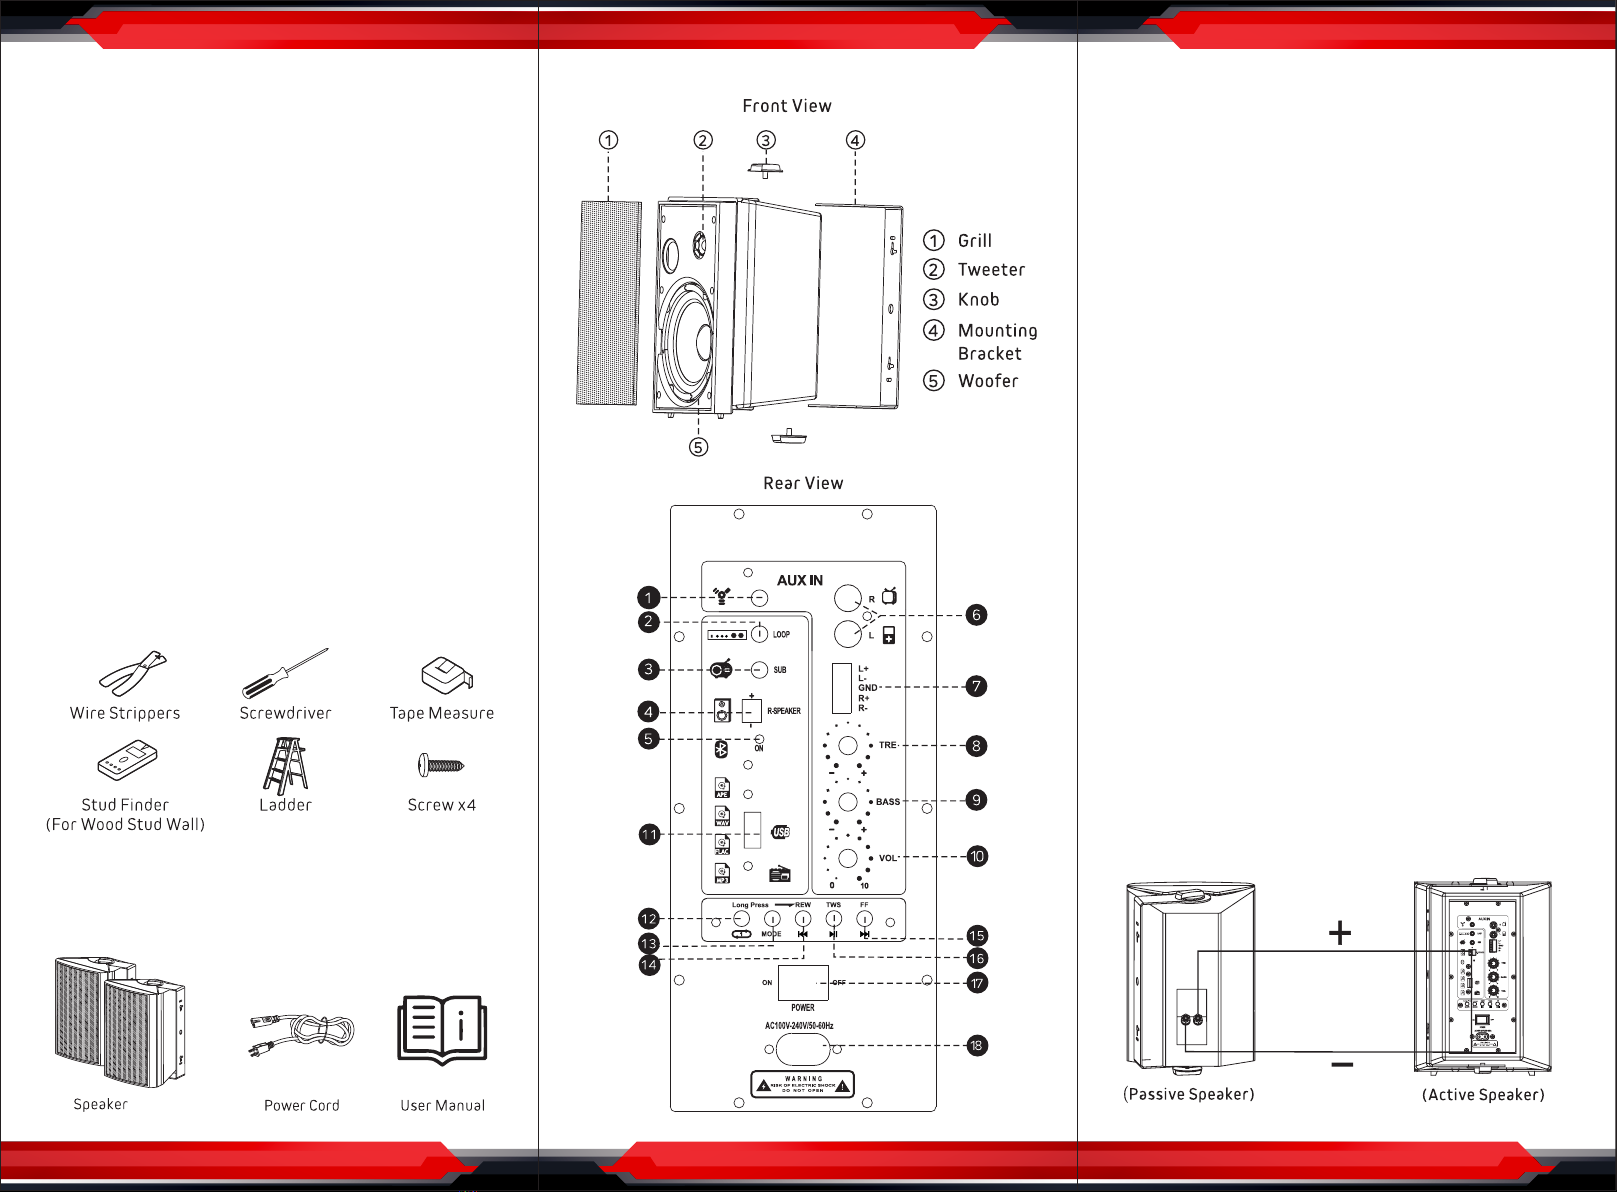
The hardware equipment listed below is needed to install the speaker.
PACKING LIST
Ensure that you have received all parts according to the component checklist
prior to installation. If any parts are missing or faulty, contact your place of
purchase for a replacement.
www.PyleUSA.com
SPEAKER OVERVIEW 1. Aux Input
2. Loop: A signal output for connecting to the other active speaker or amplier.
3. SUB: Bass output for connecting to subwoofer.
4. Speaker Output: 2-Pin terminal block for connecting to the passive
speaker.
5. LED Indicator
6. RCA Input
7. 5-Pin European-Style Terminal Block: Connects to a balanced stereo
audio input.
8. Treble: Increase or decrease the high frequency response. The O position
produces a at response. Control range: -12 dB to +12 dB.
9. Bass: Increase or decrease the low frequency response. The 0 position
produces a at response. Control range: -12 dB to +12 dB
10. Volume Control
11. USB Input
12. Replay
13. Mode: Switches audio sources.
14. Previous (Short Press)
Rewind (Press and hold)
15. Next (Short Press)
Forward (Press and hold)
16. Play/Pause (Short Press)
TWS Pairing (Press and hold)
17. Power Switch: When this switch is on Auto position, the amplier will
automatically turn on when a signal is present and it will go standby
when there is no signal input in about 15 seconds.
18. AC Power Input
CONNECTION
• Ensure that the speaker is unplugged from the mains before making any
connections.
• Connect active and passive speakers as shown. Always check to ensure
polarity is correct: "+" to "+", and "-" to "-".


