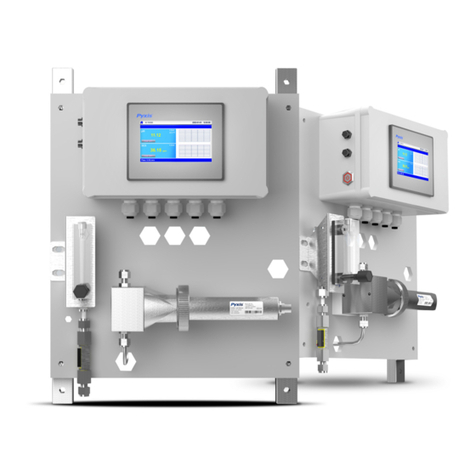
Pyxis DW-2100P User manual

Confidentiality
The information contained in this manual may be confidential and proprietary and is the property of Pyxis
Lab, Inc. Information disclosed herein shall not be used to manufacture, construct, or otherwise reproduce
the goods described. Information disclosed herein shall not be disclosed to others or made public in any
manner without the express written consent of Pyxis Lab, Inc.
Standard Limited Warranty
Pyxis Lab warrants its products for defects in materials and workmanship.
Pyxis Lab will, at its option, repair
or replace instrument components that prove to be defective with new or remanufactured components
(i.e., equivalent to new).
The warranty set forth is exclusive and no other warranty,
whether written or oral,
is expressed or implied.
Warranty Term
The Pyxis warranty term is thirteen (13) months ex-works. In no event shall the standard limited warranty
coverage extend beyond thirteen (13) months from original shipment date.
Warranty Service
Damaged or dysfunctional instruments may be returned to Pyxis for repair or replacement. In some in-
stances, replacement instruments may be available for short duration loan or lease.
Pyxis warrants that any labor services provided shall conform to the reasonable standards of technical com-
petency and performance effective at the time of delivery. All service interventions are to be reviewed and
authorized as correct and complete at the completion of the service by a customer representative, or des-
ignate. Pyxis warrants these services for 30 days after the authorization and will correct any qualifying
deficiency in labor provided that the labor service deficiency is exactly related to the originating event. No
other remedy, other than the provision of labor services, may be applicable.
Repair components (parts and materials), but not consumables, provided during a repair, or purchased
individually, are warranted for 90 days ex-works for materials and workmanship. In no event will the in-
corporation of a warranted repair component into an instrument extend the whole instrument’s warranty
beyond its original term.
Warranty Shipping
A Repair Authorization (RA) Number must be obtained from Pyxis Technical Support before any product can
be returned to the factory. Pyxis will pay freight charges to ship replacement or repaired products to the
customer. The customer shall pay freight charges for returning products to Pyxis. Any product returned to
the factory without an RA number will be returned to the customer. To receive an RMA you can generate a
request on our website at https://pyxis-lab.com/request-tech-support/.
Pyxis Technical Support
Contact Pyxis Technical Support at +1 (866) 203-8397, service@pyxis-lab.com, or by filling out a request for
support at https://pyxis-lab.com/request-tech-support/.

Related Statements
Safety Information
Please read this manual completely before unpacking, installing, and operating this equipment. In
particular, pay attention to all dangers, warnings and precautions, otherwise, it may cause serious personal
injury to the operator or damage to the equipment.
Use of Danger Information
Danger
Indicates a potentially or urgent dangerous situation that, if not avoided, will cause death or serious
injury.
Warning
Indicates a potentially or very dangerous situation that, if not avoided, may cause serious personal
injury or death.
Warning
Indicates a potentially dangerous situation that may cause a certain degree of personal injury.
Attention
Indicates conditions that if not avoided, will cause damage to the instrument. This is information that
needs special emphasis.
Warning Label
Please read all labels and marks attached to the instrument. Failure to follow the instructions on these
safety labels may result in personal injury or damage to the instrument.
If this symbol appears in the instrument, it means refer to the operation and/or safety
information in the instruction manual.
If there is this mark on the instrument housing or insulator, it means there is a risk of
electric shock or death from electric shock.
Static electricity can damage the delicate internal electronic components, resulting in
reduced performance or eventual failure of the instrument.
Electrical equipment marked with this symbol cannot be disposed of through the
European public waste system after August 12, 2005. In order to comply with European
regional and national regulations (EU Directive 2002 / 98 / EC), European electrical
equipment users must now return abandoned or expired equipment to the manufacturer
for disposal without any cost.

Table of Contents
Confidentiality ........................................................................................................................................................................ 3
Standard Limited Warranty............................................................................................................................................... 3
Warranty Term....................................................................................................................................................................... 3
Warranty Service................................................................................................................................................................... 3
Warranty Shipping................................................................................................................................................................ 3
Pyxis Technical Support...................................................................................................................................................... 3
Specifications........................................................................................................................................................ 6
Unpackaging ......................................................................................................................................................... 7
System Layout and Features ........................................................................................................................... 7
Dimension and Mounting................................................................................................................................. 9
Installation ..........................................................................................................................................................11
5.1. Installation Requirements ....................................................................................................................................11
5.2. Tube connection .......................................................................................................................................................11
5.3. Terminal Wiring........................................................................................................................................................13
Touch Screen Operation .................................................................................................................................15
6.1. Main Screen.................................................................................................................................................................15
6.2. User Login....................................................................................................................................................................15
6.3. Real-Time Monitoring ............................................................................................................................................16
6.4. Menu Bar......................................................................................................................................................................17
6.5. Configurable Parameters ......................................................................................................................................18
6.5.1. Cleaning Parameters Setting - Using FRP-200 Optional Automatic Cleaning Module........ 18
6.5.2. Alarm Parameters Setting ......................................................................................................19
6.5.3. Diagnostic Parameters............................................................................................................20
6.5.4. 4-20mA Output Parameters Setting ......................................................................................21
6.5.5. Communication Setting.......................................................................................................... 21
6.6. Calibration.................................................................................................................................................................. 22
6.6.1. pH Calibration
..........................................................................................................................22
6.6.2. Residual Chlorine Calibration................................................................................................ 24
6.6.3. Turbidity Calibration ............................................................................................................. 27
6.7. Recovering Data........................................................................................................................................................33
6.8. Alarm View................................................................................................................................................................. 33
6.9. Historical Data ...........................................................................................................................................................34
6.10. Historical Data Curves............................................................................................................................................36
6.11. User Management ................................................................................................................................................... 39
Daily Maintenance ............................................................................................................................................ 41
7.1. Correspondence Address..................................................................................................................................... 41
7.2. Operation and Maintenance.................................................................................................................................42
7.3. Instrument Alarms and Descriptions............................................................................................................... 43
Replacing pH and Oxidizer Electrode Head ............................................................................................44
9. Order Information.………………………………………………………………………………………………………………45
DW-2100P User
service@pyxis-lab.com | +1 (866) 203-8397
6
Specifications
Item DW-2100P-US DW-2100P-EU DW-2100P-US-G
DW-2100P-EU-G
P/N
42135
42136
42137
42138
Turbidity Wavelength
Warm White
860 nm
Warm White
860 nm
Light Source
LED
Turbidity Dual Range
0.001 – 10 / 10 - 40.00 NTU
Turbidity Accuracy
+ 0.005 NTU or 2% <10NTU
Turbidity Repeatability
+ 0.001 NTU or 0.5% <10NTU
Free Chlorine Method
Bare Gold - Electrochemical Method
Free Chlorine Range
0.01 –5.00 ppm as FCl2
pH Method
Electrochemical Method
pH Range
0.01 – 14.00 pH
Measurement Accuracy
0.001NTU or ± 1% Full Scale
±0.01 ppm or 1% Full Scale w/pH compensation to 9.0
±0.01 pH
Minimum Resolution
0.001 NTU / 0.01 ppm FCl / 0.01 pH
Response time
4s – Turbidity / T95≤60s – FCl / T95≤5s - pH
Compliance
EPA-180.1/334.0
ISO-7027/7393
EPA-180.1/334.0
ISO-7027/7393
Measurement Interval
Continuous Measurement
Display
7-inch LCD Color Industrial Capacitive Touch Screen
Storage Capacity
Built-In 4GB of Ram for Storing up to 1-Million Data/Event Records
Power Requirement
96-260VAC / 50-60 Hz; 10A Fuse; 200 W
Output
3 x 4-20 mA / RS-485 Modbus - RTU / Modbus TCP
Input
3 x 4-20 mA / RS-485 Modbus - RTU
USB
1 x USB host, for data downloading and screen upgrade
Internet
RJ-45 socket, Modbus-TCP
Panel Operational Temperature
40 – 113oF (4-45 oC)
Storage Temperature
Instrument: -4 – 131oF (-20 – 55oC) / Sensors 32 – 122oF (0 – 50oC)
Sample Water Temperature
40 – 104oF (4-40oC)
Sample Water Pressure
7.25 – 30 psi (0.05 – 0.2MPa)
FR-200 Sample Water Flow Rate
600-1,000mL / Minute
FR-200 Line Size
¼-inch Inlet / ⅜-inch Overflow / 20mm Outlet / ½-inch Drain
Rating
IP-65 Panel-Display / IP-67 Sensors
Regulation
CE / RoHS
Relative Humidity
20% - 90% (No Condensation)
Altitude
<6,561 feet (<2,000 Meter)
Dimensions (HxWxD)
Panel (DW-2100P) 790H x 450W x 235D mm
Approximate Product Weight
DW-2100P ~ 20 kg
Pyxis 4G CloudLinkTM
NA
Included
CloudLinkTM Bands
NA
Global B1/2/3/4/5/7/12/13/14/20/28/66/7
CloudLinkTM Protocols
NA
IP/TCP/UDP/HTTP/HTTPS/Modbus
*NOTE* - Pyxis Lab is consistently updating technologies, as such, specifications may change without notice.Technical specifications on the
LT-739/B and ST-765SS-FCL sensors can also be found in their respective Operation Manuals.Contact info@pyxis-lab.com for details or
www.pyxis-lab.com .

DW-2100P User
service@pyxis-lab.com | +1 (866) 203-8397
7
Unpackaging
The package includes the following items:
•One DW-2100P Drinking Water Panel Assembled and Complete with 110VAC Power Supply Cord
oUC-100A Touch Screen Display/Data Logger with Pyxis Sensors Prewired in RS-485 (RTU)
oFR-200 Dual Sensor Flow Reservoir
oLT-739 (Warm White Light) or LT-739B (InfrRed) Ultra-Low Turbidity Sensor (as selected)
oST-765SS-FCL – Free Chlorine / pH / Temperature Sensor
oPyxis CloudLinkTM – 4G Gateway (as selected models ending in “G”)
System Layout and Features
The DW-2100P series are multi-parameter inline water analyzers specifically designed as a ‘Turn-Key’
monitoring solution for clean water applications including drinking water networks, secondary water supply
and decorative/swimming water applications. The DW-2100P series offers highly accurate, real-time
measurement, display and data-logging of Ultra-Low Turbidity, Free Chlorine, pH and Temperature utilizing
proprietary Pyxis Lab smart sensor technology, coupled with a Pyxis touch screen display and data logging
terminal. The DW2100P series is offered in a convenient and easy to integrate panel mounted format for
rapid installation and simple maintenance.
Figure 1 DW-2100P

DW-2100P User
service@pyxis-lab.com | +1 (866) 203-8397
8
DW-2100P Features
Pyxis Lab’s advanced research and development sensor technologies to achieve highly accurate and stable
measurement of Turbidity, Free Chlorine, pH and Temperature.
Pyxis LT-739 (EPA) and LT-739B (ISO) ultra-low resolution turbidity sensors offer a detection light source
using warm white LED in 90-degree surface scatter format in accordance with USEPA 180.1 standards or
Infra-Red 860nm inaccordance with ISO-7027.1 standards. The turbidity sensors are mounted inthe
unique Pyxis FR-200dual sensor flow reservoir enabling the highest resolution possible of 0.001NTU
with unmatched stability. The LT-739 and LT-739B offers simple calibration via the Pyxis LT-SOLID-
CAL Solid State Turbidity Calibration Kit (no Formazin needed) or the Pyxis L-CALPortable Liquid
Turbidity Calibration Kit(uses 500mL percalibration).
Pyxis ST-765SS-FCL three-parameter composite sensor is used for the measurement residual free chlorine,
pH and temperature in compliance with USEPA 334.0 and ISO-7393 guidelines. The sensors advanced PCB
offers built-in temperature and pH parameter compensation (up to pH 9.0) algorithms eliminating the need
for a supplemental pH sensor and controller. Unique Bare-Gold electrode technology for residual chlorine
measurement eliminates membranes and electrode solution replenishment commonly associated with
conventional sensors. The ST-765SS-FCL has a uniquely designed flat bubble pH electrode design for
reduced fouling potential. Reduce your maintenance and cost versus colorimetric chlorine measurement or
conventional electrochemical sensors by utilizing Pyxis replaceable Electrode Head (EH-765) for this sensor
allowing for years of reliable service. The ST-765SS-FCL may be calibrated in-situ after cleaning via DPD Free
Chlorine wet chemistry test measurement of active sample.
Pyxis FR-200 Dual-Sensor flow reservoir provides sample calming for dissipation of air-bubbles and
settling of suspended solids, foam or other impurities commonly observed in drinking water influent
with a recommended flow range of 600–1,000mL/minute. This unique flow reservoir design results in
the highest level of turbidity resolution on the market and greatly extends the maintenance cycle of the
sensor while providing a large buffer capacity to mitigate pressure fluctuations. The minimum inlet pressure
of FR-200 flow reservoir is only 7.5 psi (0.05mpa) making it highly suitable for the end of pipe networks and
secondary supply influent sampling.
Both sensors offer a self-cleaning flat electrode design making them easy to maintain and clean.
Simple sensor removal and replacement. Both sensors are connected to the display/data logger via RS-485
Modbus (RTU) allowing for integrated sensor calibration interface and diagnostics within the display touch
screen.
Convenient and simple to install Back-Panel (DW-2100P) for rapid andeasy installation. Truly a plumb
and power to go platform with intense factory setup, testing and sensor calibration prior to shipment.
Touch screen display/data logger interface with sensor calibration integrated. Display/data logger offers 2x
4-20mA I/O as well as RS-485 and TCP-IP with remote diagnosis and parameter adjustment. Pyxis
CloudLinkTM 4G Gateway version available.

DW-2100P User
service@pyxis-lab.com | +1 (866) 203-8397
11
Installation
5.1. Installation Requirements
Power Supply: 100~240VAC 50/60Hz
Water Supply: Inlet water pressure should be from 7.25 – 30 psi (0.05-0.2MPa) with an inlet feedwater
line diameter of ¼-inch O.D. Tubing. The DW-2100P is provided with an inlet Rotameter and PRV for
sample water inlet flow control and limited pressure regulation. Depending on sample water quality,
these items may be installed on the application needs and user desire. The range of inlet flow for the
FR-200 should be consistently maintained between 600 and 1,000 mL per minute.
Drainage: The FR-200 outlet tube (20mm Tubing) located on the bottom of the FR-200, as well as the FR-
200 weir overflow (3/8-inch O.D. Tubing) located on the top of the FR-200, should both be connected to
a discharge drain via gravity flow.
Wall Mount Space: The DW-2100P analyzer panel size is roughly 790H x 450W x 235D (mm) in
dimension. Please accommodate sufficient space for mounting.
Wall Mount Weight: Approximately 20kg. Please use appropriate mounting hardware.
3G/4G Network: Make sure your mobile network is a CMCC/CUCC 3G/4G compatible network. Ensure
the signal strength is sufficient in the installation eara.
5.2. Tube connection
1.
Inlet Water: Connect the ¼-inch inlet water tubing to the quick adapter provided. *NOTE* The inlet flow
meter is shipped as a loose item and may be installed as desired by the user. If feedwater water quality is poor,
users may desire to not install this flow meter. Consistent flow of 600-1,000mL is required.
2.
Weir Overflow: Connect the ⅜-inch weir overflow tubing to the quick adapter provided. This line must
be diverted to drain.
3.
Outlet Line: Connect 20mm tubing to the outlet drain. This is the sample water outlet flow. This line
must be diverted to drain.

DW-2100P User
service@pyxis-lab.com | +1 (866) 203-8397
14
Figure 4 Terminal Physical Diagram
Warning
The process of electrical connection to contact the 220V single-phase power supply, should be operated by personnel
with an electrician's license. Failure to operate according to the electrical code of practice may result in electric shock
injury or even death.

DW-2100P User
service@pyxis-lab.com | +1 (866) 203-8397
15
Touch Screen Operation
6.1. Main Screen
After the system is powered on an initial screen allows the user to log into the system.
Figure 4 Main Screen
6.2. User Login
After powering on the system, log in with the username and password to be able to change system settings.
Click the "User Login" button, select the user "pyxis", enter the password: "888888" in the user password
field. A new user can be added via "User Management" in interface of the menu.
Figure 5 User Login Screen

DW-2100P User
service@pyxis-lab.com | +1 (866) 203-8397
16
If you do not need a password, or want to change the user, you can enter the system and "Manage" in the
"User Management" screen of the menu. See 6.11 for details.
6.3. Real-Time Monitoring
Click the "Enter System" button on the main interface to enter the real-time monitoring screen of the
system. The data detected by the Pyxis sensors will be displayed in real-time. See a functional overview of
each section of this screen highlighted below. (numbers 1-4)
Figure 6 Real-time monitoring screen
Section Number
Functional Overview
1 The blue area will scroll any alarm information in real time until the alarm is cleared.
2 Real-time display of the current sensor's 4-20mA signal value.
3 Real-time display of current sensor measurement value.
4 Historical data is recorded as a live curve, with the horizontal coordinate being the time
and the vertical coordinate being the measured value.
Table 1 - Main interface functional overview

DW-2100P User
service@pyxis-lab.com | +1 (866) 203-8397
17
Press and hold the curve area for 2 seconds and then let go, the Y-axis curve range setting dialog box will
appear. Users may change the display value range of Y-axis for each measurement index curve. Click the
outter area of the screen to save and exit the setting screen after modifications are made.
Figure 7 Curve Range Setting
6.4. Menu Bar
Click the button in the upper left corner of the screen to enter the system's menu interface, where
the user can select to enter the desired operation interface.
Figure 8 Menu Bar

DW-2100P User
service@pyxis-lab.com | +1 (866) 203-8397
18
6.5. Configurable Parameters
Click the "Parameter" button in the menu bar. Here you can select to enter "Alarm Parameters" and "4-
20mA Output" setting interface etc.
Figure 9 Parameter Settings
6.5.1. Cleaning Parameters Setting - Using FRP-200 Optional Automatic Cleaning Module
When entering the cleaning control parameter setting interface for the first time, a reminder screen will
pop up. After confirming that the cleaning control module (FRP-200 optional accessory) is installed, click
Enable to enter the parameter setting interface.
Figure 10 Cleaning module confirmation interface

DW-2100P User
service@pyxis-lab.com | +1 (866) 203-8397
19
On the parameter setting interface, you can set the automatic cleaning cycle time and cleaning frequency
(FRP-200 brush rotation once is 1 time); Brush orientation and manual mode can also be set. Contact Pyxis
Lab for details on purchasing the FRP-200 optional automatic cleaning module.
Figure 11 Automatic Cleaning Parameters Setting with Optional FRP-200 Module
6.5.2. Alarm Parameters Setting
Users can set the upper and lower alarm limits. Click "Alarm Parameters" to enter the alarm parameter
settings. When the measured sensor value is lower than the set lower limit (the XX lower limit alarm) or
when the measured value is higher than the set upper limit (the XX upper limit alarm), the corresponding
sensor alarm will be displayed on the real-time monitoring screen. The user can also choose to turn the
alarm display on or off at the top left of the corresponding parameter list.
Figure 12 Alarm Parameter Setting

DW-2100P User
service@pyxis-lab.com | +1 (866) 203-8397
20
6.5.3. Diagnostic Parameters
Click “Diagnosis Parameters” to the diagnosis page. In the diagnosis page, the raw data measured by the
sensor is displayed. To help troubleshooting possible issues with the sensor, please save an image of this
data when the sensor is placed in a clean water sample (tap water or deionized water), in a standard, and in
the sample that the sensor is intended for.
Figure 13 Diagnostic Parameters
Table of contents
Other Pyxis Measuring Instrument manuals

Pyxis
Pyxis SP-710 User manual

Pyxis
Pyxis PRISM RT-200 User manual

Pyxis
Pyxis SP-395 User manual

Pyxis
Pyxis CR-301 User manual

Pyxis
Pyxis SP-350 User manual

Pyxis
Pyxis DW-739 Series User manual

Pyxis
Pyxis IK-76SSS-S03 User manual

Pyxis
Pyxis SP-350 User manual

Pyxis
Pyxis prism RT-50 User manual

Pyxis
Pyxis ST-601 User manual

Pyxis
Pyxis ST-600 Quick start guide

Pyxis
Pyxis SP-910 User manual

Pyxis
Pyxis SP-395T User manual

Pyxis
Pyxis FS-100 Series User manual

Pyxis
Pyxis ST-590 Series User manual

Pyxis
Pyxis SP-360 User manual

Pyxis
Pyxis SP-200 OXIPOCKET User manual

Pyxis
Pyxis SP-395 HST Quick start guide

Pyxis
Pyxis ST-525SS User manual

Pyxis
Pyxis SP-700 User manual