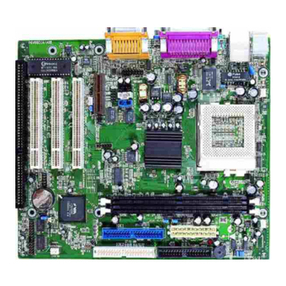
QDI J6A User manual

Notice
The information in this document is subject to change in order to improve reliability, design, or
function without prior notice and does not represent a commitment on the part of this company.
In no event will we be liable for direct, indirect, special, incidental, or consequential damages
arising out of the use or the possibility of such damages.
All trademarks are the property of their respective owners.
If you require further information, please visit our web-site www.qdigrp.com.
Item Checklist
This item checklist is only available for retail market.Completely check your package,If you
discover damaged or missing items, contact your retailer.
J6A series mainboard
QDI Driver CD
Users manual
1 IDE ribbon cable
1 floppy ribbon cable
I/O shield(option)
1 10-pin ribbon cable with bracket for USB (optional)
J6AenÐòÑÔ.p65 02-7-29, 9:551

Declaration of Conformity
QUANTUM DESIGNS(HK) LTD.
20th loor, Devon House, Taikoo Place, 979 Kings Road,
Quarry Bay, Hong Kong
declares that the product
Mainboard
J6A
is in conformity with
(reference to the specification under which conformity is declared in
accordance with 89/336 EEC-EMC Directive
!"EN 55022 Limits and methods of measurements of radio disturbance
characteristics of information technology equipment
!"EN 50081-1 Generic emission standard Part 1
Residential, commercial and light industry
!"EN 50082-1 Generic immunity standard Part 1
Residential, commercial and light industry
European Representative
QDI COMPUTER( UK ) LTD. QDI COMPUTER( SCANDINAVIA )A/S
QDI SYSTEM HANDEL GMBH QDI EUROPE B.V
QDI COMPUTER( FRANCE ) SARL QDI COMPUTER HANDELS GMBH
LEGEND QDI SPAIN S.L. QDI COMPUTER( SWEDEN )AB
Signature Place / Date HONG KONG/2002
Printed Name Xu Wenge Position/ Title Assistant President
J6AenÐòÑÔ.p65 02-7-29, 9:552

Declaration of Conformity
Trade Name: QDI Computer ( U. S . A. Inc.
Model Name: J6A
Responsible Party: QDI Computer ( U. S. A. Inc.
Address: 41456 Christy Street
Fremont, CA 94538
Telephone: (510 668-4933
Facsimile: (510 668-4966
Equipment Classification: FCC Class B Subassembly
Type of Product: Motherboard
Manufacturer:Quantum Designs (HK) Ltd.
Address: 20th Floor, Devon House, Taikoo Place
979 Kings Road, Quarry Bay, HONG
KONG
Supplementary Information:
This device complies with Part 15 of the FCC Rules. peration is subject to
the following two conditions : (1) this device may not cause harmful
interference, and (2) this device must accept any interference received,
including interference that may cause undesired operation.
Tested to comply with FCC standards.
Signature : Date : 2002
J6AenÐòÑÔ.p65 02-7-29, 9:553

II
CONTENTSCONTENTS
CONTENTSCONTENTS
CONTENTS
1. Introduction .................................................... 1
Overview.................................................................... 1
Key eatures ..............................................................1
2. Installation Instructions ..............................5
External Connectors.................................................... 5
PS/2 Keyboard /Mouse Connector.............................. 5
USB1, USB2 and LAN Connectors ............................. 5
Line-in jack, Mic-in jack, Speaker-out jack and
MIDI/Joystick Connector ..............................................6
Parallel Port, Monitor Output Connector(VGA),
Video/SPDI and S-video out Connector.....................6
Hard Disk LED Connector ( HD_LED ) .........................6
Reset Switch ( RESET ).............................................6
ACPI LED Connector( ACPI_LED ) .............................. 7
ATX 12V Power Supply Connectors
and Power Switch (POWER SW) ................................7
USB3, 4 and Serial Port Connector ..............................8
Infrared Header ( IrDA ) ...............................................8
an Connectors(CPU AN BAK AN CHS AN)..............9
Audio Connectors ( AUXIN, CD_IN ) ........................... 9
IEEE 1394 Connector( J IR1,2 ) ................................ 10
Jumper Setting ........................................................... 11
BIOS-ProtectEASY Jumper( JAV ) ............................ 11
Clear CMOS( JCC ) ................................................... 12
Enable Video/SPDI Out( JTV ) ................................. 12
3. BIOS Description................................13
Utility Support.............................................. 13
AWD LASH.EXE ...................................................... 13
AWARD BIOS Description............................... 14
Entering Setup ...........................................................14
Load Optimized Defaults ...........................................14
Standard CMOS eatures Setup................................14
J6AenÐòÑÔ.p65 02-7-29, 9:554
CONTENTSCONTENTS
CONTENTSCONTENTS
CONTENTS
Advanced BIOS eatures Setup.................................... 18
Advanced Chipset eatures Setup................................ 21
Power Management Setup............................................. 23
PnP/PCI Configurations Setup......................................... 26
Integrated Peripherals.....................................................27
PC Health Status............................................................. 29
Password Setting...........................................................31
Boot with BIOS defaults................................................. 31
Appendix....................................................................32
QDI Utility CD................................................................... 32
Norton AntiVirus.........................................................32
LogoEasyII.................................................................33
BIOS-ProtectEasy......................................................34
RecoveryEasy............................................................35
BootEasy...................................................................43
BootEasy(German)....................................................44
J6A(Spanish).............................................................45
J6A( rench)...............................................................48
J6A(Italian).................................................................52
Layout
J6AenÐòÑÔ.p65 02-7-29, 9:555

Caution
Be sure to unplug the AC power supply before adding or removing
expansion cards or other system peripherals, especially the memory
devices, otherwise your mainboard or the system memory might be
seriously damaged.
Caution
Be sure to add some Silicone Grease between the CPU and the heatsink
to keep them fully contacted to meet the heat sink requirement.
J6AenÐòÑÔ.p65 02-7-29, 9:556

1
Manual for J6A series
Chapter 1
Chapter 1
Introduction
Overview
J6A series are multimedia, high performance, cost-effective and energy efficient
mainboards based on VIA C3 BGA processors. The green mainboard utilizes the VIA
Apollo PLE133 chipset consisting of the VIA VT8601A and the VIA VT82C686B. The
chipset integrates AGP 2D/3D graphics accelerator to provide high graphics
performance. It supports the Ultra DMA33/66/100 IDE, PC100/PC133 SDRAM and AC97
audio. In addition, advanced features are supported such as ACPI power management
and hardware monitoring. Especially it supports television display and IEEE1394, which
is ideal for playing games, giving presentations, watching movies, and browsing the
Internet with a high quality TV image. BootEasy, QDI innovation, lets the PC boot freely
and rapidly.
Key Features
Form Factor
# mATX form factor of 220mm x 210mm
Microprocessor
#"Supports all VIA C3 BGA processors at 500/550/566/600/667/733/866MHz and
future processors.
Chipset
#" VIA Apollo PLE133 chipset: VT8601A + VT82C686B
Memory
#" Provides one 168-pin 3.3V 100/133MHz DIMM socket
#"Supports PC100/PC133 SDRAM
Onboard IDE
##
##
#""
""
"Two fast IDE interfaces supporting four IDE devices including IDE hard disks and
CDROM drives
##
##
#""
""
"Supports Ultra DMA33/66/100
J6Aen.p65 02-7-29, 9:551

Manual for J6A series
Introduction
Onboard I/O
##
##
#""
""
"One floppy port supporting up to two 3.5 or 5.25 floppy drives with 360K/720K/
1.2M/1.44M/2.88M format
##
##
#""
""
"Two high speed 16550 fast compatible UARTs(COM1/COM2/COM3/COM4
selective) with 16-byte send/receive I O
##
##
#""
""
"One parallel port supports SPP/EPP/ECP mode
##
##
#""
""
"Supports PS/2 mouse and PS/2 keyboard
##
##
#""
""
"Provides four USB
##
##
#""
""
"Provides one IrDA connector
##
##
#""
""
"Provides two IEEE 1394 connectors
##
##
#""
""
"Provides one S-Video out connector
##
##
#""
""
"Provides one Video/SPDI connector
Onboard Audio
##
##
#""
""
"Standard AC97 Codec interface
#" Provides onboard Line-in Jack, Microphone-in Jack, Speaker-out Jack with onboard
amplifier and MIDI/Joystick Connector
Onboard AGP
##
##
#""
""
"Supports AGP 4x
##
##
#""
""
"Integrated 2D/3D Graphics Controller
Onboard LAN( optiona )
##
##
#""
""
"10/100M LAN interface built-in on board
##
##
#""
""
"10/100M Ethernet support
Advanced Features
##
##
#""
""
"PCI 2.2 Specification Compliant
##
##
#""
""
"Provides Trend ChipAwayVirus On Guard
##
##
#""
""
"Supports Windows 98/2000/ME/XP soft-off
##
##
#""
""
"Supports system monitoring (monitors system temperature, CPU temperature, voltages
and fan speed)
##
##
#""
""
"Provides the second PCI connector to support two additional PCI connectors
##
##
#""
""
"Providing QDI innovations: BootEasy, logoEasy, BIOS-ProtectEasy, RecoveryEasy
J6Aen.p65 02-7-29, 9:552

3
Manual for J6A series
Chapter 1
BIOS
##
##
#Licensed advanced AWARD( Phoenix ) BIOS
##
##
#""
""
" Supports lash ROM with plug and play ready
##
##
#Supports IDE CDROM/SCSI bootup
Green Function
##
##
#""
""
" Supports ACPI (Advanced Configuration and Power Interface) and ODPM (OS Di-
rected Power Management)
#" Supports ACPI power status: S0( ull-on ), S1( Suspend ), S4(STD,suspend to Disk,
depends on OS ), S5(Soft-off)
Main Expansion S ots and Connectors
Slot/Port (Quantity) Description
PCI( 2 ) PCI slots
IDE( 2 ) IDE ports
LOPPY( 1 ) loppy Drive port
DIMM( 1 ) DIMM socket
USB( 4 ) USB connectors
VGA( 1 ) VGA connector
LAN( 1 ) LAN connector
UART( 2 ) UART connectors
PARALLEL( 1 ) Parallel connector
IrDA( 1 ) IrDA connector
MIDI/Joystick( 1 ) MIDI/Joystick connector
IEEE 1394(2 ) IEEE 1394 connectors
S_video out ( 1 ) S_video out connector
Video/SPDI ( 1 ) Video/SPDI connector
Note: Our technology is now being upgraded, the description and Interface for
Easy technology in this manual are only for your reference. If you would like to
get the upgraded version, please download the latest BIO or the utility from the
website to re-flash your mainboard; if your mainboard supports the latest version
Easy technology, refer to the webpage for functions and detailed operation of
the technology.
J6Aen.p65 02-7-29, 9:553

-- This page is intentionally left blank --
J6Aen.p65 02-7-29, 9:554

5
Manual for J6A series
Chapter 2
Chapter 2
Installation Instructions
This section covers External Connectors and Jumper Settings. Refer to the motherboard
layout chart for the locations of all jumpers, external connectors, slots and I/O ports.
urthermore, this section lists all necessary connector pin assignments for your reference.
The particular states of the jumpers, connectors and ports are illustrated in the following
figures. Before setting the jumpers or inserting these connectors, please pay attention to
the directions.
External Connectors
PS/2 Keyboard Connector, PS/2 Mouse Connector
PS/2 keyboard connector is for the usage of PS/2 keyboard. If using a standard AT size
keyboard, an adapter should be used to fit this connector. PS/2 mouse connector is for the
usage of PS/2 mouse.
USB1, USB2 and LAN Connectors
Two USB ports are for connecting USB devices. The RJ-45 connector is for onboard LAN.
Be sure to unplug the AC power supply before adding or removing expansion
cards or other system peripherals, otherwise your mainboard and expansion
cards might be seriously damaged.
LINK ACTIVE
USB1
USB2
LAN
PS/2 Mouse connector
PS/2 Keyboar connector
J6Aen.p65 02-7-29, 9:555

Installation Instructions
$Manual for J6A series
Line-in jack, Microphone-in jack, Speaker-out jack and MIDI/Joystick
Connector
The Line-in jack can be connected to devices such as a cassette or minidisc player to
playback or record. The Microphone-in jack can be connected to a microphone for voice
input. The Speaker-out jack allows you to connect speakers or headphones for audio
output from the internal amplifier.The MIDI/Joystick connector allows you to connect a game
joystick or a MIDI device.
Parallel Port, Monitor Output Connector( VGA ),Video/SPDI connector,
and S_Video out connector
The parallel port connector can be connected to a parallel device such as a printer. The VGA
connector is for output to a VGA-compatible device. You can enable/disable them and
choose the IRQ or I/O address in INTEGRATED PERIPHERALS in AWARD BIOS SETUP.
The Video/SPDI or S-Video connector can connect a television, supporting S_Video,
Compose Video , Scart outputs and automatic detection of TV presence.
Hard Disk LED Connector (HD_ LED)
The connector connects to the cases IDE indicator LED indicating the activity status of IDE
hard disk. The connector has an orientation. If one way doesnt work, try the other way.
Reset Switch (RESET)
The connector connects to the cases reset switch. Press the switch once, the system
resets.
Speaker Connector (SPEAKER)
The connector can be connected to the speaker on the case.
MIDI/Joystick
Speaker out Line in Microphone in
Vi eo/SPDIF
V GA
Parallel Port
S-vi eo out
J6Aen.p65 02-7-29, 9:556

7
Manual for J6A series
Chapter 2
ATX Power Supply Connector & Power Switch( POWER SW )
Be sure to connect the power supply plug to this connector in its proper orientation. The
power switch ( POWER SW ) should be connected to a momentary switch . When powering
up your system, first turn on the mechanical switch of the power supply (if one is provided),
then push once the power switch. When powering off the system, you neednt turn off the
mechanical switch, just Push once* the power button.
Note: If you change soft-off by PWRBTN from default Instant-off to Delay 4
ec in the POWER MANAGEMENT ETUP section of the BIO , the power button
should be pressed for more than 4 seconds before the system powers down.
ACPI LED Connector (ACPI LED)
When the system is in S0 status, the LED is green on. When the system is in S1 status, the
LED is green blink. When the system is in S4/S5 status, the LED is off.
HDD
LED
(+)
HDD
LED
(-)
POWER SW
VCC
NC
GREEN
(-)
LED
(+) POWER GND
SPEAKER
GND NC SPKDATA
RESET
RESET GND
NC
ACPI_LED
SPEAKER
ACPI
LED
RESET
POWER
SW
HD_LED
POWER SW
ATX Power Supply Connector
3 .3V 3.3V GND 5V GND 5V GND PS-OK 5VSB 12V
3.3V -1 2V GND PSO N GND GND G ND -5V 5V 5 V
1
20
1
J6Aen.p65 02-7-29, 9:557

Installation Instructions
&Manual for J6A series
USB3,4 and Serial Port Connectors( UART1, 2 )
Besides USB1,2 on the back panel, the mainboard also have a 10-pin header on board which
may connect to a front panel USB cable to provide additional two USB ports. And the
mainboard also have two headers on board which may connect to a cable to provide two
additional UART ports.
Infrared Header (IrDA)
This connector supports wireless transmitting and receiving device. Before using this
function, configure the settings for IR Address, IR Mode and IR IRQ from the INTEGRATED
PERIPHERALS section of the CMOS SETUP.
IrDA
VCC
IRRX
GND
IRTX
NC
1
1
UART1
UART2
1
USB3,4
1
+5V
D1-
GND D1+
GND
+5V
D0-
D0+ GND
GND
J6Aen.p65 02-7-29, 9:558

9
Manual for J6A series
Chapter 2
an Connectors (CPU AN, BAK AN, CHS AN)
The fan speed of CHS AN can be detected and viewed in PC HEALTH section of the
BIOS. CPU AN and CHS AN will be automatically turned off after the system enters
suspend mode.
Audio Connectors (CD_IN, AUX_IN)
CD_IN is a sony standard CD audio connector, it can be connected to a CD-ROM drive
through a CD audio cable. AUX_IN allow you to receive stereo audio input from sound
sources such as a TV tuner, or MPEG card.
GND
CHSFAN
NC
+12V
BAKFAN
GND
SENSE
+12V
CPUFAN
GND
+12V
Left Channel Right Channel
CD_IN
Common
Left Channel
AUXIN
GND
Right Channel
J6Aen.p65 02-7-29, 9:559

Installation Instructions
Manual for J6A series
IEEE 1394 Connector( J IR1, 2 )
The two connectors can connect two 1394 Integrated Devices, such as 1394 AUDIO, 1394
VIDEO. It enhances the connectivity of the mainboard for consumer, making it an ideal
solution for delivering optimum performance and ease-of-use for in-home network, digital
video recorders and other digital consumer electronics.
JFIR2 JFIR1
1 1
J6Aen.p65 02-7-29, 9:5510

11
Manual for J6A series
Chapter 2
BIOS-Protect Jumper (JAV)
The BIOS of the mainboard is contained inside the WH. If the jumper JAV is set as closed,
you will be unable to flash the BIOS. However in this status, the system BIOS is protected
from being attacked by serious virus such as CIH virus.
Setting the jumper JAV as open(default), meanwhile disabling the lash Write Protect item
of Advanced BIOS eatures in AWARD BIOS CMOS Setup, allows you to flash the BIOS
to the LASH ROM.
The DMI (Desktop Management Interface) system information such as the CPU type/speed,
memory size, and expansion cards will be detected by the onboard BIOS and stored in the
flash ROM. Whenever the system hardware configuration is changed, DMI information will
be updated automatically. However, setting jumper JAV as closed makes flashing BIOS and
updating DMI information impossible. Therefore, set JAV as open when changing the sys-
tem hardware configuration, or the error message Unknown lash Type will be displayed
on the screen, and DMI information update will be fail.
Jumper Settings
Jumpers are located on the mainboard, the yare, clear CMOS jumper JCC, enable BIOS
Protection function jumper JAV etc. Pin 1 for all jumpers are located on the side with a thick
white line (Pin1→ ), referring to the mainboards silkscreen. Jumpers with three
pins will be shown as to represent pin1 & pin2 (1-2) closed and to
represent pin2 & pin3 (2-3) closed.
Jumper Symbol Description Represent
set pin1 and pin2 closed
set pin2 and pin3 closed
close set the pins closed
open set the pins opened
Flash Write Disabled
Flash Write Enabled
JAV
JAV
1
1
(Default)
J6Aen.p65 02-7-29, 9:5511

Installation Instructions
Manual for J6A series
Enable Video/SPDI Out Jumper( JTV )
If you want to use the television display, set JTV with pin2 & pin3 closed. Otherwise, set
JTV with pin1&pin2 closed for use SPDI OUT function.
Clear CMOS (JCC)
If you want to clear CMOS, unplug the AC power supply first, close JCC (pin1 & pin2) once,
set JCC back to the normal status with pin2 & pin3 connected, then power on the system.
Normal Status
Clear CMOS
(Unplug the AC power supply)
JCC
JCC
1
2
3
1
2
3
(Default)
JTV
JTV
Enable Video Out
Enable SPDIF Out
123
123
J6Aen.p65 02-7-29, 9:5512

13
Manual for J6A series
Chapter 3
Chapter 3
BIOS Description
Utility Support:
AWD LASH.EXE
This is a flash memory write/read utility used for the purpose of upgrading your BIOS
when necessary. Before doing so, please note:
#We strongly recommend you only upgrade BIO when encounter problems.
#Before upgrading your BIO , review the description below to avoid making
mistakes, destroying the BIO and resulting in a non-working system.
When you encounter problems, for example, you find your system does not support the
latest CPU released after our current mainboard, you may therefore upgrade the BIOS,
please dont forget to set JAV as open and disable the lash Write Protect item in AWARD
BIOS CMOS Setup first .
ollow the steps exactly for a successful upgrade.
1.Create a bootable system floppy diskette by typing ormat A:/s from the DOS prompt
under DOS6.xx or Windows 9x environment.
2. Copy AWD LASH.EXE(version>=8.03) from the directory \Utility located on QDI Driver
CD to your new bootable diskette.
3. Download the updated BIOS file from the Website (http://www.qdigrp.com). Please
be sure to download the suitable BIOS file for your motherboard.
4. Decompress the file download, copy the BIOS file (xx.bin) to the bootable
diskette, and note the checksum of this BIOS which is located in readme file.
5. Reboot the system from the bootable diskette created.
6. Then run the AWD LASH utility at the A:\ prompt as shown below:
A:\AWD LASH xxxx.bin
ollow the instruction through the process. Dont turn off power or reset the system
until the BIOS upgrade has been completed.
If you require more detailed information concerning AWD LASH Utility, for example, the
different usage of parameters, please type A:\>AWD LASH /?
Note: Because the BIOS Software will be updated constantly, the following BIOS screens
and descriptions are for reference purposes only and may not reflect your BIOS screens
exactly.
J6Aen.p65 02-7-29, 9:5513

BIOS Description
" Manual for J6A series
AWAR BIOS escription
Entering Setup
Power on the computer, when the following message briefly appears at the bottom of the
screen during the POST (Power On Self Test), press <Del> key to enter the AWARD BIOS
CMOS Setup Utility.
Press <Del> to enter ETUP
When you have entered, the Main Menu ( igure 1) appears on the screen. Use the arrow
keys to select among the items and press the <Enter> key to accept or enter the sub-menu.
Figure-1 Main Menu
Load Optimized Defaults
The Optimized Defaults are common and efficient. It is recommended users load the
optimized defaults first, then modify the needed configuration settings.
Standard CMOS eatures Setup
The basic CMOS settings included in Standard CMOS eatures are Date, Time, Hard Disk
Drive Types, loppy Disk Drive Types, and VGA etc. Use the arrow keys to highlight the
item, then use the <PgUp> or <PgDn> keys to select the value desired in each item.
J6Aen.p65 02-7-29, 9:5514
Table of contents
Other QDI Motherboard manuals

QDI
QDI K8V800 User manual

QDI
QDI XT4500 Series User manual

QDI
QDI PlatiniX 4N Series User manual

QDI
QDI P2S User manual

QDI
QDI PlatiniX P8/333 Series User manual

QDI
QDI PlatiniX 1D Series User manual

QDI
QDI Advance 10TM User manual

QDI
QDI Superb 3L User manual

QDI
QDI SynactiX 1E User manual

QDI
QDI CenturieX 1 User manual

QDI
QDI KinetiZ 7E User manual

QDI
QDI ZillioX 5 User manual

QDI
QDI Superb 4LE Series User manual

QDI
QDI PlatiniX 2D User manual

QDI
QDI PlatiniX 2E/333 User manual

QDI
QDI PlatiniX 2E/333 User manual

QDI
QDI Advance 5/133E User manual

QDI
QDI P61440FX Commander User manual

QDI
QDI P4I865G User manual

QDI
QDI PENTIUM II P6I440EX/ATX EXCELLENT 1 User manual