manuals.online logo
Brands
  1. Home
  2. •
  3. Brands
  4. •
  5. RADWAG
  6. •
  7. Scale
  8. •
  9. RADWAG AS X2 PLUS User guide

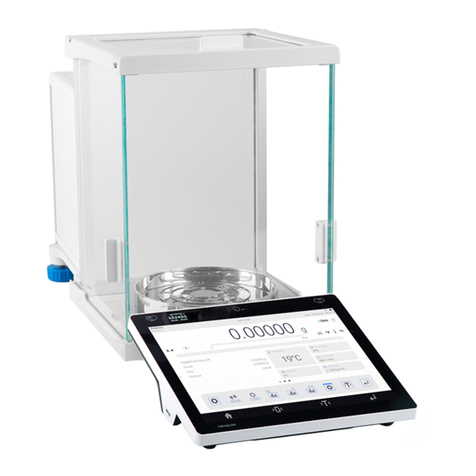
RADWAG AS X2 PLUS User guide

Start up Guide
Analytical
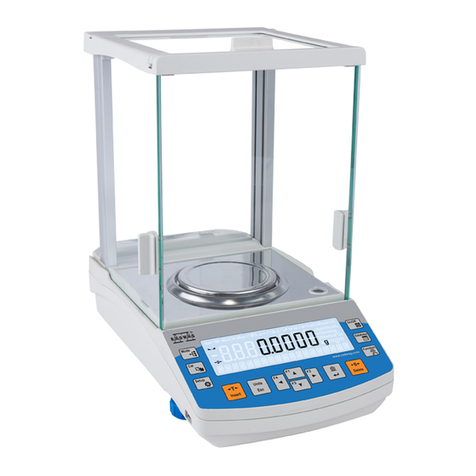
and Precision Balances
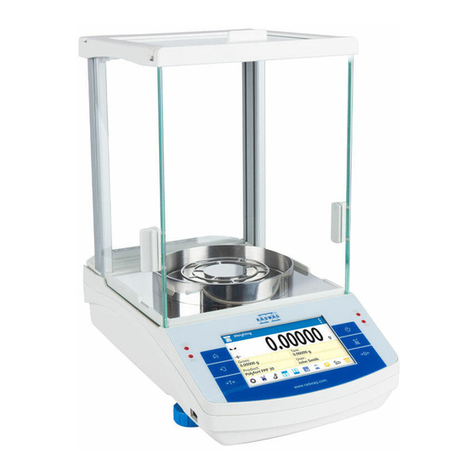
Analitycal Balances:
• AS X2 PLUS
Precision Balances:
• PS X2
• PS X2.M
• WLC X2
IMMB-04-02-11-21-EN
To view a complete User Manual go to the website or scan QR code:
radwag.com/en/manuals/6972
1. CONTENT
Model: AS X2 PLUS (d = 0.01 mg)
Models: AS X2 PLUS (d = 0.1 mg)
Balance
×1
Balance
×1
Weighing pan
×1
Weighing pan
×1
Draft shield
×1
Draft shield
×1
Centring ring
×1
Bottom insert
×1
Bottom insert
×1
Power adapter*
×1
Power adapter*
×1
Models: WLC X2 (d = 0.1 mg)
Balance
×1
Weighing pan
×1
Draft shield
×1
Bottom insert
×1
Power adapter*
×1
Models: PS X2 (d = 1 mg) | WLC X2 (d = 1 mg)
Balance
×1
Weighing pan
×1
Draft shield
×1
Grounding foot
×1
Foot
×3
Power adapter*
×1
*The plug type may vary by country.
Models: PS 3000.X2
Balance
×1
Weighing pan
×1
Draft shield
×1
Grounding foot
×1
Foot
×3
Power adapter*
×1
fabric dust
cover
×1
PS X2.M
Balance
×1
Weighing pan
×1
Draft shield
×1
Power adapter*
×1
Models: WLC X2 (d = 10 mg)
Balance
×1
Weighing pan
×1
Grounding foot
×1
Foot
×3
Power adapter*
×1
2. UNPACKING
1 2 3
Keep the packaging should a
warranty claim or service be required.
TOP
*The plug type may vary by country.
3. RECOMMENDATIONS AND WARNINGS
4. ACTIVITIES TO BE DONE PRIOR TO OPERATION
+40 °C
+104°F
+10 °C
+50 °F
Operate the device in a room where the temperature ranges between 10–40 °C
(50–104 °F) and where the relative humidity is below 80%.
Place the balance on a solid surface to ensure stability. To obtain stable and
repeatable weighing results, an anti-vibration table is recommended.
Place the balance away from heat
sources. Avoid exposing the balance
to the sunlight.
Avoid air drafts and air movements
at the workstation.
Avoid exposing the balance to amag-
netic field. Do not weigh magnetic
substances.
Make sure that the balance is placed
on an even surface.
Do not place the balance in a hazard-
ous area. Do not weigh explosive
materials.
Do not place the balance on an
unstable ground exposed to shocks
and vibrations.
Keep the transport
lock should a warranty
claim or service be
required.
4.1. Transport lock removal
Models: AS X2 (d = 0.01 mg) | AS X2 (d = 0.1 mg)
1 2
Keep the transport
lock should a warranty
claim or service be
required.
4.2. Grounding spring check
Models: AS X2 (d = 0.01 mg) | AS X2 (d = 0.1 mg) | WLC X2 (d = 0.1 mg)
Models: PS X2.M | WLC X2 (d = 1 mg)
Models: PS X2.M | WLC X2 (d = 1 mg) | WLC X2 (d = 10 mg)
1 2
Check whether the grounding
spring takes its intended
location.
Make sure that the grounding
spring juts slightly out
of the hole.
Check whether the grounding
spring takes its intended
location.
Make sure that the grounding
spring juts slightly out
of the hole.
5. COMPONENTS ASSEMBLY
1 2 3 4
AS X2 (d = 0.01 mg)
Grounding foot
1
1
1
1
2
2
2
2
3
3
Install
the grounding
foot in a freely
selected
opening.
Install
the grounding
foot in a freely
selected
opening.
Models: AS X2 (d = 0.1 mg) |WLC X2 (d = 0.1 mg)
Models: PS X2 (d = 1 mg) | WLC X2 (d = 1 mg)
Models: WLC X2 (d = 10 mg)
PS X2.M
1 2 3
Install
the grounding
foot in a freely
selected
opening.
Models: PS 3000.X2
6. PREPARING FOR WORK
6.1. Temperature stabilisation
6.3. Levelling
Prior to switching the device on, let
it reach room temperature (estimated
stabilisation time: up to 8 hours).
Connect the power adapter
to DC connector.
Connect the power
adapter to the mains.
up to 8 h
1 2 3
6.2. Switching the balance on
To switch the device on,
press ON / OFF key.
Press leveling icon. Check the balance level state. The arows shows
how to move the balance foots to level the balance.
To level the balance turn its feet, keep turning
the feet until the level indicator takes central position.
Correct leveling screen. Press button
to end the operation.
USB 1 USB 2
7. PANEL AND SCREEN
7.1. Panel keys
7.2. Home screen
Proximity sensor Proximity sensor
Switching ON/OFFHome screen
Displaying
previous screen
Editable tool bar
with quick access keys
Editable information fields
(labels, text fields and buttons)
Confirming an operation
or printing a report
Working modes list List of current working
mode functions
Taring
Weighing result window
Status bar
Parameters Adjustment Header
printout
Footer
printout
Tare Units Products
database
Operators
database
Databases
Zeroing
Autolevel*
*only in PLUS balances
8. BASIC OPERATIONS
8.1.1. Adjustment (for models with an internal adjustment only)
0.00000
Tare:
0.00000 g
User:
Gross:
0.00000 g
Product:
Weighing
Internal adjustment
Adjustment
Please wait...
1 2
Press “Adjustment” button. Wait for the process completion.
8.1.2. Adjustment (for models with an external adjustment only)
Balance model Mass standard
WLC 0.6.X2 500 g
WLC 2.X2 2 000 g
WLC 6.X2 5 000 g
WLC 10.X2 10 000 g
WLC 1/10.X2 10 000 g
WLC 20.X2 20 000 g
WLC 21.X2 20 000 g
The adjustment mass standard does not come with
the balance. Prior to adjustment prepare the right
mass standard. You are recommended to use mass
standard of class F1 or F2. View the table and
select the mass standard you need.
External adjustment is carried out using an external mass
standard of the right accuracy and weight value, which value
depends on balance type and capacity.
1 2
Press “Adjustment” button.
Wait for completion of the start mass
determination process.
Make sure that the weighing pan is empty
and press button to confirm.
Load the weighing pan with mass standard
and press button to confirm.
3 4
8.2. Zeroing
8.3. Taring
1
1
2
2
Make sure that the weighing pan is empty and press
“Zeroing” button.
The balance has been zeroed.
With loaded weighing pan: upon stabilisation
of the weighing result, press “Tare” button.
The balance has been tared.
Wait for the process completion. Unload the weighing pan.
5 6
8.4. Working modes / units selection
Press the icon of the current working
mode, to display the list of working
modes.
Press the current weight unit icon
to display list of available units.
Weighing
Dosing
Checkweighing
Formulas
Percent weighing
Statistics
Parts counting
Animal weighing
Solids density
Liquids density
Peak hold
Gram [g]
Miligram [mg]
Carat [c]
Pound [lb]
Ounce [oz]
Troy ounce [ozt]
Pennyweight [dwt]
Hong Kong Tael [tlh]
Singapore tael [tls]
Taiwanese tael [tlt]
Chinese tael [tlc]
Momme [m]
Grain [gr]
Tical [ti]
Newton [N]
Baht [baht]
Tola [tola]
Mesghal [msg]
User unit 1
User unit 2
9. SETTINGS
9.1. Administrator’s logging in
1 2
Press “Operators” button.
Press button to activate numeric keyboard.
Enter „1111” password and press button to confirm.
Users list is displayed, select “Admin” option.
You have logged as the Administrator.
Some balance settings are accessible for Administrator exclusively.
Prior balance parameters setup, log in as Administrator.
3 4
0.00000
Tare:
0.00000 g
User:
Gross:
0.00000 g
Product:
Weighing User
Log out
Admin
1111
Password
0.00000
Tare:
0.00000 g
User:
Admin
Gross:
0.00000 g
Product:
Weighing
9.2. User settings
1 2
Press “Databases” button.
Press button.
Code:
Enter user ID
Password:
Enter user password
Permissions:
Set respective access level
(user, advanced user, administrator)
Select “Users” database.
Select “Name” parameter.
User name has been entered.
Following the above procedure, set remaining parameters:
Prior to balance users setup, log in as Administrator (point 9.1.).
0.00000
Tare:
0.00000 g
User:
Admin
Gross:
0.00000 g
Product:
Weighing Databases
Products 0
Packaging 0
Customers 0
Users 1
Users
Admin
New
Name New
Password
Permissions
******
User
Code
New
Name John Smith
Password
Permissions
******
User
Code
3
5
7
4
6
Enter user name and press button to confirm.
9.3. Proximity sensors setup
1 2
Press “Parameters” button.
Select “Weighing” parameter.
Select the appropriate sensor (right or left). Select function that is to be assigned to the
choosen sensor.
Parameters list is displayed, select “Working
Modes” parameter.
Select “Proximity Sensors” parameter.
0.00000
Tare:
0.00000 g
User:
Admin
Gross:
0.00000 g
Product:
Weighing Parameters
Adjustment
Communication
Peripherals
Working modes
Working modes
Availability
Parts counting
Checkweighing
Weighing
Weighing
Readout
Autotare
Print mode When stable
Proximity sensors
Proximity sensors
Left sensor None
Right sensor
Right sensor
Accept / Print
Print header
Print footer
Zeroing
3
5
4
6
Prior balance proximity sensors setup, log in as Administrator (point 9.1.).
You can assign the proximity sensors with different functions for each working mode (the sensors will trigger
different operation for each working mode). See the below procedure of sensors setup for the weighing mode.
Following the above procedure you can configure sensors for other working modes.
10. PERIPHERAL DEVICES CONNECTORS
Wi-Fi ®is a registered trademark of Wi-Fi Alliance.
Computer
Computer Computer
Computer
Printer
Printer
Printer
Printer
Keyboard
Barcode
scanner
Barcode
scanner
Power adapter
Additional
display
11. DEVICE CLEANING
Prior to cleaning it is necessary to
disconnect the device from the mains!
Remove the plug from the outlet,
disconnect all cables.
Do not use aggressive cleaning
agents (e.g. solvents, chlorine
preparations, corrosive chemicals,
bleach).
• GLASS PANES AND COMPONENTS can be cleaned using window cleaner.
• WEIGHING PANS AND STAINLESS STEEL OR ALUMINIUM COMPONENTS can be cleaned using a cloth slightly
soaked in a solution of water and gentle cleanser (e.g. soap or dishwashing liquid).
• OPERATION PANEL AND HOUSING can be cleaned using a cloth slightly soaked in a solution of water and gentle
cleanser (e.g. soap or dishwashing liquid).
• Dry sample leftovers can be removed using either brush or handheld vacuum cleaner.
•Clean components can be dried using soft cloth or dust-free paper towel, with this the remaining moist will be absorbed.
• Install all the components providing they are completely dry.
Use soft cloth made of either natural or
synthetic fiber exclusively. Avoid using
cloth made of stiff/hard fabric, this
could cause scratches on the surface!
Neither use substances of sharp
structure nor intended for
scrubbing.
Apply the cleanser onto the cloth. Mind
not to apply the cleanser directly onto
the device!
Make sure that neither dust nor
liquid gets inside the weighing
system (device inside).
11.1. Guidelines and precautions
11.2. Cleaning instructions
Shall it be necessary to disassemble the weighing chamber,
follow the description provided in section 11.3.
11.3. Weighing chamber elements disassembly
Prior disassembling weighing chamber elements make sure the balance is turned off and unplugged
from the mains. When disassembling the elements, use tweezers that come standard with the
instrument.
1
2 43
Press the moldings on the housing and lift the movable element up.
Press the moldings
on the housing and lift
the movable element up.
Now you can take out
the front glass.
Now you can take out
the upper glass.
5 6
Take out the back glass.
The housing has recesses
to facilitate removing the glass.
Slide out the door.
All disassembled elements are prepared to be cleaned. Assembly all weighing chamber
elements in an order reverse to the disassembly process.
www.radwag.com

Other manuals for AS X2 PLUS

2

This manual suits for next models

5

Other RADWAG Scale manuals

RADWAG BALANCES APP/2C SERIES User manual

RADWAG

RADWAG BALANCES APP/2C SERIES User manual

RADWAG WPY/KO series User manual

RADWAG

RADWAG WPY/KO series User manual

RADWAG XA 5Y.M.A User guide

RADWAG

RADWAG XA 5Y.M.A User guide

RADWAG APP 3Y User manual

RADWAG

RADWAG APP 3Y User manual

RADWAG XA 5Y.M User guide

RADWAG

RADWAG XA 5Y.M User guide

RADWAG WTC 6 User manual

RADWAG

RADWAG WTC 6 User manual

RADWAG AS X2 PLUS User guide

RADWAG

RADWAG AS X2 PLUS User guide

RADWAG AS R2.PLUS User manual

RADWAG

RADWAG AS R2.PLUS User manual

RADWAG AS series User manual

RADWAG

RADWAG AS series User manual

RADWAG WLC User manual

RADWAG

RADWAG WLC User manual
RADWAG UYA 5Y User guide

RADWAG

RADWAG UYA 5Y User guide

RADWAG AS series User manual

RADWAG

RADWAG AS series User manual

RADWAG APP 35.R2 User manual

RADWAG

RADWAG APP 35.R2 User manual

RADWAG WTC series User manual

RADWAG

RADWAG WTC series User manual
RADWAG AS X2 Series User manual

RADWAG

RADWAG AS X2 Series User manual

RADWAG PM 4Y User guide

RADWAG

RADWAG PM 4Y User guide

RADWAG AS R2 User manual

RADWAG

RADWAG AS R2 User manual

RADWAG C315 Series User manual

RADWAG

RADWAG C315 Series User manual

RADWAG WPT/4 User manual

RADWAG

RADWAG WPT/4 User manual

RADWAG PM 15.4Y User guide

RADWAG

RADWAG PM 15.4Y User guide

RADWAG WPY User manual

RADWAG

RADWAG WPY User manual

RADWAG WLC A1 User guide

RADWAG

RADWAG WLC A1 User guide

RADWAG WPY User manual

RADWAG

RADWAG WPY User manual

RADWAG BWLC-C1 Series User manual

RADWAG

RADWAG BWLC-C1 Series User manual

Popular Scale manuals by other brands

Totalcomp TRWS Series Service manual

Totalcomp

Totalcomp TRWS Series Service manual

CAS CL5200 Series owner's manual

CAS

CAS CL5200 Series owner's manual

inventum WS 320 instruction manual

inventum

inventum WS 320 instruction manual

Conair Weight Watchers WW26 user manual

Conair

Conair Weight Watchers WW26 user manual

DomoClip PW 5570 FA manual

DomoClip

DomoClip PW 5570 FA manual

Fakir Hercules instruction manual

Fakir

Fakir Hercules instruction manual

Conair WW38WC Instructions for use

Conair

Conair WW38WC Instructions for use

Doran 8000XL Operator's manual

Doran

Doran 8000XL Operator's manual

Charder MS4640 user manual

Charder

Charder MS4640 user manual

Avery Weigh-Tronix G235 User instructions

Avery Weigh-Tronix

Avery Weigh-Tronix G235 User instructions

Doran DS8030 user manual

Doran

Doran DS8030 user manual

Belt-Way 45 manual

Belt-Way

Belt-Way 45 manual

Health O Meter 3423 manual

Health O Meter

Health O Meter 3423 manual

Ves Electric V-BS 10 instruction manual

Ves Electric

Ves Electric V-BS 10 instruction manual

TMG TMG-FS10 product manual

TMG

TMG TMG-FS10 product manual

OBH Nordica BALANCE 5000 manual

OBH Nordica

OBH Nordica BALANCE 5000 manual

Beurer GS 14 Instructions for use

Beurer

Beurer GS 14 Instructions for use

DB Electronics DB-100 Series manual

DB Electronics

DB Electronics DB-100 Series manual

manuals.online logo
manuals.online logoBrands
  • About & Mission
  • Contact us
  • Privacy Policy
  • Terms and Conditions

Copyright 2025 Manuals.Online. All Rights Reserved.