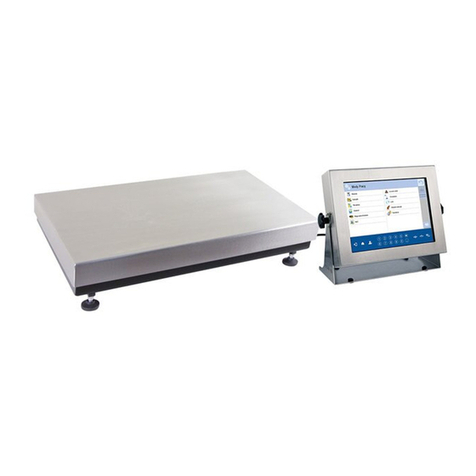
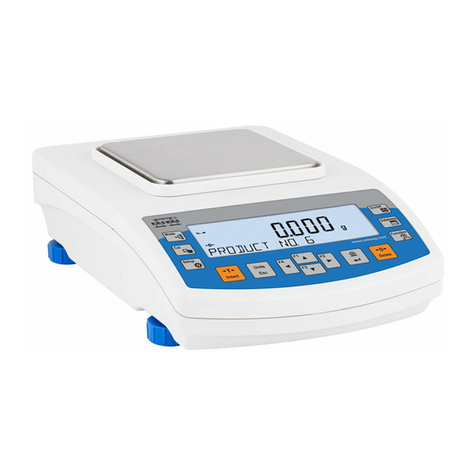
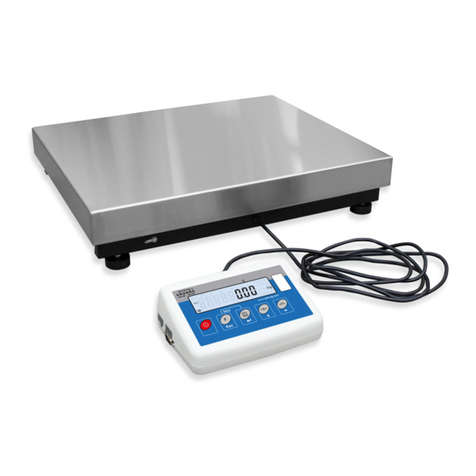
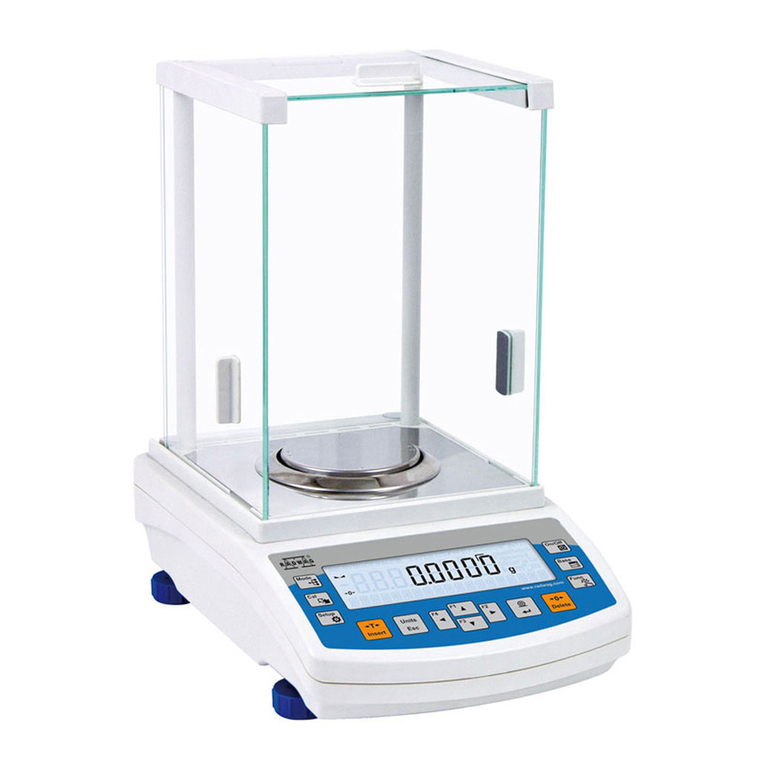
manuals.online logo
Brands
  1. Home
  2. •
  3. Brands
  4. •
  5. RADWAG
  6. •
  7. Scale
  8. •
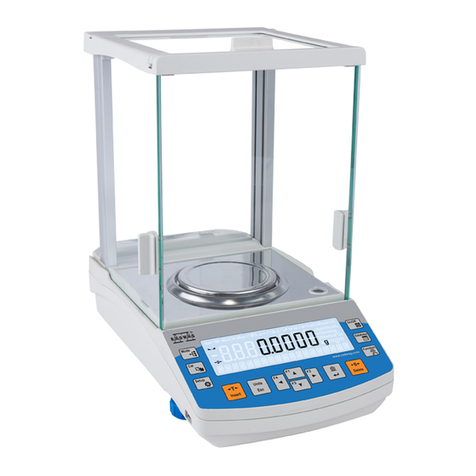
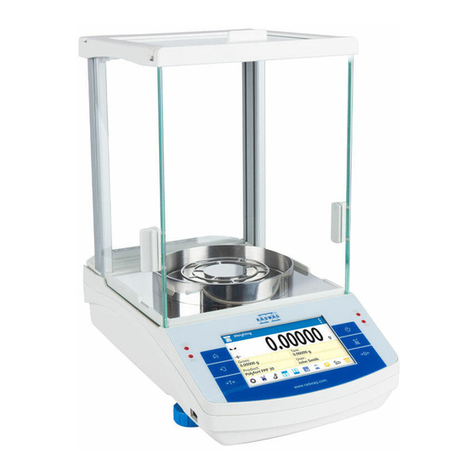
  9. RADWAG PM 15.4Y User guide

RADWAG PM 15.4Y User guide

Szybki start
Wagi Precyzyjne
Start up Guide
Precision Balances
IMMB-05-02-05-22-EN-PL
• PM 4Y
•WLY
Aby wyświetlić pełną instrukcję obsługi, przejdź do strony internetowej lub zeskanuj kod QR:
To view a complete User Manual go to the website or scan QR code:
radwag.com/en/manuals/3657
radwag.com/en/manuals/3034
PM 4Y
WLY
*Rodzaj wtyczki może się różnić w zależności od kraju.
*The plug type may vary by country.
WLY D2
WLY F1
WLY C2 | PM 4Y (d ≥ 0,5 g)
PM 4Y (d = 0,01 g)
1. CONTENT
ZAWARTOŚĆ
Precision balance Weighing pan Grounding foot Foot Power adapter*
Waga precyzyjna Szalka Stopka uziemiająca Stopka Zasilacz sieciowy*
×1 ×1 ×1 ×3 ×1
Precision balance Power adapter*
Waga precyzyjna Zasilacz sieciowy*
×1 ×1
Precision balance Power adapter*
Waga precyzyjna Zasilacz sieciowy*
×1 ×1
Precision balance Weighing pan Power adapter*
Waga precyzyjna Szalka Zasilacz sieciowy
×1 ×1 ×1
Models: PM 4Y (d = 0,1 g)
1 2 3
1 2 3
1 2 3
*Rodzaj wtyczki może się różnić w zależności od kraju.
WLY D2
WLY F1
WLY C2 | PM 4Y (d ≥ 0,5 g)
*The plug type may vary by country.
2. UNPACKING
ROZPAKOWANIE
Precision balance Weighing pan Power adapter*
Waga precyzyjna Szalka Zasilacz sieciowy
×1 ×1 ×1
4
+10 oC
+50 oF
+104oF
+40 oC
1 2 3
Zachowaj opakowanie do celów
gwarancyjnych i serwisowych.
Unikaj podmuchów i ruchu powietrza
w miejscu eksploatacji wagi.
Używaj wagi z dala od źródeł ciepła.
Nie wystawiaj jej na działanie promieni
słonecznych.
Nie wystawiaj urządzenia na działanie
pola magnetycznego. Nie odważaj
substancji magnetycznych.
Urządzenie należy użytkować w pomieszczeniach niezapylonych o temperaturze
powietrza: 10–40 °C (50–104 °F) i optymalnej wilgotności względnej poniżej 80 %.
Ewentualne zmiany temperatury powinny następować stopniowo i bardzo powoli.
Waga powinna być ustawiona na stabilnym stole lub konsoli ściennej. Dla osią-
gnięcia najbardziej stabilnych i powtarzalnych wyników zaleca się użycie stołu
antywibracyjnego.
PM 4Y (d ≤ 0,1 g)
Keep the packaging should a warranty
claim or service be required.
Operate the device in a room where the temperature ranges between
10–40 °C (50 – 104 °F) and where the relative humidity is below 80 %. Tem-
perature must change slowly and gradually.
Using the anti-vibration table is recommended in order to enable the most
stable and repeatable measurement.
Avoid air drafts and air movements
at the workstation.
Place the balance away from heat
sources. Avoid exposing the balance
to the sunlight.
Avoid exposing the balance to a
magnetic field. Do not weigh mag-
netic substances.
3. RECOMMENDATIONS AND WARNINGS
ZALECENIA I OSTRZEŻENIA
1 2 3
Nie używaj w miejscu zagrożonym
wybuchem. Nie odważaj materiałów
wybuchowych i łatwopalnych.
Przed montażem wagi usuń blokady transportowe.
Nie używaj wagi na nierównym lub
niewypoziomowanym podłożu.
Nie używaj w miejscach niestabilnych,
narażonych na wstrząsy i wibracje.
W modelach: PM 4Y | WLY F1 | WLY C2 | PM 4Y (d≥0,5 g) sprężyna uziemiająca jest
fabrycznie zainstalowana
Sprawdź czy sprężyna uziemiająca
jest odpowiednio umiejscowiona.
Upewnij się, że sprężyna uziemia-
jąca wystaje lekko z otworu.
WLY F1 | WLY C2 | PM 4Y (d ≥ 0,5 g)
Keep the transport lock should a warranty claim or service be required.
In models: PM 4Y | WLY F1 | WLY C2 | PM 4Y (d≥0,5 g) earthing spring is factory pre-instaled
WLY D2
Not intended for usage within EX
zones. Not intended for weighing
explosive or flammable substances.
Make sure that the balance is placed
on an even surface.
Do not place the balance on an
unstable surface exposed to shocks
and vibrations.
Check whether the grounding
spring takes its intended location.
Make sure that the grounding
spring juts slightly out of the hole.
Stopka uziemiająca
Grounding
foot
4. ACTIVITIES TO BE DONE PRIOR TO OPERATION
CZYNNOŚCI WSTĘPNE
4.1. Transport lock removal
Usunięcie blokad transportowych
4.2.Grounding spring check
Kontrola sprężyny uziemiającej
1 2
1 2
1 2
1 2
Zamontuj stopkę
uziemiającą w dowolnie
wybranym otworze.
WLY D2
PM 4Y (d = 0,01 g)
PM 4Y (d ≤ 0,1 g)
WLY F1 | WLY C2 | PM 4Y (d ≥ 0,5 g)
Install the grounding
foot in a freely selected
opening.
5. COMPONENTS ASSEMBLY
MONTAŻ ELEMENTÓW WAGI
1 2 3
1 2 3
up to 1- 8 h
up to 1- 8 h
Nie podłączaj wagi aż do osiągnięcia
temperatury pokojowej (orientacyjny
czas stabilizacji: do 8 godzin).
Podłącz przewód zasilacza do gniazda
DC z boku terminala.
Podłącz zasilacz do
gniazda elektrycznego.
Nie podłączaj wagi aż do osiągnięcia
temperatury pokojowej (orientacyjny
czas stabilizacji: do 8 godzin).
Podłącz przewód zasilacza do gniazda
DC z tyłu wagi.
Podłącz zasilacz do
gniazda elektrycznego.
Ustaw urządzenie w miejscu jego użytkowania i pozostaw je do osiągnięcia temperatury pokojowej.
Prior switching the device on let it
reach room temperature (estimated
stabilization time: up to 8 hours).
Connect the power adapter
to DC connector.
Connect the power
adapter to the mains.
Place the device at the workstation, wait until it reaches room temperature.
WLY D2
WLY D2 | PM 4Y (d = 0,1 g)
Prior switching the device on let it
reach room temperature (estimated
stabilization time: up to 8 hours).
Connect the power adapter to DC
connector.
Connect the power
adapter to the mains.
6. PREPARING FOR WORK
PRZYGOTOWANIE WAGI DO PRACY
6.1. Temperature stabilization
Stabilizacja temperatury wagi
1
Automatic adjustment
2
3 4 Leveling
Leveling
W eigh ing
0%
Home
Supplementary unit
Tare
Gross
0.000000 g
0.000000 g
Packaging
0.000
100%
Lo g in Leveling
Levelling
Waga została wypoziomowana.
By zamknąć okno naciśnij przycisk .
Naciśnij ikonę poziomowania.
Aby włączyć urządzenie, naciśnij przycisk ON / OFF.
Sprawdź stan wypoziomowania wagi. Strzałki wskazują
kierunek obrotu nóżek w celu wypoziomowania wagi.
Potwierdź albo anuluj rozpoczęcie procesu auto-
matycznej adiustacji.
Obracaj nóżkami wagi do momentu, aż punkt na poziomi-
cy (na ekranie wagi) znajdzie się w pozycji centralnej.
Leveling
Leveling
To switch the device on, press ON / OFF key. Confirm or cancel the start of the automatic
adjustment process.
Press “Levelling” icon. Check the balance level state. The arrows shows
how to move the balance foots to level the balance.
PS 250.3Y.M | PM 50.4Y
To level the balance turn its feet, keep turning the feet
until the level indicator takes central position.
Balance has been levelled. To close the
levelling window press button.
Leveling
Leveling
6.2.Switching the balance on
Włączenie wagi
6.3. Balance levelling
Poziomowanie wagi
Obracaj nóżkami wagi do momentu,
aż pęcherzyk powietrza w poziomicy
znajdzie się w pozycji centralnej.
Przed wypoziomowaniem wagi należy zdjąć szalkę. Po wypoziomowaniu ponownie postaw
szalkę. Operacja opisana w pkt. 4
Twoja waga jest gotowa do użycia!
Obracaj nóżkami wagi do momentu,
aż pęcherzyk powietrza w poziomicy
znajdzie się w pozycji centralnej.
Your balance is ready to use!
WLY F1 | WLY C2 | PM 4Y (d = 0,1 g)
WLY D2
Before levelling the balance, remove the weighing pan. After levelling put the weighing pan
again. The operation described in pt. 4
To level the balance, turn its
feet and keep turning the feet
until an air bubble takes the
central position.
To level the balance, turn its
feet and keep turning the feet
until an air bubble takes the
central position.
Weighing
0%
Home
Supplementary unit
Tare
Gross
0.000000 g
0.000000 g
Packaging
0.000000
100%
Log in
Weighing
0%
Home
Supplementary unit
Tare
Gross
0.000000 g
0.000000 g
Packaging
0.000000
100%
SETUP
Log in
Pasek szybkiego dostępu
Edytowalne pole informacyjne
Okno wyniku ważenia
Pasek stanu
Pole informacji o procesie
Parametry Pomoc Towary Adiustacja Opakowania Tarowanie
Lista trybów pracy Ikona poziomowania: status
wypoziomowania wagi
Włączenie /
wyłączenie wagi
Zerowanie
Tarowanie
Zatwierdzenie operacji
lub wydruk raportu
Wybór profilu
(przycisk programowalny)
Ustawienia,
przycisk funkcyjny
Adiustacja wewnętrzna
(przycisk programowalny)
Czujnik zbliżeniowy
Wybór trybu pracy
(przycisk programowalny)
Czujnik zbliżeniowy
Proximity sensor
Switching on / off
Zeroing
Taring
Approval and sending
the weighing result to
a printer or a computer
Selecting profile
(programmable button)
Selecting working mode
(programmable button)
Proximity sensor
Internal adjustment
(programmable button)
SETUP/ function button
Editable quick access toolbar
Configurable additional
information field
Weighing result window
Status bar
Process information field
Working modes list Levelling icon:
balance level state
Parameters Help Products Adjustment Packaging Taring
7. PANEL AND SCREEN
KLAWIATURA I EKRAN
7.2. Home screen
Ekran główny
7.1. Panel keys
Klawiatura
1 2
0%
Home
0.0000
100%
Admi n
Start d rying [ A ccept]
W ei g h i ng
Supplementary unit
Tare
Gross
0.000 g
0.000 g
Packaging
P ar ameter s
D atab ase C ommunication P er ip h er al s
Adjustment O p er ator s P r of il es
Adjustment
3 4
1
2
U ser ad j ustment
A d j ustment w eigh ts
3
Adjustment
E x ternal ad j ustment
U nload th e w eigh ing pan
Adjustment
Przed rozpoczęciem procesu adiustacji musisz zaopatrzyć
się w odpowiedni wzorzec masy. Zaleca się użycie wzorca
klasy F1 lub F2. Z tabeli obok wybierz wzorzec odpowiedni
dla Twojej wagi.
Adiustacja zewnętrzna wykonywana jest za pomocą wzorca o
odpowiedniej dokładności i masie zależnej od typu i udźwigu wagi.
Wybierz parametr „Kalibracja zewnętrzna”. Upewnij sie, że szalka jest pusta i naciśnij
przycisk by zatwierdzić adiustację.
Naciśnij przycisk „Parametry”. Naciśnij przycisk „Kalibracja”.
Press “Parameters” button. Press “Adjustment” button.
Press “External Adjustment” parameter. Unload the weighing pan and press
button for confirmation.
The adjustment mass standard does not come with the
balance. Prior to adjustment prepare the right mass standard.
You are recommended to use a mass standard of class F1 or
F2. View the table and select the mass standard you need.
External adjustment is carried out using an external mass standard of
the right accuracy and weight value, which value depends on balance
type and capacity.
Balance model Mass standard [g]
Model wagi Wzorzec masy [g]
PM 15.4Y 10000 g
PM 60.1.4Y 50000 g
PM 60.05.4Y 50000 g
WLY 1/D2 1000 g
WLY 2/D2 2000 g
WLY 10/D2 10000 g
WLY 12/F1 10000 g
WLY 20/D2 20000 g
WLY 30/F1 20000 g
WLY 120/C2 100000 g
8. BASIC OPERATIONS
OPERACJE PODSTAWOWE
8.1. Adjustment (for models whit external adjustment)
Adiustacja (tylko dla modeli z zewnętrzną adiustacją)
5
9
7
6
10
8
S tar t mass deter mination
Adjustment
Adjustment
Adjustment
Z er oing
Adjustment
C ompleted
Adjustment
U nload th e w eigh ing pan
Adjustment
L oad 5 0.0000 g
Adjustment
1 2
W eig h ing
0%
Home
Supplementary unit
Tare
Gross
0.000 g
0.000 g
Packaging
0.000
100%
L og in
C ompleted
Automatic adjustment
Poczekaj na zakończenie procesu ustalania
masy początkowej.
Postaw wzorzec masy na szalce i naciśnij
przycisk by zatwierdzić.
Trwa zerowanie. Poczekaj na zakończenie
procesu zerowania.
Poczekaj na zakończenie adiustacji.
Adjustacja zakończona. naciśnij przycisk
aby zatwierdzić.
Zdejmij wzorzec z szalki i naciśnij przycisk
aby zatwierdzić.
Adiustacja została zakończona. Naciśnij
przycisk aby zatwierdzić.
Naciśnij przycisk „Adiustacja” i poczekaj
aż zakończy się proces adiustacji.
Determination of start mass in progress.
Wait for determination completion.
Load the weighing pan with mass standard
and press button for confirmation.
Wait for the process completion. Unload the weighing pan and press
button for confirmation.
Zeroing in progress. Wait for zeroing
completion.
Adjustment completed. Press button
for confirmation.
Press “Adjustment” button and wait
for completion of the adjustment process.
Adjustment completed. Press button
for confirmation.
8.2.Adjustment (for models whit automatic adjustment)
Adiustacja (tylko dla modeli z wewnętrzną adiustacją)
1 2
W eig h ing
0%
Home
Supplementary unit
Tare
Gross
0.000 g
0.12 9 g
Packaging
0.129
100%
SETUP
L og in
W eig h ing
0%
Home
Supplementary unit
Tare
Gross
0.18 5 g
0.000 g
Packaging
0.000
100%
L og in
N et
1 2
Supplementary unit
W eig h ing
Tare
Gross
0.000 g
0%
Home
0.18 5 g
Packaging
0.185
100%
SETUP
L og in
W eig h ing
0%
Home
Supplementary unit
Tare
Gross
0.18 5 g
0.000 g
Packaging
0.000
100%
L og in
N et
Upewnij się, że szalka jest pusta i naciśnij
przycisk „Zerowanie”.
Waga została wyzerowana.
Przy obciążonej szalce: po uzyskaniu stabilnego
wyniku kliknij przycisk „Tarowanie”.
Waga została wytarowana.
With loaded weighing pan: upon stabilisation
of the weighing result, press “Tare” button.
Balance has been tared.
Make sure that the weighing pan is empty
and press “Zeroing” button.
The balance has been zeroed.
8.4. Taring
Tarowanie
8.3. Zeroing
Zerowanie
Weighing
0%
Home
Supplementary unit
Tare
Gross
0.000 g
0.000 g
Packaging
0.000
100%
Log in Weighing
0%
Home
0.000
100%
Log in
Supplementary unit
Tare
Gross
0.000 g
0.000 g
Packaging
Weighing
Printouts Prof ile
Settings B uttons I nf ormation
1 2
3
Naciśnij ikonę aktualnej jednostki masy,
aby wyświetlić listę dostępnych jednostek.
Naciśnij ikonę aktualnego trybu pracy,
aby wyświetlić listę trybów pracy.
Ważenie
Dozowanie
Doważanie
Receptury
Odchyłki procentowe
Statystyki
Liczenie sztuk
Ważenie zwierząt
Gęstość cial stalych
Gęstosć cieczy
Zatrzask Max
Naciśnij ikonę aktualnego trybu pracy, aby wyświetlić
listę dostępnych trybów pracy. Naciśnij pole informacyjne, aby uzyskać dostęp do
opcji wybranego trybu pracy.
Ustawienia: konfiguracja parametrów związanych z
aktualnym trybem pracy
Przyciski: wybór przycisków szybkiego dostępu dla
aktualnego trybu pracy
Informacje: wybór informacji widocznych w polu
informacyjnym
Wydruki: wybór typu wydruku
Profil: wybór profilu wykorzystywanego podczas pracy
Naciśnij wybrany przycisk, aby wyświetlić listę
dostępnych opcji.
Press the icon of the current working mode, to display
the list of available working modes. Press information field to access current working
mode options.
Press selected button to view the list
of available options.
Settings: additional options
Buttons: quick access buttons configuration
Information: setting data that is to be displayed in
the workspace
Printouts: setting printout type and conten
Profile: setting profile that is to be used during operation
Press the current weight unit icon
to display list of available units.
Press the icon of the current working
mode, to display the list of working modes.
Gram [g]
Miligram [mg]
Carat [c]
Pound [lb]
Ounce [oz]
Troy ounce [ozt]
Pennyweight [dwt]
Hong Kong Tael [tlh]
Singapore tael [tls]
Taiwanese tael [tlt]
Chinese tael [tlc]
Momme [m]
Grain [gr]
Tical [ti]
Newton [N]
Baht [baht]
Tola [tola]
Mesghal [msg]
User unit 1
User unit 2
Weighing
Dosing
Checkweighing
Formulas
Percent weighing
Statistics
Parts counting
Animal weighing
Solids density
Liquids density
Peak hold
8.6. Working modes settings
Ustawienia trybów pracy
8.5. Working modes / units selection
Tryby pracy / Wybór jednostek
1 2
Supplementary unit
Weighing
Tare
Gross
0.000 g
0%
Home
0.000 g
Packaging
0.000
100%
Log in
Log in
L og out
1
2
A d min
O perators
2
A d min
1 2
Weighing
0%
Home
Supplementary unit
Tare
Gross
0.000 g
0.000 g
Packaging
0.000
100%
A d m in
P ar ameter s
D atab ase C ommunication P er ip h er al s
Adjustment O p er ator s P r of il es
O p er ator s
3 4
****
Enter password
Supplementary unit
Weighing A d m in
Tare
Gross
0.000 g
0%
Home
0.000 g
Packaging
0.000
100%
Aby wejść do menu „Użytkownicy”,naciśnij przycisk
„Zaloguj się”.
Na wyświetlonej liście użytkowników wybierz
„Administrator”.
Naciśnij przycisk „Parametry”. Naciśnij przycisk „Użytkownicy”.
Przed konfiguracją użytkowników zaloguj się jako Administrator (patrz krok 9.1).
Zostałeś zalogowany jako Administrator.
Niektóre ustawienia wagi są dostępne wyłącznie dla Administratora.
Przed ustawieniem parametrów wagi zaloguj się jako Administrator.
Wprowadź hasło „1111” i zatwierdź przyciskiem .
Prior to users settings, log in as Administrator (point 9.1.).
Press “Parameters” button. Press “Operators” button.
You have logged in as the Administrator.Enter “1111” password and press button to confirm.
To enter ‘’Users’’ menu press “Log in” button. Users list is displayed, select “Admin” option.
Some settings are accessible for Administrator exclusively.
Prior to balance parameters setup, log in as the Administrator.
9.2.User settings
Konfiguracja użytkowników
9.1. Administrator’s logging in
Logowanie administratora
9. SETTINGS
USTAWIENIA
N ame J oh n Smith
1
2
C od e
Passw ord * * * * * * *
N ame and Surname
A cces lev el O perator
A ccount activ e Y es
3
4
5
6
Edit record
7
3
5 6
4
J oh n Smith
N ame
Name J oh n Smith
1
2Code
Password *******
Name ad Surname
Acces level O p erator
Account active Yes
3
4
5
6
E dit r ecor d
1
Admin
O p er ator s
Name
1
2Code
Password *******
Name ad Surname
Acces level User
Account active Yes
3
4
5
6
E dit r ecor d
1Name
Kod: wpisz unikalny identyfikator użytkownika
Hasło: nadaj użytkownikowi hasło
Imię i nazwisko: Wpisz imię i nazwisko użytkownika
Poziom uprawnień: nadaj uprawnienia (użytkownik,
użytkownik zaawansowany, administrator)
Status Konta: (aktywny lub nieaktywny)
Postępując zgodnie z powyższą procedurą, ustaw pozostałe
parametry:
Wprowadź nazwę użytkownika i naciśnij
przycisk ,aby potwierdzić. Nazwa użytkownika została wprowadzona.
Naciśnij przycisk „Dodaj”. Wybierz parametr „Nazwa”.
Enter user name and press button to confirm. User name has been entered.
Press “Add” button. Select “Name” parameter.
Code: Enter user ID
Password: Enter user password
First and last name: Enter user’s first and last name
Access levels: Set respective access level
(user, advanced, admin)
Account status: (active or inactive)
Following the above procedure, set remaining parameters:
3 4
S of t k ey 7 T ar e
7
8
B utton F 1 W or k ing mode
B utton F 2 P r of il e
B utton F 3 Adjustment
L ef t p r of imity sensor N one
R ig h t p r ocimity sensor N one
9
1 0
1 1
1 2
B uttons
1 2
R ig h t p r ocimity sensor N one
Right proximity sensor
N one
Prof ile
A d j ustment
Z ero
Tare
1 2
A d m in
Weighing
0%
Home
Supplementary unit
Tare
Gross
0.2 3 118 5 g
0.000000 g
Packaging
0.000
100%
Log in
Supplementary unit
Tare
Gross
0.000 g
0.000 g
Packaging
W eig h ing
P r intouts P r of il e
S etting s B uttons I nf or mation
B uttons
Postępując zgodnie z powyższą procedurą, możesz skonfigurować czujniki dla innych trybów pracy.
Wybierz konkretny czujnik (prawy lub lewy)
z listy.
Przed konfiguracją czujników zbliżeniowych zaloguj się jako Administrator (patrz krok 9.1.).
Wybierz funkcję, którą chcesz przypisać
do danego czujnika.
Naciśnij pole informacyjne, aby uzyskać
dostęp do opcji aktualnego trybu pracy.
Naciśnij przycisk „Przyciski”.
Do każdego czujnika zbliżeniowego możesz przyporządkować wybraną funkcję.Ponadto w różnych trybach pracy
możesz przypisać do tego samego czujnika inną funkcję. Zobacz przykładową procedurę konfiguracji czujników dla
trybu pracy “Ważenie”.
Following the above procedure you can configure sensors for other working modes.
Select the appropriate sensor (right or left). Select function that is to be assigned to
the choosen sensor.
Prior to proximity sensors setup, log in as Administrator (point 9.1.).
You can assign the proximity sensors with different functions for each working mode (the sensors will trigger
different operation for each working mode). See the below procedure of sensors setup for the “Weighing” mode.
Press information field to access current
working mode options.
Press “Buttons” button.
9.3. Proximity sensors setup
Konfiguracja czujników zbliżeni owych
DB15
Wi-Fi ® jest zarejestrowanym znakiem towarowym będącym własnością organizacji Wi-Fi Alliance.
Komputer
Komputer
Komputer Drukarka Kontroler PLC Kolumna
świetlna
Drukarka
Drukarka
Skaner kodów
kreskowych
Skaner kodów
kreskowych
Czytnik kart
RFID
Czytnik kart
RFID
Czujnik warunków
środowiskowych THB
Skaner kodów
kreskowych
Computer
Computer
Computer Printer PLC controller Stack-light
Printer
Printer
Barcode
scanner
Barcode
scanner
RFID transponder
card reader
RFID transponder
card reader
THB ambient
conditions sensor
Barcode
scanner
Wi-Fi ® is a registered trademark of Wi-Fi® Alliance.
10. PERIPHERAL DEVICES CONNECTORS
PODŁĄCZENIE URZĄDZEŃ PERYFERYJNYCH
Przed rozpoczęciem czyszczenia
koniecznie odłącz wagę od źródła
zasilania! Wyjmij wtyczkę z gniazda
elektrycznego i odłącz wszystkie inne
przewody podłączone do wagi.
Do czyszczenia stosuj wyłącznie
miękkie ściereczki z mikrowłókien,
włókien naturalnych lub sztucznych.
Nie używaj ściereczek o ostrej struktu-
rze ani żadnych materiałów mogących
zarysować powierzchnię!
Środek czyszczący nanoś najpierw na
ściereczkę. Nigdy nie aplikuj środka
czyszczącego bezpośrednio na
urządzenie!
Nie używaj agresywnych środków
czyszczących (np. rozpuszczalników,
preparatów zawierających chlor,
substancje żrące i wybielacze).
Nie używaj środków czyszczących
zawierających substancje o ostrej
strukturze oraz preparatów przezna-
czonych do szorowania.
Uważaj, żeby do układu wagowego
(do wnętrza urządzenia) nie dostał
się żaden pył ani ciecz.
Prior to cleaning it is necessary
to disconnect the device from the
mains! Remove the plug from the
outlet, disconnect all cables.
Use soft cloth made of either natural
or synthetic fiber exclusively. Avoid us-
ing cloth made of stiff/hard fabric, this
could cause scratches on the surface!
Apply the cleanser onto the cloth.
Mind not to apply the cleanser
directly onto the device!
• GLASS PANES AND COMPONENTS can be cleaned using window cleaner.
•WEIGHING PANS AND STAINLESS STEEL OR ALUMINIUM COMPONENTS can be cleaned using a cloth slight-
ly soaked in a solution of water and gentle cleanser (e.g. soap or dishwashing liquid).
•OPERATION PANEL AND HOUSING can be cleaned using a cloth slightly soaked in a solution of water and gentle
cleanser (e.g. soap or dishwashing liquid).
Do not use aggressive cleaning
agents (e.g. solvents, chlorine prepa-
rations, corrosive chemicals, bleach).
Make sure that neither dust nor
liquid gets inside the weighing
system (device inside).
Neither use substances of sharp
structure nor intended for scrub-
bing.
Shall it be necessary to disassemble the weighing chamber, follow the description pro-
vided in section 11.3.
11. DEVICE CLEANING
CZYSZCZENIE I KONSERWACJA
11.1. Guidelines and precautions
Zalecenia i ostrzeżenia
11.2. Cleaning instructions
Wskazówki dotyczące czyszczenia urządzenia

This manual suits for next models

9

Other RADWAG Scale manuals

RADWAG TMX series User manual

RADWAG

RADWAG TMX series User manual

RADWAG AS X2 PLUS User guide

RADWAG

RADWAG AS X2 PLUS User guide

RADWAG XA 5Y.M.A User guide

RADWAG

RADWAG XA 5Y.M.A User guide

RADWAG UYA 4Y User manual

RADWAG

RADWAG UYA 4Y User manual

RADWAG AS series User manual

RADWAG

RADWAG AS series User manual

RADWAG WLC/C2 User manual

RADWAG

RADWAG WLC/C2 User manual

RADWAG PS 5Y.M User guide

RADWAG

RADWAG PS 5Y.M User guide

RADWAG PS Series User manual

RADWAG

RADWAG PS Series User manual

RADWAG WLX series User manual

RADWAG

RADWAG WLX series User manual

RADWAG WTC series User manual

RADWAG

RADWAG WTC series User manual

RADWAG XA 5Y.M User guide

RADWAG

RADWAG XA 5Y.M User guide

RADWAG WLC/A1/C/2 User manual

RADWAG

RADWAG WLC/A1/C/2 User manual

RADWAG APP 3Y User manual

RADWAG

RADWAG APP 3Y User manual

RADWAG HX7 User manual

RADWAG

RADWAG HX7 User manual

RADWAG PM C32 User guide

RADWAG

RADWAG PM C32 User guide

RADWAG WLT L Series User manual

RADWAG

RADWAG WLT L Series User manual

RADWAG C32 User manual

RADWAG

RADWAG C32 User manual

RADWAG HRP.R Series User manual

RADWAG

RADWAG HRP.R Series User manual

RADWAG WTC 200 User guide

RADWAG

RADWAG WTC 200 User guide

RADWAG C315 Series User manual

RADWAG

RADWAG C315 Series User manual

RADWAG PS Series User manual

RADWAG

RADWAG PS Series User manual

RADWAG WLC 6/F1 User guide

RADWAG

RADWAG WLC 6/F1 User guide

RADWAG 3Y Series User manual

RADWAG

RADWAG 3Y Series User manual

RADWAG PM C32 User guide

RADWAG

RADWAG PM C32 User guide

Popular Scale manuals by other brands

Yamato DP-6900 Service manual

Yamato

Yamato DP-6900 Service manual

OMEGAbilance FREESTYLE Compact Lite CS Series quick start guide

OMEGAbilance

OMEGAbilance FREESTYLE Compact Lite CS Series quick start guide

Rice Lake Farm Bars Operation manual

Rice Lake

Rice Lake Farm Bars Operation manual

Detecto 6475 Specifications

Detecto

Detecto 6475 Specifications

TEC SL-9000-ESB SERIES owner's manual

TEC

TEC SL-9000-ESB SERIES owner's manual

INNOLIVING INN-132 user manual

INNOLIVING

INNOLIVING INN-132 user manual

ETEKCITY ESF93 user manual

ETEKCITY

ETEKCITY ESF93 user manual

Scarlett Vitaspa SC-BS33E093 manual

Scarlett

Scarlett Vitaspa SC-BS33E093 manual

Kilotech KHS 200-30 user guide

Kilotech

Kilotech KHS 200-30 user guide

Beurer BG 20 Instructions for use

Beurer

Beurer BG 20 Instructions for use

Tanita Ironman Innerscan BC-549 instruction manual

Tanita

Tanita Ironman Innerscan BC-549 instruction manual

TEFAL Premiss PP1070V0 quick start guide

TEFAL

TEFAL Premiss PP1070V0 quick start guide

DAY Useful Everyday 75391 instruction manual

DAY Useful Everyday

DAY Useful Everyday 75391 instruction manual

GSE Porta-Tronic installation guide

GSE

GSE Porta-Tronic installation guide

Topcom DIET SCALE 200 user guide

Topcom

Topcom DIET SCALE 200 user guide

Vivax KS-505 BW user manual

Vivax

Vivax KS-505 BW user manual

e-tarti L60 Technical manual

e-tarti

e-tarti L60 Technical manual

Zelmer BS1800 user manual

Zelmer

Zelmer BS1800 user manual

manuals.online logo
manuals.online logoBrands
  • About & Mission
  • Contact us
  • Privacy Policy
  • Terms and Conditions

Copyright 2025 Manuals.Online. All Rights Reserved.