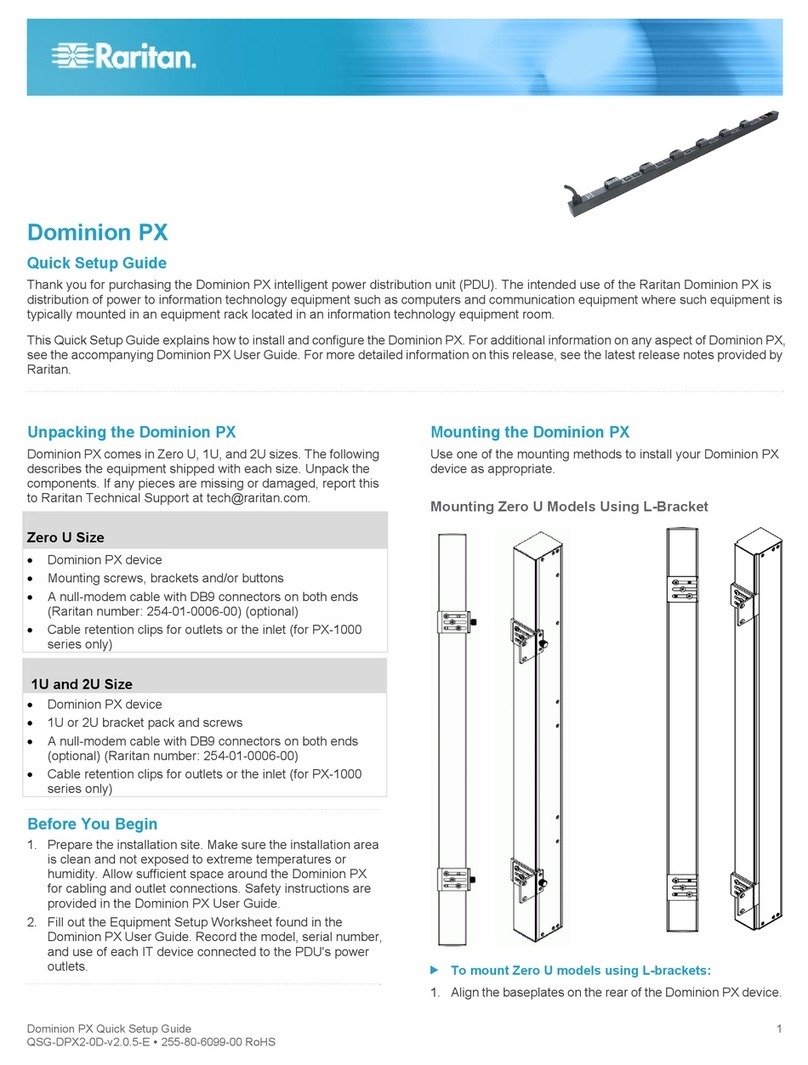
Raritan Dominion Px User manual

Copyright © 2008 Raritan, Inc.
DPX-0I-E
October 2008
255-80-6080-00
Dominion PX
User Guide
Release 1.2.5

This document contains proprietary information that is protected by copyright. All rights reserved. No
part of this document may be photocopied, reproduced, or translated into another language without
express prior written consent of Raritan, Inc.
© Copyright 2008 Raritan, Inc., CommandCenter®, Dominion®, Paragon® and the Raritan company
logo are trademarks or registered trademarks of Raritan, Inc. All rights reserved. Java® is a
registered trademark of Sun Microsystems, Inc. Internet Explorer® is a registered trademark of
Microsoft Corporation. Netscape® and Netscape Navigator® are registered trademarks of Netscape
Communication Corporation. All other trademarks or registered trademarks are the property of their
respective holders.
FCC Information
This equipment has been tested and found to comply with the limits for a Class A digital device,
pursuant to Part 15 of the FCC Rules. These limits are designed to provide reasonable protection
against harmful interference in a commercial installation. This equipment generates, uses, and can
radiate radio frequency energy and if not installed and used in accordance with the instructions, may
cause harmful interference to radio communications. Operation of this equipment in a residential
environment may cause harmful interference.
VCCI Information (Japan)
Raritan is not responsible for damage to this product resulting from accident, disaster, misuse, abuse,
non-Raritan modification of the product, or other events outside of Raritan's reasonable control or not
arising under normal operating conditions.
LISTED
CUS
L
U
1F61
I.T.E.
To avoid potentially fatal shock hazard and possible damage to Raritan
equipment:
SYSTEMS SHOULD BE CONFIGURED ONLY BY A
KNOWLEDGEABLE PERSON.
IT IS ESSENTIAL THAT THIS EQUIPMENT IS CONNECTED TO
AN ELECTRICAL SUPPLY THAT HAS A PROTECTIVE GROUND
CONDUCTOR
Safety Guidelines

Safety Guidelines
iii
WARNING: TO ISOLATE THIS EQUIPMENT DISCONNECT
POWER SUPPLY PLUG.
ATTENTION: AFIN D'ISOLER TOTALEMENT CET APPAREIL
DEBRANCHER FICHE D'ALIMENTATION.
CAUTION: USE ONLY IN DRY LOCATIONS.
ATTENTION: UTILISER UNIQUEMENT DANS DES
EMPLACEMENTS SECS.
Do not use a 2-wire power cord in any product configuration.
Test AC outlets at your computer and monitor for proper polarity and
grounding.
Use only with grounded outlets at both the computer and monitor.
When using a backup UPS, power the computer, monitor and
appliance off the supply.
The installation socket outlet used for the power supply to this
equipment must be installed near the equipment and must be easily
accessible.
When installing this product, it is essential that the distribution circuit
supplying the product is protected by a branch circuit protection
device with a maximum rating to suit the product maximum rating.
This power distribution unit is intended for power supply provision to
equipment only. Secondary (Satellite) power strips shall not be
connected to the receptacles
This product has been designed to conform to the latest safety
requirements. In addition to compliance with standards for general
use, it has been factory configured for use in rack mounting
environments aiding the installer to provide systems compliant with
relevant standards.
Provide an earthing connection before the mains plug is connected to
the mains. And, when disconnecting the earthing connection, be sure
to disconnect after pulling out the mains plug from the mains.

iv
Contents
Safety Guidelines ii
Chapter 1 Introduction 1
Product Models..............................................................................................................................1
Product Photos ..............................................................................................................................1
Zero U Size..........................................................................................................................1
1U Size................................................................................................................................2
2U Size................................................................................................................................2
Product Features ...........................................................................................................................3
Package Contents..........................................................................................................................4
Zero U Products...................................................................................................................4
1U Products.........................................................................................................................5
2U Products.........................................................................................................................5
Chapter 2 Rack-Mounting the Dominion PX 6
Rack Mount Safety Guidelines ......................................................................................................6
Standard Rack Mounting...............................................................................................................6
For Zero U Models Using L-Bracket..............................................................................................9
For Zero U Models Using Tool-less Button Mounting..................................................................10
Before You Begin Tool-less Mounting:..............................................................................10
To Mount............................................................................................................................10
Chapter 3 Installation and Configuration 12
Before You Begin.........................................................................................................................12
Unpack the Dominion PX and Components......................................................................12
Prepare the Installation Site ..............................................................................................12
Fill Out the Equipment Setup Worksheet..........................................................................12
Connecting the Dominion PX to a Computer...............................................................................13
Connecting the Dominion PX to Your Network............................................................................14
Configuring the Dominion PX for Network Connectivity..............................................................15
Resetting to Factory Defaults ......................................................................................................18
Chapter 4 Using the Dominion PX 20
Front Panel ..................................................................................................................................20
Connection Ports...............................................................................................................20
Blue LED............................................................................................................................21

Contents
v
Back Panel...................................................................................................................................21
Power Cord........................................................................................................................21
Outlets ...............................................................................................................................21
LED Display.......................................................................................................................22
Circuit Breaker.............................................................................................................................24
Beeper .........................................................................................................................................24
Measurement Accuracy...............................................................................................................25
Chapter 5 Using the Web Interface 26
Logging into the Web Interface....................................................................................................26
Log In.................................................................................................................................26
Change Your Password.....................................................................................................29
Using the Web Interface ..............................................................................................................30
Menus................................................................................................................................30
Navigation Path .................................................................................................................31
Status Panel ......................................................................................................................32
Status Messages...............................................................................................................34
Unavailable Options ..........................................................................................................34
Reset to Defaults...............................................................................................................35
Refresh..............................................................................................................................35
Using the Home Window .............................................................................................................35
Line Loads Display ............................................................................................................36
Circuit Breaker Status........................................................................................................36
Outlets List.........................................................................................................................37
All Outlets Control..............................................................................................................38
Monitoring Line and Circuit Breaker Status.................................................................................39
Line Details Page ..............................................................................................................39
Circuit Breaker Details Page .............................................................................................40
Setting Up User Profiles ..............................................................................................................41
Create a User Profile.........................................................................................................41
Copy a User Profile ...........................................................................................................43
Modify a User Profile.........................................................................................................44
Delete a User Profile .........................................................................................................44
Set User Permissions Individually.....................................................................................44
Setting Up User Groups...............................................................................................................45
Create a User Group .........................................................................................................46
Set System Permissions....................................................................................................46
Set Outlet Permissions......................................................................................................48
Copy a User Group............................................................................................................49
Modify a User Group .........................................................................................................49
Delete a User Group..........................................................................................................50
Setting Up Access Controls.........................................................................................................50
Force HTTPS Encryption...................................................................................................50
Configure the Firewall........................................................................................................51
Create Group Based Access Control Rules......................................................................54
Set Up User Login Controls...............................................................................................57
Setting Up a Digital Certificate.....................................................................................................60
Create a Certificate Signing Request................................................................................61
Install a Certificate.............................................................................................................63

Contents
vi
Setting Up External User Authentication .....................................................................................63
Gather Information for LDAP Configuration. .....................................................................64
Setup LDAP Authentication...............................................................................................65
Setting Up RADIUS Authentication ...................................................................................67
Setting Up Outlets and Power Thresholds ..................................................................................68
Set Default Outlet State.....................................................................................................69
Set Dominion PX Thresholds ............................................................................................70
Set Outlet Power-Up Sequence ........................................................................................71
Name Outlets.....................................................................................................................72
Set Outlet Thresholds........................................................................................................73
View Outlet Details............................................................................................................74
Power Cycle an Outlet.......................................................................................................75
Turn Outlet On or Off.........................................................................................................75
Environmental Sensors................................................................................................................75
Connect Environmental Sensors.......................................................................................76
Map Environmental Sensors .............................................................................................76
Configure Environmental Sensors and Thresholds...........................................................79
View Sensor Readings ......................................................................................................80
Configuring and Using Alert Notifications....................................................................................80
Components of an Alert.....................................................................................................81
How to Configure an Alert .................................................................................................81
Sample Alerts ....................................................................................................................89
Setting Up Event Logging............................................................................................................92
Configure Local Event Log................................................................................................93
View Internal Event Log.....................................................................................................95
Configure NFS Logging.....................................................................................................96
Configure SMTP Logging..................................................................................................97
Configure SNMP Logging..................................................................................................98
Configure Syslog Forwarding............................................................................................98
Managing the Dominion PX.........................................................................................................99
Displaying Basic Device Information.................................................................................99
Displaying Model Configuration Information....................................................................101
Displaying Connected Users...........................................................................................101
Naming the Dominion PX................................................................................................102
Modifying the Network Settings.......................................................................................103
Modifying the Communications, Port and Bandwidth Settings........................................104
Modifying the LAN Interface Settings..............................................................................105
Setting the Date and Time...............................................................................................106
Configuring the SMTP Settings.......................................................................................107
Configuring the SNMP Settings.......................................................................................108
Enabling Data Retrieval...................................................................................................109
Resetting the Dominion PX .............................................................................................110
Updating the Firmware....................................................................................................112
Copying Configurations with Bulk Configuration.............................................................113
Outlet Grouping..........................................................................................................................116
Identifying Other Dominion PX Units...............................................................................116
Grouping Outlets Together..............................................................................................117
Viewing and Controlling Outlet Groups...........................................................................118
Editing or Deleting Outlet Groups....................................................................................119
Deleting Outlet Group Devices........................................................................................119
Contents
vii
Chapter 6 Integration 121
Dominion KX..............................................................................................................................122
KX Manager Application (Dominion KX-I only)................................................................122
Associate Outlets with a Target.......................................................................................123
Control a Target's Power.................................................................................................124
Dominion KX-II.................................................................................................................125
Paragon II ..................................................................................................................................125
Paragon Manager Application.........................................................................................126
Add a Dominion PX Unit in Paragon II............................................................................126
Associate Outlets with a Target.......................................................................................127
Control a Target's Power.................................................................................................127
Control an Outlet's Power................................................................................................128
Dominion SX..............................................................................................................................128
Configure a Dominion PX Power Unit on Dominion SX..................................................128
Power Control..................................................................................................................129
Check Power Strip Status................................................................................................130
Dominion KSX............................................................................................................................130
CommandCenter Secure Gateway............................................................................................131
Direct Control from CC-SG 4.0........................................................................................131
Appendix A Equipment Setup Worksheet 132
Appendix B Using the CLP Interface 136
About the CLP Interface ............................................................................................................136
Logging into the CLP interface ..................................................................................................136
With HyperTerminal.........................................................................................................137
With SSH or Telnet..........................................................................................................138
Showing Outlet Information .......................................................................................................139
Syntax..............................................................................................................................139
Attributes..........................................................................................................................139
Examples.........................................................................................................................140
Turning an Outlet On or Off.......................................................................................................140
Syntax..............................................................................................................................141
Querying an Outlet Sensor........................................................................................................141
Appendix C Using SNMP 142
Enabling SNMP..........................................................................................................................142
Configure Users for Encrypted SNMP v3........................................................................144
Configuring SNMP Traps...........................................................................................................145
SNMP Gets and Sets.................................................................................................................146
The Dominion PX MIB.....................................................................................................147
Disabling Switching .........................................................................................................148

Contents
viii
Appendix D Using the IPMI Tool Set 149
Channel Commands..................................................................................................................149
authcap <channel number> <max priv>..........................................................................149
info [channel number]......................................................................................................150
getaccess <channel number> [userid] ............................................................................150
setaccess <channel number> <userid>[callin=on|off] [ipmi=on|off] [link=on|off]
[privilege=level]................................................................................................................150
getciphers <all | supported> <ipmi | sol> [channel].........................................................150
Event Commands ......................................................................................................................150
<predefined event number> ............................................................................................151
file <filename> .................................................................................................................151
LAN Commands.........................................................................................................................151
print <channel>................................................................................................................151
set <channel> <parameter> ............................................................................................152
Sensor Commands....................................................................................................................153
list ....................................................................................................................................153
get <id> ... [<id>]..............................................................................................................153
thresh <id> <threshold> <setting>...................................................................................154
OEM Commands .......................................................................................................................154
A Note About Group Commands.....................................................................................155
Set Power Set Delay Command......................................................................................155
Get Power On Delay Command......................................................................................155
Set Receptacle State Command.....................................................................................155
Get Receptacle State Command.....................................................................................156
Set Group State Command.............................................................................................156
Set Group Membership Command..................................................................................157
Get Group Membership Command .................................................................................157
Set Group Power On Delay Command...........................................................................158
Get Group Power On Delay Command...........................................................................158
Set Receptacle ACL........................................................................................................159
Get Receptacle ACL........................................................................................................159
Set Sensor Calibration.....................................................................................................159
Test Actors.......................................................................................................................160
Test Sensors....................................................................................................................160
Set Power Cycle Delay Command..................................................................................160
Get Power Cycle Delay Command..................................................................................160

Contents
ix
IPMI Privilege Levels .................................................................................................................161
Appendix E Event Types 163
Appendix F Specifications 164
Environmental Specifications.....................................................................................................164
Dominion PX Serial RJ-45 Port Pinouts ....................................................................................164
Dominion PX Feature RJ-12 Port Pinouts.................................................................................164
Index 167


1
The Dominion PX unit is an intelligent power distribution unit that allows
you to reboot remote servers and other network devices and to monitor
power in the data center through Raritan's KVM switches and Secure
Console Servers. From the office or from anywhere, the Dominion PX
unit will power on, power off, or reboot remote equipment, as well as
monitor current, voltage, power, and temperature.
The Dominion PX offers the ability to recover systems remotely in the
event of system failure and/or system lockup. It eliminates the need to
perform manual intervention or dispatch field personnel, reduces
downtime and mean time to repair, and increases productivity.
In This Chapter
Product Models..........................................................................................1
Product Photos..........................................................................................1
Product Features.......................................................................................3
Package Contents.....................................................................................4
Product Models
The Dominion PX comes in several models that are built to stock and
can be obtained almost immediately. Raritan also offers custom models
that are built to order and can only be obtained on request.
See http://www.raritan.com or your local reseller for a list of available
models.
Product Photos
The Dominion PX comes in Zero U, 1U, and 2U sizes.
Zero U Size
Chapter 1 Introduction

Chapter 1: Introduction
2
1U Size
2U Size

Chapter 1: Introduction
3
Product Features
Dominion PX models and sizes vary. In general, Dominion PX features
include:
•The ability to control outlets collectively and individually
•The ability to power on, power off, and reboot the devices connected
to each outlet
•The ability to group outlets from multiple Dominion PX as virtual
outlets accessible from a single session
•The ability to monitor the following at the outlet level:
RMS Current
Power Factor
Maximum RMS Current
Voltage
Active Power
Apparent Power

Chapter 1: Introduction
4
•The ability to monitor the internal CPU temperature of the Dominion
PX
•The ability to monitor environmental factors such as external
temperature and humidity
•An audible alarm (beeper) and a visual alarm (blinking LED) to
indicate current overload
•Configurable alarm thresholds
•Support for SNMP v1, v2, and V3
•The ability to send traps using SNMP protocol
•The ability to retrieve outlet specific data using SNMP, including
outlet state, current, voltage, and power
•The ability to retrieve a history of sampled data at all levels (unit,
circuit breaker, outlet, etc) via SNMP
•The ability to configure and set values through SNMP, including unit
and outlet threshold levels
•The ability to save one unit's configuration settings and then deploy
those settings to other Dominion PX units
•Fully shrouded local branch circuit breakers on products rated over
20A to protect connected equipment against overload and short
circuits
•Integration with Raritan's Paragon II, CommandCenter Secure
Gateway (CC-SG), and Dominion access devices
•Line current and circuit breaker monitoring
•A combination of outlet types (e.g., C13 + C19) in select models
Select models may be available without switching. Please check with
your reseller or distributor.
Package Contents
The following describes the equipment and other material included in
each product package.
Zero U Products
•Dominion PX unit including power cord
•Bracket for Zero U and screws
•Tool-less mounting bracket for Zero U units
•Null-modem cable with RJ-45 and DB9F connectors on either end

Chapter 1: Introduction
5
1U Products
•Dominion PX unit including power cord
•1U bracket pack and screws
•Null-modem cable with RJ-45 and DB9F connectors on either end
2U Products
•Dominion PX unit including power cord
•2U bracket pack and screws
•Null-modem cable with RJ-45 and DB9F connectors on either end

6
In This Chapter
Rack Mount Safety Guidelines..................................................................6
Standard Rack Mounting...........................................................................6
For Zero U Models Using L-Bracket..........................................................9
For Zero U Models Using Tool-less Button Mounting.............................10
Rack Mount Safety Guidelines
In Raritan products which require Rack Mounting, follow these
precautions:
Operation temperature in a closed rack environment may be greater
than room temperature. Do not exceed the rated maximum ambient
temperature of the appliances (see Appendix A: Specifications).
Ensure sufficient airflow through the rack environment.
Mount equipment in the rack carefully to avoid uneven mechanical
loading.
Connect equipment to the supply circuit carefully to avoid
overloading circuits.
Ground all equipment properly, especially supply connections, to the
branch circuit.
Standard Rack Mounting
The Zero U units are provided with high
grade engineering polycarbonate isolation
hardware to allow fixing in a variety of
positions within the rack.
For panel/flush mount, pull out fixing
brackets are available on each end cap to
allow mounting on suitable rails.
See other options shown below.
Chapter 2 Rack-Mounting the Dominion PX

Chapter 2: Rack-Mounting the Dominion PX
7
Side Fixing
End Fixing
Blind Fixing

Chapter 2: Rack-Mounting the Dominion PX
8
The Zero U units are provided with high
grade engineering polycarbonate isolation
hardware to allow fixing in a variety of
positions within the rack.
For panel/flush mount, pull out fixing
brackets are available on each end cap to
allow mounting on suitable rails.
See other options shown below.
Side Fixing
End Fixing

Chapter 2: Rack-Mounting the Dominion PX
9
Blind Fixing
For Zero U Models Using L-Bracket

Chapter 2: Rack-Mounting the Dominion PX
10
1. Align the base-plates on the back of the Dominion PX unit and
tighten the thumb screws to secure them in place.
2. Unscrew the large buttons in the center of the base plates.
3. Align the L-Brackets with the base plates so that the five screw-holes
line up through the L-Bracket's slots. The rack-mount side of the
plates should face either the left or right side of the Dominion PX.
4. Fasten the L-brackets in place with at least three screws (one
through each slot). Use additional screws as desired.
5. Using rack screws, fasten the Dominion PX to the rack through the
L-Brackets.
For Zero U Models Using Tool-less Button Mounting
The Zero U units ship with tool-less mounting brackets consisting of an
adjustable base-plate with a large button on one side. These work by
attaching to the back side of a Zero U Dominion PX (the side opposite of
the outlets) and fitting the button into the mounting holes of the cabinet.
Note that not all racks may allow the option of securing the Dominion PX
in this way.
Before You Begin Tool-less Mounting:
•Ensure that you have sufficient space in the cabinet to mount the
Dominion PX. Approximately one inch of clearance is required at
each end (top and bottom) of the unit.
•It may help to mark the back of the Dominion PX through the
mounting holes you intend to use. You can then use this mark to
assist in aligning the silver buttons properly when attaching the base-
plate.
To Mount
Other manuals for Dominion Px
5
Table of contents
Other Raritan Power Distribution Unit manuals

Raritan
Raritan PX3TS User manual

Raritan
Raritan Dominion Px User manual

Raritan
Raritan PX3-1000 series User manual

Raritan
Raritan Dominion Px User manual

Raritan
Raritan PX3-4000 series User manual

Raritan
Raritan PX2 User manual

Raritan
Raritan PX2-1000 SERIES User manual

Raritan
Raritan Dominion Px User manual

Raritan
Raritan PXE User manual

Raritan
Raritan Dominion Px User manual