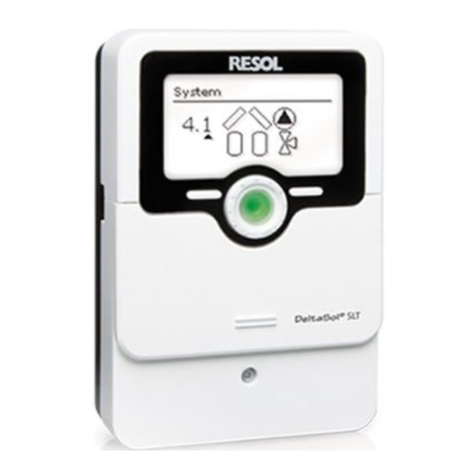
Resol DeltaSol SLT User manual

*11207361*
11207361
DeltaSol®
SLT
www.resol.com
Manual
en
Solar and heating controller
Manual for the specialised
craftsman
Installation
Operation
Functions and options
Troubleshooting
Thank you for buying this RESOL product.
Please read this manual carefully to get the best performance from this unit.
Please keep this manual safe.
The Internet portal for easy and secure access to
your system data – www.vbus.net
VBus.net
Beginning with rmware version 1.04

2
en
© 20170517_11207361_DeltaSol_SLT.monen
Safety advice
Please pay attention to the following safety advice in order to avoid danger and
damage to people and property.
Instructions
Attention must be paid to the valid local standards, regulations and directives!
Information about the product
Proper usage
The solar controller is designed for use in solar thermal systems and heating sys-
tems in compliance with the technical data specied in this manual.
Improper use excludes all liability claims.
CE Declaration of conformity
The product complies with the relevant directives and is therefore la-
belled with the CE mark.The Declaration of Conformity is available upon
request, please contact the manufacturer.
Note:
Strong electromagnetic elds can impair the function of the device.
ÎMake sure the device as well as the system are not exposed to strong
electromagnetic elds.
Subject to technical change. Errors excepted.
Target group
These instructions are exclusively addressed to authorised skilled personnel.
Only qualied electricians should carry out electrical works.
Initial installation must be effected by the system owner or qualied personnel
named by the system owner.
Description of symbols
WARNING! Warnings are indicated with a warning triangle!
ÎThey contain information on how to avoid the danger
described.
Signal words describe the danger that may occur, when it is not avoided.
• WARNING means that injury, possibly life-threatening injury, can occur.
• ATTENTION means that damage to the appliance can occur.
Note:
Notes are indicated with an information symbol.
ÎArrows indicate instruction steps that should be carried out.

3
en
Solar and heating controller DeltaSol®S LT
The DeltaSol®SLT effortlessly controls even complex systems. 27 pre-cong-
ured system layouts with numerous pre-programmed optional functions such as
thermal disinfection or zone loading enable adaptation to the individual system
requirements.
The operation via 2 main buttons and 1 adjustment dial, the Lightwheel®, still fol-
lows the well-known operating concept.The multicoloured LED, integrated in the
Lightwheel®, offers many possibilities to signal different system states.The MicroSD
card slot and the 2 microbuttons for quick access to the manual mode and the hol-
iday function are located underneath the slidable housing cover, the SLider.
Contents
1 Overview ..............................................................................................4
1.1 Optional functions.......................................................................................................5
2 Installation ...........................................................................................5
2.1 Mounting........................................................................................................................5
2.2 Electrical connection...................................................................................................6
2.3 Data communication / Bus ..........................................................................................6
2.4 MicroSD card slot........................................................................................................7
2.5 Mini-USB port...............................................................................................................7
2.6 LAN interface (optional)............................................................................................7
3 Step-by-step parameterisation ..........................................................7
4 Operation and function ......................................................................8
4.1 Buttons and adjustment dial......................................................................................8
4.2 Microbutton for manual mode and holiday mode................................................8
4.3 Control lamp.................................................................................................................9
4.4 Selecting menu points and adjusting values ...........................................................9
4.5 Menu structure...........................................................................................................13
5 Commissioning..................................................................................14
5.1 Basic systems and hydraulic variants .....................................................................16
5.2 Overview of relay and sensor allocation..............................................................17
6 Main menu .........................................................................................21
7 Status..................................................................................................21
7.1 Meas./ Balance values.................................................................................................21
7.2 Solar..............................................................................................................................22
7.3 Arrangement...............................................................................................................22
7.4 Heating .........................................................................................................................22
7.5 Messages ......................................................................................................................22
7.6 Ethernet .......................................................................................................................24
7.7 Service ..........................................................................................................................24
8 Solar....................................................................................................24
8.1 Basic solar settings.....................................................................................................24
8.2 Solar optional functions............................................................................................27
8.3 Holiday function .........................................................................................................40
8.4 Solar expert menu.....................................................................................................41
9 Arrangement .....................................................................................41
9.1 Optional functions.....................................................................................................41
10 Heating...............................................................................................50
10.1 Demands......................................................................................................................50
10.2 Optional functions.....................................................................................................50
11 HQM ...................................................................................................54
12 Basic settings .....................................................................................55
13 MicroSD card .....................................................................................58
14 Manual mode .....................................................................................60
15 User code ...........................................................................................60
16 In- / Outputs........................................................................................60
16.1 Inputs ............................................................................................................................61
16.2 Outputs........................................................................................................................61
17 Troubleshooting.................................................................................63
18 Accessories ........................................................................................66
18.1 Sensors and measuring instruments......................................................................67
18.2 VBus®accessories......................................................................................................67
18.3 Interface adapters ......................................................................................................68
19 Index ...................................................................................................69
4
en
1 Overview
• 4 relay outputs (incl. 1 extra-low voltage relay)
• 4 inputs for Pt1000, Pt500 or KTY temperature sensors
• Inputs for 1 analogue Grundfos Direct Sensor™ and 1 FlowRotor
• 1 V40 impulse input (also usable as a Pt1000, Pt500 or KTY tempera-
ture sensor input)
• 2 PWM outputs for speed control of high-efciency pumps
• MicroSD card slot, LAN interface (optional), mini-USB port
• Automatic function control according to VDI 2169
110
166
130
47
Technical data
Inputs: 4 inputs for Pt1000, Pt500 or KTY temperature sensors, 1 analogue
Grundfos Direct Sensor™, 1 FlowRotor, 1 V40 impulse input (also usable as a
Pt1000, Pt500 or KTY temperature sensor input)
Outputs: 3 semiconductor relays, 1 potential-free extra-low voltage relay, 2 PWM
outputs (switchable to 0-10V)
PWM frequency: 512 Hz
PWM voltage: 10.8 V
Switching capacity per relay:
1 (1) A 240 V~ (semiconductor relay)
1 (1) A 30 V⎓(potential-free relay)
Total switching capacity: 3 A 240 V~
Power supply: 100 … 240 V~ (50 … 60 Hz)
Supply connection: type Y attachment
Standby: 0.68 W (without LAN interface), 1.43 W (with LAN interface)
Temperature controls class: I
Energy efciency contribution: 1 %
Mode of operation: Typ 1.B.C.Y
Rated impulse voltage: 2.5 kV
Data interface:
RESOL VBus®, MicroSD card slot, LAN interface (optional), mini-USB port
VBus®current supply: 60 mA
Functions: DT control, pump speed control,heat quantity measurement, operating
hours counter for the relays, tube collector function, thermostat function, store
loading in layers, priority logic, drainback option, booster function, heat dump func-
tion, thermal disinfection function, PWM pump control, function control according
to VDI 2169.
Housing: plastic, PC-ABS and PMMA
Mounting: wall mounting, also suitable for mounting into patch panels
Display:
full graphic display, control lamp (Lightwheel®) and background illumination
Operation: 4 push buttons at the front and 1 adjustment dial (Lightwheel®)
Protection type: IP 20/ DIN EN 60529
Protection class: I
Ambient temperature: 0 … 40 °C
Degree of pollution: 2
Dimensions: 110 x 166 x 47 mm

5
en
1.1 Optional functions
Solar
Bypass
External heat exchanger
Tube collector
Target temperature
Antifreeze
Afterheating suppression
Parallel relay
Cooling mode
Drainback
Twin pump
Heat dump
Flow rate monitoring
Pressure monitoring
Arrangement
Parallel relay
Mixer
Zone loading
Error relay
Heat exchange
Solid fuel boiler
Circulation
Return preheating
Function block
Heating
Thermal disinfection
DHW heating
2 Installation
2.1 Mounting
WARNING! Electric shock!
Upon opening the housing, live parts are exposed!
ÎAlways disconnect the controller from power supply
before opening the housing!
Note:
Strong electromagnetic elds can impair the function of the device.
ÎMake sure the device as well as the system are not exposed to strong
electromagnetic elds.
The unit must only be located in dry interior rooms.
The controller must additionally be supplied from a double pole switch with contact
gap of at least 3 mm.
Please pay attention to separate routing of sensor cables and mains cables.
In order to mount the device to the wall, carry out the following steps:
ÎUnscrew the crosshead screw from the cover and remove it along with the
cover from the housing.
ÎMark the upper fastening point on the wall. Drill and fasten the enclosed wall
plug and screw leaving the head protruding.
ÎHang the housing from the upper fastening point and mark the lower fastening
points (centres 130 mm).
ÎInsert lower wall plugs.
ÎFasten the housing to the wall with the lower fastening screw and tighten.
ÎCarry out the electrical wiring in accordance with the terminal allocation, (see
page 6).
ÎPut the cover on the housing.
ÎAttach with the fastening screw.

en
6
Installation Indications, functions and options Messages
CommissioningOperation and function
2.2 Electrical connection
WARNING! Electric shock!
Upon opening the housing, live parts are exposed!
ÎAlways disconnect the controller from power supply
before opening the housing!
ATTENTION! ESD damage!
Electrostatic discharge can lead to damage to electronic com-
ponents!
ÎTake care to discharge properly before touching the
inside of the device! To do so, touch a grounded sur-
face such as a radiator or tap!
Note:
Connecting the device to the power supply must always be the last step
of the installation!
Note:
The pump speed must be set to 100% when auxiliary relays or valves are
connected.
The controller is supplied with power via a mains cable. The power supply of the
device must be 100 … 240 V~ (50 … 60 Hz).
The controller is equipped with 4 relays in total to which loads such as pumps,
valves, etc. can be connected:
• Relays 1 … 3 are semiconductor relays, designed for pump speed control:
• Conductor R1 … R3
• Neutral conductor N
• Protective conductor ⏚
• Relay 4 is a potential-free low voltage relay
Depending on the product version, mains cables and sensor cables are already con-
nected to the device. If that is not the case, please proceed as follows:
Temperature sensors have to be connected to the terminals S1 … S4 and GND
(either polarity).
Connect the Grundfos Direct Sensor™ to the S6 input.
Connect the FlowRotor to the S7 input.
A V40 owmeter can be connected to the terminals S5 / V40 and GND (either po-
larity).The terminals marked PWM are control outputs for a high-efciency pump
(convertible to 0-10V signal outputs, see page 61).
NN N N
R3 R2 R1 L
1234
56789
10 11
VBus
VBus
S5/V40
S4
S3
GND
S6
S7
Sensors
S2
S1
100 ... 240 V
T4A
50-60 Hz
N
R3
R2
R1
L
R1-R3|1 (1) A 240 V~R4|1 (1) A 30V
IP 20
R4
PWMA
0-10V
PWMB
0-10V
SD
R4
The mains connection is at the terminals:
Neutral conductor N
Conductor L
Protective conductor ⏚
Note:
For further information about heat quantity measurement with a Grundfos
Direct Sensor™ see page 54.
Note:
The connection depends on the system layout selected (see page 17).
Note:
For more details about the initial commissioning procedure see page 7.
2.3 Data communication / Bus
The controller is equipped with the RESOL VBus®for data transfer and energy
supply to external modules.The connection is carried out at the 2 terminals marked
VBus (any polarity).
One or more RESOL VBus®modules can be connected via this data bus, such as:
• RESOL DL2 Datalogger
• RESOL DL3 Datalogger
Furthermore, the controller can be connected to a PC or integrated into a network
via the RESOLVBus
®
/ USB or VBus
®
/ LAN interface adapter (not included). Different
solutions for visualisation and remote parameterisation are available on the RESOL
website www.resol.com. On the website, rmware updates are also available.
Note:
More accessories in page 66.

en
7
InstallationIndications, functions and optionsMessages Commissioning Operation and function
2.4 MicroSD card slot
The controller is equipped with a MicroSD card slot.
With a MicroSD card, the following functions can be carried out:
• Store measurement and balance values onto the MicroSD card.After the trans-
fer to a computer, the values can be opened and visualised, e. g. in a spreadsheet.
• Prepare adjustments and parameterisations on a computer and transfer them via
the MicroSD card.
• Store adjustments and parameterisations on the MicroSD card and, if necessary,
retrieve them from there.
• Download rmware updates from the Internet and install them on the controller
via MicroSD card.
MicroSD card slot
A MicroSD card is not included, but can be purchased from the manufacturer.
Note:
For more information about using a MicroSD card, see page 58.
2.5 Mini-USB port
The mini-USB port can be used for connecting the controller to a PC. It enables
a fast transmission of system data for processing, visualising and archiving as well
as the parameterisation of the controller. Different solutions for visualisation and
remote parameterisation are available on the RESOL website www.resol.com.
2.6 LAN interface (optional)
The controller is equipped with a LAN interface for connecting it to a computer or
router by means of a network cable (CAT5e, RJ45).
For more information about the LAN interface, see page 56.
3 Step-by-step parameterisation
The DeltaSol®SLT is a controller that offers a broad variety of functions to the
user.At the same time, the user has a lot of freedom in conguring them.Therefore,
to set up a complex system, careful planning is required.We recommend drawing a
sketch of the system rst.
If planning, hydraulic construction and electrical connection have all been carried
out successfully, proceed as follows:
1. Running the commissioning menu
The commissioning menu is run after the rst connection and after every reset. It
will request the following basic adjustments:
• Menu language
• Temperature unit
• Volume unit
• Pressure unit
• Energy unit
• Auto DST
• Time
• Date
• Selection: System or Scheme
• Scheme number (if selection = Scheme)
• Solar system (if selection = System)
• Hydraulic variant (if selection = System)
At the end of the commissioning menu, a security enquiry follows. If the security
enquiry is conrmed, the adjustments are saved.
For further information about the commissioning menu see page 14.
2. Registering sensors
If a owmeter, a ow switch, a FlowRotor and / or a Grundfos Direct SensorTM are
connected, these have to be registered in the Inputs / Outputs menu.
For detailed information about the registration of sensors see page 61.

en
8
Installation Indications, functions and options Messages
CommissioningOperation and function
3. Activating solar optional functions
The basic solar system has been adjusted during commissioning. Now, optional
functions can be selected, activated and adjusted.
Free relays can be allocated to optional functions which require a relay.The control-
ler always suggests the numerically smallest free relay.
Sensors can be allocated to more than one function.
For further information about the solar optional functions see page 27.
4. Activating optional arrangement functions
Now, optional functions for the non-solar part of the arrangement can be selected,
activated and adjusted.
Free relays can be allocated to optional functions which require a relay.The control-
ler always suggests the numerically smallest free relay.
Sensors can be allocated to more than one function.
For further information about the optional arrangement functions see page 41.
5. Activating heating optional functions
For the heating part of the arrangement, optional functions can be selected, acti-
vated and adjusted.
To optional functions which require one or more relays, the corresponding num-
ber of free relays can be allocated.The controller always suggests the numerically
smallest free relay.
Sensors can be allocated to more than one function.
For more information about heating optional functions, see page 50.
4 Operation and function
4.1 Buttons and adjustment dial
The controller is operated via 2 buttons and 1 adjustment dial (Lightwheel®) below
the display:
Left button (⟲)- escape button for changing into the previous menu
Right button (✓)- conrming / selecting
Lightwheel®- scrolling upwards / scrolling downwards, increasing adjustment
values / reducing adjustment values
4.2 Microbutton for manual mode and holiday mode
The controller is equipped with 2 microbuttons for quick access to the manual
mode and the holiday function.The microbuttons are located underneath the slida-
ble housing cover, the SLider.
Microbutton ☛: If the microbutton ☛ is briey pressed, the controller changes to
the manual mode menu (see page 60).
Microbutton ⛁: The microbutton ⛁is used for activating the holiday function
(see page 40). If the microbutton is pressed and held down
for approx. 3 s, the adjustment channel Days of absence ap-
pears, allowing to enter the number of days for an absence. If the
parameter is set to a value higher than 0, the function becomes
active using the adjustments that have previously been made in
the Holiday menu.The days will be counted backwards at 00:00.
If the value is set to 0, the function is deactivated.

en
9
InstallationIndications, functions and optionsMessages Commissioning Operation and function
4.3 Control lamp
The controller is equipped with a multicolour LED in the centre of the Lightwheel®,
indicating the following states:
Colour Permanently shown Flashing
Green
Everything OK Manual mode: at least one relay in manual oper-
ation
Red
Sensor line break, sensor short circuit, ow rate
monitoring, overpressure, low pressure
Yellow
Holiday function
active
DT too high, night circulation, FL / RE interchanged,
store maximum temperature exceeded, update in
progress, MicroSD card writing error
4.4 Selecting menu points and adjusting values
During normal operation of the controller, the display is in the status menu.
If no button is pressed for 1 min, the display illumination goes out. After 3 more
minutes, the controller switches to the Status menu.
In order to get from the Status menu into the Main menu, press the left button
(⟲)!
Press any key to reactivate the display illumination. In order to scroll through the
display channels, turn the Lightwheel®.
If the symbol »is shown behind a menu item, pressing the right button (✓) will
open a new sub-menu.
Values and adjustments can be changed in different ways:
Numeric values can be adjusted by means of a slide bar.The minimum value is indi-
cated to the left, the maximum value to the right.The large number above the slide
bar indicates the current adjustment.By turning the Lightwheel®, the upper slide bar
can be moved to the left or to the right.
Only after the adjustment has been con rmed by pressing the right button (✓) will
the number below the slide bar indicate the new value.The new value will be saved
if it is con rmed by pressing the right button (✓) again.
active area inactive area
When 2 values are locked against each other, they will display a reduced adjustment
range depending on the adjustment of the respective other value.
In this case, the active area of the slide bar is shortened, the inactive area is indicated
as a dotted line.The indication of the minimum and maximum values will adapt to
the reduction.

en
10
Installation Indications, functions and options Messages
CommissioningOperation and function
If only one item of several can be selected, they will be indicated with radio buttons.
When one item has been selected, the radio button in front of it is lled.
If more than one item of several can be selected, they will be indicated with check-
boxes.When an item has been selected, an xappears inside the checkbox.
If further menu items are available and the symbol is indicated on the upper
right-hand side of the display, more menu items can be accessed by turning the
Lightwheel®.
Adjusting the timer
When the Timer option is activated, a timer is in-
dicated in which time frames for the function can be
adjusted.
In the Day selection channel, the days of the week
are available individually and as frequently selected
combinations.
If more than one day or combination is selected, they
will be merged into one combination for the following
steps.
The last menu item after the list of days is Continue. If
Continue is selected, the timer menu opens, in which
the time frames can be adjusted.
Adding a time frame:
In order to add a time frame, proceed as follows:
ÎSelect New time frame
ÎAdjust Start and Stop for the desired time frame.

en
11
InstallationIndications, functions and optionsMessages Commissioning Operation and function
Copying a time frame:
In order to copy time frames already adjusted into
another day / another combination, proceed as follows:
ÎChoose the day / The combination into which the
time frames are to be copied and select Copy
from.
A selection of days and / or combinations with time
frames will appear.
ÎSelect the day or combination from which the
time frames are to be copied.
All time frames adjusted for the selected day or com-
bination will be copied.
If the time frames copied are not changed, the day or
combination will be added to the combination from
which the time frames have been copied.
The time frames can be adjusted in steps of 5 min.
ÎIn order to save the time frame, select Save and
con rm the security enquiry with Ye s .
ÎIn order to add another time frame, repeat the
previous steps.
6 time frames can be adjusted per day or combination.
ÎPress the left button (⟲) in order to get back to
the day selection.

en
12
Installation Indications, functions and options Messages
CommissioningOperation and function
Changing time frames:
In order to change a time frame, proceed as follows:
ÎSelect the desired time frame.
ÎMake the desired change.
ÎIn order to save the time frame, select Save and
con rm the security enquiry with Ye s .
Removing a time frame:
In order to delete a time frame, proceed as follows:
ÎSelect the time frame that is to be deleted.
ÎSelect Delete and con rm the security enquiry
with Ye s .
Resetting the timer:
In order to reset time frames adjusted for a certain day
or combination, proceed as follows:
ÎSelect the desired day or combination.
ÎSelect Reset and con rm the security enquiry
with Ye s .
The selected day or combination will disappear from
the list, all its time frames will be deleted.
In order to reset the whole timer, proceed as follows:
ÎSelect Reset and con rm the security enquiry
withYe s .
All adjustments made for the timer are deleted.

en
13
InstallationIndications, functions and optionsMessages Commissioning Operation and function
4.5 Menu structure
Main menu
Status
Solar
Arrangement
Heating
HQM
Basic settings
SD card
Manual mode
User code
In- / Outputs Arrangement
Optional functions
Basic setting
System
Collector
Store
Loading logic
Optional functions
Parallel relay
Mixer
Zone loading
Error relay
…
Heating
Demands
Optional functions
Solar
Basic setting
Optional functions
Function control
Holiday function
Expert
The menu items and adjustment values selectable are variable depending on adjust-
ments already made.The gure only shows an exemplary excerpt of the complete
menu in order to visualise the menu structure.
Basic settings
Language
Auto DST
Date
Time
Temp. unit
Vol. unit
…
In- / Outputs
Inputs
Outputs
Parallel relay
Relay
Reference relay
Overrun
Delay
Speed
Inverted
…

en
14
Installation Indications, functions and options Messages
CommissioningOperation and function
5 Commissioning
When the hydraulic system is lled and ready for operation, connect the controller
to the mains.
The controller runs an initialisation phase in which the Lightwheel® ashes red.
When the controller is commissioned or when it is reset, it will run a commis-
sioning menu after the initialisation phase.The commissioning menu leads the user
through the most important adjustment channels needed for operating the system.
Commissioning menu
The commissioning menu consists of the channels described in the following. In or-
der to make an adjustment,adjust the value by turning the Lightwheel® and con rm
by pressing the right button (✓).The next channel will appear in the display.
Adjustment mode
Operation
Changing a value
Con rming a value
Next parameter
1. Language:
ÎAdjust the desired menu language.
2. Units:
ÎAdjust the desired temperature unit.
ÎAdjust the desired volume unit.
ÎAdjust the desired pressure unit.
ÎAdjust the desired energy unit.

en
15
InstallationIndications, functions and optionsMessages Commissioning Operation and function
4. Time:
ÎAdjust the clock time. First of all adjust the hours,
then the minutes.
5. Date:
ÎAdjust the date. First of all adjust the year, then the
month and then the day.
3. Daylight savings time adjustment:
ÎActivate or deactivate the automatical daylight
savings time adjustment.
8. Completing the commissioning menu:
After the system has been selected or the scheme
number has been entered respectively, a security en-
quiry appears. If the security enquiry is con rmed, the
adjustments are saved.
ÎIn order to con rm the security enquiry, press the
right button (✓).
ÎIn order to reenter the commissioning menu
channels, press the left button (⟲). If the secu-
rity enquiry has been con rmed, the controller is
ready for operation and normally the factory set-
tings will give close to optimum operation.
Note:
The adjustments carried out during commis-
sioning can be changed anytime in the cor-
responding adjustment channel. Additional
functions and options can also be activated or
deactivated.
Set the code to the customer code be-
fore handing over the controller to the
customer (see page 60).
7b. Selection of the solar system (if 6. = System):
ÎAdjust the desired solar system (number of collec-
tors and stores, hydraulic variants).
6. Selection: System or Scheme
ÎChoose whether the controller is to be con gured
with a scheme number or with a system and a var-
iant.
7a. Scheme (if 6. = Scheme)
ÎEnter the scheme number of the desired system.

en
16
Installation Indications, functions and options Messages
CommissioningOperation and function
5.1 Basic systems and hydraulic variants
System
The controller is pre-programmed for 4 basic systems. The selection depends on
the number of heat sources (collector elds) and heat sinks (stores, pool). Factory
setting is system 1.
A solar system with store loading in layers is
implemented as a 2-store system
(store top = store 1; store bottom = store 2).
System 0: no solar system
System 1: 1 collector eld - 1 store
System 2: East / west collectors - 1 store
System 3: 1 collector eld - 2 store
System 4: East / west collectors - 2 store
The selection of the basic solar system is one of the most important adjustments
and is thus requested already in the commissioning menu.
First, the basic system is adjusted by means of the number of stores and collectors
elds, then the hydraulic variant.
The selected system is visualised by the corresponding number of store and collec-
tor symbols.The gure to the left shows system 4 which consists of 2 stores and 2
collector elds (“east- / west collectors”).
Variant
The hydraulic variant refers to the different actuators that are to be controlled.
They are visualised on the display by means of symbols, when the variant is selected.
The upper symbol indicates the actuator belonging to the collector elds, the lower
one the actuators belonging to the stores.
The exemplary gure shows the display indicated when system 4, variant 1 has
been selected. In this case, each collector eld has a pump, the stores are loaded by
means of valve logic.
For each variant, the controller allocates the corresponding relays and sensors.The
allocations of the most important combinations are shown in chap. 5.2.

en
17
InstallationIndications, functions and optionsMessages Commissioning Operation and function
5.2 Overview of relay and sensor allocation
System 1
R1; A
S1
S2
System 2 variant 1
S1 S3
R1; A
R2; B
S2
Sensors
Collector 1 S1
Store base S2
Relay; PWM / 0-10 V
Solar pump R1; A
Sensors
Collector 1 S1
Store base S2
Collector 2 S3
Relay; PWM / 0-10 V
Pump collector 1 R1; A
Pump collector 2 R2; B

en
18
Installation Indications, functions and options Messages
CommissioningOperation and function
S1 S3
R1 R2
S2
R3; A
System 2 variant 2 System 3 variant 1
S1
R2
R1; A
S2
S4
Sensors
Collector 1 S1
Store base S2
Collector 2 S3
Relay; PWM / 0-10 V
2-PV collector 1 R1
2-PV collector 2 R2
Solar pump R3;A
Sensors
Collector S1
Store 1 base S2
Store 2 base S4
Relay; PWM / 0-10 V
Solar pump R1; A
3-PV store 2 R2

en
19
InstallationIndications, functions and optionsMessages Commissioning Operation and function
System 3 variant 2 System 3 variant 3
R1;
A
R2 R3
S2
S4
S1
S1
R1; A R2; B
S4
S2
Sensors
Collector S1
Store 1 base S2
Store 2 base S4
Relay; PWM / 0-10 V
Solar pump store 1 R1; A
Solar pump store 2 R2; B
Sensors
Collector S1
Store 1 base S2
Store 2 base S4
Relay; PWM / 0-10 V
Solar pump R1; A
2-PV store 1 R2
2-PV store 2 R3

en
20
Installation Indications, functions and options Messages
CommissioningOperation and function
System 4 variant 1
R1;
A
R2; B R3
S2 S4
S1 S3
Sensors
Collector 1 S1
Store 1 base S2
Collector 2 S3
Store 2 base S4
Relay; PWM / 0-10 V
Pump collector 1 R1; A
Pump collector 2 R2; B
3-PV store 2 R3
Table of contents
Other Resol Controllers manuals

Resol
Resol DeltaSol KS User manual

Resol
Resol EC1 User manual

Resol
Resol DeltaSol E User manual

Resol
Resol DeltaSol MX User manual

Resol
Resol DeltaSol AX HE User manual

Resol
Resol DeltaSol MiniPool User manual

Resol
Resol DeltaSol E User manual

Resol
Resol DeltaSol AL Guide

Resol
Resol ER3 User manual

Resol
Resol FriwaMaster User manual

Resol
Resol DeltaSol SL User manual

Resol
Resol DeltaTherm FK User manual

Resol
Resol DeltaTherm HC mini User manual

Resol
Resol DeltaSol BS Plus User manual

Resol
Resol DeltaSol BS Plus User manual

Resol
Resol DeltaSol Plus User manual

Resol
Resol DeltaSol BS Plus User manual

Resol
Resol DeltaSol BX User manual

Resol
Resol DeltaSol SLL Owner's manual

Resol
Resol DeltaSol BX L User manual