Respirex Simplair Hood User manual

Simplair Hood
Instructions for use
BS\004\D\2021
EN14605:2005+A1:2009
TYPE PB[3], TYPE PB[4]
EN

Contents
General Information..............................................................................1
Warnings & Limitations.........................................................................1
Pre-Checks Before Use........................................................................2
Compressed Air Supply Tube (CAST) ..................................................2
Maximum And Minimum Airow (litres/minute)....................................3
Checking Airow ..................................................................................3
Minimum Flow Warning Device............................................................3
Donning ................................................................................................4
Inspection & Replacement Of Component Parts .................................4
Removal & Replacement Of Control Waist Belt ...................................5
Silencer Replacement ..........................................................................5
Replacing Removable Visor (Rigid Visor Model Only)..........................6
Replacing Exhalation Valve Diaphragm................................................6
Replacing Exhalation Valve Assembly..................................................8
Cleaning ...............................................................................................9
Storage.................................................................................................9
Product labelling.................................................................................10
Sizing..................................................................................................11

General Informa on
The Respirex Simplair hood is designed for use within certain contaminated environments only. You should carefully read and
follow the opera ng procedures detailed in these instruc ons.
The hood must be used in combina on with breathable air supplied from an external compressed air source that provides posi ve
pressure. Air fl owing into the hood must conform to the requirements of EN 12021:2014.
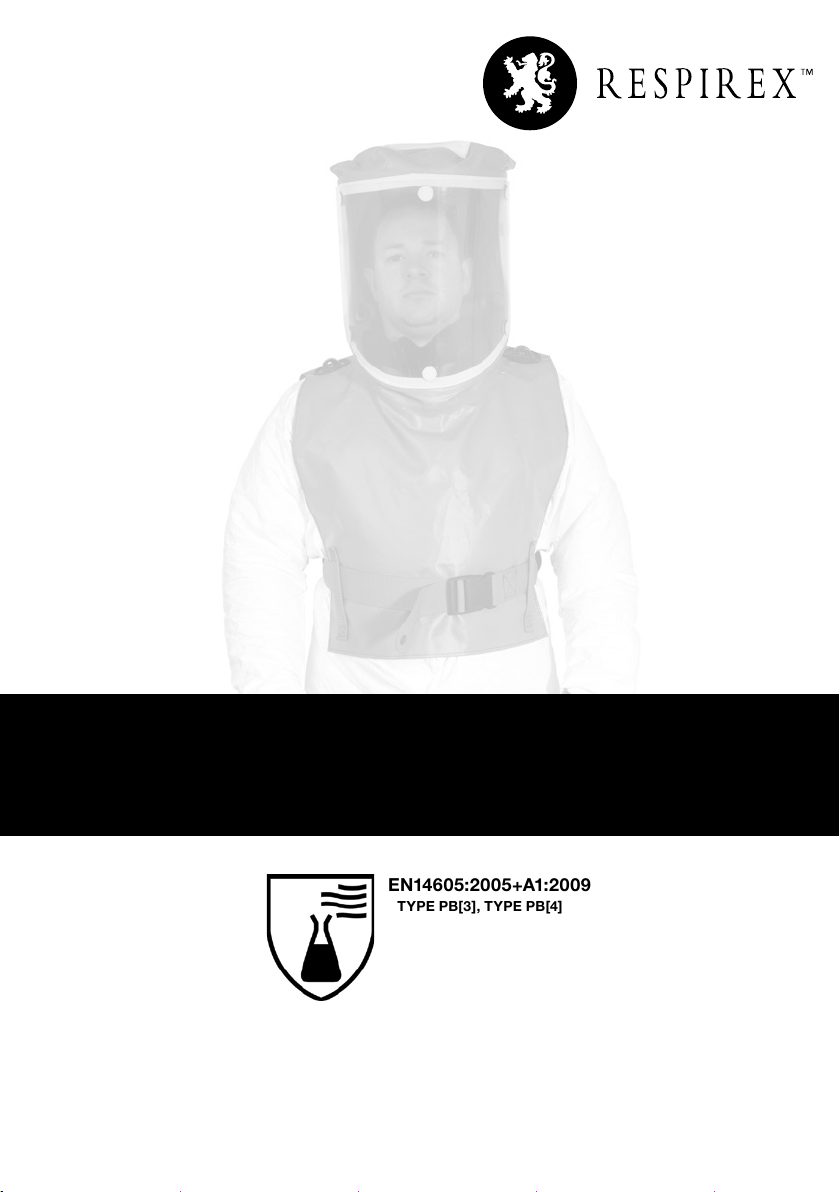
The Simplair hood is divided into two main sec ons; headtop assembly and air supply belt assembly. The headtop assembly meets
the lower strength requirements of EN 14594:2005, whilst the air supply belt meets the higher strength requirements. The product
is UKCA and CE marked to indicate compliance with European Regula on 2016/425 on personal protec ve equipment (PPE) and
Regula on 2016/425 on personal protec ve equipment as brought into UK law and amended, and complies with the following
harmonized and designated standards:
• Headtop assembly - EN 14594:2005 (con nuous fl ow compressed air line breathing apparatus with a hood) - Class 4A
• Air supply belt assembly - EN 14594:2005 (con nuous fl ow compressed air line breathing apparatus) - Class 4B
• EN 14605:2005+A1:2009 (protec ve clothing against liquid chemicals - clothing providing protec on to parts of the body
only (PB [4])
The standards above specify the physical performance requirements of the equipment, i.e. level of respiratory protec on and
mechanical strength of component parts etc, and also the resistance to permea on by liquids of the main material of construc on*.
The hood offers a nominal protecon factor of 2000 as detailed in the guidance document for respiratory protecve equipment,
EN 529:2005. The UKCA and CE Declarations of Conformity can be found at www.respirex.com/doc
* Performance results for the main material of construc on are detailed on a separate data sheet supplied with the hood.
Warnings & Limita ons
• Only for use by trained, competent personnel.
• Always seek advice if you are in any doubt as to the suitability of the Simplair hood for your par cular working environment.
Refer to rear of user instruc ons for contact details.
• Failure to follow all instruc ons and/or failure to wear the Simplair hood during all mes of exposure may be detrimental to
the wearer’s health.
• At high work rates pressure in the hood may become nega ve at peak inhala on fl ow or during bending or squa ng.
• The hood may not provide adequate protec on in atmospheres that are immediately dangerous to life or health (IDLH). Use
only in atmospheres where the oxygen content of the air is 18-23 vol.%.
• The hood must NOT be used with oxygen only or oxygen enriched air.
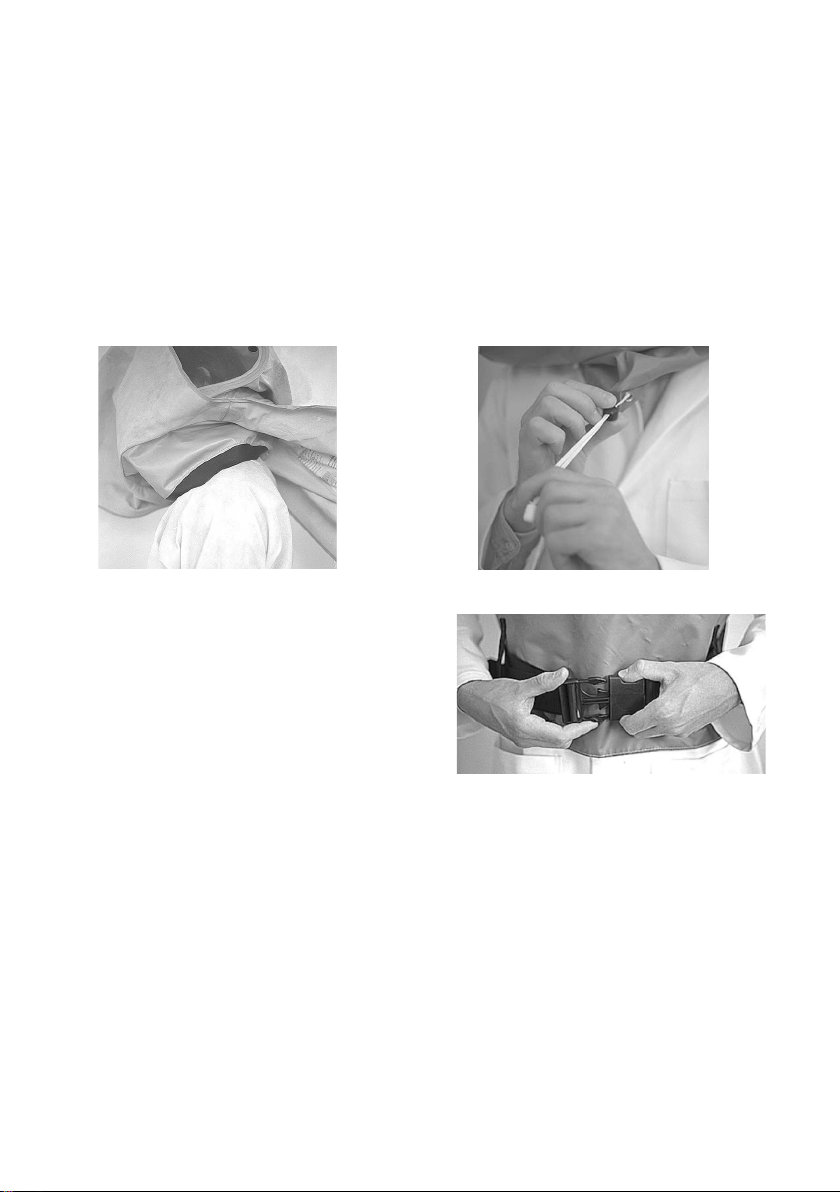
• Ensure the hood is used with a compressed air supply tube (CAST) of appropriate length and bore size (see page 2); a low
airfl ow may cause a reduced level of protec on.
• The equipment is designed to work on a range of air line pressures. The Simplair hood is supplied pre-set by Respirex to
operate at the end users specifi c air line pressure (the maximum airline pressure that the hood can be set to is 8.27 bar {120
lbf/in²}).
• The Simplair hood provides par al body protec on to classifi ca on PB [4] as defi ned by the harmonized standard
EN14605:2005+A1:2009. Seek alterna ve PPE if full body protec on is required. Always use compa ble PPE, e.g. gloves and
safety boots advised by Respirex.
• The Simplair hood is manufactured from non-breathable materials; it is likely that the wearer’s body temperature will rise
during use, par cularly throughout periods of intense physical ac vity. Users who show signs of excessive stress such as
fever, nausea, dizziness, eye irrita on, diffi culty in breathing, becoming fa gued or any unusual order or taste, should leave
the working environment immediately and remove the hood. Wherever possible opera onal procedures should be planned
to minimize the risk of heat stress occurring. Respirex assumes no responsibility for improper use of the Simplair hood.
• If the hood is to be used in low temperatures and mis ng of the visor occurs, apply Respirex FOG OFF to the inner and outer
surfaces of the visor.
• The Simplair hood is not designed to be used for abrasive blas ng opera ons or in applica ons with a high fl ammability risk.
Alterna ve PPE off ering the necessary level of protec on should be u lised for such applica ons.
• The Simplair hood should not be worn in working environments where protec on against non-ionizing radia on is necessary.
• Materials used in the construc on of the Simplair hood are not known to cause allergic reac ons to the majority of individuals.
The hood contains no components made from natural rubber latex.
For any enquiries please contact the Respirex customer services department on Tel : +44 (0)1737 778600 or Fax : +44 (0)1737
779441.
1

Pre-Checks Before Use
Under the Control of Substances Hazardous to Health (COSHH) regulations 2002 and the Personal Protective Equipment
(EC Directive) regulations 1992, a thorough examination of respiratory protection equipment (RPE) is required to be
undertaken in a clean area at least once per month if the garment has not been used. When in use Respirex recommend
that the RPE is always checked before the start of each shift cycle. These inspections are required to ensure that the RPE
will perform as intended and is free from defects.
Each inspection should be recorded and the following noted : date, serial number, name of examiner, condition of
the equipment and details of any defect found. The inspection records should be kept by relevant Health & Safety
departments for a period of at least ve years.
1. Visually inspect the hood for any damage that may impair the correct working of the garment .
2. Check correct airow into the hood. The hood will be marked with its working pressure which must correspond to
the airline pressure as indicated by the pressure gauge at the airline supply outlet point. Ensure that the silencer
is clean and free of any contamination from the airline. The silencer must be replaced if it is contaminated
to any extent.
3. The hood is free from contamination both internally and externally.
4. The identication number is clearly legible in the hood.
5. The hood materials are free from tears and holes; pay particular attention to the seam areas.
6. The waist belt air attachment is secure and undamaged.
7. Vision through the visor is not impaired by scratches or scu marks. On hoods tted with rigid visors a removable
outer visor can be tted which prevents damage to the main visor. This can be changed by simply peeling away
from the Velcro fasteners and replaced with a new outer visor.
8. It is recommended that the exhalation valves are part of the visual pre-check. If the valve diaphragm is distorted or
damaged in any way it must be replaced (see page 6).
9. Ensure that the rubber neck seal (if tted) is not torn or damaged and is still capable of sealing around the neck. If a
drawstring neck seal is tted ensure that the cord is intact and that the toggle will give a good seal around the neck.
An inspection of the compressed air supply tube (CAST) which supplies breathing quality air to the operator should be
carried out at least once per month and before each shift cycle and the results recorded.
During the inspection the following should be checked:
1. The CAST is clean externally.
2. The CAST is free from damage (holes, splits, etc.).
3. Air line coupling connections are in good condition and non-return valves are in good working order.
Submerge in water to locate any leaks if any sign of damage is evident. Report any defects to the supervisor and record
them. The CAST must NOT be used until the defect has been rectied.
Compressed Air Supply Tube (CAST)
It is recommended that a CAST with a minimum internal diameter bore diameter of 9.5mm (3/8”) is used in combination
with the Simplair hood. The CAST must meet the requirements of EN 14594:2005. If CASTs and couplings not supplied
by Respirex are to be used they should be suitable for the intended purpose and conform to the requirements of EN
14594:2005 (a sample must be supplied to Respirex to enable the correct airow settings to be achieved).
Notes:
To ensure compliance with product type approval, CASTs marked ‘A’ (indicating suitability for use with Class A devices)
should not be used with the Simplair hood.
CAST must conform to the strength requirements necessary for a Class 4B device, as specied by EN14594:2005.
Respirex supply the Simplair hood pre-set to deliver the correct rate of airow that coincides with the end user’s supplied
airline pressure, (as notied to Respirex) this will be indicated on the airline waist belt label. End users shall assure
themselves that the pressure range of the air supply to the apparatus is within the limits recommended by Respirex.
2

3
Maximum And Minimum Airow (litres/minute)
Airow to the hood must be within the range:
Maximum 280 l/min.
Minimum 220 l/min.
This must be checked prior to each use by means of the Respirex airow meter (see below).
RESPIREX
AIR
l/min
HOOD
BLOUSE
SUIT
220
280
360
440
270
340
SCREW TUBE CONNECTOR
ONTO AIR MANIFOLD.
CONNECT TO AIR SUPPLY.
FLOW METER
Fig. 1.
Checking Airow
1. Lay the hood open to allow access to the air system.
2. Unscrew the connecting collar from the air manifold.
3. With the Respirex ow meter on at a level surface, screw the tube connector from the ow meter onto the air manifold.
4. Connect the garment onto the air supply and measure the airow on the meter. See above for correct ow rates.
5. Disconnect the ow meter and reconnect the air system. If you are unable to achieve the airows indicated the silencer
should be replaced.
Note : Respirex recommend that end users set up their own silencer replacement programme. This will be determined by the
quality of the air and the frequency of use of the hood.
Minimum Flow Warning Device
1. With the Respirex ow meter connected to the air system turn the air pressure down to obtain the minimum airow
into the garment.
2. When the minimum airow is reached the low ow warning device will sound a high pitch whistle.
3. After checking the low ow warning device set the air pressure back to the correct working pressure.

4
Donning
It is strongly recommended that before anybody attempts to wear or use an air supplied garment full training is given on
wearing and decontamination by a competent person and the details of the training recorded.
Connect a compressed air supply tube (CAST) to an air source supplying air conforming to the requirements of EN
12021:2014.
Connect the Simplair hood to the CAST making sure that the couplings are tted together correctly. Pull lightly on both
hoses to make sure they are attached securely.
Check the airow to ensure that the correct amount of air is being delivered to the hood.
Put on the Simplair hood making sure that it sits evenly on the shoulders.
Pull down the back cape making sure that it lays at.
On rubber neck seal models ensure that the rubber grommet is seated correctly without any creases or folds that may
allow air too much air to escape (Fig. 2).
On drawstring neck seal models lift up the front cape then carefully tighten the seal to a comfortable level until secure
around the neck (Fig. 3).
Fig. 2. Fig. 3.
Pull down the front cape, make sure it is lying at, then pass
the waist belt through the belt loops and fasten the belt buckle.
Adjust the waist belt until comfortable (Fig. 4).
Re-check air pressure and adjust if necessary.
With air owing into your Simplair hood you are now ready to
enter the work area.
If necessary a hard safety hat can be worn inside the Simplair
hood. This should be worn according to the manufacturers
instructions.
Inspection & Replacement Of Component Parts
A regular inspection and replacement program should be conducted by end users.
The Simplair hood and all component parts and assemblies should be inspected for damage or excessive wear before and
after each use to ensure proper functioning. Immediately remove the hood from service and replace parts or assemblies
that show any signs of failure or excessive wear that might reduce the degree of protection originally intended.
Use only approved Respirex components and replacement parts.
Fig. 4.

5
Removal & Replacement Of Control Waist Belt
1. Lay the hood assembly on a clean at surface and lift up the front cape.
2. Unscrew the retaining ring from the bulkhead (Fig. 5).
3. Pull the breathing air tube assembly away from the control waist belt.
4. Release the two pop studs on the waist belt (Fig. 6) and slide the waist belt out through the belt loops.
Before tting a control waist belt check there is a new silencer tted and that it is securely screwed into the bulkhead.
Fig. 5. Fig. 6.
Silencer Replacement
1. Lay the hood assembly on a clean at surface and lift up the front cape.
2. Unscrew the retaining ring from the bulkhead (Fig. 5).
3. Pull the breathing air tube assembly away from the control waist belt.
4. Unscrew the silencer from the bulkhead (Fig. 7).
5. Screw a new silencer into the bulkhead.
6. Locate the breathing air tube assembly over the bulkhead and tighten the retaining ring .
Check that the Simplair hood is working correctly and that there are no air leaks before use.
Fig. 7.

6
Replacing Removable Visor (Rigid Visor Model Only)
1. Carefully peel the removable visor from the Velcro discs.
2. If necessary clean the rigid visor before tting a new removable visor.
3. Remove the protective lm from the new removable visor.
4. Locate the centre discs at the top and bottom of the removable visor on to the centre discs on the hard visor.
5. Wrap the removable visor around each side of the rigid visor lining up all the xing discs and rmly press together
(Fig. 8).
Fig. 8.
Replacing Exhalation Valve Diaphragm
1. Using a torque driver with a ‘T8’ Torx bit, loosen and remove the screw from the centre of the exhalation valve, then
remove the cap.
2. Carefully slide the diaphragm up the central spigot and remove from the exhalation valve body.
3. Check that there is no dust, debris or contamination of any kind in the exhalation valve body.
4. Carefully slide a new diaphragm down the central spigot until it rests evenly on the valve body. Ensure the diaphragm
is correctly orientated with the ridged side uppermost (Fig. 10 ).
5. Replace the exhalation valve cap and ensure the two location channels engage with the locating keys on either
side of the valve body. Note: When correctly located, the valve cap will not rotate independently on the valve body.
6. Replace the centre screw, turn by hand two times to engage the thread with the valve body, then fully tighten using
a torque driver set to 23 ± 2 cNm.

Valve cap
Diaphragm
Valve body
No4 x 1¼ ‘Torx’
C/sk screw
Locating key
Locating
channel
Fig. 9.
Ensure the diaphragm is
seated evenly on the valve
body with ridged side uppermost
Fig. 10.
7

Retaining ring.
Rubber sealing washer.
Two pin wrench.
Rubber sealing washer.
Valve assembly
Fig. 11.
Replacing Exhalation Valve Assembly
1. Lay the hood on a clean at surface and open fully at the waist to allow access to the interior of the hood.
2. Using a two pin wrench (Tool No. G01486) locate the pins into the two holes in the exhalation valve-retaining ring
and unscrew.
3. Remove the rubber sealing washer.
4. From the outside of the hood carefully remove the exhalation valve assembly.
5. New exhalation valve assemblies will have all component parts screwed together, therefore prior to tting remove
the retaining ring and one of the rubber sealing washers.
6. Check that the remaining rubber sealing washer is laying at against the valve body.
7. Locate the thread on the exhalation valve assembly through the hole at the rear of the hood.
8. Locate the second rubber sealing washer around the thread on the valve body so that it is lying at against the
material of the hood.
9. Hand tighten the retaining ring onto the exhalation valve.
10. Check that the exhalation valve is orientated correctly (the Respirex lettering should be at the top of the valve and
the three slots under the cover must be at the bottom).
11. Tighten the retaining ring using the two pin wrench (Tool No. G01486, see Fig. 12).
Fig. 12.
8

Cleaning
Respirex do not recommend laundering the hood. If the hood becomes dirty it should be cleaned by wiping the outer
surfaces with a sponge using a solution of Citikleen* and warm water (temperature not exceeding 50°C), followed by rinsing
with cold water. Inner surfaces of the hood should be sprayed with Synodor to kill all bacteria.
Do not use solvents or strong cleaning and disinfecting agents as these can damage the visor and valve seals.
Care should be taken to prevent water entering the exhalation valves, air supply hoses and ow control waist belt assembly.
The air supply hoses should be cleaned by wiping with a sponge using warm water and a mild detergent, rinsed and air dried.
Do not allow water to enter the air supply hoses.
*Mix one part Citrikleen to 19 parts water, i.e 5% solution. Never use Citrikleen in neat form as this will cause damage to the
hood materials.
Both Citrikleen & Synodor can be supplied by Respirex.
The hood should be hung in a warm room to dry (temperature should not exceed 30°C), if there is a possibility that water or
cleaning agent has entered the air system, air should be passed through the air system until it is dry.
Warnings
HAND WASH ONLY
DO NOT SPIN
DO NOT DRY CLEAN
DO NOT BLEACH
DO NOT IRON
DO NOT TUMBLE DRY
DO NOT USE AGGRESSIVE CLEANING POWDERS
DO NOT SCRUB THE SURFACE OF THE FABRIC
Storage
The Respirex Simplair hood is supplied with a three point hanging system, there are loops on the head and shoulders that
allow the hood to be hung on a three point hanging frame. The Respirex three point hanging frame is designed to allow the
hood to be hung without distortions to the visor (Fig. 13).
If the hood is to be stored in a box or container it should be folded so that the pipes are not twisted and the visor is not
distorted.
9
Fig. 13.
Always store the hood in a dry condition
Note: In order to maintain the level of protection oered, care should
be taken to minimize the risk of damage occurring to the Simplair Hood
during transportation between work areas. It is recommended that
all Simplair Hoods are transported in a suitably sized rigid container
resistant to penetration by sharp objects, abrasive surfaces, chemicals,
oils, solvents etc.

Product labelling
1. Manufacturer of garment and address:
Respirex Interna onal Ltd.
2. Manufacturer’s Model number
3. Material of Manufacture.
4. Manufacturer’s Order No.
5. Customer Name.
6. Date of manufacture: Day/Month/Year.
7. Standard Garment Size for wearer
Body Height (cm) Waist Girth (cm)
158 - 194 60 - 112
info@respirex.co.uk
EN14605:2005+A1:2009
TYPE PB[4]
FAX +44 (0)1737 779441
TEL +44 (0)1737 778600
8. CE and UKCA mark including No fi ed Body and Approval Body code.
9. “Open Book Pictogram”; wearer must refer to the “Instruc ons for use” for further informa on.
10. Pictogram defi ning protec on types: Par culate Radia on Pictogram
11. Five care pictograms indica ng that clothing is not suitable for cleaning and reuse.
• Pictogram 1 Hand wash
• Pictogram 2 Do not bleach
• Pictogram 3 Do not iron
• Pictogram 4 Do not machine dry
• Pictogram 5 Do not dry clean
11
7
10
1
8
6
9
3
5
4
2
10

158 - 194
60 - 112
Waist girth Body height
60-112 158-194
Body measurements in cm
Sizing
The following pictogram designates the range of height & waist sizes suitable for the Respirex Simplair hood, check your
body measurements to make sure you are suitable. Body measurements in cm.
11


RESPIREX INTERNATIONAL LTD,
Unit F Kingsfield Business Centre,
Philanthropic Road,
Redhill,
Surrey RH1 4DP
United Kingdom
Tel. +44 (0) 1737 778600
Fax.+44(0) 1737 779441
www.respirexinternational.com
Module B and D
Type Examination By:
BSI,
Davy Avenue, Knowhill,
Milton Keynes, MK5 8PP,
ENGLAND
BSI Group The Netherlands B.V.
Say Building, John M. Keynesplein 9,
1066 EP,
Amsterdam, NETHERLANDS
UK Approved Body No. 0086 Notied Body No. 2797
RESPIREX GmbH
Wilthener Straße 32
Gebäude 4a,
D-02625,
Bautzen
DEUTSCHLAND
+49 (0)3591-5311290
+49 (0)3591-5311292
Table of contents
Other Respirex Safety Equipment manuals

Respirex
Respirex Frontair 2 Suit User manual

Respirex
Respirex WORKMASTER DIELECTRIC Operation manual

Respirex
Respirex MFC International STAKJAK KSM17 User manual

Respirex
Respirex PRPS (T) User manual

Respirex
Respirex WORKMASTER COMPACT DIELECTRIC OVERBOOT Operation manual

Respirex
Respirex Airprotex AF User manual

Respirex
Respirex WORKMASTER DIELECTRIC OVERBOOTS Operation manual

Respirex
Respirex Workmaster HAZMAX FPA Operation manual

Respirex
Respirex WORKMASTER DIELECTRIC Operation manual

Respirex
Respirex Flo-Pod User manual