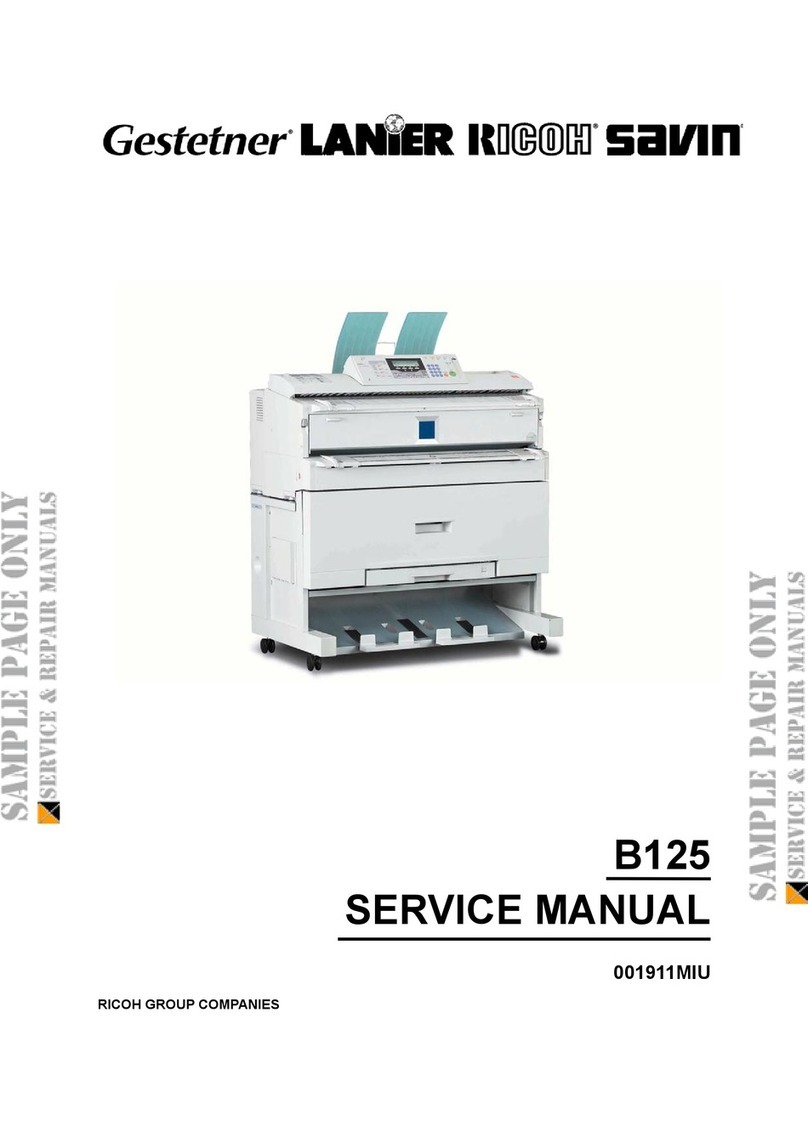
Ricoh FW750 User manual

i
SAFETYINFORMATION
When using your machine, the following safety precautions should be always be followed.
In this manual, the following important symbols are used:
R
WARNING:Ignoring this warning could cause serious injury or even death.
R
CAUTION: Ignoring this caution could cause injury or damage to property.
Symbol Rmean a situation that requires you take care.
Symbol vmean “Hot surface”.
Do NOT carry out the operation represented by this symbol m.
This example means “Do not take apart”.
Symbols lmean you MUST perform this operation.
This example means “You must remove the wall plug”.
INTRODUCTION
This copier is a console plain papercopier carefully manufactured to exacting standards of high
performance. it consistently yields high contrast copies with a superior finish.
This manual contains detailed instructions on the operation and maintenance of this copier. To get
maximum versatility from this copier, all operators should carefully read and follow the instruc-
tions in this manual. Please keep this manual in a handy place near the copier.
Please read the next section before using this copier. It contains important information related to
USER SAFETY and PREVENTING EQUIPMENT PROBLEMS.
SafetyDuringOperation
ExamplesOfIndications
R
v
q
r

ii
• Only connect the machine to the power source described on the
inside front cover of this manual.
• Avoid multi-wiring.
• Do not damage, break or make any modifications to the power
cord. Do not place heavy objects on it, pull it hard or bend it more
than necessary. These actions could cause an electric shock or
fire.
• Do not plug or unplug the power cord with your hands wet. Other-
wise, an electric shock might occur.
• Make sure the wall outlet is near the machine and freely acces-
sible so that in event of an emergency it can be unplugged easily.
• Do not remove any covers or screws other than those specified
in this manual. Some parts of the machine are at a high voltage
and could give you an electric shock. Also, if the machine has
laser systems, direct(or indirect)reflected eye contact with the
laser beam may cause serious eye damage. When the machine
needs to be checked, adjusted, or repaired, contact your service
representatives.
• Do not take apart or attempt any modifications to this machine.
There is a risk of fire, electric shock, explosion or loss of sight. If
the machine has laser systems, there is a risk of serious eye
damage.
• If the machine looks damaged or breaks down, smoke is coming
out, there is a strange smell or anything looks unusual, immedi-
ately turn off the operation and main power switches then unplug
the power cord from the wall. Do not continue using the machine
in this condition. Contact your service representative.
• If metal, liquid, or foreign matter falls into the machine, turn off the
operation and main power switches, and unplug the main power
cord. Contact your service representative. Do not keep using the
machine with a fault or defect.
• Do not put any metal objects or containers holding water(e.g.
vases, flowerpots, glasses) on the machine. If the contents fall
inside the machine, a fire or electric shock could occur.
RR
RR
R WARNING:
m
r
q
o
m

iii
• Do not incinerate used toner, toner bottles or toner cartridges.
Toner dust might ignite when exposed to an open flame. Dispose
of the used toner cartridges according to local regulations for
plastics.
s

iv
• Keep the machine away from humidity and dust. A fire or an
electric shock might occur.
• Do not place the machine on an unstable or tilted surface. If it
topples over, it could cause injury.
• After you move the machine, fix it with the caster fixture. Other-
wise, the machine might move or come down to cause a per-
sonal injury.
• When you move the machine, unplug the power cord from the
wall outlet to avoid fire or electric shock.
• When the machine will not be used for a long time, unplug the
power cord.
• When you pull out the plug from the socket, grip the plug to avoid
damaging the cord and causing fire or electric shock.
• If you use the machine in a confined space, make sure there is a
continuous air turnover.
• Do not reuse stapled paper. Do not use aluminium foil, carbon
containing paper or other conductive paper. Otherwise, a fire
might occur.
• When removing misfed paper, do not touch the fusing section
because it could be very hot.
• This machine has been tested for safety using this supplier’s
partsandconsumables.Werecommendyou only use thesespeci-
fied supplies.
• Do not eat or swallow toner.
• Keep toner(used or unused) and toner cartridges out of reach of
children.
• This equipment is only to be installed by a qualified service
personnel.
RR
RR
RCAUTION:
m
o
r
t
o
m
n
R
R
R

v
• Deliver to collection point for waste products. Do not be disposed
of via domestic refuse collection.
R

vii
TABLE OF CONTENTS
1. GETTINGSTARTED ................................................... 1
HOW TO USE THIS COPY MACHINE............................. 1
WHERE IT IS & WHAT IT IS............................................ 4
CopierExterior ............................................................. 4
OperationPanel ........................................................... 6
RECOMMENDEDORIGINALS ........................................ 8
RECOMMENDEDPAPER ............................................ 10
TONER......................................................................... 12
2. COPYING................................................................. 13
BASICCOPYING ......................................................... 13
Using the Rear Table .................................................. 18
COPYINGONTO ROLLPAPER.................................... 19
Semi Synchro Cutting ................................................ 20
Preset Cutting ............................................................ 22
VariableCutting.......................................................... 23
USINGTHEROLLCUTTINGRAIL ................................. 24
3. COPY SETTINGS .................................................... 27
COPYING ONTOOTHER MEDIA .................................. 27
ADJUSTINGCOPYIMAGEDENSITY ........................... 29
MAKING SEVERAL COPIES OF THE
SAMEORIGINAL ......................................................30
SETTINGA LEADINGEDGE MARGIN.......................... 31
PARTIALCOPYING ...................................................... 32
PROGRAMMINGSETTINGYOU OFTENUSE .............. 34
A) Program key ......................................................... 34
B) Changing TheDefault Setting ................................ 35

viii
USERTOOLS ...............................................................36
Semi Synchro Cut Adjustment ....................................36
WHAT YOURSERVICEREPRESENTATIVE
CANCHANGE...............................................................37
4. MAINTAININGYOURCOPIER ..................................39
CHANGINGTHETONERBOTTLE .................................39
ADDINGTONER............................................................42
LOADING A ROLL OF PAPER.......................................45
LOADING A NEW ROLL
(ONTOROLLCUTTINGRAIL) ........................................49
5. TROUBLESHOOTING ...............................................51
If Something Goes Wrong ...........................................51
If A Service Indicator Lights Up ....................................51
IFJAMS OCCUR ...........................................................52
OTHERS .......................................................................58
THINGS TO DO EVERY DAY.........................................60
DO’S & DON’TS ............................................................61
WHERE TO PUT YOUR COPIER...................................62
6. SPECIFICATIONS .....................................................65
COPIER ........................................................................65
OPTIONS ......................................................................66
INDEX ...........................................................................67

1
1. GETTING STARTED
HOWTOUSETHIS COPYMACHINE
1Turn the machine switch on.
When the “Wait “ indicator goes off and the ”Set Paper” indicator goes on, the copier enter the
ready condition.
2Select any copy settings you require, such as the media type or copy density.
If you have Roll Feeder (option), press the R/F Select key to select “Roll Feeder”.
3Center the paper face up on the Copy Paper Table and slide the paper straight into the copier.
pThese illustrations show the copier with the Original Guides, the Paper Guides, and other
optional equipment.
Copy Media
Lighter Darker
Clear/Stop
Emergency Stop
Program
Clear Modes/
Energy Saver
Set
Paper RF
Select
Wait
Vellum
Film
Lighter Copy
Set
Original
Energy
Saver
Paper Length
Semi Synchro
Preset/
Variable
Leading Edge
Copy Counter
Function Select
RF Select/Cut
Copy Media
Lighter Darker
Clear/Stop
Emergency Stop
Program
Clear Modes/
Energy Saver
Set
Paper RF
Select
Wait
Vellum
Film
Cut Select
Preset Cut
Lighter Copy
Set
Original
Energy
Saver
PB001
PM001

2
4Set the Original Guides (option) to match the original size mark. Set the original face up and
slide it straight into the copier along the Original Guides.
5The original comes out from the opening just under the original table À.
The copy is delivered from the slot on top of the copier Á.
If you make several copies of the same original, when the copy comes out, remove it and repeat
from step3.
PB003
PB004
PB002

3
SB011
Notes
pIf you want to catch copies the back of the
machine, change the copy delivery directions
as shown in the figure.

4
SB001
1a 2 4 3 13 5 6
7 8 9 10 11 12
Copier Exterior
SB002
1b
Set the Manual Pocket as shown in the figure.
WHERE IT IS & WHAT IT IS

5
Squeeze both locks to open the unit. Open the unit to empty the used
toner bottle and to remove jammed paper.
Open the cover(and the unit) to access the toner cartridge.
Place your original here, face up. If you want to copy a stiff original
that can’t be bent, use the Rear Table (see 6).
Use the guide to keep the original going straight as you feed the
original into the copier.
See page 6.
Place stiff originals here, face down.
Feeds paper from a roll to the copier.
Use the guides to keep the copy paper going straight as you feed the
into the copier.
Open this table if you are copying to sheets, changing the toner
cartridge, or if you have to open the copier.
Open these covers to change the roll of paper and to clear paper jams.
Holds your copier and the Roll Feeder.
Turn to start the copier and off when you’re done for the day. The
copier will need about 5 minutes to warm up, if it’s been turned off for
a long time.
Makes sure the copies don’t fall off as they come out.
1a & 1b Locks
2. Front Cover
3. Original Table
4. Original Guides
(option)
5. Operation Panel
6. Rear Table
7. Roll Feeder (option)
8. Paper Guides (option)
9. Copy Paper Table
10.Roll Feeder Covers
11.Table (option)
12.Main switch
13.Copy Exit Guide

6
Paper Length
Semi Synchro
Preset/
Variable
Leading Edge
Copy Counter
Function Select
RF Select/Cut
Copy Media
Lighter Darker
Clear/Stop
Emergency Stop
Program
Clear Modes/
Energy Saver
Set
Paper RF
Select
Wait
Vellum
Film
Cut Select
Preset Cut
Lighter Copy
Set
Original
Energy
Saver
OperationPanel
1234567891011
12 13 14 15 16 17 18 19
These indicators show which setting you are currently editing, Press
the Function key to cycle through them.
The top indicator lights when the paper length is being set.
The middle indicator lights when the lead margin is being set.
The bottom indicator lights when the number of copies is being set.
Shows the length of paper the Roll Feeder will send.
Scrolls through the preset paper lengths for the Roll Feeder.
Turns Semi synchro Cut, or Preset/Variable Cut on/off.
Shows that it is in a state of wait (Energy Saver). Press key 10.
See page 51 for details.
Shows that the copier is not yet ready to copy.
Lights up when the copier is ready to receive an original.
1. Function indicators
2. Paper length display
3. Preset Cut key
4. Cut Select key
5. Energy Saver indicator
6. Troubleshooting
7. Wait indicator
8. Ready/SetOriginal

7
The Set Paper indicator on the left lights when the copier is ready
to receive an paper. The RF Select indicator on the right lights when
you select the Roll Paper.
Cancels all of current settings. When you hold down this key for
three seconds or more, the copier enters the Energy Saver mode
allowing you to conserve power.
To exit Energy Saver mode, press this key again.
Allows you to recall or set a program.
Press to change which setting you are editing. The current selection
is shown by the indicators above: Paper Length
LeadingEdge
Copy Counter
Also used for copying a selected portion of the original.
Press to increase the setting being edited.
Press to decrease the value being edited.
Displays the margin settings and the number of copies made.
Selects the paper feed type (when the Roll feeder option is in-
stalled). Also press to stop a copy job.
Press to select the type of copy paper you are using.
The copier will apply more or less heat accordingly.
Press to stop the copying process immediately.
Use if your original is getting stuck in the copier.
If you stop the operation by pressing this key, remove both the
original and paper.
Shows the density level the copies will have.
Press the left key to make copies lighter.
Press the right key to make copies darker.
While entering numbers, press to cancel a number to have entered.
While copying, press to stop copying.
9. Set Paper or RF
Select indicator
10. Clear Modes/Energy
Saver key
11. Program key
12. Function Select key
13. Plus and minus key
14. Leading Edge/Copy
Counter indicator
15. RF Select/Cut key
16. Copy Media key
17. Emergency Stop key
18. Density indicator
Density keys
19. Clear/Stop key

8
RECOMMENDED ORIGINALS
❐You can set originals with weight in the range 21g/m2, 6 lb to 157 g/m2, 41 lb in this copier.
❐Feedable size is between 914×2,000mm (W×L), 36”×80” (maximum width that can be fed:
960mm, 38.4”) and 210×297mm (W×L), 8.5”×11” for minimum.
❐You can not use the Repeated Copying function in the following cases.
When using the Carrier Sheet (option)
When setting an original longer than 1200mm (47”)
❐Fix the curl of original to within the following range.
• For the curl of the leading edge and the trailing edge: R50mm (2.0”) or more, H20mm (0.8”)
or less
• For the curl of the whole area of the paper: Ø30mm (1.2”) or more
❐When you copy the following originals, set them in the Rear Table:
cSee page 18, “Using the Rear Table”
• Thick originals (0.19mm, 35µ~1mm)
• Originals which cannot be folded.
• Originals less than 297mm (12”) in width and more than 1200mm (47”) in length.
❐When you copy the following originals, use the Carrier Sheet (option) to set them:
• Piled originals • Folded originals
• Taped or pasted originals • Originals which have a hole near the leading edge 40mm
(1.6”) to the right or left of the center
• Dog-eared originals • Creased, torn, or clipped-out originals
• Wavy originals • Pasted originals
• Originals whose leading edge is • Curled originals
not straight

9
Non-recommendedoriginals
NotesForOriginals
SB042
pThe following types of originals are not recommended.
• Wet originals • Originals with cardboard stuck on the leading edge
• Originals with clips or staples • Originals with wet ink or white-out
• Carbon paper • Originals made of materials other than paper or film
(thermosensitive paper, aluminum foil,etc)
pMargins on the leading and side edges of originals are not copied as shown in the illustration.
a=0±3mm(0.12”)
b1+b2<0±2mm(0.08”)(A1M)

10
RECOMMENDEDPAPER
pStandard paper sizes that can be used in this copier are shown below.
pWhen you make a copy on a non-standard size of paper, set the paper on the Copy Paper
Table.
pWeight of paper suitable for this copier: 51g/m2, 14lb to 134g/m2, 36lb.
pDo not use the following kinds of paper or a paper jam might occur.
• Bent, folded, or creased paper
• Torn paper
• Perforated paper
• Non-smooth paper
• Slippery paper
• Thin paper that has low stiffness
pDo not make a copy on paper with any kind of coating, such as thermosensitive paper, art
paper, aluminium foil, and carbon paper.
A fault might occur.
pDo not use paper with strong curls at the edges or corners. (Curls rising more than 5mm(1/4”)
or falling more than 20mm (3/4”) over a 40mm (1.5”) radius.)
pWhen you make copies on film, take out the copies delivered to the copy guide one sheet at a
time and place them on a flat surface.
Metric version Inch version Bypass Roll Feeder
A0 E (36” ×48”) KK
A1 D (24” ×36”) KL KL
A2 C (18” ×24”) KL KL
A3 B (12” ×18”) KL KL
A4 A ( 9” ×12”) KK

11
DehumidifingHeater
pIf copying to natural tracing paper (all pulp,translucent paper)at a relative humibity of 35%
or less.
a)If the paper was left out of its package for 5 minutes or more, remove the first 700mm(28”)
before copying.
b)If copies come out wavy or with white spots, use vellum tracing paper instead of natural
tracing paper.
c)Always keep the paper in a bag when not using it.
pStore the paper in a sealed polyvinyl bag if not used for a long period.
If it gets humid, paper will curl or wave causing a paper jam or part of the image not to be
copied.
pWhen you use paper in high humidity under hot conditions, take out only the necessary
amount of paper at a time from the bag. Do not take all the paper out of the bag.
pUnder humid conditions, the copier turns on the dehumidifying heater. It is turned on automati-
cally even when the main switch is off. Do not unplug the power.

12
TONER
R
WARNING:
• Do not incinerate used toner, toner bottle or toner cartridge.
• Toner dust might ignite when exposed to an open flame.
• Dispose of the toner bottle and the used toner cartridge
according to local regulations for plastics.
R
Caution: •Do not eat or swallow toner.
•Keep toner(used or unused), toner bottle, and toner cartridge out of
reach of children.
R
Caution: •This machine has been tested for safety using this supplier’s parts
and consumables.We recommend you only use these specified sup-
plies.
❐If you use toner other than that recommended, a fault might occur.
❐If you want to add toner, see ⇒ P.42 ”ADDING TONER”
❐Store toner cartridge horizontally in a cool, dark place.
❐Do not leave toner cartridge in your car on a hot day for a long period of time, or anywhere the
toner could be subjected temperatures of over 95°F (35°C).
❐Never store toner where it will be exposed to heat.
❐Do not lay heavy objects on toner bottles.
❐Used toner cannot be re-used.
HandlingToner
Toner Storage
UsedToner
R
R
s

13
BASICCOPYING(COPYINGTOSHEETS)
Use the Copy Paper Table to copy onto paper.
Notes
pFor acceptable types of original and paper see ⇒ page 8 and 10.
pSet one sheet of paper at a time on the Copy Paper Table. Never insert more than one
sheet of paper.
pIf the copy paper is curled, set it with curl facing downwards.
pWhen you set A0 size(36” × 48”) paper, to make sure the ends do not touch the floor
and get dirty, lay a wide piece of paper or some other covering on the floor.
pDo not use the paper which is cut obliquely, when the difference between the right
side and the left side of the paper is more than 5mm (4/5”), creasing or a paper jam might occur.
pYou cannot copy to both sides of the paper at a time.
pIt takes about 5 minutes until you can start copying after you turn the copier on. The
machine is warming up when the “Wait” indicator is lit, but you can still edit settings, insert
copy paper or insert your original.
pYou can set either paper or an original first. When you have set both of them, the
copier starts copying automatically.
pDo not lean on the copy table or lay heavy objects on it.
2.COPYING
CAUTION : Ifduring copying your original gets stuck in the copier, press the
Emergency Stop key.
If you stop the operation by pressing this key, remove both the
original and paper.
This manual suits for next models
3
Table of contents
Other Ricoh Copier manuals

Ricoh
Ricoh Aficio SP 5200S User manual

Ricoh
Ricoh Aficio FT4027 User manual

Ricoh
Ricoh Aficio MP C3000SPF Service manual

Ricoh
Ricoh Aficio MP 1600L User manual

Ricoh
Ricoh FT8982 User manual

Ricoh
Ricoh SWALLOW 2 User manual

Ricoh
Ricoh MP C4504 series Guide

Ricoh
Ricoh Aficio 480W User manual

Ricoh
Ricoh FT4215 User manual

Ricoh
Ricoh MP 1813L User manual