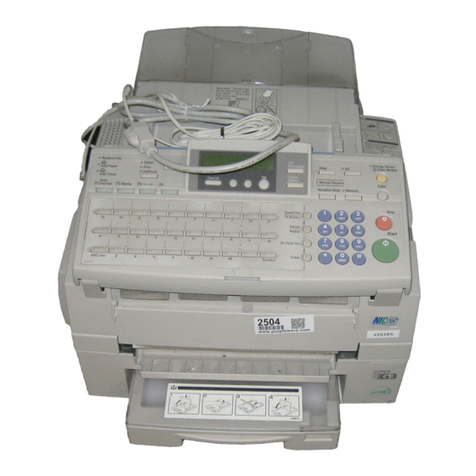
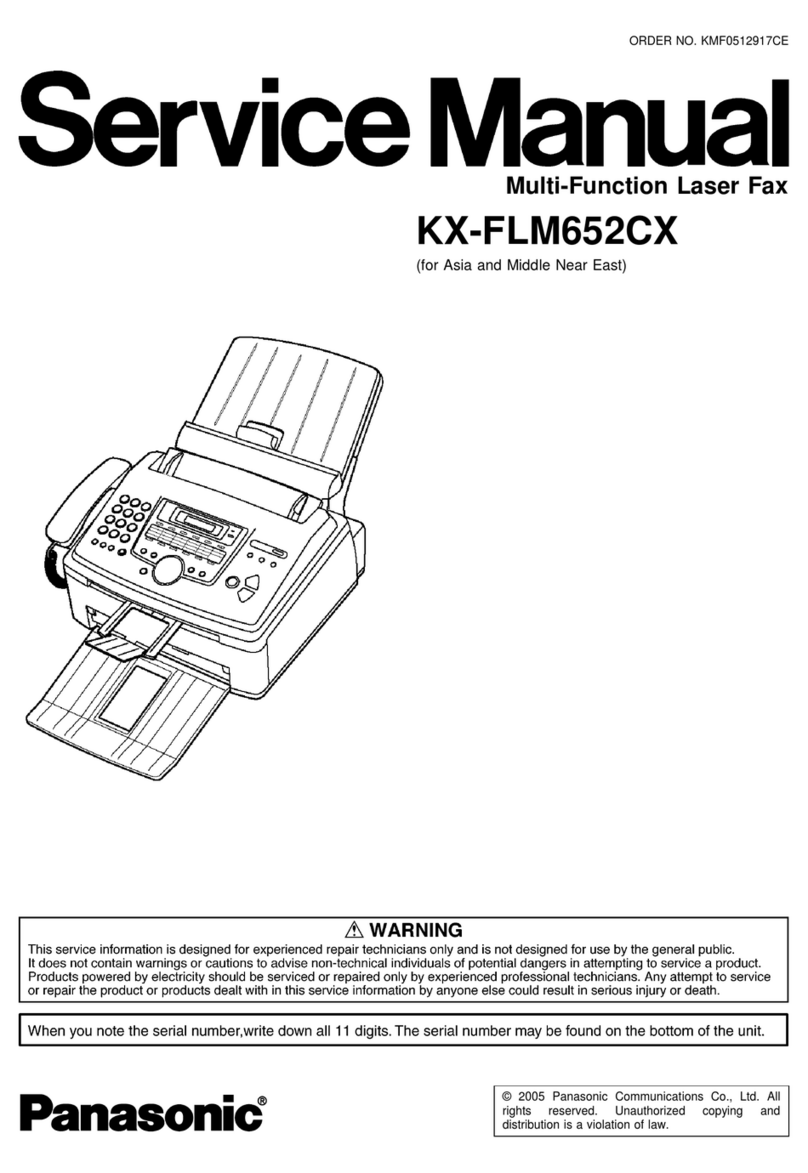
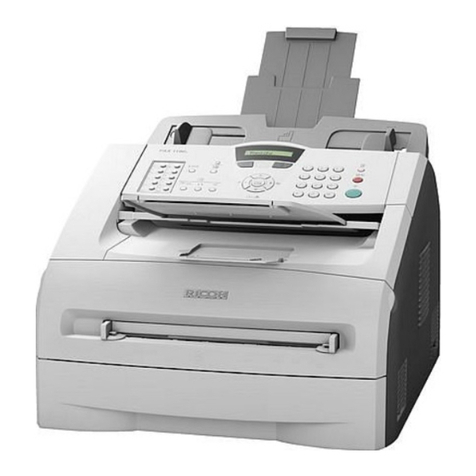
Ricoh FAX2900L User manual

FAX2900L
Operator's Manual
TSTH120N
Read this manual carefully before you use this product and keep it handy for future
reference.
For safety, please follow the instructions in this manual.
SMTEN990427_FM.book Page 1 Thursday, September 2, 1999 10:03 AM

FAX2900L Operator’s Manual
RICOH COMPANY, LTD.
15-5, 1 chome, Minami-Aoyama, Minato-ku, Tokyo
Telephone: Tokyo 3479-3111
Ricoh shall not be responsible for any damage or ex-
pense that may result from the use of parts other than
recommended parts.
For good copy quality, Ricoh recommends that you
use genuine Ricoh toner.
TONER CASSETTES
RICOH FAX TONER CASSETTE TYPE 1430 BLACK is recom-
mended for the best performance.
Overseas Affiliates
U.S.A.
RICOH CORPORATION
5 Dedrick Place
West Caldwell, New Jersey 07006
Phone: +1-973-882-2000
The Netherlands
RICOH EUROPE B.V.
Groenelaan 3, 1186 AA, Amstelveen
Phone: +31-(0)20-5474111
United Kingdom
RICOH UK LTD.
Ricoh House,
1 Plane Tree Crescent, Feltham,
Middlesex, TW13 7HG
Phone: +44-(0)181-261-4000
Germany
RICOH DEUTSCHLAND GmbH
Mergenthalerallee 38-40,
65760 Eschborn
Phone: +49-(0)6196-9060
France
RICOH FRANCE S.A.
383, Avenue du Général de Gaulle
BP 307-92143 Clamart Cedex
Phone: +33-(0)1-40-94-38-38
Spain
RICOH ESPAÑA S.A.
Avda. Litoral Mar, 12-14,
08005 Barcelona
Phone: +34-(0)93-295-7600
Italy
RICOH ITALIA SpA
Via della Metallurgia 12,
37139 Verona
Phone: +39-(0)45-8181500
Hong Kong
RICOH HONG KONG LTD.
23/F., China Overseas Building,
139, Hennessy Road,
Wan Chai, Hong Kong
Phone: +852-2862-2888
Singapore
RICOH ASIA PACIFIC PTE.LTD.
260 Orchard Road,
#15-01/02 The Heeren,
Singapore 238855
Phone: +65-830-5888
Printed in China
EN USA H547-8600A
SMTEN990427_FM.book Page 1 Thursday, September 2, 1999 10:03 AM

Optional Equipment
❖
❖❖
❖
PAPER FEED UNIT TYPE 180 (Second Cassette)
A second paper feed unit can be added to the base machine.
❖
❖❖
❖
BYPASS FEEDER TYPE 180 (Multi-purpose Feeder)
A third paper feed unit can be added to the base machine.
❖
❖❖
❖
FAX EXPANSION CARD TYPE 10
A 1-Mbyte memory card can be added.
❖
❖❖
❖
FAX EXPANSION CARD TYPE 20
A 2-Mbyte memory card can be added.
❖
❖❖
❖
FAX EXPANSION CARD TYPE 40
A 4-Mbyte memory card can be added.
❖
❖❖
❖
ISDN INTERFACE UNIT TYPE 190 (SIG4)
This allows you to send and receive using the ISDN (Integrated Service Digital Network)
SMTEN990427_FM.book Page 1 Thursday, September 2, 1999 10:03 AM

USA
❖
❖❖
❖
FCC Requirements
1. This equipment complies with Part 68 of the FCC rules. On the cover of this equipment is a label
that contains, among other information, the FCC registration number and ringer equivalence
number (REN) for this equipment. If requested, this information must be provided to the telephone
company.
2. This equipment uses the following USOC jack: RJ11C
3. The REN is used to determine the quantity of devices which may be connected to the telephone
line. Excessive REN's on the telephone line may result in the devices not ringing in response to
an incoming call. In most, but not all areas, the sum of the REN's should not exceed five (5.0).
Contact the telephone company to determine the maximum REN for the calling area.
4. If this equipment causes harm to the telephone network, the telephone company will notify you in
advance that temporary discontinuance of service may be required. If advance notice is not prac-
tical, the telephonecompany will notify the customer assoon as possible. Also,you will be advised
your right to file a complaint with the FCC if you believe it is necessary.
5. The telephone company may make changes in its facilities, equipment, operations, or procedures
that could affect the operation of the equipment. If this happens, the telephone company will pro-
vide advance notice in order to make necessary modifications in order to maintain uninterrupted
service.
6. In the event of operation problems (document jam, copy jam, communication error indication), re-
fer to the solving problems section in this manual.
7. If you cannot correct the problem, please contact the RICOH CORP. CUSTOMER SUPPORT
DEPT. at 1-800-FASTFIX for repair and warranty information. If it is causing harm to the telephone
network, the telephone company may request you to disconnect the equipment from the network
until the problem is resolved.
8. This equipment cannot be used telephone company-provided coin service. Connection to Party
Line Service is subject to state tariffs.
❖
❖❖
❖
WHEN PROGRAMMING EMERGENCY NUMBERS AND/OR MAKING TEST CALLS TO
EMERGENCY NUMBERS:
1. Remain on the line and briefly explain to the dispatcher the reason for the call before hanging up.
2. Perform such activities in the off-peak hours, such as early morning hours or late evenings.
CANADA
The Industry Canada label identifies certified equipment. This certification means that the equipment
meets telecommunications network protective, operational, and safety requirements as prescribed in the
appropriate Terminal Equipment Technical Requirements document(s). The department does not guar-
antee the equipment will operate to the user's satisfaction.
Before installing this equipment, users should ensure that it is permissible to be connected to the facilities
of the local telecommunications company. The equipment must also be installed using an acceptable
method of connection. The customer should be aware that compliance with the above conditions may not
prevent degradation of service in some situations.
Repairs to certified equipment should be coordinated by a representative designated by the supplier. Any
repairs or alterations made by the user to this equipment, or equipment malfunctions, may give the tele-
communications company cause to request the user disconnect the equipment.
User should ensure for their own protection that the electrical ground connections of the power utility, tel-
ephone lines, and internal metallic water pipe system, if present, are connected together. This precaution
may be particularly important in rural areas.
Caution: Users should not attempt to make such connections themselves, but should contact the appro-
priate electric inspection authority, or electrician, as appropriate.
The Ringer Equivalence Number (REN) assigned to each terminal device provides an indication of the
maximum number of terminals allowed to be connected to a telephone interface. The termination on an
interface may consist of any combination of device subject only to the requirement that the sum of the
Ringer Equivalence Numbers of all the devices does not exceed 5.
Copyright © 1999 Ricoh Co., Ltd.
SMTEN990427_FM.book Page 1 Thursday, September 2, 1999 10:03 AM
SMTEN990427_FM.book Page 2 Thursday, September 2, 1999 10:03 AM
USA
❖
❖❖
❖
FCC Requirements
1. This equipment complies with Part 68 of the FCC rules. On the cover of this equipment is a label
that contains, among other information, the FCC registration number and ringer equivalence
number (REN) for this equipment. If requested, this information must be provided to the telephone
company.
2. This equipment uses the following USOC jack: RJ11C
3. The REN is used to determine the quantity of devices which may be connected to the telephone
line. Excessive REN's on the telephone line may result in the devices not ringing in response to
an incoming call. In most, but not all areas, the sum of the REN's should not exceed five (5.0).
Contact the telephone company to determine the maximum REN for the calling area.
4. If this equipment causes harm to the telephone network, the telephone company will notify you in
advance that temporary discontinuance of service may be required. If advance notice is not prac-
tical, the telephonecompany will notify the customer assoon as possible. Also,you will be advised
your right to file a complaint with the FCC if you believe it is necessary.
5. The telephone company may make changes in its facilities, equipment, operations, or procedures
that could affect the operation of the equipment. If this happens, the telephone company will pro-
vide advance notice in order to make necessary modifications in order to maintain uninterrupted
service.
6. In the event of operation problems (document jam, copy jam, communication error indication), re-
fer to the solving problems section in this manual.
7. If you cannot correct the problem, please contact the 1-914-347-7811 for repair and warranty in-
formation. If it is causing harm to the telephone network, the telephone company may request you
to disconnect the equipment from the network until the problem is resolved.
8. This equipment cannot be used telephone company-provided coin service. Connection to Party
Line Service is subject to state tariffs.
❖
❖❖
❖
WHEN PROGRAMMING EMERGENCY NUMBERS AND/OR MAKING TEST CALLS TO
EMERGENCY NUMBERS:
1. Remain on the line and briefly explain to the dispatcher the reason for the call before hanging up.
2. Perform such activities in the off-peak hours, such as early morning hours or late evenings.
CANADA
The Industry Canada label identifies certified equipment. This certification means that the equipment
meets telecommunications network protective, operational, and safety requirements as prescribed in the
appropriate Terminal Equipment Technical Requirements document(s). The department does not guar-
antee the equipment will operate to the user's satisfaction.
Before installing this equipment, users should ensure that it is permissible to be connected to the facilities
of the local telecommunications company. The equipment must also be installed using an acceptable
method of connection. The customer should be aware that compliance with the above conditions may not
prevent degradation of service in some situations.
Repairs to certified equipment should be coordinated by a representative designated by the supplier. Any
repairs or alterations made by the user to this equipment, or equipment malfunctions, may give the tele-
communications company cause to request the user disconnect the equipment.
User should ensure for their own protection that the electrical ground connections of the power utility, tel-
ephone lines, and internal metallic water pipe system, if present, are connected together. This precaution
may be particularly important in rural areas.
Caution: Users should not attempt to make such connections themselves, but should contact the appro-
priate electric inspection authority, or electrician, as appropriate.
The Ringer Equivalence Number (REN) assigned to each terminal device provides an indication of the
maximum number of terminals allowed to be connected to a telephone interface. The termination on an
interface may consist of any combination of device subject only to the requirement that the sum of the
Ringer Equivalence Numbers of all the devices does not exceed 5.
SMTEN990427_FM.book Page 1 Thursday, September 2, 1999 10:03 AM
SMTEN990427_FM.book Page 2 Thursday, September 2, 1999 10:03 AM
USA
❖
❖❖
❖
FCC Requirements
1. This equipment complies with Part 68 of the FCC rules.On the cover of this equipment is a label
that contains, among other information, the FCC registration number and ringer equivalence
number (REN) for this equipment. If requested, this information must be provided to the tele-
phone company.
2. This equipment uses the following USOC jack: RJ11C
3. The RENis used to determine the quantity of devices which may be connected to the telephone
line. Excessive REN's on the telephone line may result in the devices not ringing in response to
an incoming call. In most, but not all areas, the sum of the REN's should not exceed five (5.0).
Contact the telephone company to determine the maximum REN for the calling area.
4. If this equipment causes harm to the telephone network, the telephone company will notify you
in advance that temporary discontinuance of service may be required. If advance notice is not
practical, the telephone company will notify the customer as soon as possible. Also, you will be
advised your right to file a complaint with the FCC if you believe it is necessary.
5. The telephone company may make changes in its facilities, equipment, operations, or proce-
dures that could affect the operation of the equipment. If this happens, the telephone company
will provide advance notice in order to make necessary modifications in order to maintain unin-
terrupted service.
6. In the event of operation problems (document jam, copy jam, communication error indication),
refer to the solving problems section in this manual.
7. If you cannot correct the problem, please contact the SAVIN CORP. CUSTOMER SUPPORT
at 1-800-756-8798 for repair and warranty information. If it is causing harm to the telephone net-
work, the telephone company may request you to disconnect the equipment from the network
until the problem is resolved.
8. This equipment cannot be used telephonecompany-provided coin service. Connection to Party
Line Service is subject to state tariffs.
❖
❖❖
❖
WHEN PROGRAMMING EMERGENCY NUMBERS AND/OR MAKING TEST CALLS TO
EMERGENCY NUMBERS:
1. Remain on the line and briefly explain to the dispatcher the reason for the call before hanging
up.
2. Perform such activities in the off-peak hours, such as early morning hours or late evenings.
SMTEN990427_FM.book Page 1 Thursday, September 2, 1999 10:03 AM
i
Notice
R
CAUTION:
Use of controls, adjustments or performance of procedures other than those
specified herein may result in hazardous radiation exposure.
Shielded interconnect cables must be employed with this equipment to ensure
compliance with the pertinent RF emission limits governing this device.
Although this equipment can use either loop disconnect or DTMF signalling,
only the performance of the DTMF signalling is subject to regulatory require-
ments for correct operation. It is therefore strongly recommended that the equip-
ment is set to use DTMF signalling for access to public or private emergency
services. DTMF signalling also provides faster call set up.
Note
❒Some illustrations may be slightly different from your machine.
❒Certain options may not be available in some countries. For details, please
contact your local dealer.
-
--
-Notice about the Telephone Consumer Protection Act (Valid in USA
only).
The Telephone Consumer Protection Act of 1991 among other things makes it
unlawful for any person to send any message via a telephone fax machine unless
such message clearly contains in a margin at the top or bottom of each transmit-
ted page or on the first page of the transmission, the date and time it is sent and
an identification of the business, other entity, or other individual sending the
message and the telephone number of the sending machine or such business,
other entity or individual. This information is transmitted with your document
by the TTI (Transmit Terminal Identification) feature. In order for you to meet
the requirement, your machine must be programmed by following the instruc-
tions in the accompanying Operation Manual. In particular, please refer to the
chapter of Installation. Also refer to the TTI (Transmit Terminal Identification)
programming procedure to enter the business identification and telephone
number of the terminal or business. Do not forget to set the date and time.
Thank you.
Direct (or indirect reflected eye contact with the laser beam may cause serious eye
damage. Safety precautions and interlock mechanisms have been designed to prevent
any possible laser beam exposure to the operator.
SMTEN990427_FM.book Page i Thursday, September 2, 1999 10:03 AM

ii
Laser Safety:
The Center for Devices and Radiological Health (CDRH) prohibits the repair of
laser-based optical unit in the field. The optical housing unit can only be re-
paired in a factory or at a location with the requisite equipment. The laser sub-
system is replaceable in the field by a qualified Customer Engineer. The laser
chassis is not repairable in the field. Customer engineers are therefore directed
to return all chassis and laser subsystems to the factory or service depot when
replacement or the optical subsystem is required.
Operator Safety :
This machine is considered a CDRH class I laser device, safe for office / EDP use.
The machine contains two 5-milliwat, 765 - 805 nanometer wavelength, GaAIAs
laser diodes. Direct (or indirect reflected) eye contact with the laser beam might
cause serious eye damage. Safety precautions and interlock mechanisms have
been designed to prevent any possible laser beam exposure to the operator.
In accordance with IEC 60417, this machine uses the following symbols for the
main power switch:
•ameans POWER ON.
•bmeans POWER OFF.
Note to users in the United States of America
-
--
-Notice:
This equipment has been tested and found to comply with the limits for a Class
B digital device, pursuant to Part 15 of the FCC Rules. These limits are designed
to provide reasonable protection against harmful interference in a residential in-
stallation. This equipment generates, uses and can radiate radio frequency ener-
gy and, if not installed and used in accordance with the instructions, may cause
harmful interference to radio communications. However, there is no guarantee
that interference will not occur in a particular installation. If this equipment does
cause harmful interference to radio or television reception, which can be deter-
mined by turning the equipment off and on, the user is encouraged to try to cor-
rect the interference by one more of the following measures:
• Reorient or relocate the receiving antenna.
• Increase the separation between the equipment and receiver.
• Connect the equipment into an outlet on a circuit different from that to which
the receiver is connected.
• Consult the dealer or an experienced radio /TV technician for help.
SMTEN990427_FM.book Page ii Thursday, September 2, 1999 10:03 AM
iii
-
--
-Warning
Changes or modifications not expressly approved by the party responsible for
compliance could void the user's authority to operate the equipment.
Examples Of Indications
STAR Program
As an ENERGY STAR Partner, we have determined that this machine model
meets the ENERGY STAR Guidelines for energy efficiency
The ENERGY STAR Guidelines intend to establish an international energy-sav-
ing system for developing and introducing energy-efficient office equipment to
deal with environmental issues, such as global warming. This product was de-
signed to reduce the environmental impact associated with fax equipment by
means of energy-saving features, such as Energy Saving Standby mode.
This fax automatically lowers its power consumption 5 minute after the last op-
eration has been completed by default. To exit low power mode, press the {
En-
ergy Saver
}key. The fax starts printing in about 40 seconds in the Energy Saving
Standby mode or in about 30 seconds in the Fax Standby Mode. Please see the
applicable page for details.
Symbols Rmean a situation that requires you take care.
Symbols vmean “Hot surface”.
Symbols nmean “Do not touch”.
SMTEN990427_FM.book Page iii Thursday, September 2, 1999 10:03 AM
iv
Specification
Recycled paper
Please contact your sales or service representative for recommended recycled
paper types that may be used in this machine.
Energy Saving Standby Mode Fax Standby Mode
Power consump-
tion 2W Power consump-
tion 30W
Default Time 5 minutes Default Time 5 minutes
Print Start Time Within about 40
seconds Print Start Time Within about 30
seconds
SMTEN990427_FM.book Page iv Thursday, September 2, 1999 10:03 AM

v
TABLE OF CONTENTS
1.Safety
Important Safety Instructions................................................................... 1
When to Call Your Service Representative............................................. 3
Power And Grounding .............................................................................. 4
Power Supply................................................................................................ 4
Grounding ..................................................................................................... 4
Other Important Informations................................................................... 5
General ......................................................................................................... 5
Cold Weather Power-up................................................................................ 5
Thunderstorms.............................................................................................. 5
Operating Precautions .................................................................................. 5
Copy Paper................................................................................................... 6
Symbols & Conventions Used in This Manual .............................................. 6
2.Useful
Help List ..................................................................................................... 7
Blank Sheet Detect.................................................................................... 7
Quick Label................................................................................................ 8
3.Machine Layout
Part Names................................................................................................. 9
Operation Panel....................................................................................... 11
4.Faxing
Recommended Types of Document ...................................................... 13
Correct Size for the Document Delivery Tray.............................................. 13
Page Condition............................................................................................ 14
Memory Transmission And Immediate Transmission......................... 15
Memory Transmission (Memory Indicator Lit)............................................. 15
Immediate Transmission............................................................................. 18
Dialing with the Telephone Directory .......................................................... 19
Receiving Telephone Calls & Fax Messages (Faxes/Phone Calls)..... 20
Switching Between Fax and Telephone Mode............................................ 20
Receiving the Fax Message in the Telephone Mode.................................. 20
Printing Received Messages That Have Been Stored (Substitute
Reception)............................................................................................... 21
Faxing a Page with Very Fine Detail...................................................... 22
Resolution & Shading.................................................................................. 22
SMTEN990427_FM.book Page v Thursday, September 2, 1999 10:03 AM
vi
Optional Features for Transmission...................................................... 23
Sending at a Specific Time (Send Later) .................................................... 23
Printing the Page Number (Page Count) .................................................... 23
Sending Your Identification at the Top of Your Message (TTI)................... 24
Sending by a Specific Time (Transmission Deadline)................................. 24
Personal Codes........................................................................................... 25
Using the Stamp...................................................................................... 27
Changing the Stamp Home Position Setting............................................... 27
Redialing .................................................................................................. 28
Automatic Redialing .................................................................................... 28
Using the AI Redial key............................................................................... 28
Storing & Editing Fax Numbers (Functions 31 & 32)........................... 30
Storing, Editing & Erasing Quick Dial Numbers (Function 31).................... 30
Storing, Editing & Erasing Speed Dial Numbers (Function 32)................... 31
Storing & Editing a Group of Fax Numbers (Function 33)................... 33
Erasing Groups........................................................................................... 34
Programming the Group Key ...................................................................... 34
Dial Options ............................................................................................. 36
Programming the Dial Option Key............................................................... 36
Using the Dial Options ................................................................................ 36
Chain Dialing............................................................................................ 38
Erasing a Stored Message before It Is Sent (Functions 21 & 22)........ 39
Printing a Stored Message (Function 51).............................................. 40
Locking Incoming Messages (Memory Lock)....................................... 41
Storing a Memory Lock ID........................................................................... 41
Editing the Memory Lock ID........................................................................ 42
Switching Memory Lock on/off .................................................................... 42
Programming Special Terminals for Lock in Memory ................................. 43
Selecting which Messages to Lock in memory ........................................... 43
Printing a Memory-locked Message (Function 55)...................................... 43
Sending a Fax Using the External Telephone....................................... 44
Answering the Telephone....................................................................... 45
If the Telephone Rings Continuously......................................................... 45
Phoning and Faxing on the Same Call.................................................. 46
To Talk before Sending a Fax..................................................................... 46
5.Other Features
Verifying Communications, Errors, Counters, Etc............................... 47
Automatically Printed Reports..................................................................... 47
Report Formats........................................................................................... 48
Counters (function 94)................................................................................. 49
Programming Keystrokes....................................................................... 50
Storing a Keystroke Program...................................................................... 50
SMTEN990427_FM.book Page vi Thursday, September 2, 1999 10:03 AM
vii
Labeling a Program..................................................................................... 51
Using a Program ......................................................................................... 51
Erasing a Program / Changing the Program Label..................................... 52
Storing an Often Used Document (Auto Document)............................ 53
Storing an Auto Document (Function 35).................................................... 53
Using an Auto Document ............................................................................ 54
Printing the Contents of an Auto Document (Function 53).......................... 55
Erasing an Auto Document ......................................................................... 55
Batch Transmission................................................................................ 56
Changing the Batch Transmission on/off .................................................... 56
Closed Network (Transmission)............................................................. 57
Sending Confidential Messages (Function 12)..................................... 58
Confidential ID Override Option .................................................................. 59
Transfer Request (Function 13) ............................................................. 60
Storing Your Machine's Own Telephone Number....................................... 60
Storing the ID Code..................................................................................... 61
Programming the ID Code .......................................................................... 61
Editing the ID Code..................................................................................... 62
Making a Transfer Request......................................................................... 62
Combining Transfer Request with Broadcasting......................................... 64
Multi-step Transfer...................................................................................... 65
Programming the Personal Codes (Function 72)................................. 66
Storing a Personal Code............................................................................. 66
Editing or Erasing a Personal Code............................................................ 67
Tonal Signals........................................................................................... 69
Using the Tone Key..................................................................................... 69
Rejecting Messages from Senders Who Don't Identify Themselves.. 70
Receiving Confidential Messages.......................................................... 71
Storing a Confidential ID ............................................................................. 71
Editing the Confidential ID........................................................................... 72
Printing a Confidential Fax Message (Function 54).................................... 72
Confidential File Report............................................................................... 73
Closed Network (Reception)................................................................... 74
Rejecting or Accepting Messages from Specified Senders
(Authorized Reception).......................................................................... 75
About Authorized Reception ....................................................................... 75
Entering a List of Senders to Treat Differently (Function 81)...................... 75
Switching Authorized Reception on / off (Function 62) ............................... 75
Cassette Selection................................................................................... 76
About Cassette Selection............................................................................ 76
Entering a List of Senders to Treat Differently (Function 81)...................... 76
Selecting the Messages to Be Printed from the Main Cassette.................. 76
Selecting the Cassette (Function 62).......................................................... 76
Multi-sort Document Reception............................................................. 78
SMTEN990427_FM.book Page vii Thursday, September 2, 1999 10:03 AM
viii
About Multi-sort Reception.......................................................................... 78
Switching Multi-sort Document on/off (Function 62) ................................... 78
Setting the Number of Copies (Function 83)............................................... 79
Programming the Special Terminals to Make Multi-sort-copies.................. 79
Choosing How to Treat the Special Terminals............................................ 80
Programming a List of Senders to Treat Differently (Function 81)..... 81
Programming the List of Senders (Special Senders).................................. 81
Editing the RTI/CSI for the Special Terminals............................................. 82
Erasing the Special Terminal ...................................................................... 84
Forwarding .............................................................................................. 85
Programming the Forwarding Feature (Function 82).................................. 85
Editing the Forwarding Feature................................................................... 87
Switching Forwarding on / off (Function 62)................................................ 88
Selecting Which Messages to Forward....................................................... 89
Switching Local Printing on / off.................................................................. 89
Enabling and Disabling the Forwarding Mark ............................................. 89
Wild Cards................................................................................................ 90
Receiving Options................................................................................... 91
Reverse Order Printing ............................................................................... 91
Printing a Center Mark ................................................................................ 91
Checkered Mark.......................................................................................... 91
Reducing the Page Length ......................................................................... 91
Reception Time........................................................................................... 92
Two In One (Into 1) ..................................................................................... 92
Reports You Can Printout Yourself....................................................... 93
Journal (Function 41) .................................................................................. 93
File List (Function 42).................................................................................. 93
Telephone Number List (Function 43)......................................................... 93
Quick Label (Function 44)........................................................................... 93
Program List (Function 45).......................................................................... 93
Energy Saving.......................................................................................... 94
Introduction ................................................................................................. 94
Entering Energy Saving mode .................................................................... 95
Exiting Energy Saving mode....................................................................... 95
Selecting the Energy Saving mode type ..................................................... 95
Reception in Energy Saving mode.............................................................. 96
Saving Energy with the Power Saving Timer........................................ 97
Setting the Power Saving time (Function 71).............................................. 97
Switching the Power Saving Timer on / off (Function 62) .......................... 98
Copying.................................................................................................... 99
Calling to Request a Message (Polling) .............................................. 100
Picking up Messages Stored Elsewhere (Polling Reception) ................... 100
Operating Procedure................................................................................. 100
Entering a Personal Code......................................................................... 100
Stored ID Override Option......................................................................... 101
SMTEN990427_FM.book Page viii Thursday, September 2, 1999 10:03 AM

ix
Leaving a Document to Be Picked up by Others (Polling
Transmission)....................................................................................... 102
Free Polling (Function 15)......................................................................... 102
Secured Polling (Function 14)................................................................... 103
Stored ID Override .................................................................................... 103
Options for Polling Transmission .............................................................. 104
Canceling a Polling Transmission (Function 23)....................................... 105
Printing a Polling Transmission File (Function 52).................................... 105
User Function Keys (Function 36)....................................................... 107
Programming a User Function Code......................................................... 107
Using a Function Program ........................................................................ 108
Editing a Function Program....................................................................... 108
Deleting a Function Program .................................................................... 108
Dual Access........................................................................................... 109
6.Maintaining Your Machine
Loading Paper in the Main Cassette.................................................... 111
Loading Paper in the Second Cassette............................................... 114
Loading Paper in the Optional Multi-purpose Feeder........................ 117
Replacing the Toner Cassette and Cleaning Pad............................... 118
Toner Cassette....................................................................................... 122
Replacing the Stamp............................................................................. 123
Cleaning the Rollers and Scanner....................................................... 124
Changing the Paper Size in the Main Cassette................................... 125
Changing the Paper Size in the Second Cassette.............................. 131
Changing the Paper Size in the Optional Multi-purpose Feeder....... 136
Changing the Paper Size Settings....................................................... 138
7.Troubleshooting
If an Indicator Lights up on the Operation Panel ............................... 139
Clearing a Document Jam .................................................................... 140
Clearing a Copy, Fax, or Print Jam...................................................... 142
Clear a Jam inside the Machine................................................................ 142
Clear a Jam in the Cassette Entrance ...................................................... 144
Clear a Jam in the Optional Second Cassette .......................................... 145
Clear a Jam in the Upper Rear Unit.......................................................... 146
Clear a Jam in the Lower Rear Unit.......................................................... 147
If Messages You Receive Don't Fit on Your Paper............................. 149
Breaking Down Large Format Messages.................................................. 149
Communication Problems.................................................................... 150
SMTEN990427_FM.book Page ix Thursday, September 2, 1999 10:03 AM

x
RDS (Remote Diagnostic System)....................................................... 151
Switching RDS On/Off............................................................................... 151
Adjusting the Printing Margins (Function 95)..................................... 152
Operating Difficulties............................................................................ 153
Displayed Error Messages.................................................................... 158
Error Codes............................................................................................ 160
Calling the Service Station................................................................... 164
Sending a Service Report ......................................................................... 164
8.Technical Reference
Access Code for Functions 61 to 95.................................................... 165
User Parameters.................................................................................... 166
User Parameter Hints................................................................................ 173
Adjusting the Volume of Various Features (Function 92) ................. 174
Selecting the Display's Language (Function 93)................................ 175
Entering Characters.............................................................................. 176
Entering Symbols...................................................................................... 176
Document & Paper Specifications....................................................... 177
Documents (Using the Auto Document Feeder) ....................................... 177
Document Feeder Requirements.............................................................. 177
Paper Requirements ................................................................................. 177
Capabilities ............................................................................................ 178
Stored Numbers (Long Term) ................................................................... 178
Stored Destinations................................................................................... 178
File Storage............................................................................................... 178
Specifications........................................................................................ 179
Base Machine ........................................................................................... 179
Optional Lower Paper Cassette ................................................................ 179
Multi-purpose Feeder................................................................................ 180
9.ISDN
Introduction............................................................................................ 181
Setting up the Group 4 Interface.......................................................... 182
Subaddress Key........................................................................................ 182
Own ISDN-G4 Number ............................................................................. 182
Programming the IG3 CSI......................................................................... 182
Programming the Terminal ID................................................................... 182
Programming the G4 Directory Number 1................................................. 183
Programming the G4 Directory Number 2................................................. 183
Programming the G4 Subaddress............................................................. 184
Programming the IG3 Directory Number 1................................................ 184
Programming the IG3 Directory Number 2................................................ 185
SMTEN990427_FM.book Page x Thursday, September 2, 1999 10:03 AM
xi
Programming the IG3 Subaddress............................................................ 185
Operation................................................................................................ 186
Dialing and Storing Telephone Numbers .................................................. 186
Transmission Procedure ........................................................................... 186
Storing a Telephone Number.................................................................... 187
Automatic Fallback from Group 4 Mode to Group 3 Mode........................ 188
Terminal ID................................................................................................ 189
Explanation of the Items in the Group 4 Identifier..................................... 190
Switching the Command Information Line On/Off..................................... 191
Troubleshooting.................................................................................... 192
Call Progress Signals (CPS)..................................................................... 192
10.Installation
Before Installation................................................................................. 193
Machine Environment........................................................................... 194
Location..................................................................................................... 194
Installing the Toner Cassette .............................................................. 195
Installing the Main Paper Cassette...................................................... 198
Installing the Optional Second Cassette............................................. 200
Attaching the Trays and Document Table........................................... 202
Ventilation Grill Direction........................................................................... 203
Installing the Optional Multi-purpose Feeder..................................... 204
Installing the Optional Memory Card................................................... 206
Installing The Optional Handset........................................................... 207
Connecting the Machine....................................................................... 209
Connecting up to the Telephone Line................................................. 210
Connecting the Power and Switching on............................................ 211
Initial Settings & Adjustments.............................................................. 212
Initial Settings (Function 61)...................................................................... 213
Setting the Access Number....................................................................... 215
Setting the Phone Line (Function 62)........................................................ 216
Setting the Date & Time (Function 91)...................................................... 216
Summer Time / Daylight Saving Time (Function 62) ................................ 217
11.Function List
Function List.......................................................................................... 219
12.Certification Label
Certification Label................................................................................. 223
INDEX...................................................................................................... 224
SMTEN990427_FM.book Page xi Thursday, September 2, 1999 10:03 AM
xii
SMTEN990427_FM.book Page xii Thursday, September 2, 1999 10:03 AM
Other manuals for FAX2900L
3
Table of contents
Other Ricoh Fax Machine manuals

Ricoh
Ricoh 1195L User manual

Ricoh
Ricoh F102 User manual

Ricoh
Ricoh Fax 2210L User manual

Ricoh
Ricoh FAX1400L User manual

Ricoh
Ricoh Aficio 1018 User manual

Ricoh
Ricoh 1000L Quick start guide

Ricoh
Ricoh FAX 2900Li User manual

Ricoh
Ricoh fax2000l User manual

Ricoh
Ricoh 1190L Operating and safety instructions

Ricoh
Ricoh FAX75 User manual

Ricoh
Ricoh FAX2900L User manual

Ricoh
Ricoh Aficio 2022 User instructions

Ricoh
Ricoh MV74 User manual

Ricoh
Ricoh Fax 2210L User manual

Ricoh
Ricoh Fx880 User manual

Ricoh
Ricoh FAX1700L User manual

Ricoh
Ricoh FAX2500L User manual

Ricoh
Ricoh FAX07 Quick start guide

Ricoh
Ricoh fax4700l User manual

Ricoh
Ricoh fax1160l User manual