manuals.online logo
Brands
  1. Home
  2. •
  3. Brands
  4. •
  5. Ricoh
  6. •
  7. Printer Accessories
  8. •
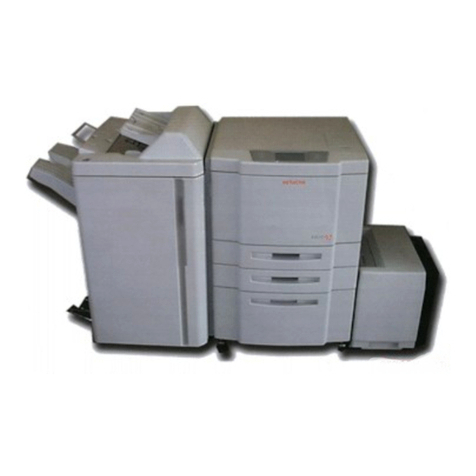
  9. Ricoh Aficio AP4510 Parts list manual

Ricoh Aficio AP4510 Parts list manual

The maintenance kit contains the parts required to maintain the printer.When "Change Maint.Kit"
appears on the panel display, replace the parts included in the maintenance kit.Read this guide
carefully before you use the maintenance kit.
For safety purposes, carefully follow the instructions in this guide.
Maintenance KitType 4510 REPLACEMENT GUIDE
○○○○○○○○○○○○○○○○○○○○○ ○ ○ ○○○○○○○○○○○○○○○○ ○○○○○○○○○○○○○○○○○○○○○○○○○○○
○○○○○○○○ ○○○○○○○○ ○○○○○○○○ ○○○○○○ ○○○○○○○○
○○○○○○○○○
○○○○○○○○○○○○○○○○○○○○○○○○○○○○○
○○○○○○○○○○○○○○○○○○○○○○○○○○○○○○○○○○○○○○○
○○○○○○○○○○○○○○○○○
< G790-8610 >
○○○○○○○ ○○○○○○○○ ○○○○○○○○○○○○○
Hold both sides of the unit. Lift the side of the unit closest
to you slightly (
a
), and remove the unit from the printer
(
b
) as shown in the illustration.Put the used transfer unit
in the disposal bag.
Important
❒After removing the transfer unit, put the unit in the disposal
bag. Be careful not to tilt or shake the unit. Otherwise, toner
might scatter.
Take the new transfer unit out of theType 4500B box, and
remove the plastic bag.
Take the desiccant out.
There is an arrow sticker in the bottom right side of the
cover,which ispointing to the shaft.Alignthenewtransfer
unit with the shaft (
a
), and then slide the unit in place
(
b
).
a
a
b
TAPM030E
While pressing down on the corner of the transfer unit
indicated by the arrow (
a
), return the green lever (
b
) to
its original position to lock the transfer unit in place.
TAPM040E
Note
❒If you cannot return the green lever to its original position,
raise the green lever and remove the transfer unit. After that,
try to install the transfer unit again.
Leave the right cover open, and go to “ REPLACING THE
DEVELOPMENT UNIT”.
You should replace all the parts included in the
maintenancekit atthe same time.Besureto replacethem
in the following order:
1. Transfer Unit
2. Development Unit
3. Fusing Unit
CHECKINGTHE CONTENTS OFTHE
BOX
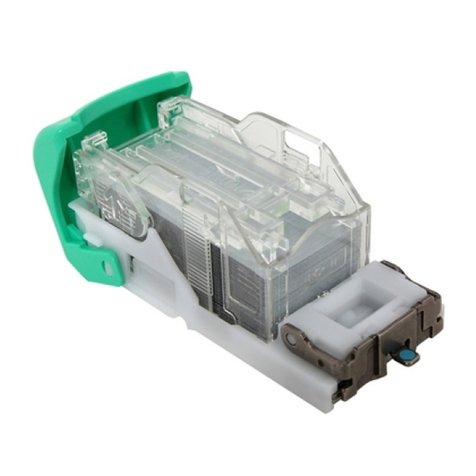
The maintenance kit is composed of 2 types of boxes,
Type 4510A and Type 4510B. Each box contains the
following parts. Confirm that the contents of the boxes
match the following lists.
Type 4510A
Replacement Guide (this sheet)
Removing the Development Unit from the Box
Development Unit
ZFCM010J
Disposal Bag
For packing the used Development Unit
Type 4510B
Fusing Unit
ZFCM020J
Transfer Unit
TAPM660E
Gloves
TAPM241E
Disposal Bag
For packing the used Transfer Unit
Brief reference sheet
If one or more of the items are missing, please contact your sales
or service representative.
CAUTION
•The inside of the machine becomes very hot. Do not touch the parts
with a label indicating a “hot surface”. Touching a “hot surface”
could result in a burn injury.
•Disposal should take place at an authorized dealer or appropriate
collection site.
•If you dispose of the used parts yourself, dispose of them according
to local regulations.
TURNING OFFTHE PRINTER
Turn the printer’s power switch off.
Important
❒The inside of the machine becomes very hot. Be sure to turn
off the printer before attempting to replace any of the parts.
When replacing the old fusing unit with a new one, turn off
the printer and wait for about 30 minutes before beginning
the installation.
On
Off
REPLACINGTHETRANSFER UNIT
WARNING
•Do not incinerate the used transfer unit. Toner dust might ignite
when exposed to an open flame.
•Disposal should take place at an authorized dealer or appropriate
collection site.
•If you dispose of the used parts yourself, dispose of them according
to local regulations.
Open the bypass tray (
a
), and then open the duplex unit
by pushing the catch upwards (
b
).
Open the right cover by pushing the catch upwards.
Put onthe gloves included in the Type 4500B box.
Be sure to wear the gloves to avoid getting your hands dirty or
damaging the belt surface of the new transfer unit.
TAPM310E
Raisethe greenlever (
a
)inside therightcover torelease
the transfer unit.
TAPM010E
a
REPLACINGTHE DEVELOPMENT
UNIT
WARNING
•Do not incinerate the used development unit. Toner dust might ignite
when exposed to an open flame.
•Disposal should take place at an authorized dealer or appropriate
collection site.
•If you dispose of the used parts yourself, dispose of them according
to local regulations.
Open the front cover.
While raising the green lever inside the front cover (
a
),
and then slide the development unit out about 10cm (4”).
ZFCM050E
Slide the development unit out far enough so that you can
hold it by the handle (
a
).
Important
❒Slide the unit out to the position shown in the following
illustration. If you slide it out too far, it may fall and damage
the front cover.
ZFCM040E
Copyright© 2001 G790-8610 Printed in China
UE USA EE GB
○○○○○○○○○○○○○ ○○○○○○○○○○○○ ○○○○○○○○○○○○○○○○
○○○○○○○○○○○○○○○○○○○○○○ ○○○○○○○○○○○○○○○○○○○○
○○○○○○ ○○○○○○○○ ○○○○○○○○○○○○○○○○○○○○○○○○○
○○○○○○○○○○○○○○○ ○○○○○○○○○○○○○○○○○○○○○○○
○○○○○○○○○○○○○○○○○○○○○ ○○○○○○○○ ○○○○○○○○○○○○○○○○○○○○○○○○
○○○○○○○○○○○○○○○ ○○○○○○○○○○○○○○○ ○○○ ○○○○○○○○○○○○○○○○○○ ○○○○○○○○○○○○○○○○○○○
REPLACINGTHE FUSING UNIT
CAUTION
•The fusing unit becomes very hot. When installing the new fusing
unit, turn off the printer and wait for about 30 minutes. After waiting,
install the new fusing unit. Not waiting for the unit to cool down can
result in a burn injury.
Be sure to wait 30 minutes after turning off the printer,
and confirm that it is cool before continuing.
Pull out the standard paper tray (Tray 1), and take the
screwdriver (
a
) from the tray.
Remove the screw inside the front cover (
a
) by turning it
counterclockwise to release the fusing unit.
ZFCM090E
Important
❒When removing the screw, press the screwdriver onto the screw
until it makes an audible click as it pops into place.
TAPP761E
Note
❒ You need the screw to lock the new fusing unit afterwards.
Holdthe greenhandle(
a
),and slideout thedevelopment
unit (
b
). Put the used development unit in the disposal
bag.
ZFCM060J
Important
❒After removing the development unit, put the unit in the
disposal bag. Be careful not to tilt or shake the unit, otherwise,
toner might scatter.
Take the new development unit from theType 4510A box.
Before taking the development unit from the box, be sure to read
the “Removing the Development Unit from the Box” sheet in the
Type 4510A box and follow the instructions.
Important
❒After taking the new development unit from the box, be careful
not to shake or jar the unit.
Remove thetape with thered tag(
a
)and thetransparent
tape (
b
).
Important
❒While pulling out the tape, keep the development unit
horizontal, as shown in the illustration. Tilting or shaking
the unit might cause the toner to scatter.
❒Do not remove the black sheet until you finish installing the
unit. The black sheet is used to protect the green part of the
development unit.
ZFCM080J
Align the new development unit with the rail in the printer.
Slide the development unit into the printer until it makes a
click as it locks into place.
ZFCM070J
At the right side of the printer, remove the tape on the left
and right sides of the black sheet, and then pull out the
sheet using both hands.
Important
❒Do not toucth the green part protected by the black sheet.
TAPM090E
Leave the right cover open, and go to “ REPLACING THE FUSING
UNIT”.
Lock the fusing unit in place with the screw you removed
in step .
ZFCM130E
Note
❒Be sure to return the screwdriver to the paper tray after using
it.
Close the right cover.
ZFCH192E
Important
❒Do not force the right cover to close. If you cannot close it
easily, confirm that the development unit and the fusing unit
are installed correctly, and that the transfer unit is locked
correctly.
Holdthe blueknob, and slowlypullthe fusing unit out until
the whole of the green handle is visible.
ZFCM100E
There is the green lever (
a
) on the left side of the fusing
unit. While pressing the green lever to the left, slide the
fusing unit out slowly with rasing the green handle and
holding it.
ZFCM110E
Take the new fusing unit from the Type 4510B box and
remove the plastic bag.
Remove the two pins with red tag (
a
), the three
transparent tapes (
b
) and the desiccant (
c
).
ZFCM140J
Note
❒ There is another transparent tape at the bottom of the fusing
unit, make sure to remove the transparent tape.
Place the green handle in the fusing unit. Hold the new
fusing unit with both hands, and keep the unit horizontal.
Align the unit with the rail in the printer (
a
), and then
slide the fusing unit into the printer until it stops.
ZFCM120E
Closethe duplexunit (
a
),and then close the bypasstray
(
b
).
Close the front cover.
Take the gloves off.
Turn the printer’s power switch on.
Note
❒ The first time you turn the printer on after installation or after
replacing the photoconductor unit, it will make several loud
noises. This is due to the photoconductor unit initializing and
is perfectly normal.
Confirm that the "Change Maint.Kit" message on the
operation panel has cleared.
Replacing the maintenance kit is finished.

Other manuals for Aficio AP4510

7

This manual suits for next models

1

Other Ricoh Printer Accessories manuals

Ricoh PJ Interactive Kit Type 3 User manual

Ricoh

Ricoh PJ Interactive Kit Type 3 User manual

Ricoh G165 User manual

Ricoh

Ricoh G165 User manual

Ricoh Aficio 3228C User manual

Ricoh

Ricoh Aficio 3228C User manual

Ricoh FT4227 User manual

Ricoh

Ricoh FT4227 User manual

Ricoh PB3040 User manual

Ricoh

Ricoh PB3040 User manual

Ricoh MP CW2201sp User manual

Ricoh

Ricoh MP CW2201sp User manual

Ricoh Aficio 7000 Series User manual

Ricoh

Ricoh Aficio 7000 Series User manual

Ricoh S7 D3DS Quick start guide

Ricoh

Ricoh S7 D3DS Quick start guide

Ricoh 140F User manual

Ricoh

Ricoh 140F User manual

Ricoh Shepherd-Lt Service manual

Ricoh

Ricoh Shepherd-Lt Service manual

Ricoh Aficio CL3000 User manual

Ricoh

Ricoh Aficio CL3000 User manual

Ricoh AP600N User manual

Ricoh

Ricoh AP600N User manual

Ricoh M15 Quick start guide

Ricoh

Ricoh M15 Quick start guide

Ricoh Aficio MP W3600 User manual

Ricoh

Ricoh Aficio MP W3600 User manual

Ricoh LCIT RT5030 Service manual

Ricoh

Ricoh LCIT RT5030 Service manual

Ricoh LCIT PB3170 Quick start guide

Ricoh

Ricoh LCIT PB3170 Quick start guide

Ricoh M3 Quick start guide

Ricoh

Ricoh M3 Quick start guide

Ricoh 3800H Operating manual

Ricoh

Ricoh 3800H Operating manual

Ricoh Priport DX 4640PD User manual

Ricoh

Ricoh Priport DX 4640PD User manual

Ricoh 3532 User manual

Ricoh

Ricoh 3532 User manual

Ricoh PB1120 Quick start guide

Ricoh

Ricoh PB1120 Quick start guide

Ricoh SR3180 Quick start guide

Ricoh

Ricoh SR3180 Quick start guide

Ricoh BY5020 Quick start guide

Ricoh

Ricoh BY5020 Quick start guide

Ricoh BN3110 Quick start guide

Ricoh

Ricoh BN3110 Quick start guide

Popular Printer Accessories manuals by other brands

EFI DocuColor 8000 reference guide

EFI

EFI DocuColor 8000 reference guide

General iq314s quick start guide

General

General iq314s quick start guide

Canon DADF-M1 Service manual

Canon

Canon DADF-M1 Service manual

Novexx Solutions AP 4.4 Service manual

Novexx Solutions

Novexx Solutions AP 4.4 Service manual

Intermec PW50 instructions

Intermec

Intermec PW50 instructions

Canon imagePROGRAF SS-41 Setup guide

Canon

Canon imagePROGRAF SS-41 Setup guide

Brother HL-L2310D manual

Brother

Brother HL-L2310D manual

Roland Metaza MPX-95 Gift Kit GK-1 manual

Roland

Roland Metaza MPX-95 Gift Kit GK-1 manual

Roland PNS-52 Assembly instructions

Roland

Roland PNS-52 Assembly instructions

Lanier 6213 Black Toner 117-0125 datasheet

Lanier

Lanier 6213 Black Toner 117-0125 datasheet

Kyocera TASKALFA 300I Release notes

Kyocera

Kyocera TASKALFA 300I Release notes

Oki C3200n installation instructions

Oki

Oki C3200n installation instructions

Oki C5150n Replacement guide

Oki

Oki C5150n Replacement guide

Oki OKIPOS X400 Installation

Oki

Oki OKIPOS X400 Installation

Oki ES3640eMFP Change instructions

Oki

Oki ES3640eMFP Change instructions

Oki OKIPAGE10e installation instructions

Oki

Oki OKIPAGE10e installation instructions

Panasonic KV-SS05 Operation manual

Panasonic

Panasonic KV-SS05 Operation manual

Lexmark CS410 series Technical reference manual

Lexmark

Lexmark CS410 series Technical reference manual

manuals.online logo
manuals.online logoBrands
  • About & Mission
  • Contact us
  • Privacy Policy
  • Terms and Conditions

Copyright 2025 Manuals.Online. All Rights Reserved.