manuals.online logo
Brands
  1. Home
  2. •
  3. Brands
  4. •
  5. Rimage
  6. •
  7. Disc Duplicator
  8. •
  9. Rimage Allegro 20 Operating and safety instructions

Rimage Allegro 20 Operating and safety instructions

4001940_A Page 1Copyright © 2016 Rimage
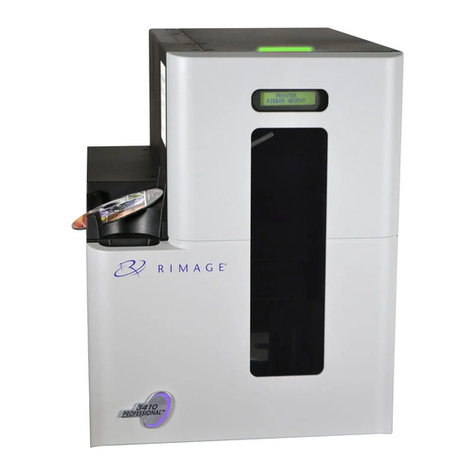
Rimage® Allegro™ 20 Setup and Installaon Guide
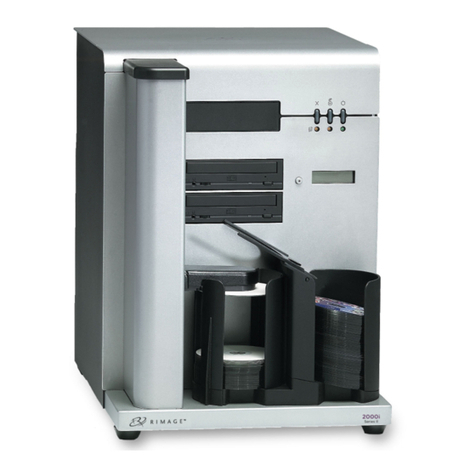
2Get to know your Rimage Allegro 20
4
31 Unpack the accessory kit
Install the all-in-one ink cartridge
Thank you for selecng the Rimage Allegro 20
disc publishing system.
Extendable
Output Bin
Recorder Tray
Button
Input Bin
Cover
Robotic Arm
Power/Ink
Button
CD/DVD
Recorder
Drive
Ink Cartridge
Carrier
As you unpack your system,
remove any tape or cardboard
restraints from the system. The
accessory kit contains:
• Allegro Setup and Installaon
Guide (this document)
• Rimage Product Warranty/
Guarantee
• A/C cord
• USB cable
• All-in-one ink cartridge
• Rimage Allegro User
Guide disc
• Rimage Soware
Suite disc
Connect the power cable and power on the system
Before you begin:
This document describes how to set up your Rimage Allegro™ 20 disc
publishing system. It is intended for people who are familiar with hardware
setup, soware installaon, and Windows operang systems. If you do not
understand the procedures in this document, ask your computer technician
for help.
Documents referenced in this procedure shipped with your system and
are also available online at www.rimage.com/support under Autoloader &
Printer Support.
Important!
• Read all setup instrucons thoroughly before you begin.
• Save all packing boxes and packing materials.
• Refer to the PC Specicaons document at www.rimage.com/support for
minimum PC requirements.
• Do not plug in any cables unl you are instructed to do so.
Notes:
• Your system may not look exactly like the system pictured.
• You must have administrave privileges to install the Rimage Soware Suite.
a. Li the printer cover.
b. Push the power/ink buon.
The ink cartridge cradle moves
from the le to the center of
the printer.
c. When the ink cartridge cradle is staonary, li the cartridge latch
(see below).
d. Slide the all-in-one ink cartridge into the cradle as shown.
e. Close the cartridge latch.
f. Close the printer cover. The Allegro 20 system inializes.
Power Input Port
USB 3.0 Port
Power Input Port
USB 3.0 Port
a. Connect the power cord to the
power input port on the back of
the Allegro 20.
b. Plug the other end of the power
cord into an electrical outlet.
Important!
• Do not connect the USB cable at this me.
• The outlet must be an earth-grounded outlet.
c. Press the power/ink buon on the top of
the Rimage Allegro 20 system. The power
indicator light illuminates solid blue.
d. Power on the external PC that will send
content to the Allegro 20 for output.
Note: Your Allegro system may come
with an extra power cord. Please use
the correct power cord for your region.
USB 3.0 Port Power Input Port
Power/Ink
Buon
CD/DVD
Recorder Dirve
Recorder Tray
Buon
Extendable
Output Bin Input Bin
Roboc Arm
Ink Cartridge
Carrier
Cover
4001940_A Page 2Copyright © 2016 Rimage
9Learn more
7
10
8
Answer setup prompts
How to power o your Allegro 20 system
Test and verify
6
5Load discs in the system
Install the soware and plug in the USB cable
Use QuickDisc™ to run a 3-disc test job to verify that the Allegro 20 system is
operang correctly.
Note: You can now use �image WebRSM™ to adjust the system sengs.
Your PC may prompt you for alignment and calibraon. Follow the prompts
on the screen.
To ensure that the Allegro 20 system is ready when needed, you may leave it
powered on. To power it o, make sure that the cover is closed, then press
and hold the power/ink buon for ve seconds.
• These documents are available on the Rimage Allegro User Guide disc
that shipped with your Allegro 20 system:
Rimage Allegro 20 User Guide
Rimage Product Warranty
Access these documents by placing the User Guide disc in the disc drive
of a PC.
Note: If the User Guide menu does not display automacally, browse to the
Home.htm le on the User Guide disc.
• Please refer to www.rimage.com for the most current versions of all
documents.
• For informaon about operang and maintaining the Allegro 20 system,
refer to the Rimage Allegro 20 User Guide.
• For addional support and product informaon, go to
www.rimage.com/support.
Important! Do not plug in the USB cable unl instructed to do so.
Note: You must have administrave privileges to install the soware on
the external PC.
a. Place the Rimage Soware Suite disc into the disc drive of the
connected external PC. The Choose Setup Language dialog box opens.
(The default is English).
Tip: If the soware installaon does not start automacally, browse to the
setup.exe le on the Rimage Soware Suite disc.
b.
Follow the on-screen prompts to connue the soware installaon.
c. When prompted, connect the USB cable.
i. Connect the USB cable to the back of the Allegro 20.
ii. Connect the other end of the USB cable to the external PC.
Power Input Port
USB 3.0 Port
Note: For opmum performance, connect the Allegro 20 USB cable to a
USB port on your motherboard rather than to a USB card port.
d.
Connue to follow the on-screen prompts to complete installaon. Once
installaon is complete, you may be prompted to reboot your PC.
Note: Aer the soware starts, the Allegro 20 system begins the
inializaon process. Inializaon may take up to 5 minutes. During the
inializaon process, the li arm moves to the recorder and the printer.
When the li arm assembly stops moving, inializaon is complete and
your system is ready to process jobs.
The input bin holds up to 20
discs. Use only recordable
discs that are coated with an
inkjet printable surface. Place
the discs in the input bin so
that the recording side of the
discs is facing down; the print
surface will be facing up.
USB 3.0 Port Power Input Port

Other manuals for Allegro 20

2

Other Rimage Disc Duplicator manuals

Rimage Desktop 360i Operating and safety instructions

Rimage

Rimage Desktop 360i Operating and safety instructions

Rimage Professional 3400 User manual

Rimage

Rimage Professional 3400 User manual

Rimage Professional 5100N User manual

Rimage

Rimage Professional 5100N User manual

Rimage Professional Endeavor User manual

Rimage

Rimage Professional Endeavor User manual

Rimage 2000i 6.5-7.1 Service Pack 1 Instruction Manual

Rimage

Rimage 2000i 6.5-7.1 Service Pack 1 Instruction Manual

Rimage 2000i 6.5-7.1 Service Pack 1 User manual

Rimage

Rimage 2000i 6.5-7.1 Service Pack 1 User manual

Rimage Producer III 7100 User manual

Rimage

Rimage Producer III 7100 User manual

Rimage Producer 8200N User manual

Rimage

Rimage Producer 8200N User manual

Rimage 2000i 6.5-7.1 Service Pack 1 User manual

Rimage

Rimage 2000i 6.5-7.1 Service Pack 1 User manual

Rimage 2000i 6.5-7.1 Service Pack 1 User manual

Rimage

Rimage 2000i 6.5-7.1 Service Pack 1 User manual

Rimage Professional 2450 Operating and safety instructions

Rimage

Rimage Professional 2450 Operating and safety instructions

Rimage Producer IIIN+ 7100N User manual

Rimage

Rimage Producer IIIN+ 7100N User manual

Rimage Producer III 7100 Operating and safety instructions

Rimage

Rimage Producer III 7100 Operating and safety instructions

Rimage DL5200 Operating and safety instructions

Rimage

Rimage DL5200 Operating and safety instructions

Rimage Perfect Image Parts list manual

Rimage

Rimage Perfect Image Parts list manual

Rimage AMIGO II EVEREST Instructions for use

Rimage

Rimage AMIGO II EVEREST Instructions for use

Rimage 2000i 6.5-7.1 Service Pack 1 User manual

Rimage

Rimage 2000i 6.5-7.1 Service Pack 1 User manual

Rimage Professional 5300N User manual

Rimage

Rimage Professional 5300N User manual

Rimage Professional 3400 Quick start guide
Rimage

Rimage Professional 3400 Quick start guide
Rimage Allegro 20 User manual

Rimage

Rimage Allegro 20 User manual

Rimage Professional 5100N Parts list manual

Rimage

Rimage Professional 5100N Parts list manual

Rimage Producer IIIN+ 7100N Installation instructions

Rimage

Rimage Producer IIIN+ 7100N Installation instructions

Rimage Allegro 20 User manual

Rimage

Rimage Allegro 20 User manual

Rimage Producer III User manual

Rimage

Rimage Producer III User manual

Popular Disc Duplicator manuals by other brands

Disc Makers ReflexFlash11 user guide

Disc Makers

Disc Makers ReflexFlash11 user guide

Disc Makers Pico MAC user guide

Disc Makers

Disc Makers Pico MAC user guide

MediaFORM DVD-QuadraPro LX Operator's guide

MediaFORM

MediaFORM DVD-QuadraPro LX Operator's guide

Codonics Virtua C reference guide

Codonics

Codonics Virtua C reference guide

Epson Disc Producer PP-50 Setup guide

Epson

Epson Disc Producer PP-50 Setup guide

Carry IQ 112 user guide

Carry

Carry IQ 112 user guide

Pioneer PDR-W739 quick start guide

Pioneer

Pioneer PDR-W739 quick start guide

Aleratec 350115 quick start guide

Aleratec

Aleratec 350115 quick start guide

U-Reach Carry Flash UB600 user guide

U-Reach

U-Reach Carry Flash UB600 user guide

LaCie 107756 - Dupli Disc DVD121 Brochure & specs

LaCie

LaCie 107756 - Dupli Disc DVD121 Brochure & specs

Disc Makers ReflexUltra quick start guide

Disc Makers

Disc Makers ReflexUltra quick start guide

Teac P-55KIT instruction manual

Teac

Teac P-55KIT instruction manual

Addonics Technologies DGBRC1 user guide

Addonics Technologies

Addonics Technologies DGBRC1 user guide

U-Reach SAS Series user manual

U-Reach

U-Reach SAS Series user manual

ezdupe DVD Coach user manual

ezdupe

ezdupe DVD Coach user manual

Primera BravoPro autoprinter user manual

Primera

Primera BravoPro autoprinter user manual

Tascam CD-D4000 MKII owner's manual

Tascam

Tascam CD-D4000 MKII owner's manual

MicroBoards Technology CopyWriter Pro-452RM user manual

MicroBoards Technology

MicroBoards Technology CopyWriter Pro-452RM user manual

manuals.online logo
manuals.online logoBrands
  • About & Mission
  • Contact us
  • Privacy Policy
  • Terms and Conditions

Copyright 2025 Manuals.Online. All Rights Reserved.